Create a Service Account in G Suite
A G Suite Service Account is always present in the project at the Google Cloud Console. If you have an existing project, then you can continue to create the Service account in it. But there is no project, then you will need to first create a project and then create a service account in it.
STAGE 1 – CREATE A PROJECT
Step 1: Sign-in to the Google Cloud Platform Console using the Super Administrator credentials.

Step 2: Expand the IAM & Admin center and choose the last option to Manage Resources.

Step 3: At the top of the screen you will find option create the project; click it.

Step 4: In the Project name field, provide the unique name to the Project. Attach an Organization and select a Location. Finally, click Create.

STAGE 2 – TURN ON THE IMPORTANT APIs FOR THE PROJECT
A project needs the assistance of multiple APIs and SDKs to run various functions smoothly. You can look for all such stuff in the library at the API & Resources.
Step 1: Make sure that you have selected the project. Then click APIs & Resources>>Library.

Step 2: After opening the library, click the option Enable APIs and Services.

Step 3: In the text field, input the name of the SDK whom you want to add to your project like Admin SDK.

Step 4: After choosing the SDK, it will open the new page showing the properties of SDK. Click the Enable button.

Step 5: Similarly, you can choose multiple SDKs and APIs suitable for your business. Some other much needed APIs are contacts and calendar APIs. You can type Contacts API and it will appear in the search. Select it.

Click Enable button.

Step 6: Come back to library page and type calendar API. It will show Google Calendar API, select it.

Step 7: Click Enable button.

Step 8: Type Google Chat API in the library and it will show the Hangout Chat API. Select it.

Click Enable button.
Step 9: Type Google Drive API in the library and when it shows Google Drive API, select it. Click Enable button.

STAGE 3 – CREATE THE SERVICE ACCOUNT.
Step 1: Go back to APIs and Services, then click Credentials.

Step 2: After opening new window, click Create Credentials.

Step 3: In the drop-down, choose Service Account.

Step 4: Fill the name of the new Service account. The Service Account ID will be filled itself.

Click Create.
Step 5: To Provide a Role to the Service account, you can choose Project Owner.

Step 6: Click Continue.

Step 7: The third step is an optional step where you can grant access to the users or groups that can perform actions on this service account. Click Done.
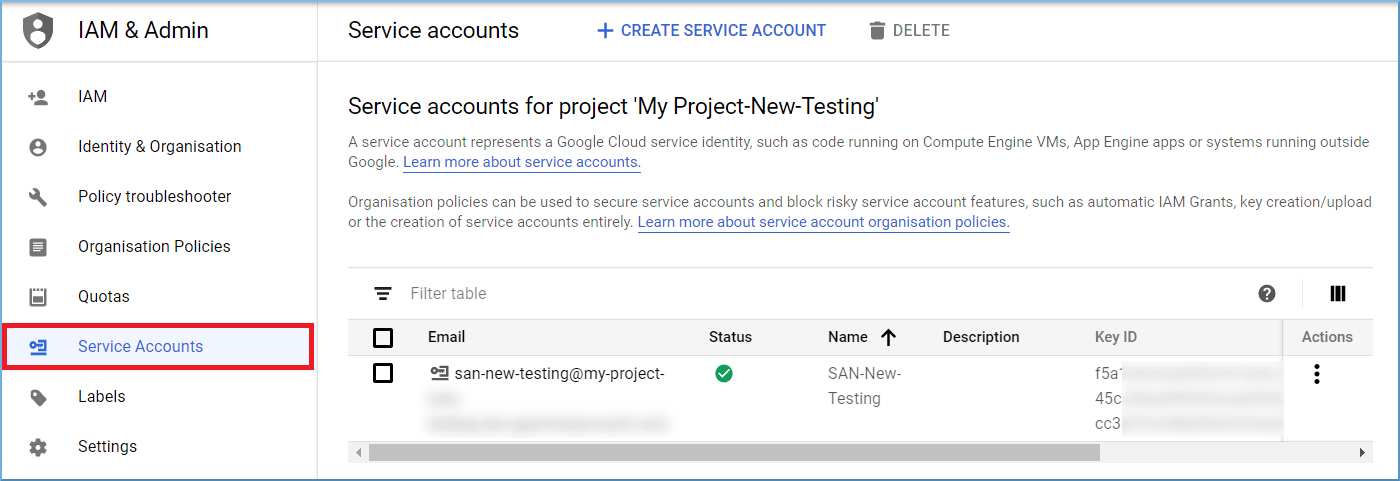
A new Service Account has been created in your G Suite. You can check its presence in the Service Account list in the IAM & Admin Center.

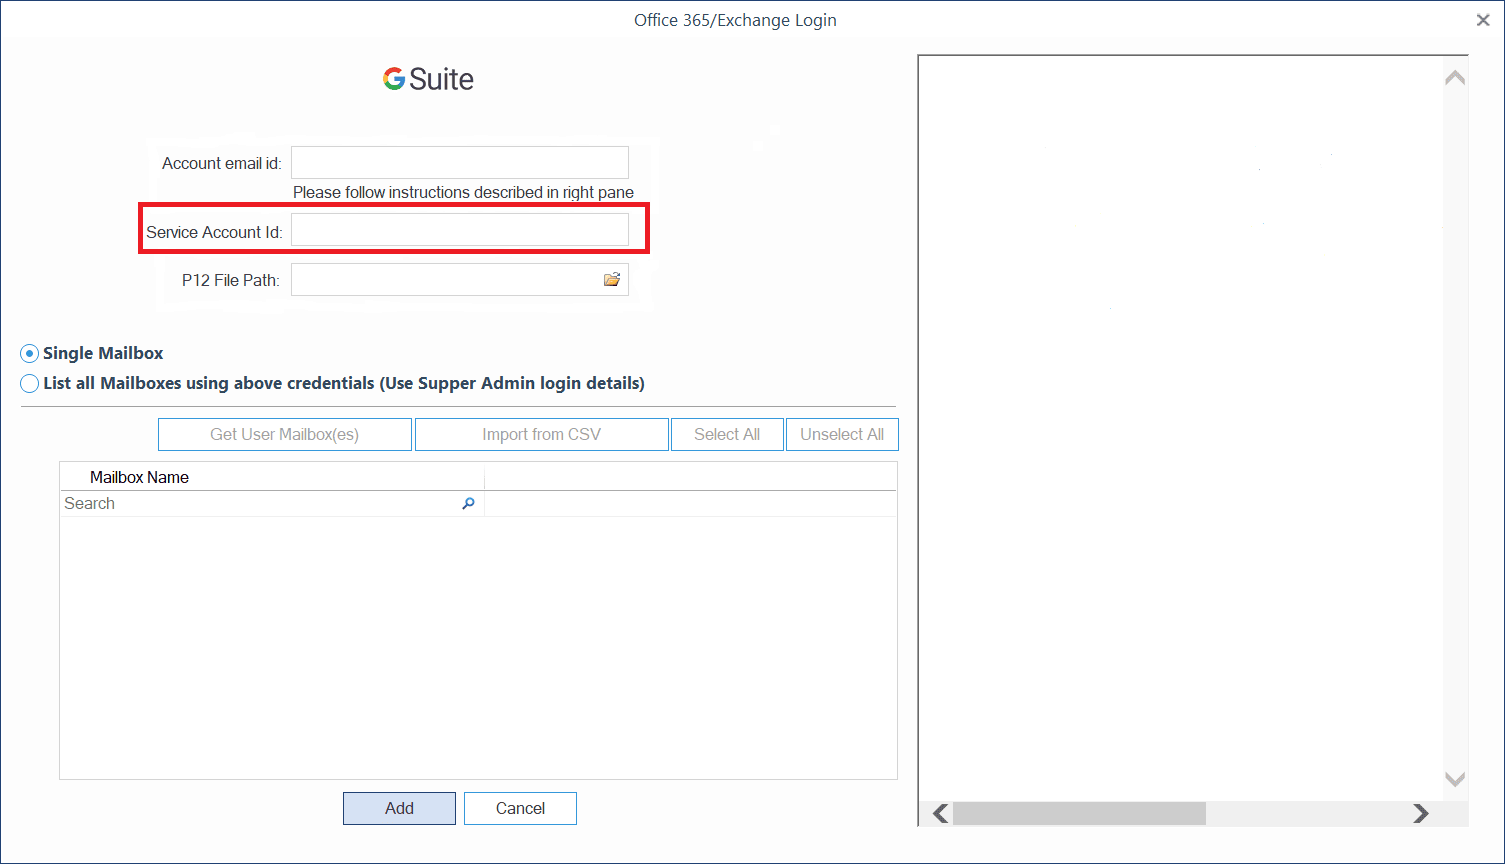
You will need this whole Email ID to put in the Account email ID of the tool.

Provide API Access Control and Domain Wide Delegation to the Service Account
When you want your G Suite Service accounts to provide domain-wide access to third-party applications, then you need to provide Access Control and Domain-Wide authority to them. Here are the steps:
Step 1: You need to have the Unique ID of the service account in order to complete the authorization. For this, go to the IAM & Admin Center > Service Accounts and click the account.

Step 2: Go to Unique ID and note it.

Step 3: Type https://admin.google.com in the web browser. After opening the Admin Console, click Security.

Step 4: Now, click advanced settings.

Step 5: In the App access control page, click the option Manage third-party app access.

Step 6: There are two categories to select - Google Services and Apps. Click Apps.

Step 7: In the Add app drop-down, click OAuth App Name or Client ID.

Step 8: Input the Unique ID that you have copied from the newly created Service Account. Click Search.

Step 9: The search results will show the New-Testing Application for the service account. Please select it and click Add.

Step 10: Go back to App access control and click Manage Google Services.

Step 11: In the Add app drop-down, click OAuth Name or Client ID.

Step 12: Input the Unique ID of the service account and click Search.

Step 13: The associated application will show up. Click Add.

Step 14: Come back to the Advanced Setting page and click Manage domain-wide delegation option under Domain-wide delegation.

Step 15: Click Add New.

Step 16: Input the client ID of the Service account, and in the OAuth scopes, you need to input the name of the Google app.

Step 17: You can add multiple Google APIs in the list. After inputting the required number of APIs, click Authorize.

Step 18: The list of the apps will show the APIs added to the app. You can click the View details option.

Step 19: All the added APIs are available in the Scopes of the Client ID of the Account.

Generate P12 Key for the Service Account in G Suite
To create a private P12 key for the Service Account in G Suite, follow the below steps;
Step 1: Go to the IAM & Admin page of the Google Cloud and click Service Accounts.

Step 2: Please choose the desired service account and open it.

Step 3: Go to the Keys section and click ADD KEY.

Step 4: Choose to Create new key

Step 5: Choose P12 and click Create.

Step 6: A message will appear to show that Private key is saved to your computer.

Step 7: On your computer, you can find the newly downloaded key.

Step 8: To add the P 12 key in the software, you need to copy the full path till of P 12 key location and paste it at the P 12 field in the login page.
