When you choose Modern Authentication login method in our application, then you must register it in the Azure Active Directory. Later, you can provide adequate roles and permission and create relevant Client ID, Tenant ID, and Client Secret value. You can register the application using Microsoft 365 Admin Center or from Azure portal directly.
Register the app in Microsoft Entra ID (Azure AD)
For app registration, follow the below steps –
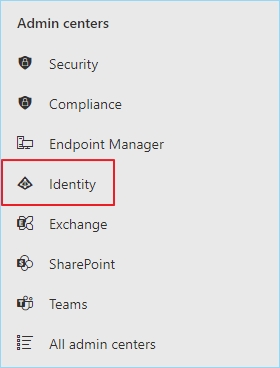
Step 1: Sign into Microsoft 365 Admin center using Administrator credential and go to admin option. In the list of available admin centers, choose Identity.
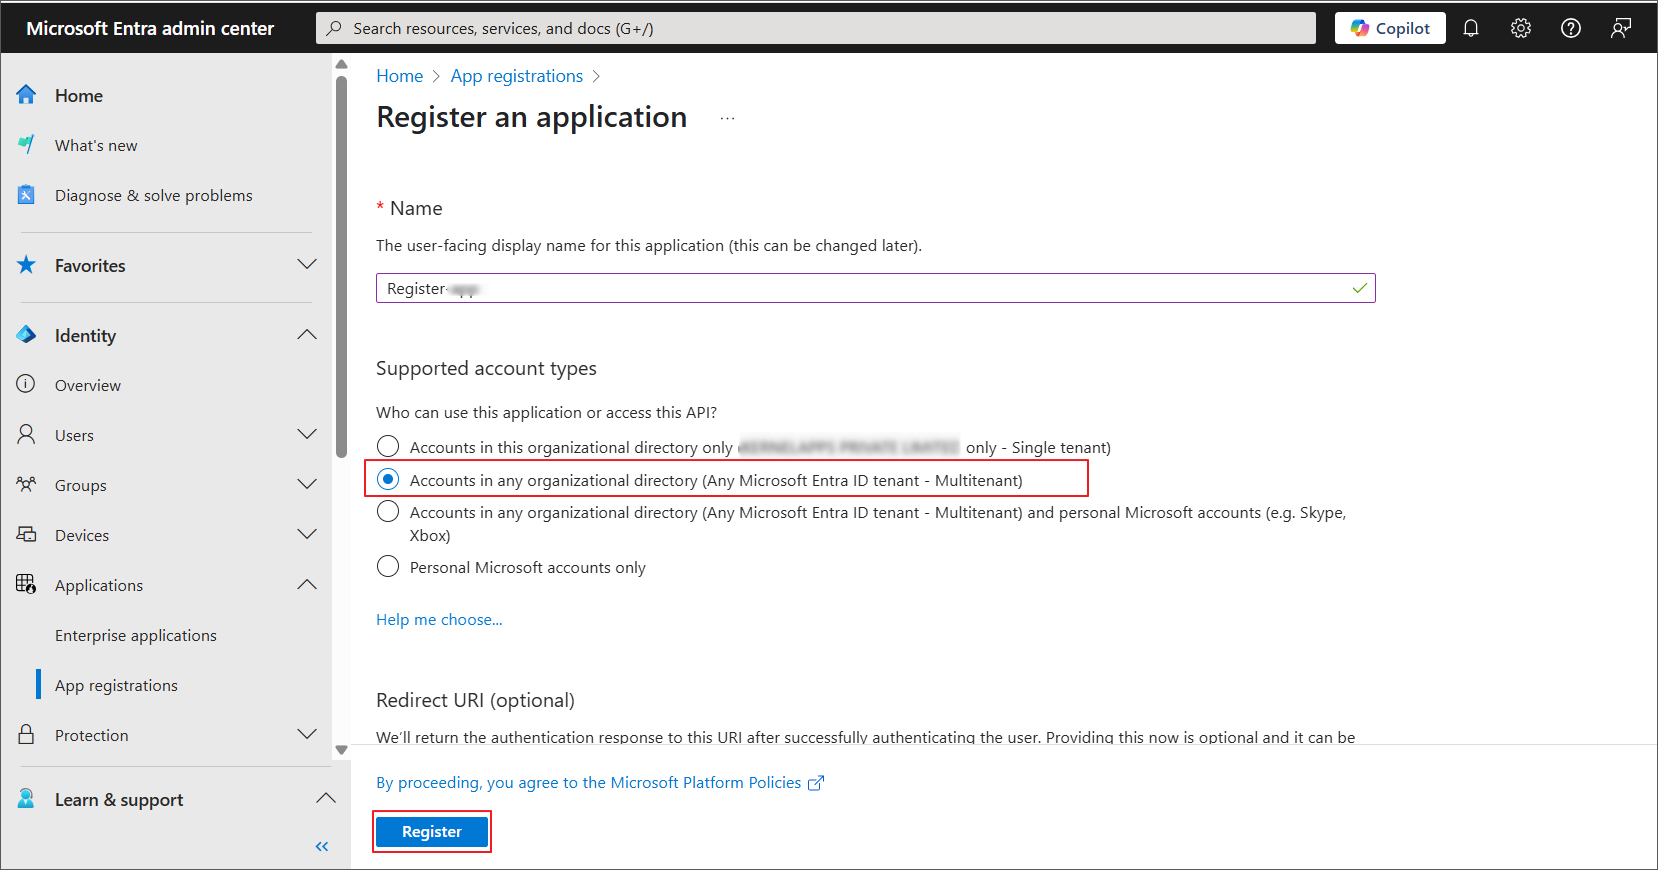
Step 2: Expand Applications list and select App registrations.

Step 3: In the App registrations page, click on ‘New registration.’

Step 4: Provide any name to proceed with the app registration entry. For Supported account types, choose “Who can use this application or access this API?” option based on your account. Then click the Register option.
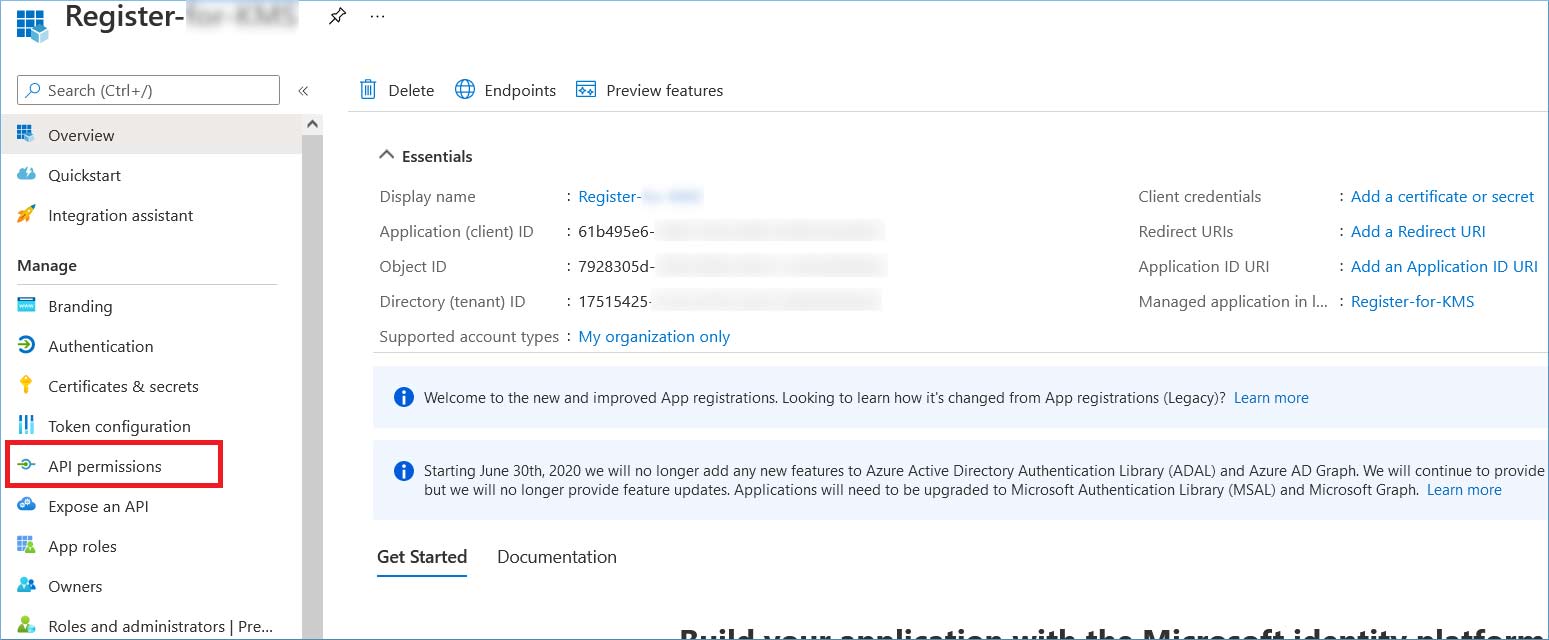
After registering the app, you need to enable APIs in it. Click API Permissions in the Manage category. There will be different permissions for the registered applications.
To migrate Office 365 mailbox contents, it requires API permissions that provide it full access to the registered App.
Step 1: In API Permissions, click Add a permission. At the top of the Request API permissions pane, click the ‘APIs my organization uses’ tab and search Office 365 Exchange Online.

Step 2: When the result appears, then click on it and go to Application permissions category.

Step 3: Click on Microsoft Graph and go to Application permissions. Search for MailboxSetting in the search box and select the permission MailboxSettings.Read.
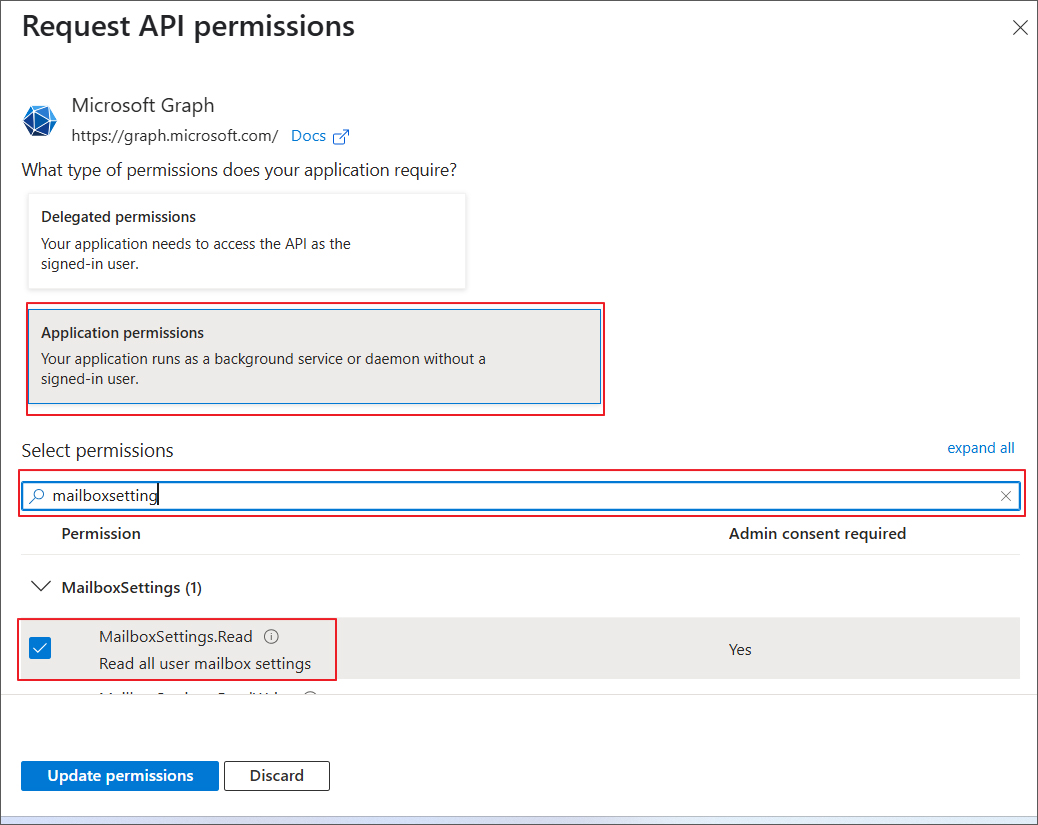
Step 4: Add the following permissions from the below table.
| Migration type | Permission Category | Permission |
|---|---|---|
| For Office 365 | Exchange | Exchange.ManageAsApp |
| Full Access | Full_access_as_app | |
| Read all user mailbox settings | MailboxSettings.Read |
Step 5: After choosing the application, you should click Add Permissions.
Step 6: Once you have enabled all the APIs in the newly registered apps, you should grant admin consent for the account.
Choose API permissions and select Grant Admin console for <App_name>

Step 7: Click Yes, to grant the confirmation for admin consent.

For a newly registered application related to SharePoint Online/OneDrive, you require to assign some application permissions.
Step 1: In API permissions, click ‘Add a permission’.

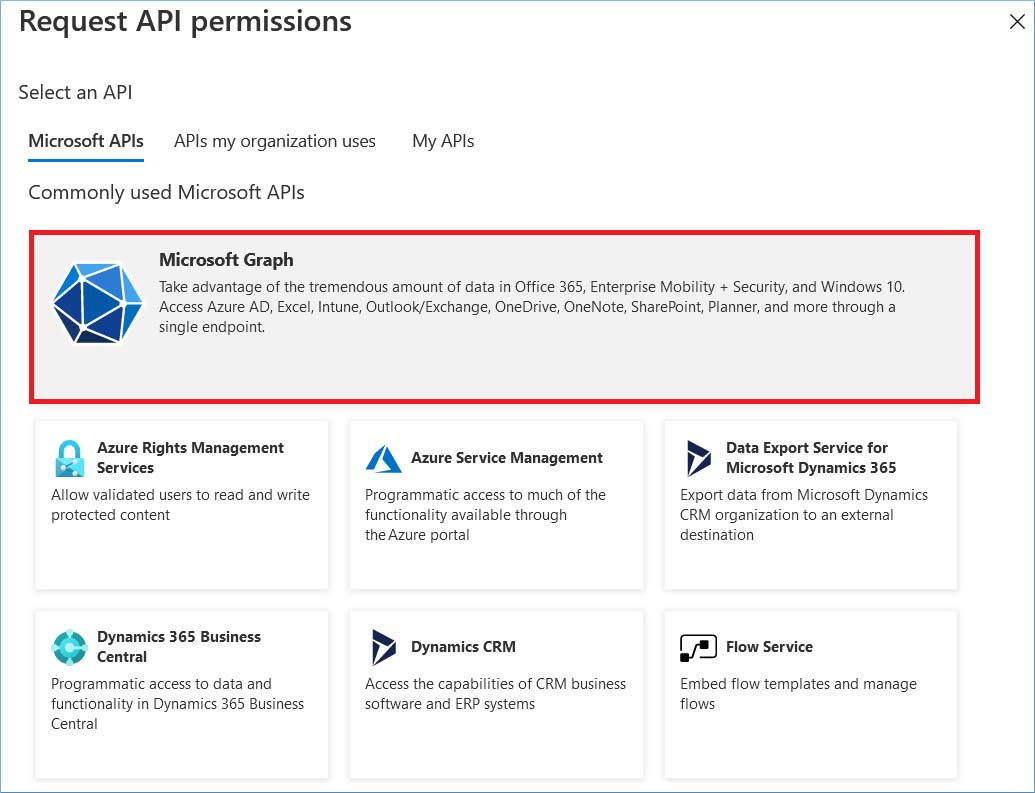
Step 2: Select Microsoft Graph under Microsoft APIs.
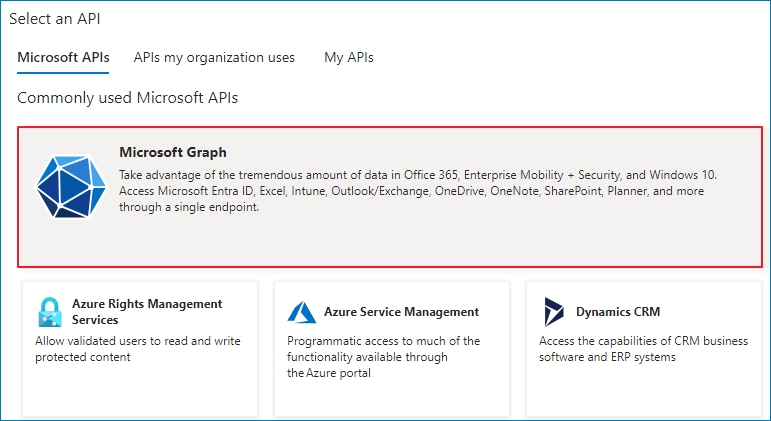
Step 3: Select Application Permissions.

Step 4: In Files category, select the ‘Files.ReadWrite.All’ permission.
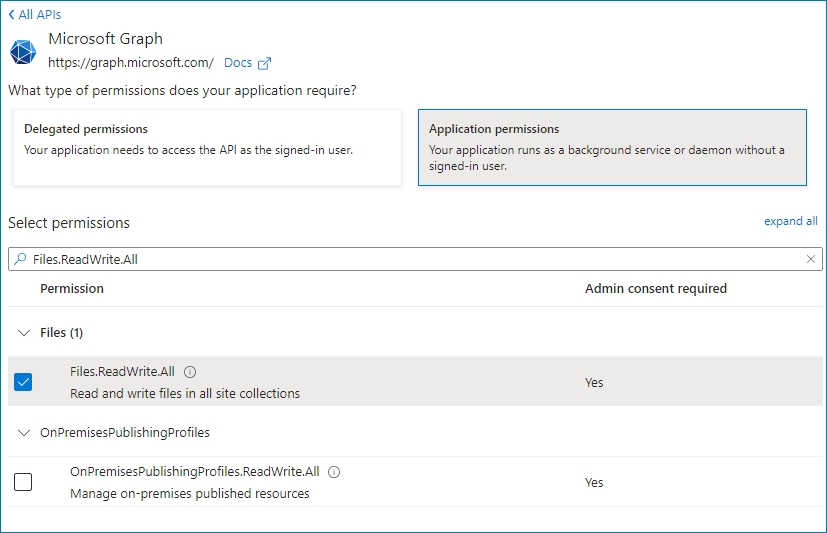
Step 5: In Site category, select the ‘Sites.ReadWrite.All’ permission.
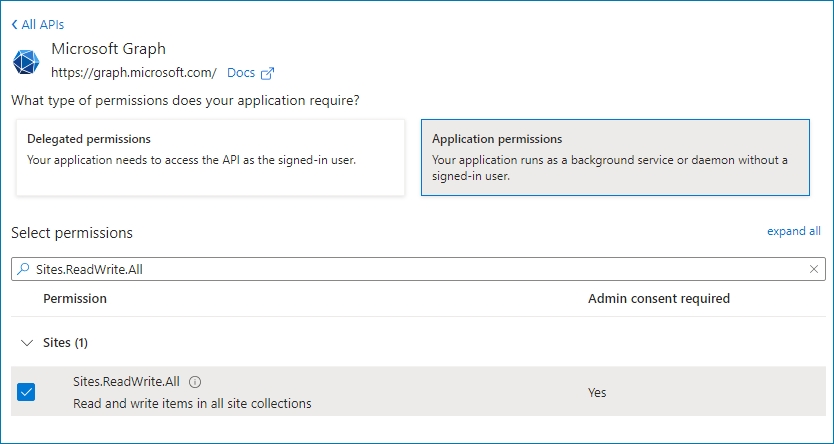
Step 6: In Group category, select the ‘Group.Read.All’ permission.
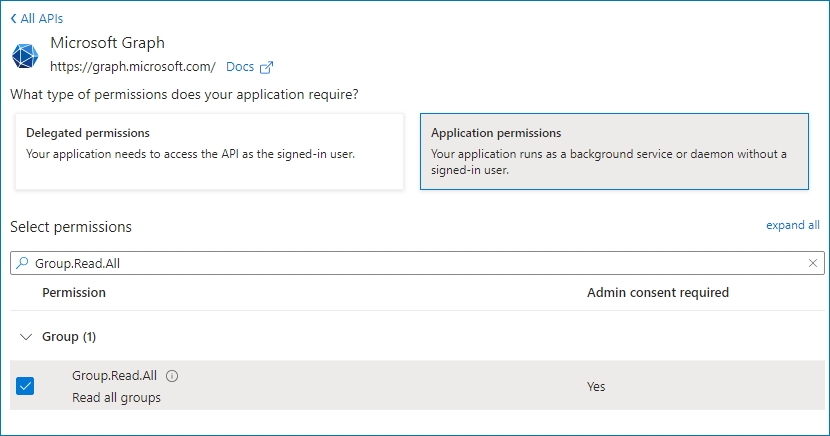
Step 7: Click Add permissions.

Step 8: Now, you must assign the Admin grant consent to the newly assigned applications. Click on ‘Grant admin consent for <application name>.’
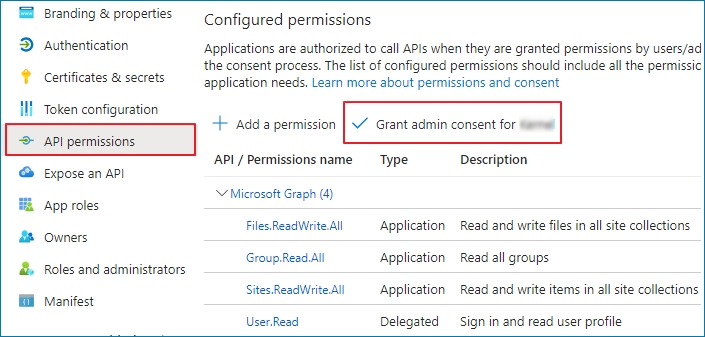
Step 9: Click Yes to the prompt messages.

To migrate content from OneDrive and SharePoint Online account, it requires some App’s permissions Request XML. Its process is given in the following page - https://www.nucleustechnologies.com/sharepoint-migration/modern-auth-sharepoint-permissions.html
Step 1: Click Add a permission.

Step 2: Click and Open Microsoft Graph.
Step 3: One by one assign Delegated permissions and Application permissions for both Source and Destination.
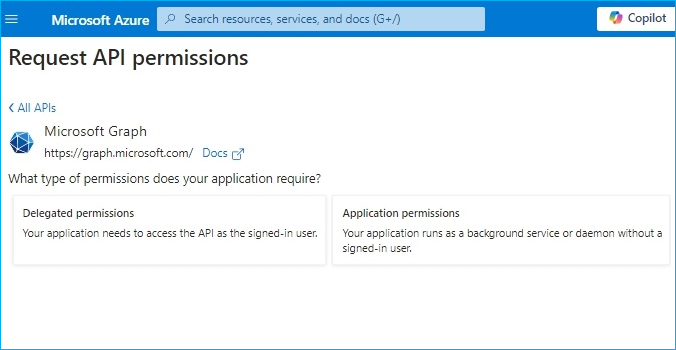
Step 4: Apply all the permissions given in the below table.
| Migration Type | Permission Category | Source Permissions | Destination Permissions | ||
|---|---|---|---|---|---|
| Application | Delegated | Application | Delegated | ||
| For Microsoft Teams and Chat | Application | Application.Read.All | N/A | N/A | N/A |
| Calendars | Calendars.Read Calendars.ReadBasic.All |
N/A | N/A | N/A | |
| ChannelMessage | ChannelMessage.Read.All | N/A | N/A | ChannelMessage.Send | |
| Chat | Chat.Read.All | Chat.Read | N/A | Chat.Create Chat.ReadBasic Chat.ReadWrite |
|
| ChatMember | N/A | N/A | ChatMember.Read.All ChatMember.ReadWrite.All |
ChatMember.Read.All ChatMember.ReadWrite.All |
|
| ChatMessage | N/A | N/A | N/A | ChatMessage.Send | |
| Directory | Directory.Read.All | N/A | N/A | Directory.ReadWrite.All | |
| Files | Files.Read.All | N/A | files.readwrite.all | Files.ReadWrite Files.ReadWrite.All |
|
| Group | Group.Read.All | Group.Read.all | N/A | Group.ReadWrite.All | |
| GroupMember | GroupMember.Read.All | N/A | N/A | GroupMember.ReadWrite.All | |
| Notes | Notes.Read.All | Notes.Read.all | N/A | Notes.ReadWrite.All | |
| Sites | Sites.Read.All | N/A | Sites.readwrite.all | Sites.Manage.all | |
| Tasks | Tasks.Read.All | N/A | N/A | Tasks.ReadWrite | |
| Team | Team.ReadBasic.All | N/A | N/A | Team.Create Team.ReadBasic.All |
|
| TeamMember | TeamMember.Read.All TeamMember.ReadWriteNonOwnerRole.All |
N/A | N/A | TeamMember.ReadWrite.All TeamMember.ReadWriteNonOwnerRole.All |
|
| TeamSettings | TeamSettings.Read.All | N/A | N/A | TeamSettings.ReadWrite.All | |
| TeamsTab | TeamsTab.Read.All | N/A | N/A | TeamsTab.ReadWrite.All | |
| TeamworkAppSettings | TeamworkAppSettings.Read.All | N/A | N/A | TeamworkAppSettings.ReadWrite.All | |
| TeamworkTag | TeamworkTag.Read.All | N/A | N/A | TeamworkTag.ReadWrite | |
| User | User.Read.All | N/A | N/A | User.Read.All User.ReadBasic.All User.ReadWrite.All |
|
| ChannelMember | ChannelMember.Read.All | N/A | N/A | ChannelMember.Readwrite.All | |
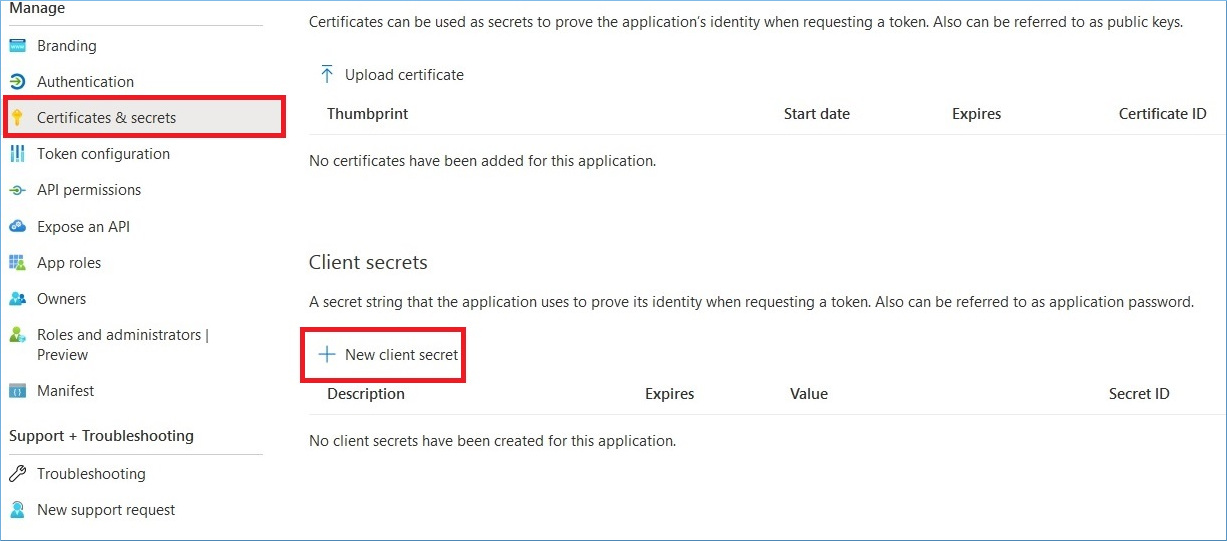
Step 1 Choose certificates & secrets option from the menu, then click New Client Secret.
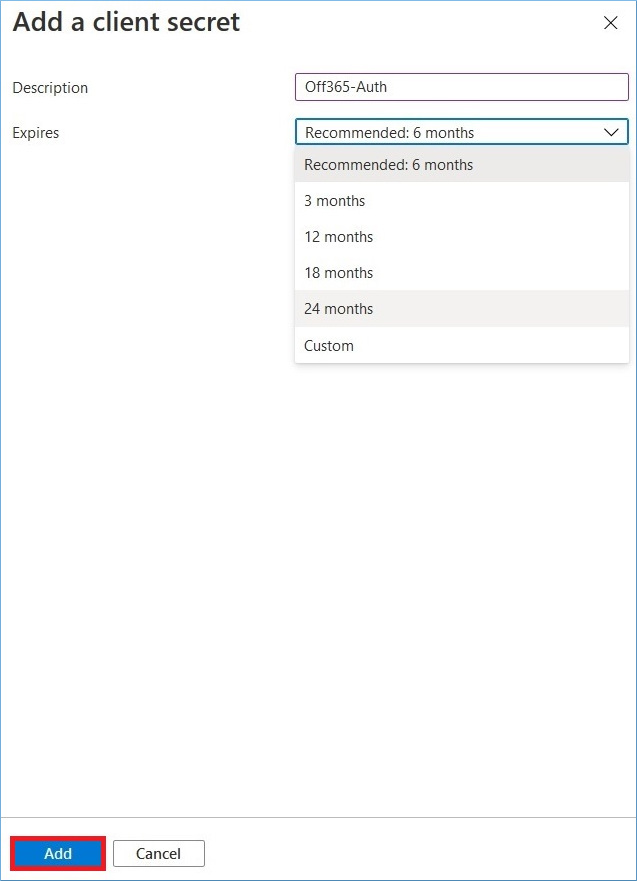
Step 2 Provide a brief description for the new secret. Also, choose period till you want to use the secret. Then click Add.
Step 3 Copy the Secret Value as you will require it at the login page to connect the mailbox.

(For Team Chat migration and Google Chat to Team Chat Migration)
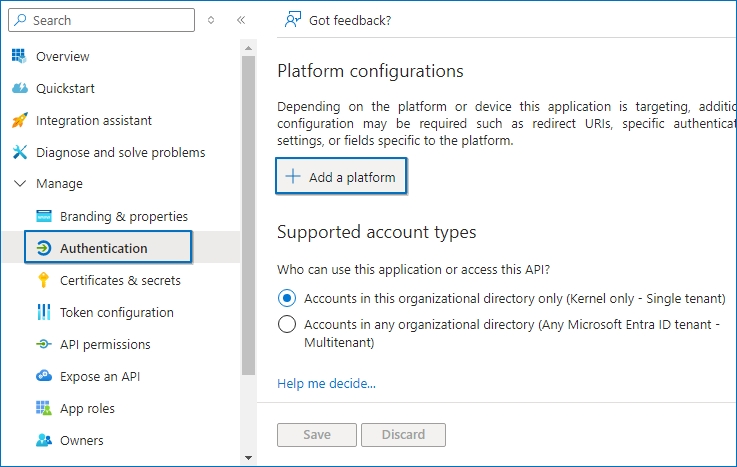
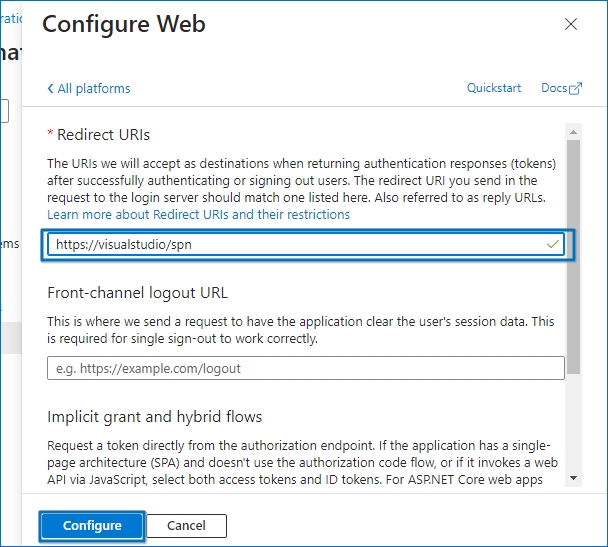
Step 1 In Authentication section, click Add a platform.
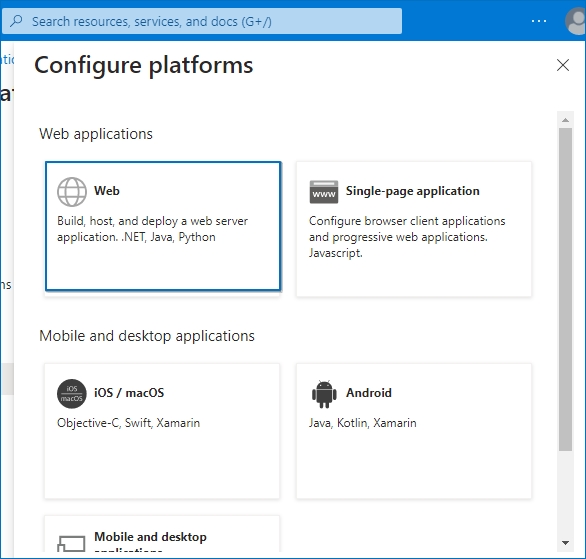
Step 2 Choose Web.
Step 3 In the redirect URIs textbox enter https://visualstudio/spn and click Configure.
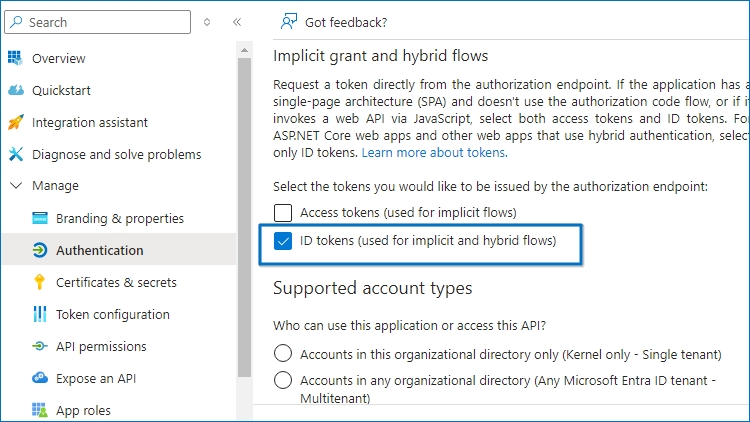
Step 4 Click the checkbox ID token (used for implicit and hybrid flows).
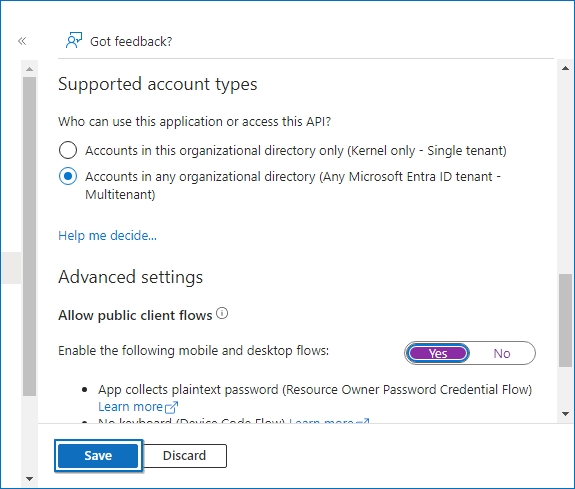
Step 5 In Advanced Settings, click Yes to Allow public client flows at the bottom of the page. Click Save.
The Office 365 account requires the Global Administrator role to access multiple mailboxes.
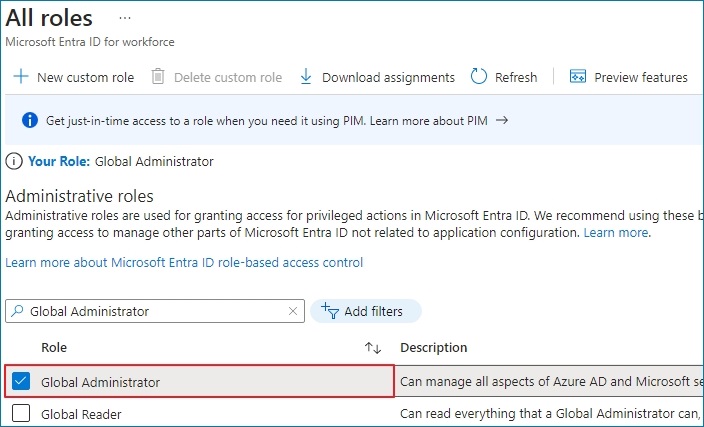
Step 1 In the top search bar, type roles and administrators and when the Microsoft Entra ID roles and administrators appear, click on it.
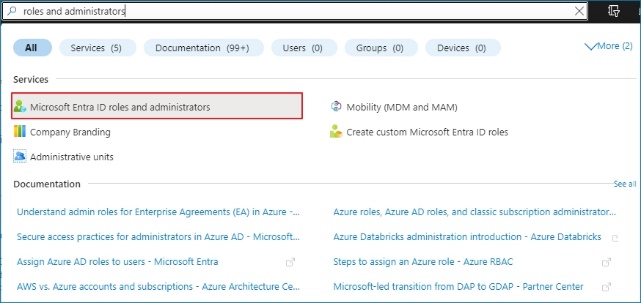
Step 2 Type Global Administrator or Global Reader in the text box and in the search, result double-click on Global Administrator or Global Reader.
Step 3 Click Add assignments.
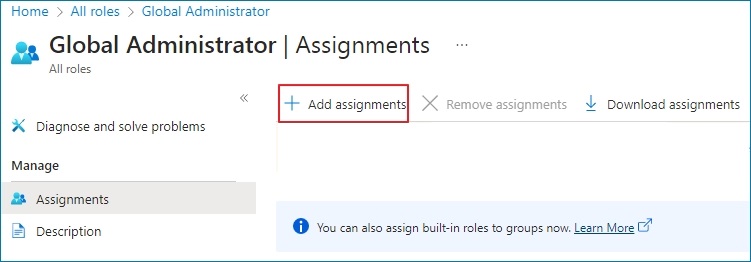
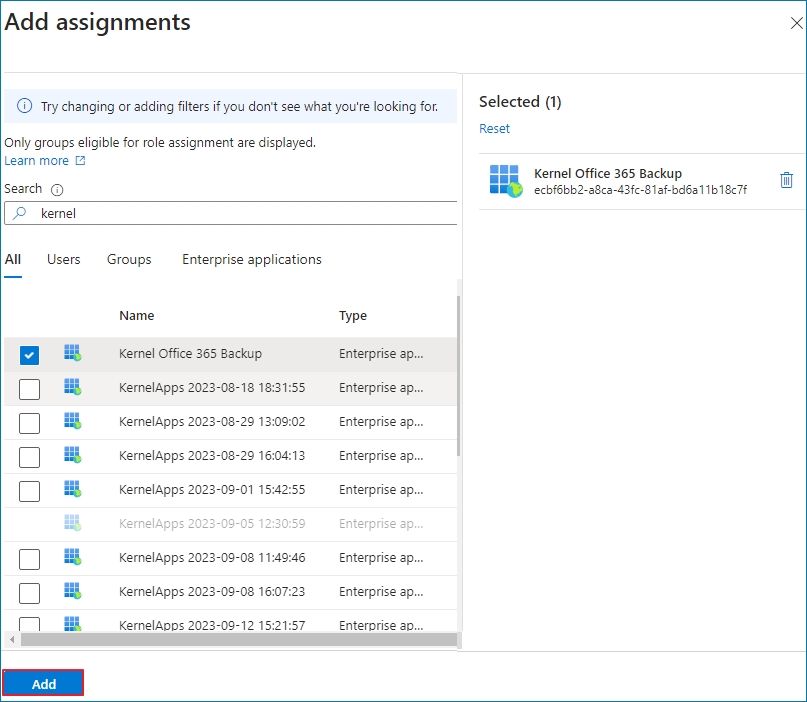
Step 4 Type the name of the registered app and select it from the list when its name appears. Then, click Add button and the app will get Global Administrator role.
