Read time: 5 min
Conversation is the most crucial way to share your thoughts, opinions, and valuable insights on any topic. In this digital era, everyone is moving towards a remote working platform; thus, they require an interactive and feature-rich communication platform.
Microsoft Teams is one such cumulative platform that allows users to chat remotely with others. MS Teams isn’t only limited to conversation; you can even send essential images and files like PDF, Word, Excel, and many more to your respective ones.
However, users often need to save Teams chat history for various reasons. However, Microsoft didn’t provide any built-in tool to save chat history in Teams. In this article, we will cover all the reasons, manual methods, and professional software to perform MS Teams save chat history.
Why is it necessary to save Teams Chat history?
Multiple scenarios exist when a user needs to save Microsoft Teams chat history. Here, we mention some reasons that motivate you to back up Microsoft Teams chat history.
- To back up your Teams chat history on your local drive.
- Need to use Teams chat attachments for any essential work.
- Remotely share Teams chat history with another user.
Manual solutions to save Microsoft Teams Chat history
Numerous manual solutions allow you to save chat history in teams. Here, we will discuss about them to save Microsoft Teams chat history in just a few steps.
Method 1. Copy and Paste Microsoft Teams Chat
Copy-paste is a well-known method that allows you to copy specific Microsoft Teams user’s chats and then paste them into any notepad editor to save them in an abc.txt format.
Method 2. Print as PDF MS Teams save chat history
You can easily save Microsoft Teams chat history in PDF using Print option. Open any Microsoft Teams Chat history and press Ctrl + P together to print that chat. After that, select PDF and save it to your local drive.
Method 3. Save Microsoft Teams chat history in image using Screenshot feature
Press Windows + PrintScreen key to capture a screenshot of the Teams Chat history. Afterward, you can access your Teams chat history in image form in your local folder.
Method 4. Save message in MSG format.
You can easily share your Microsoft Teams Chat with Outlook and export that message in MSG format. To save data in MSG format, open shared Team chat history in Outlook and drag-and-drop that message on desktop.
Limitation of manual methods
Microsoft didn’t provide any inbuilt facility to save Teams chat history. Since users have attempted manual solutions, they haven’t gotten satisfactory results. Also, there are various limitations associated with manual methods, such as:
- Manual methods cannot save Microsoft Teams components such as attachments, gifs, links, etc.
- You cannot save the entire Microsoft Teams chat history using manual approaches.
- Users cannot import and utilize these Microsoft Teams chats anywhere for work.
To overcome the limitations of manual methods, it’s important to get help from a reliable Microsoft Teams Backup software that allows you to back up the entire Microsoft Teams Chat in the local or network drive of the system.
Professional software to save Microsoft Teams Chat history
Kernel Migration for SharePoint software allows users to save their Microsoft Teams Chat history on the local or network drive of the system. You can easily save Microsoft Teams Chat with its components, such as content, images, emojis, gifs, attachments, hyperlinks, and many more, in the original hierarchy. The software saves posts conversations in HTML format and the other attachments in raw format.
Automated steps to save Microsoft Teams Chat history
The software comes with an interactive interface to ensure quick and hassle-free Teams backup process. Here’s how to do so:
Step 1. Download and install the Kernel Microsoft Teams Backup software.
Step 2. Launch the software to execute the process.
Step 3. On the software’s home screen Source section, left click on Microsoft Teams > Add Teams.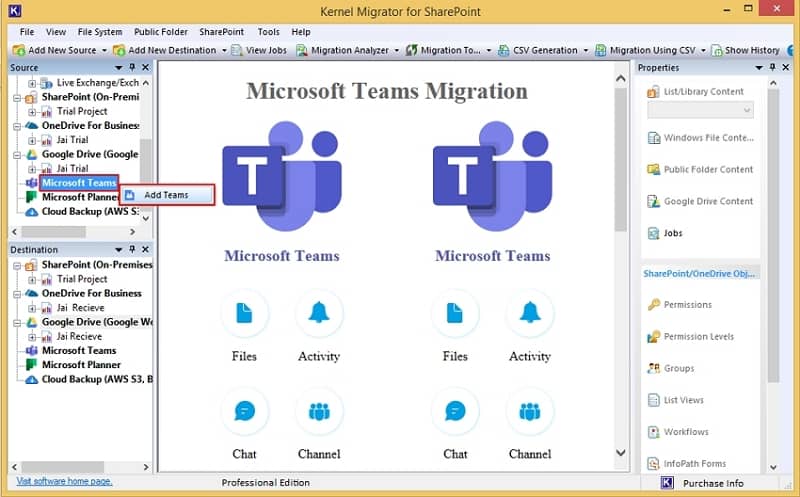
Step 4. In Add Teams window, enter Project Name, and select Basic or Modern Authentication for login accordingly. After that, click Next to map your Microsoft Teams account with the software.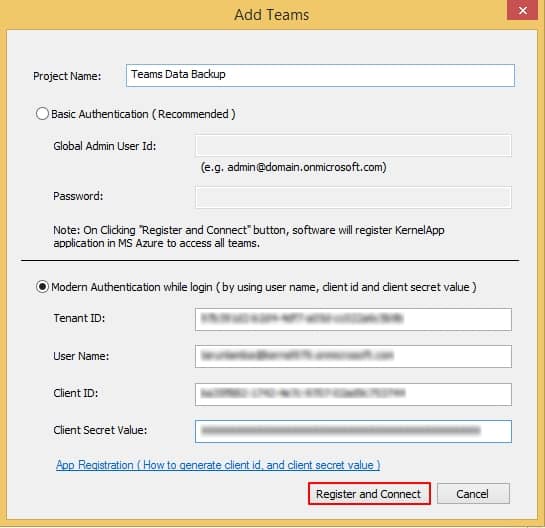
Step 5. Left click on Microsoft Teams and click on Backup.
Step 6. In Microsoft Teams window, select specific Teams and click Next.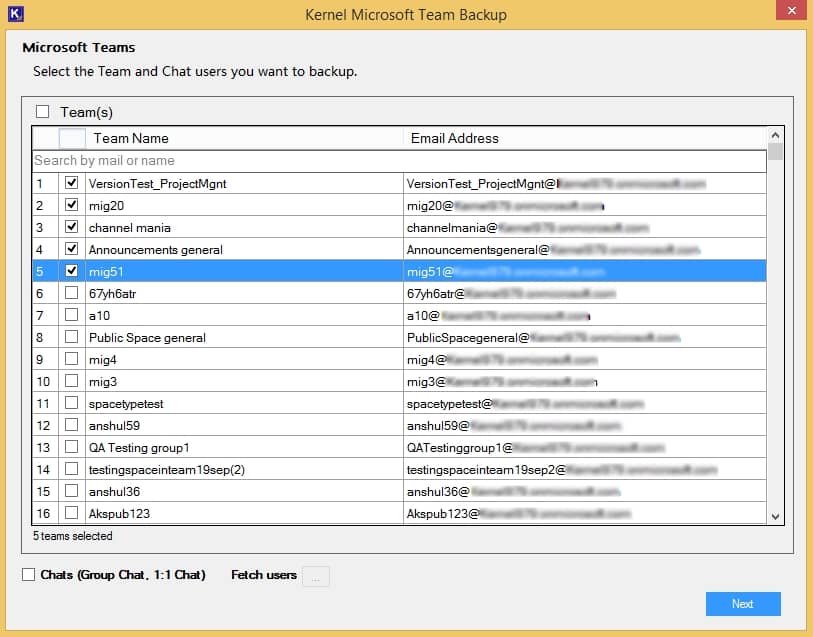
Step 7. The software will start fetching channels from the Microsoft Teams account.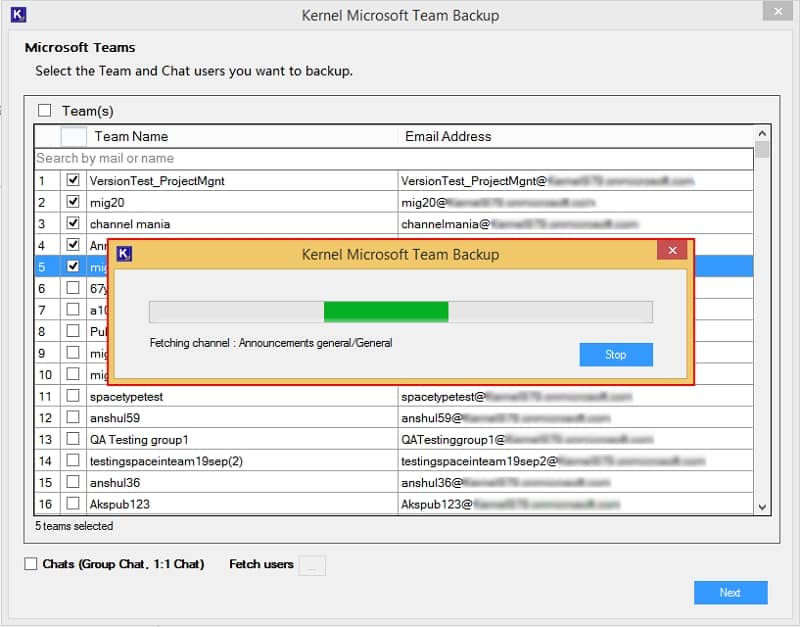
Step 8. In Select Teams and Chat Users window, select Teams and click Next.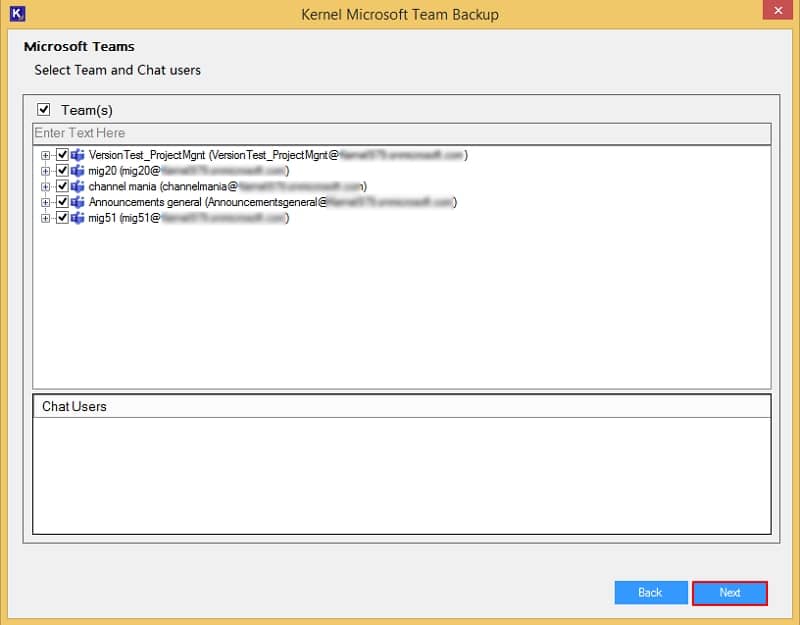
Step 9. Apply Date Filter and check Creation Date to backup data from specific date range. Check Exclude Left Chats to skip left chats backup. In Destination option, click Browse.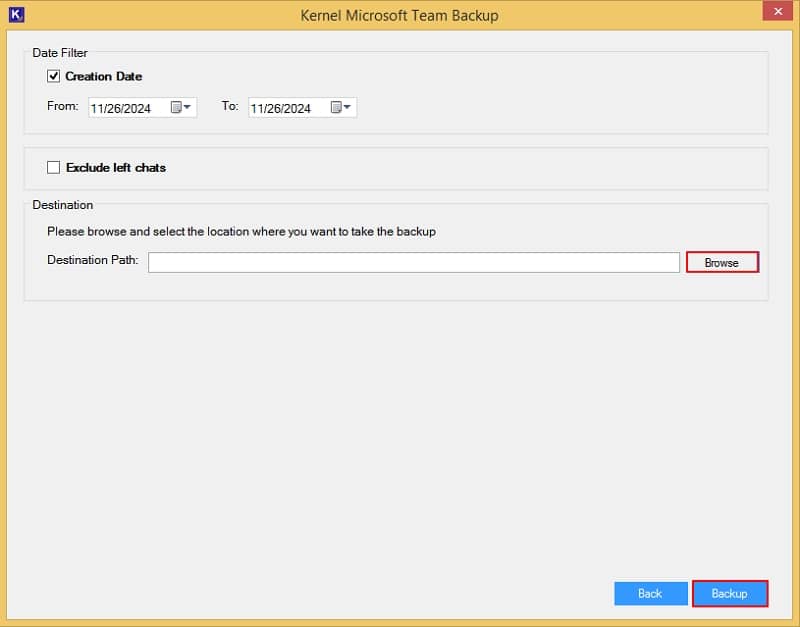
Step 10. In the Browse For Folder section, select a specific drive to save backed-up files and click Next. Also, you can click on Make New Folder to create a new folder and save data.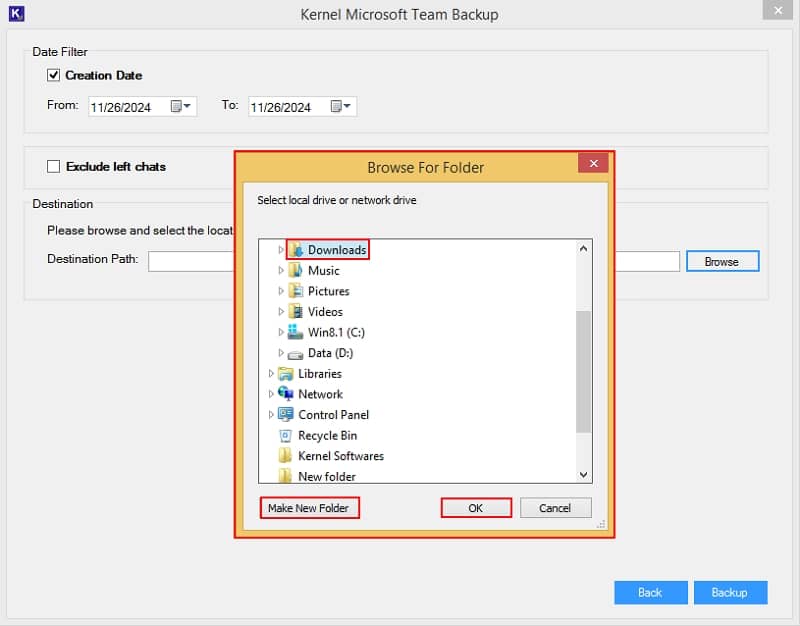
Step 11. Again, in the following window, click Backup option.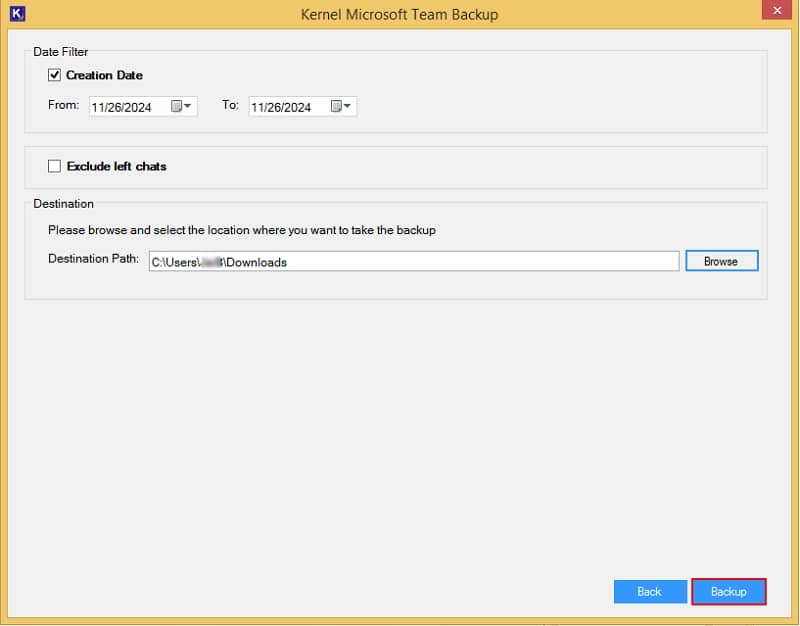
Step 12. The software will start the backup process and show Taking Backup message.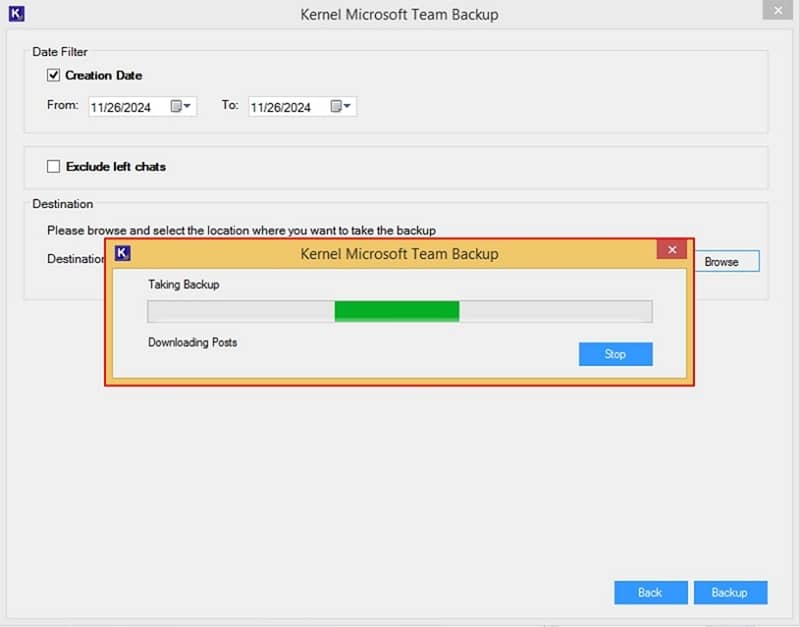
Step 13. Once the software MS Teams save chat history quickly and shows a “Backup is completed” message. Click OK to end the backup process.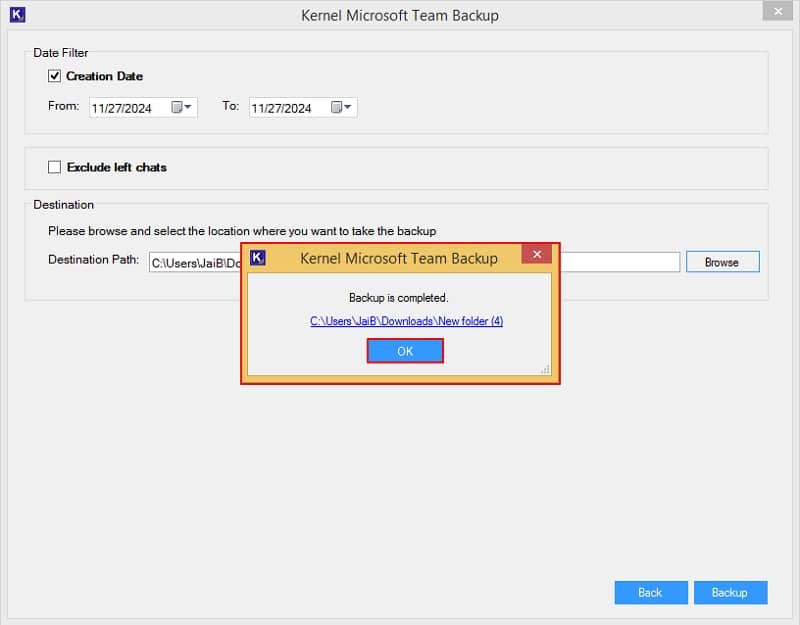
Conclusion
Saving Microsoft Teams Chat history is crucial, and Microsoft Teams does not provide any built-in tool to do so. That’s why you must opt for a recommended Kernel Microsoft Teams Backup tool. It can easily save all your Microsoft Teams chat history in the system’s local or network drive in the original hierarchy.
