Read time: 6 min
Salesforce is a robust CRM platform that allows you to manage and store data of your organization or business. The data stored includes standard objects, custom objects, reports, attachments, product-related data, and more. The Salesforce attachments include data items like files, documents, images, email, etc. Exporting these attachments can be crucial for various reasons, including data backup, compliance, and data availability. This blog will provide a detailed guide on how to export attachments from Salesforce with a powerful tool specialized for Salesforce data backup and restore.
Why export attachments from Salesforce?
The need to export notes and attachments in Salesforce can arise due to several factors. A few of them are:
- Data backup: Salesforce export files and attachments provide users with a local copy of data, ensuring data availability in case of accidental deletion.
- Compliance: Saving the Salesforce file and attachments also helps with regulatory compliance and audits.
- Easy access of data: You can export attachments from Salesforce locally and view them as your convenience. This eliminates the need for the internet to access Salesforce data.
- Data migration: Simplify the data migration task with locally stored Salesforce data.
Why choose a professional tool to export attachments from Salesforce?
Salesforce export attachments using Data Loader is a common way to export notes and attachments from Salesforce. This tool allows for bulk import and export of Salesforce data. However, the Data Loader utility has certain limitations, such as manual mapping, inability to schedule data export, file size restrictions, and more. These limitations could cause inconvenience for users.
To overcome such restrictions and perform an efficient Salesforce export notes and attachments process, it is vital to utilize a third-party professional tool. The tool should be capable of correctly analyzing and downloading every Salesforce object, whether standard or custom.
How to save attachments from Salesforce with a specialized tool?
An effective Salesforce export files and attachments process can be easily performed with an advanced tool such as Kernel Salesforce Backup and Restore. This Salesforce backup tool is equipped with powerful algorithms specially optimized to deliver robust performance throughout the process. The tool deeply scans every Salesforce data object and export attachments from Salesforce completely with any data loss. In addition to attachments, a user can save standard objects, custom objects, files, records, metadata and even export contacts from Salesforce.
Some prominent features of the tool are:
- Complete data integrity is maintained.
- Original file/folder hierarchy is preserved.
- The tool provides a secure platform to connect your Salesforce account and save data.
- Automate Salesforce backup with the advanced scheduling feature of the tool.
- Restore Salesforce data from backup.
Steps to execute Salesforce export notes and attachments
Follow the comprehensive step-by-step guide to effortlessly execute Salesforce export files and attachments process.
Step 1: Download Kernel Salesforce Backup and Restore tool from its official website.
Step 2: Complete the installation process and launch it.
Step 3: Select Salesforce module from the home screen.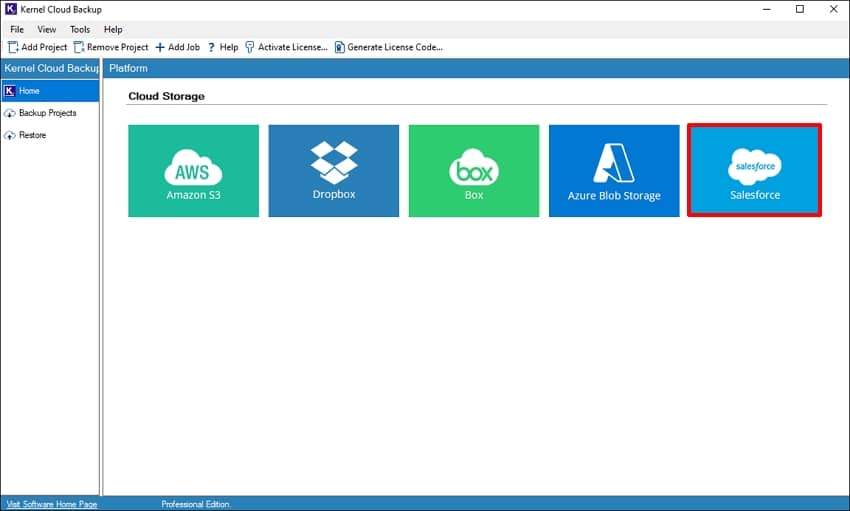
Step 4: To create a backup, provide a project and job name.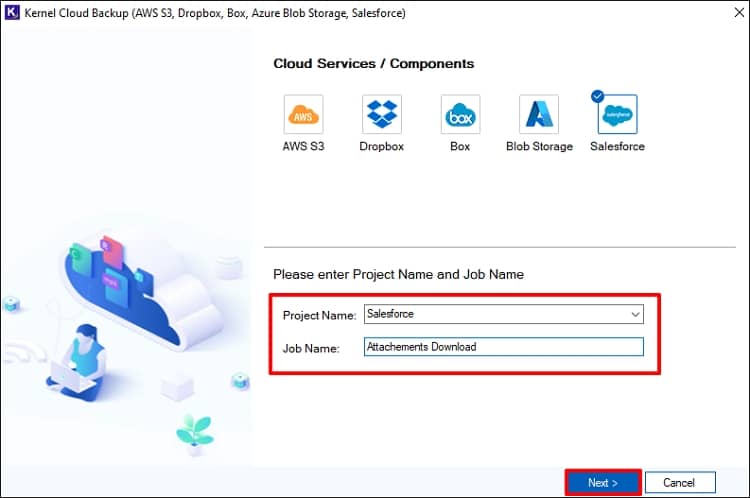
Step 5: Click Yes, if tool asks to create the project.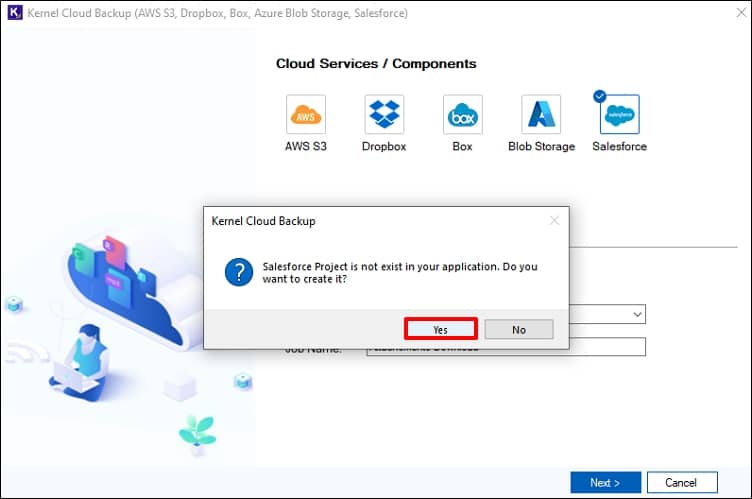
Step 6: Establish a connection with the Salesforce account by entering the required credentials. Then click Next.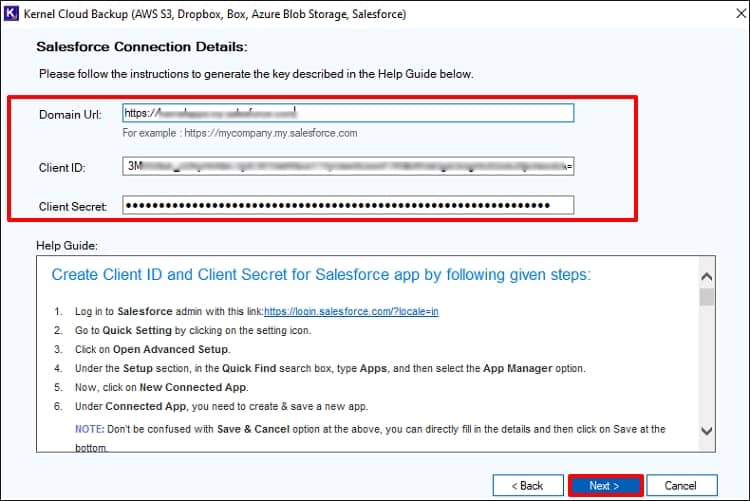
Step 7: Click Browse and specify a location to save the Salesforce backup file.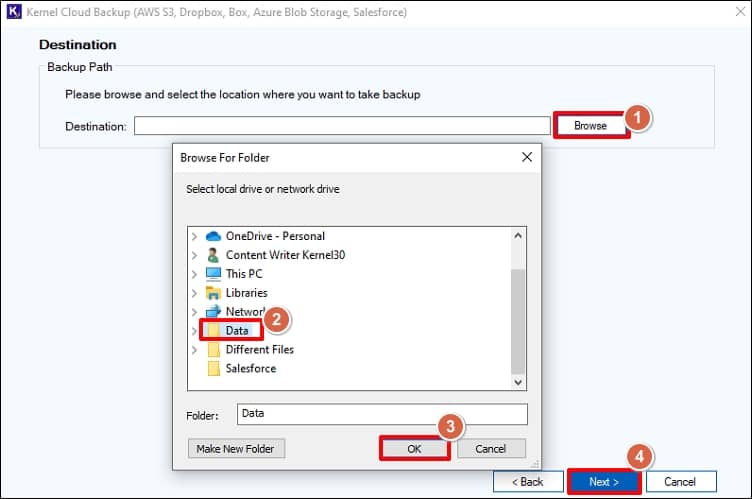
Step 8: If you want to begin the backup instantly, select Execute Immediate and click Finish.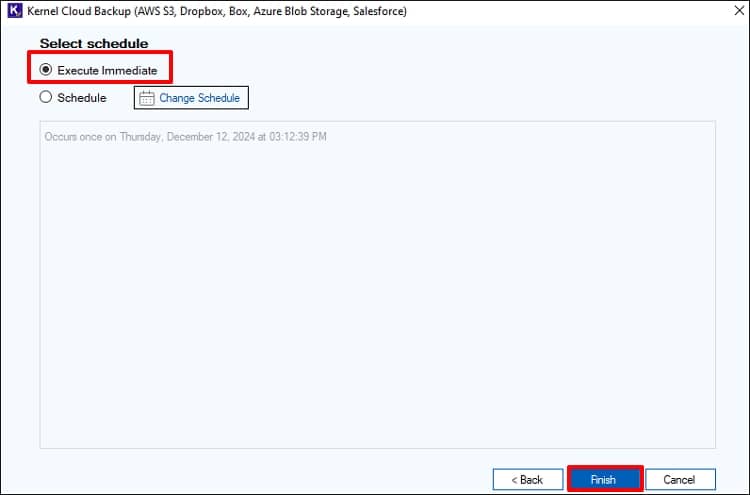
Step 9: To schedule the backup, select Schedule and click Change Schedule. Set a date & time and click Next. Click Finish to start the backup.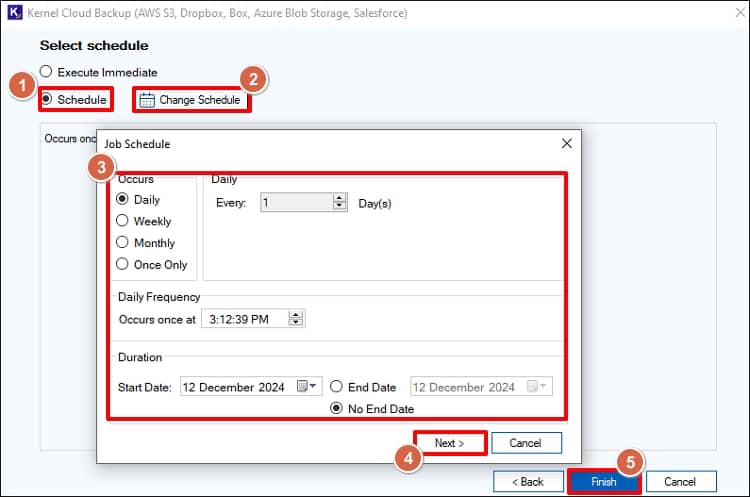
Step 10: To see the real-time backup progress, select the newly created project and click on the job name. Also, notice the job State which is labeled as Running for a job in progress.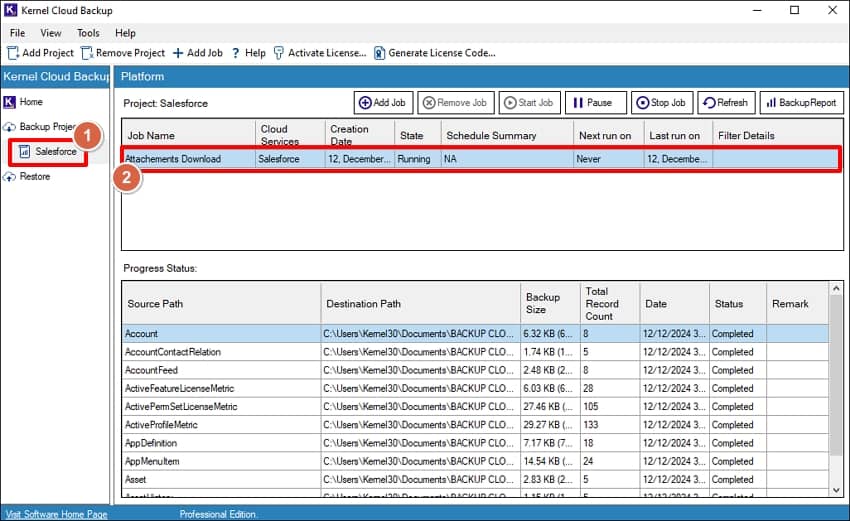
Step 11: Once a job is finished, the job state will change to Ready.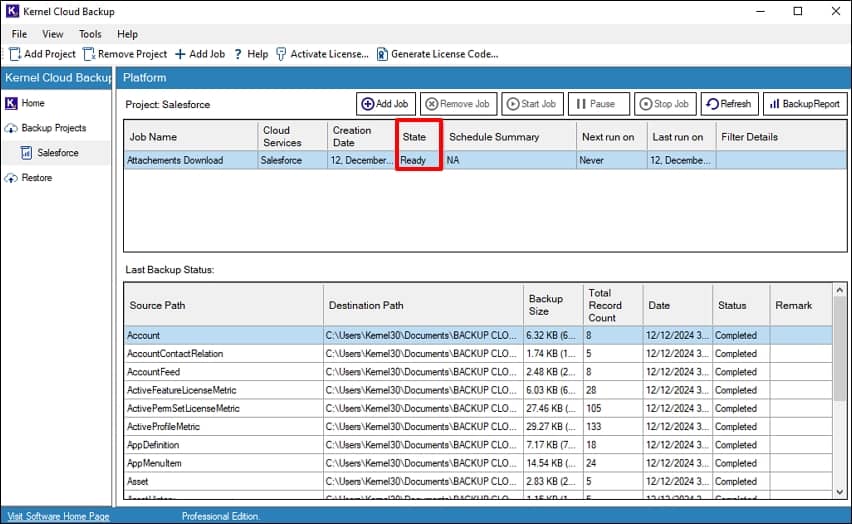
Step 12: To view the backup report of the job, click Backup Report and click View Details.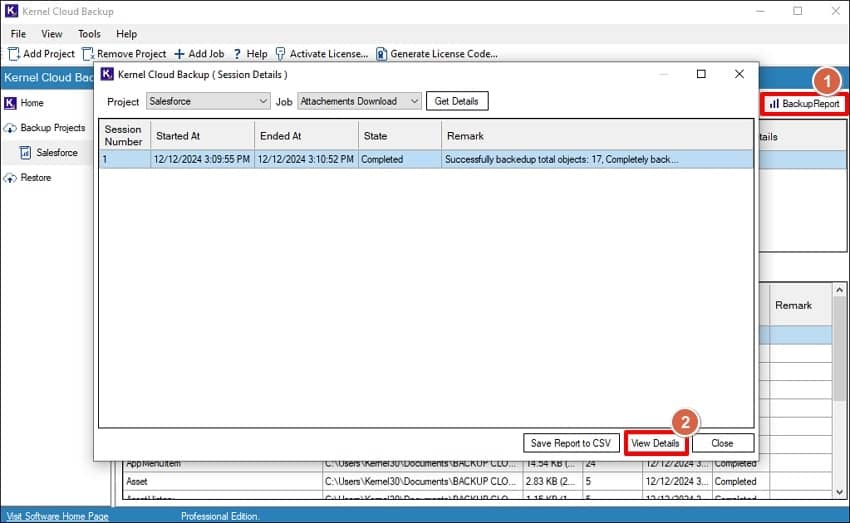
Step 13: A detailed backup report will be displayed. To save an offline copy of the report, click on Save Report to CSV.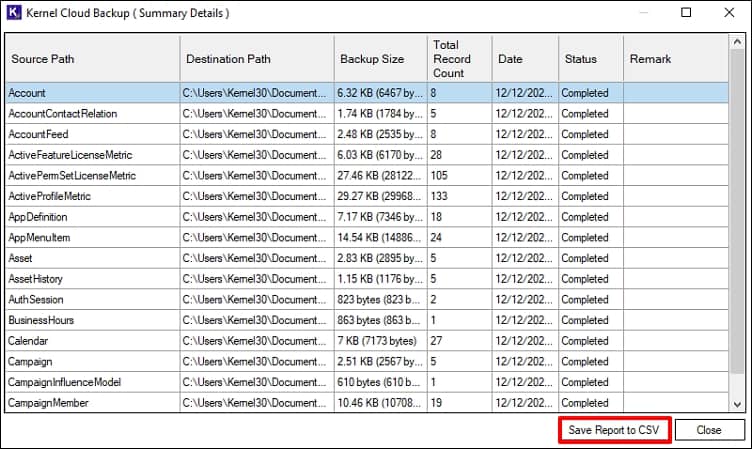
Step 14: Provide a location to save the report and click Save.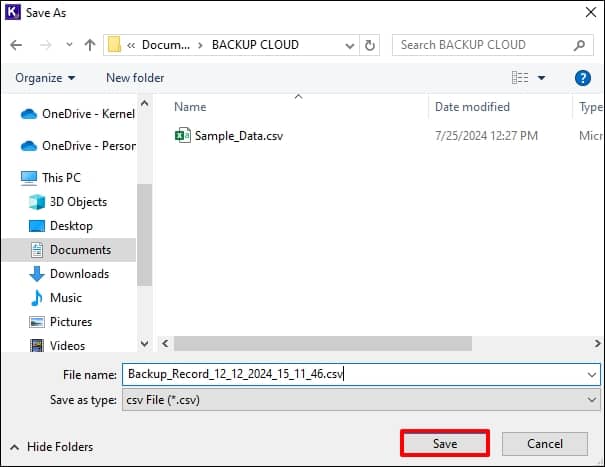
Conclusion
The need to export data from Salesforce can arise due to several reasons. Whether it is done for backup purposes or meeting business compliance needs, downloading files without losing data is crucial. Salesforce export attachments using Data Loader is not an efficient way to save your data offline. To avoid the complexities and limitations of the native methods, you must use the professional tool Kernel Salesforce Backup and Restore. The tools also feature a demo version to allow you to experience the tool’s capability for free.
FAQs
Q. What types of attachments can be exported from Salesforce?
A. You can export various types of attachments, including documents, images, PDFs, emails, and other file formats associated with Salesforce.
Q. How do you perform Salesforce export files and attachments in bulk?
A. With tools like Data Loader, you can bulk import & export Salesforce content. However, this free utility lacks features like automating download tasks, file size limitations, etc. To automate and download complete Salesforce data, you must opt for an advanced tool like Kernel Salesforce Backup and Restore.
Q. How frequently should you export notes and attachments from Salesforce?
A. Weekly Salesforce data backup is recommended to maintain the latest data backup. However, the frequency of backups also depends upon the usage and data of your Salesforce account.
Q. What is the best way to export Salesforce leads?
A. To export leads from Salesforce follow the following steps:
1. Login into your Salesforce account, navigate to Setup section.
2. Search for export data option in the ‘Quick Find’ box.
3. Select Export Now to save the leads instantly. You can also use the Schedule Export option to schedule a download time.
4. Select the lead you want to save and then click the option save the file as CSV.
5. You will get a download link to save the CSV file directly in your email account.
