
Read time: 5 min
Email addresses play a vital role in establishing smooth communication with others in every organization. In some instances, to simplify the workflow, email address extraction from Gmail account is needed. But the main question arises is how to extract all email addresses from Gmail account? There are not many ways available to extract email addresses from Gmail account. In this upcoming guide, we are going to learn a manual method and a professional email extractor for Gmail. First, let’s know the reasons to extract email addresses from Gmail account.
Reasons to extract all email addresses from Gmail account
There are many reasons for extracting email addresses from Gmail account. Some of them are listed below:
- Creating a backup: Extracting and saving email addresses at one place creates a safe backup. Doing this protects the email addresses from data loss.
- Switching platforms: While switching the email client, the organizations look to extract all the email addresses in a single file.
- Collaboration with others: For a smooth collaboration with clients and colleagues, extracting email addresses is necessary.
- Easy to share: Storing all the emails in a single file facilitates easy file sharing with others within the organization.
- Mass emailing: With all email addresses arranged in a single file, it helps to send bulk emails at once.
Manual Method to extract email addresses from Gmail account
There is only one manual way to extract email addresses from Gmail account. And this can be done by Gmail’s inbuilt feature. Here are the steps to export all email addresses from Gmail account:
Step 1. Open any web browser on your system and login to your Gmail account.
Step 2. Click on the Google Apps icon and select Contacts from there.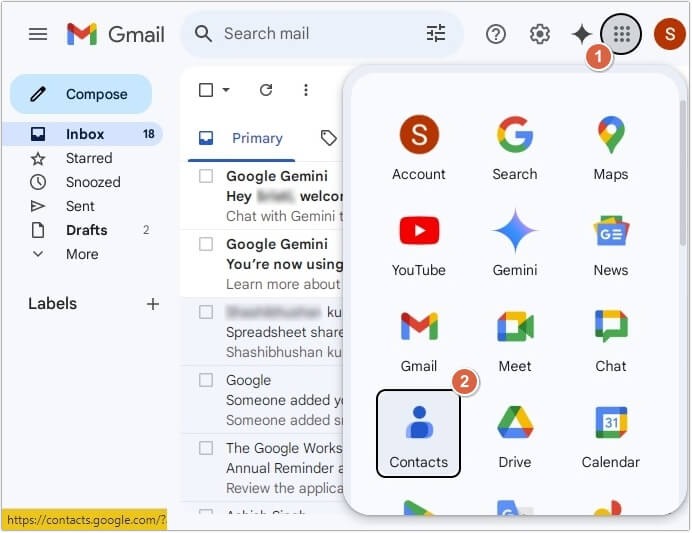
Step 3. Select all the contacts you want to export, then click on three-dots >Export.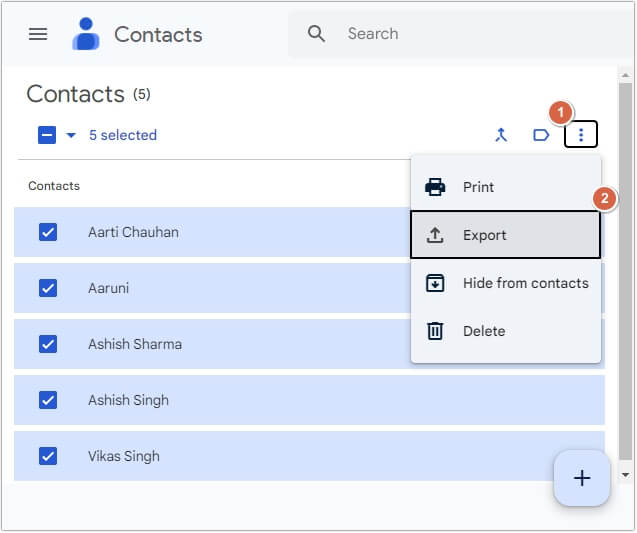
Step 4. From the given options, select any according to your requirements (we have selected Google CSV) and click Export.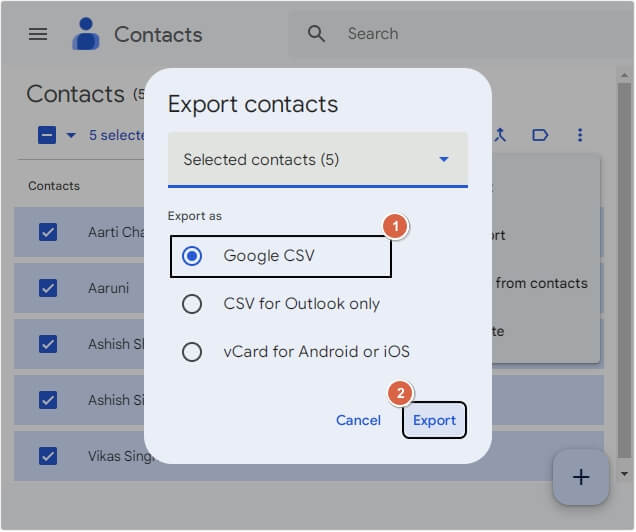
Once the process is done, all the email addresses will be saved on your local system.
Automated tool to extract email addresses from Gmail account
The above-mentioned manual method is not reliable because along with email addresses, it also extracts other contact details such as mobile numbers, titles, home address, and other details. This makes it difficult for users to look for the extracted email addresses from the heap of data. That’s why we suggest using a professional email extractor for Gmail.
Kernel Outlook Attachment Extractor fits best in this scenario. This is a feature-rich Outlook attachment extractor, which also extracts email addresses smoothly. The software provides multiple filters, including a date filter to make the email extraction easy and selective.
Simple steps to use Outlook attachment extractor tool
Here is the detailed working of the software with step-by-step guide to successfully extract email addresses from Gmail account.
Step 1. Download and set-up Kernel Outlook Attachment Extractor.
Note- You must configure your Gmail account with Outlook before executing the process.
Step 2. Click on Add Outlook Profile option.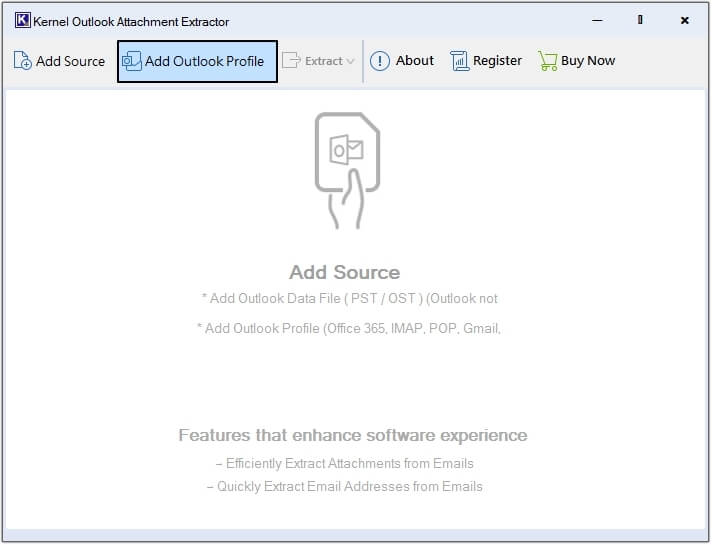
Step 3. All the profiles configured with Outlook will get listed in the left pane. Click on any folder to get a preview.
Step 4. Click on Extract, then Email Addresses.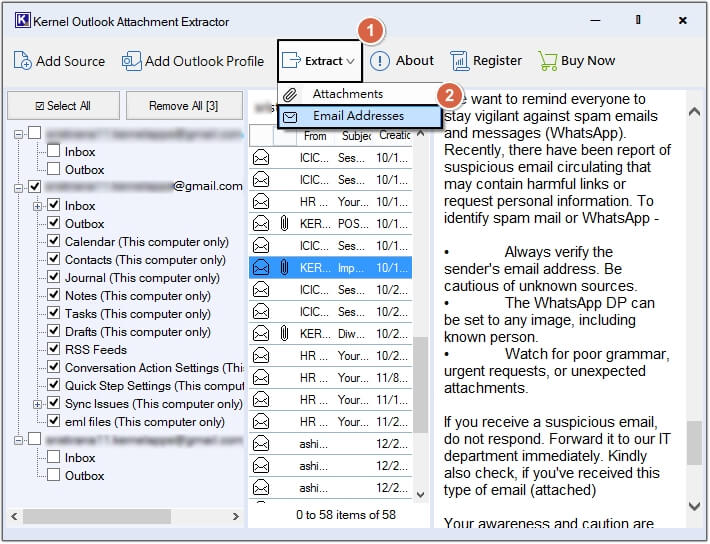
Note- For selective extraction, select the email addresses and right-click on them. Then select Extract Email Addresses.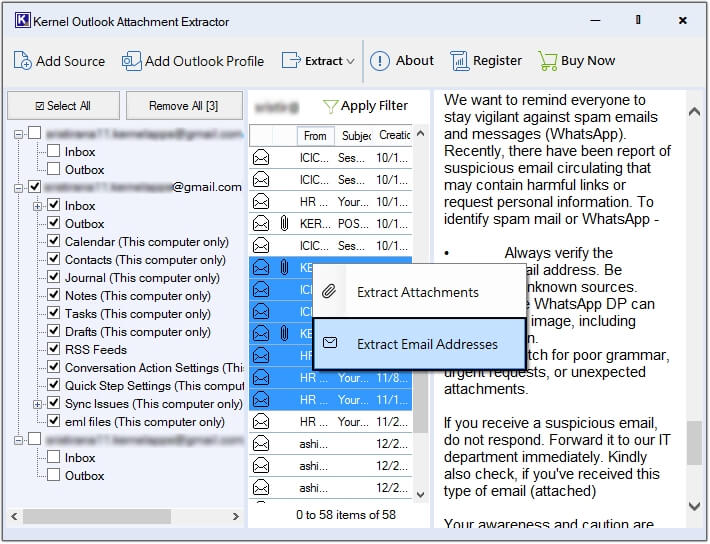
Step 5. Click on Browse to provide the saving location.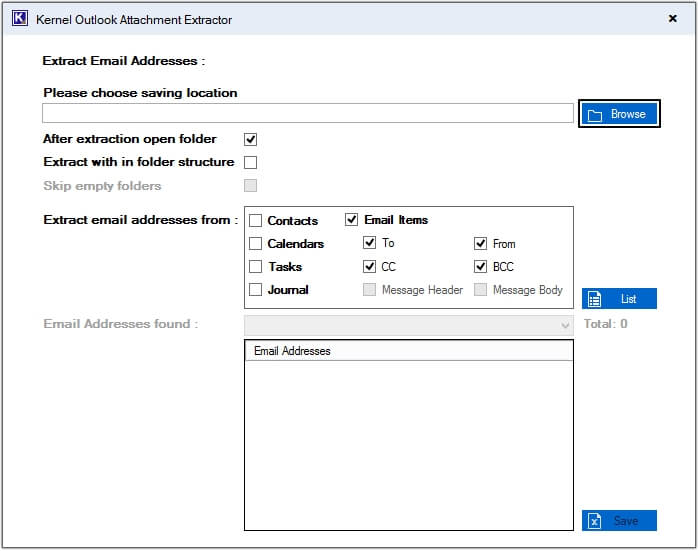
Step 6. Click on Make New Folder, then OK.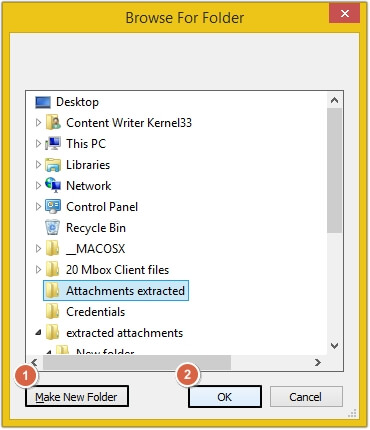
Note- You will get two options to save extracted email addresses:
1. Extract and save email addresses in a single Excel sheet.
Here are the steps to save the extracted email addresses in a single file:
a) Select the email attributes from Extract email addresses from pane, then click List. The software will list all email addresses in the Email Addresses found pane. Click Save.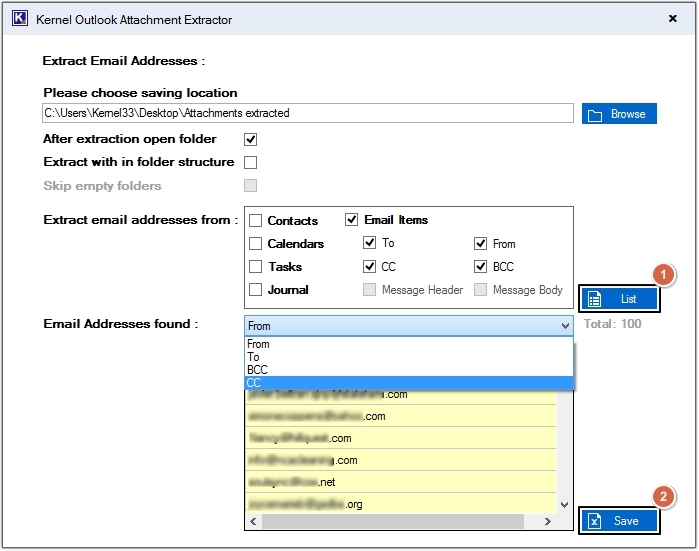
b) Once the extraction process is completed, a successful message will pop-up on your screen, click OK >Done and you will be redirected to the extracted email addresses location.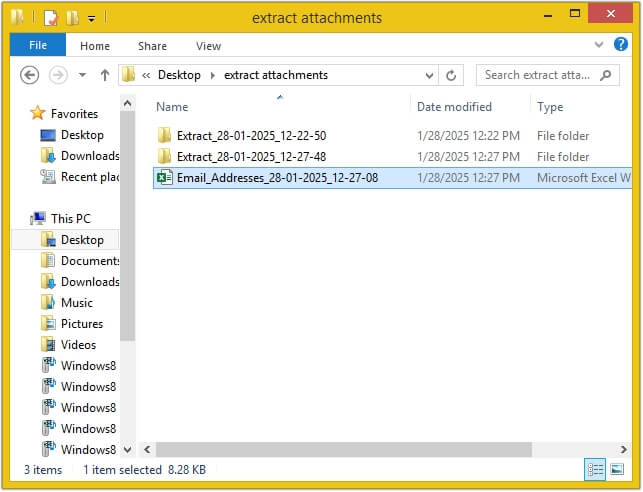
c) All the email addresses are saved in a single excel sheet, click on it to get a preview of them.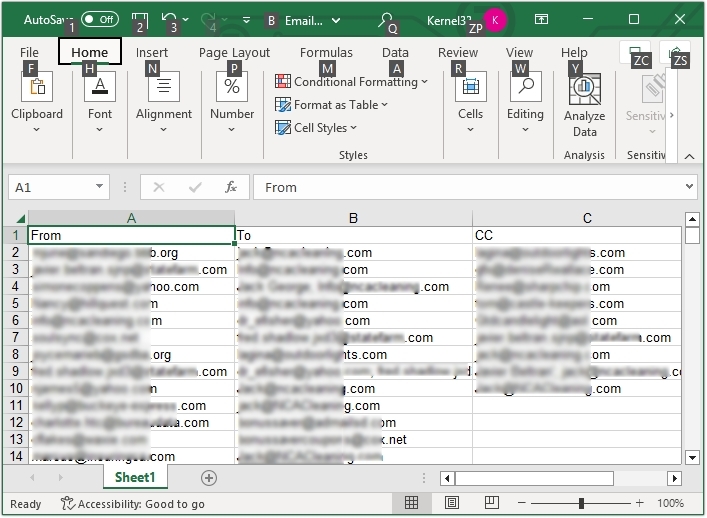
2. Extract and save email addresses in the actual folder structure.
Here are the steps to save the extracted email addresses in the actual folder structure:
a) Choose necessary email attributes, then select Extract with in folder structure option and Skip Empty folders for selective email address extraction and click Extract.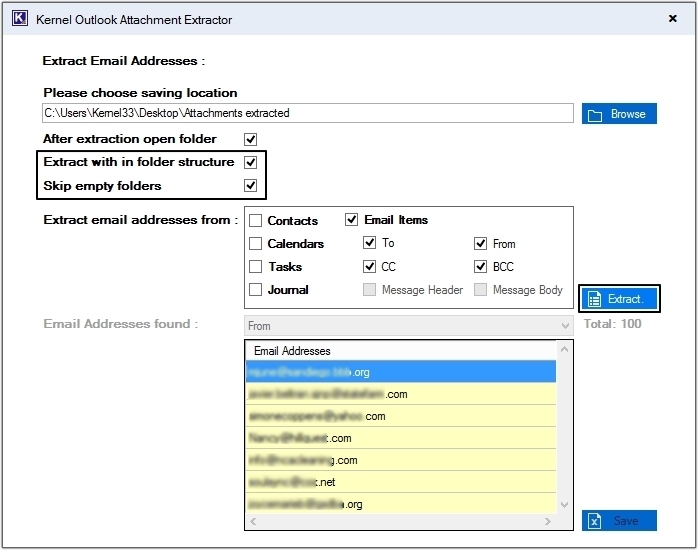
b) Once the process is completed, click on Done and you will be redirected to the specified location in the above steps, click on any folder and get a preview of extracted email addresses.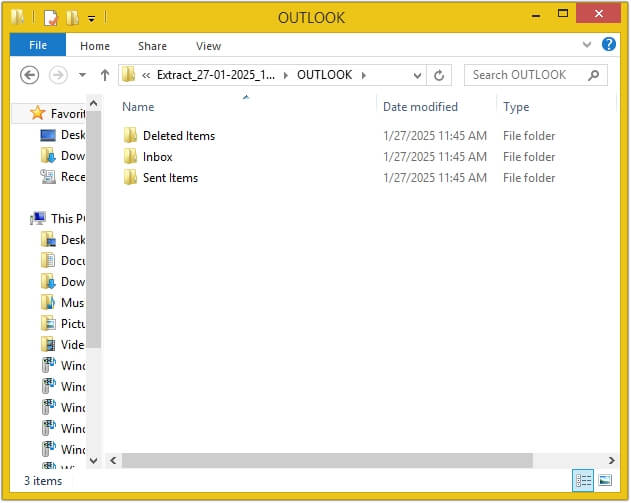
Conclusion
Extracting email addresses from Gmail is needed for various ways, which we have discussed in the above-mentioned guide. Moreover, the discussed manual method is not suggested due to lack of compatibility. To export all email addresses from Gmail, we have highlighted a professional email address extractor for Gmail. The software is highly functional and comes with many filters to make email address extraction easy. Moreover, it also allows you to extract email addresses from Outlook and save at your desired location in your system’s local storage.