


SharePoint holds sensitive business data which is collected from daily tasks and collaborations. But sometimes, we aim to export data or a set of data to different tenants. The need of tenant to tenant SharePoint migration occurs during the scenarios like restructuring, merger, or acquisition involving two organizations. SharePoint migration is comparatively more complex than migrating Exchange within Office 365 tenants. This intricacy is because there are no straightforward methods available for SharePoint tenant to tenant migration or the success rate is very low. However, to resolve the concerns and technical complexity involved, using a third-party SharePoint migration tool is the best solution.
Due to the unavailability of a secure manual migration method, you must go for the automated process using the migration tool. It is a straightforward migration tool complete that performs a secure tenant to tenant SharePoint migration without any issue Let’s go through the process of adding a SharePoint site as the Source and another as the Destination for copy and move files between SharePoint.
Prerequisites for tenant to tenant SharePoint migration
Before you start the migration process, it is important to prepare by arranging the prerequisites and SharePoint source and destination environment. Here are some requirements that you should consider before executing the migration.
- Active subscription to Microsoft 365 linked with SharePoint Online.
- Give admin access to a proficient individual from your organization.
- Check the destination tenant's configurations, licenses & settings for not experiencing compatibility issues.
- Learn about the permissions and structure of the MS 365 tenant site.
- Analyze the influence this migration will have on your team and stakeholders.
- Find out the size and amount of data you need to migrate.
The manual methods available for migrating SharePoint data require technical proficiency and are time-consuming. It won't be a wise decision to go with them. We suggest you to use a professional SharePoint data migration tool to migrate all sorts of data, including SharePoint list/library, permissions, site/site collections, and other attributes.
![]()
How to migrate using Kernel Migration for SharePoint?
Kernel Migration for SharePoint simplifies the process of moving SharePoint data from one tenant to another. The software makes it easy even for a non-technical person to move content while restoring the permissions and data hierarchy. The tool uses a simple graphical user interface for the tenant to tenant SharePoint migration. Download and follow the steps as follows:
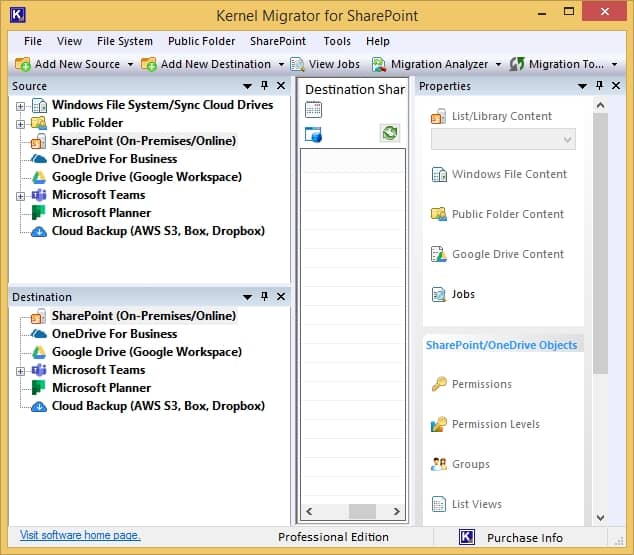
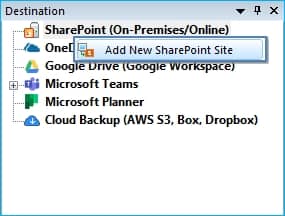
- Install and run the software. The home page presents all the options for selecting the data from Windows File System, Public Folder, SharePoint Server, OneDrive for Business, Google Drive, Microsoft Teams, and Microsoft Planner, along with Cloud Backup.
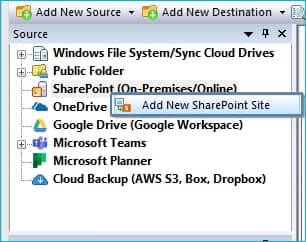
- Right-click the SharePoint Server and select Add New SharePoint Site.
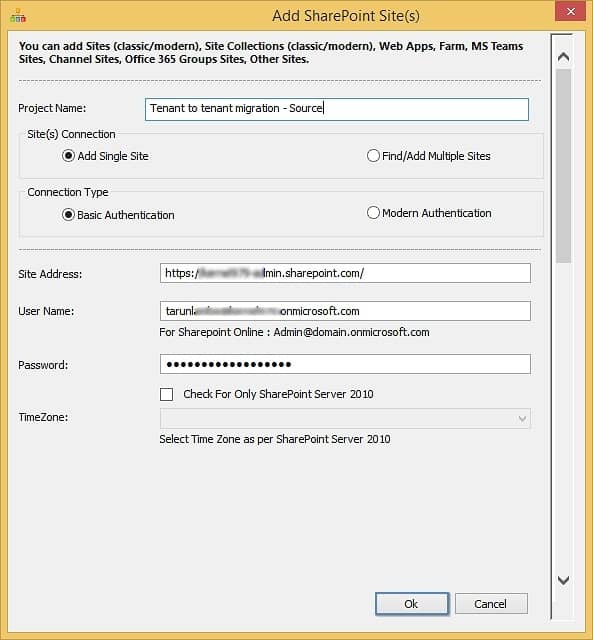
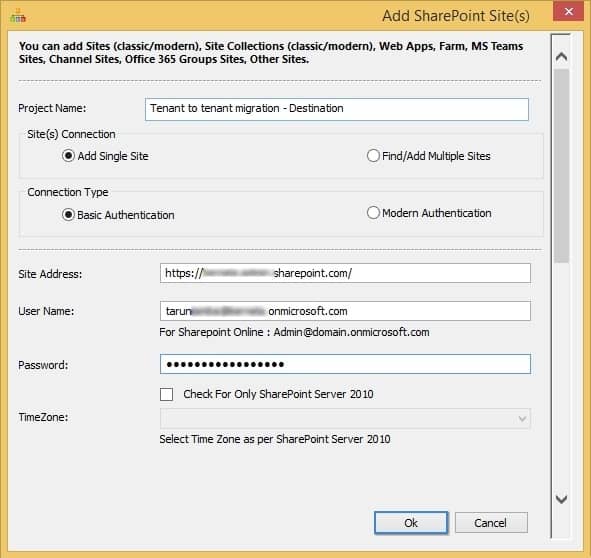
- Provide a Project Name. Input the Site Address, Username, and Password. Click OK.
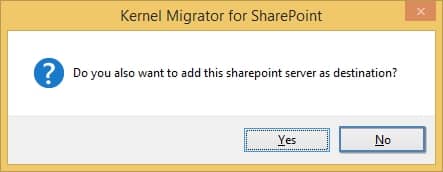
- The wizard will ask if you want to add the SharePoint Server as the destination also. Click No.
- The SharePoint Site will be added as the Source. You can visit all the lists and libraries. The tool will show all the details of it.

- Now go to the destination pane. Right-click SharePoint Server and click Add New SharePoint Site.
- Provide the Project Name, Site Address, User Name, and Password. Finally, click OK.
- The tool will ask if you want to add SharePoint as Source. Click NO.

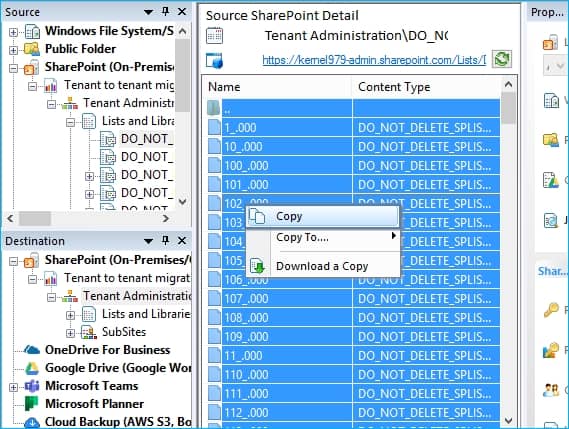
- SharePoint is in the destination pane, and you can now conduct the migration. Go to any source list or library, press Ctrl + Click to select the data, then right-click, and select Copy.
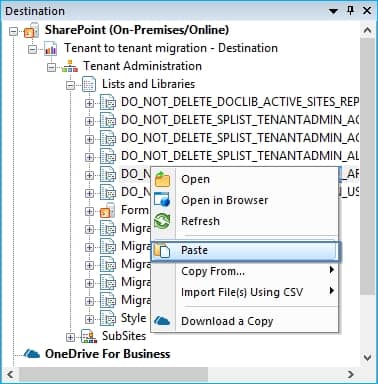
- Now, go to the destination pane. Select the desired library, right-click it, and select Paste.
- A new wizard shows all the items you have chosen on the source, and you can choose to deselect them. Click Next.

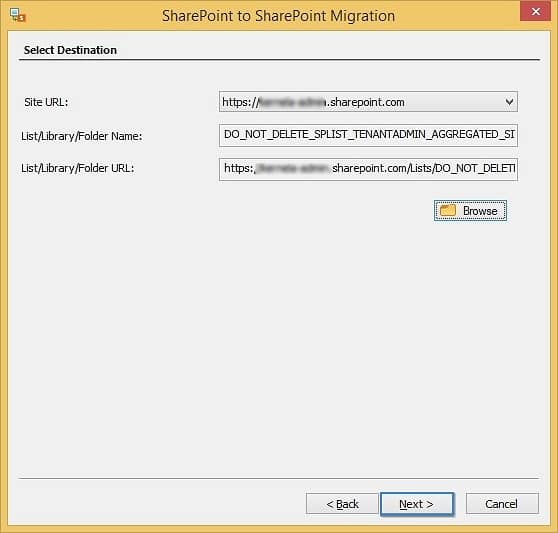
Note: You can add more to the selection by clicking on Edit Source selection. Select any list/library and then press Remove to delete specific item from the selected ones. Press Remove All to clear all the selected items. - The tool shows the Site URL, List/Library/Folder Name, List/Library/Folder URL. You can use the drop-down and choose any other destination site. Click Next.
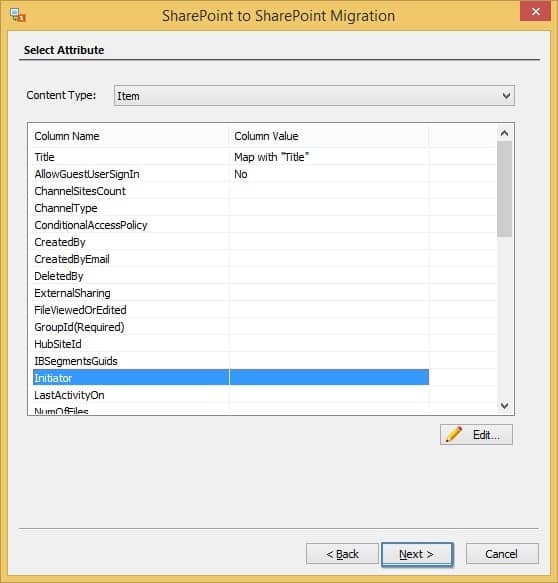
- Select any attribute of the Item and you can edit them using the Edit button. Click Next to go ahead.
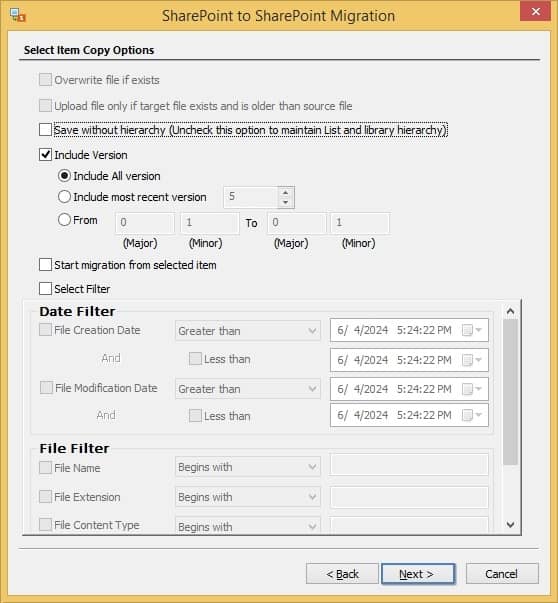
- The Filter page consists of all the crucial filters for SharePoint tenant to tenant migration. There are Item Copy Options, Date Filter, File Filter, etc. Use these filters and click Next.
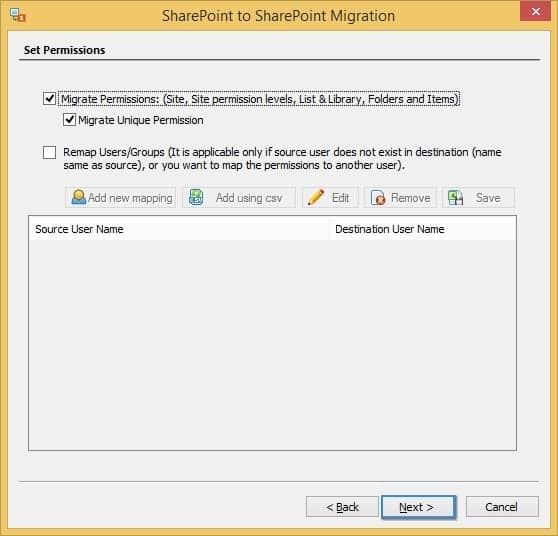
- Set the permissions for data and map the users and role groups. Click Next.
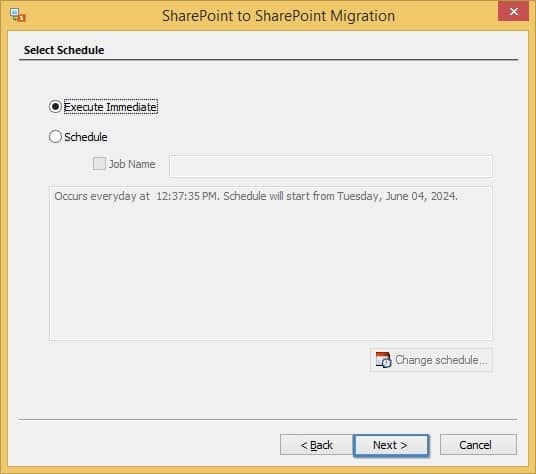
- Select from the options for scheduling the migration at a suitable period, or you can choose to run the migration immediately. Click Next.
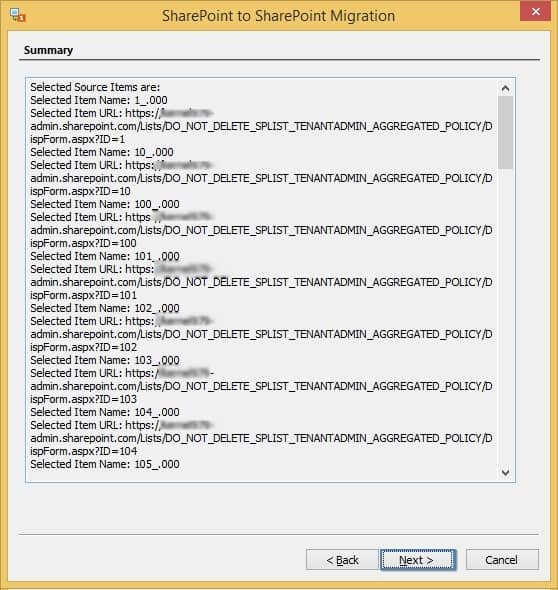
- There is a final summary of the whole data which you are migrating. Click Next.
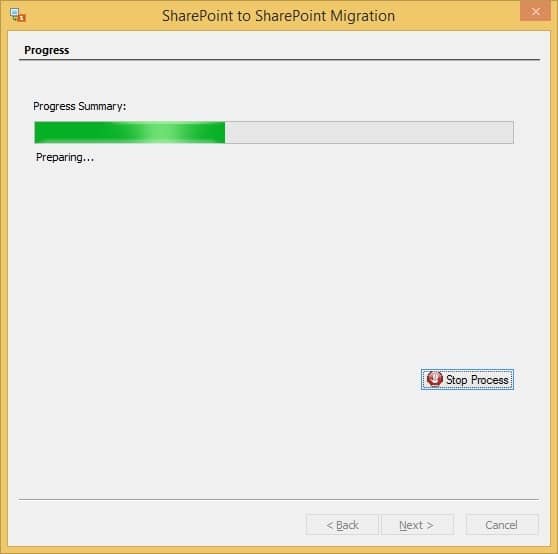
- The process of migrating SharePoint tenant to tenant has started (you can click the Stop-Process button and stop the migration).
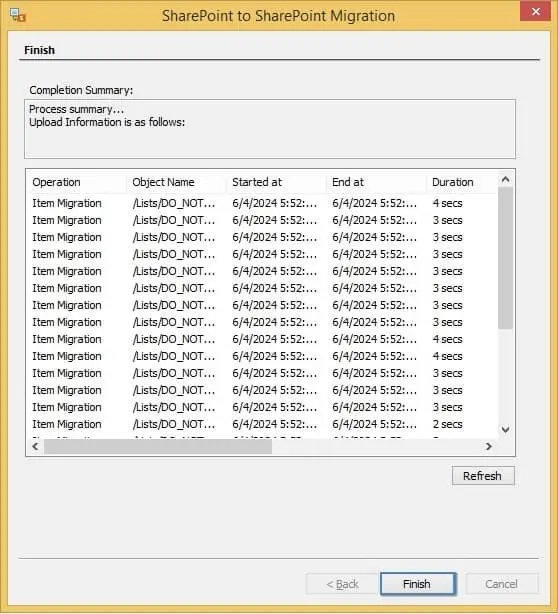
- At last, you can get a whole migration report with the status of each migrated item. Click Finish.


Conclusion
Now, we have understood that if you want to proceed traditional approaches for SharePoint tenant to tenant migration, then there will be certain complications. Therefore, it is evident that using Kernel Migration for SharePoint tool is the most reliable solution. The tool boasts a range of advanced features, making tenant-to-tenant SharePoint migration a straightforward and trouble-free experience. It provides complete control of the migration process, and at the end, it yields a detailed migration summary mentioning all the aspects.
![]()
This is the best tool for tenant to tenant migrations. When you perform tenant to tenant migrations, then you do not have manual methods. So, use this software and start the migration of data along with complete permissions and metadata.