


Office 365 Shared Mailbox allows multiple users to access, reply, and read documents with a centralized email address. In comparison, Office 365 Group is a collaboration feature that helps organizations and teams to work cooperatively. However, it's difficult to migrate Office 365 Shared Mailbox to Office 365 Groups, and users often face multiple issues during the process.
Migrating data from shared mailbox needs to be performed with full concentration or your data may get lost. But at first, it’s necessary to understand why we need to move Shared Mailbox to Office 365 Groups.
Why migrate Office 365 Shared Mailbox to Office 365 Groups?
Migrating from Office 365 Shared Mailbox to Office 365 Groups benefits in various ways. Read the below-listed points and know the reasons to convert shared mailbox to Office 365 groups:
- Centralized communication: With Office 365 Group, all the members of the organization can work at the same time with a single group mailbox.
- Easy management: Customize permissions of Office 365 Groups, including adding or removing users according to your requirements.
- Guest access: With Office 365 Groups, organizations can allow external users to access and collaborate with other employees easily.
- Collaboration: Office 365 Groups puts forward many collaborative tools, including OneDrive, SharePoint, etc., to provide a common workspace for teams.
- Better features: Office 365 Groups provide multiple features like a shared calendar, Planner tasks, document library, and more for better communication.
Methods to Migrate Office 365 Shared Mailbox to Office 365 Groups
There is a manual method available to convert Shared Mailbox to Office 365 Groups. First, you need to login into Office 365 admin center and then create a group there. After this, use the eDiscovery feature to create a new search, then search and export the emails of Shared Mailbox. Once done, use PowerShell to import emails in the new Office 365 Group. Make sure permissions such as Send As and Full Access are set for the new Office 365 group.
Limitations to Move Shared Mailbox to Office 365 Groups Manually
The manual method to Migrate Office 365 Shared Mailbox to Office 365 Groups has several drawbacks. Here is a list of some:
- The manual method contains multiple steps to achieve success, which is very lengthy and time-consuming.
- Only an expert with technical knowledge can perform the manual method, making it challenging for non-technical users.
- When moving from Office 365 Shared Mailbox to Office 365 Groups, users may lose their important data.
- There are chances of corruption, damage, or inaccessibility in Office 365 mailbox.
Instantly Migrate Office 365 Shared Mailbox to Office 365 Groups
If you convert shared mailbox to Office 365 groups with manual methods, then you must have come across many limitations. To avoid these shortcomings, users must rely on a Secured O365 Mailbox Migration Tool to get efficient and error-free results. Kernel Office 365 Migration fits the best to migrate Office 365 Shared Mailbox to Office 365 Groups with ease. This tool provides multiple filters to make the migration precise and quick.
Features of Kernel Office 365 Migration Software:
- Selective migration with filters such as date filter, item type filter, skip previously migrated items, exclude deleted and empty folders, etc.
- Migrate unlimited mailbox data with zero size restriction and preserve the data integrity.
- Easily migrate between any Office 365 plan, be it a Premium, Essentials, or Basic plan.
- Quick and accurate mapping of source and destination.
![]()
![]()
Let's proceed and migrate Office 365 shared mailbox to Office 365 Groups by using this utility:
Step 1. Download Kernel Office 365 Migration from the official website and launch it.
Step 2. Click + Add to add source Office 365 Shared Mailbox.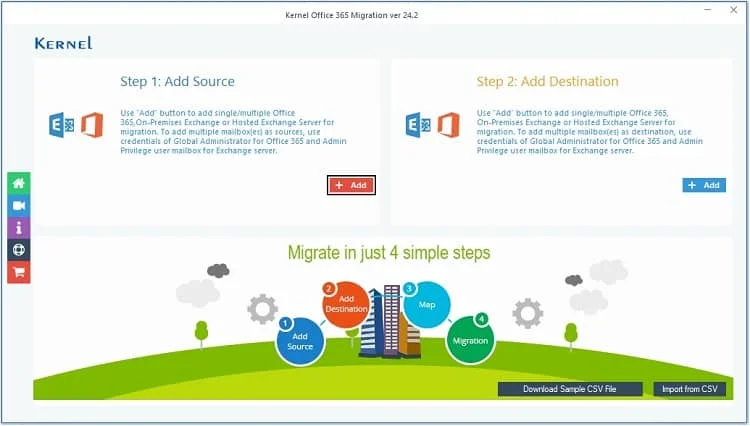
Step 3. Select Use Modern Authentication while login (by using user client id and secret) and click OK.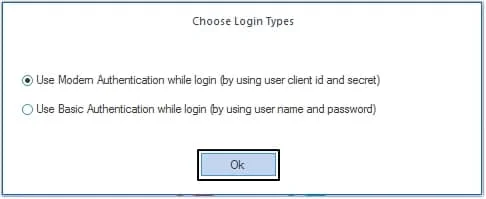
Step 4. Provide the Tenant ID, Client ID, and Client Secret Value and select List all Mailbox using above credentials > Get User Mailbox. Click Add to add that mailbox.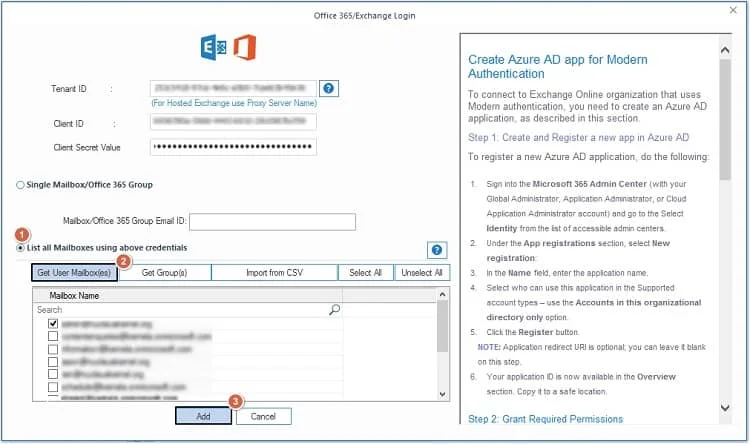
Step 5. Click +Add option on the rightmost side to add the destination Office 365 account.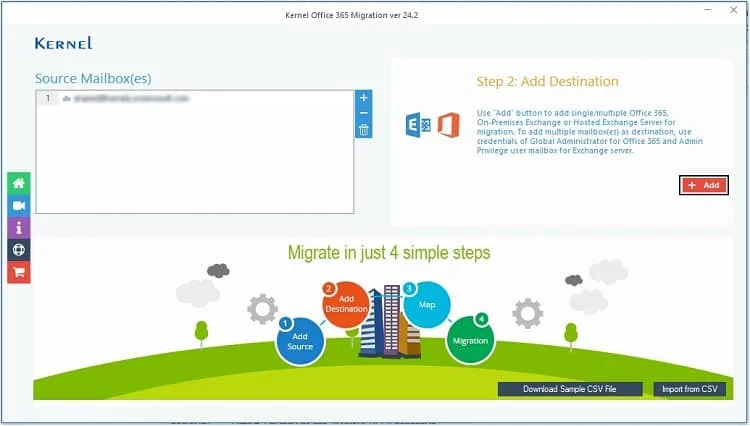
Step 6. Enter the Tenant ID, Client ID, and Client Secret Value and select List all Mailbox using above credentials >Get Groups. Click Add.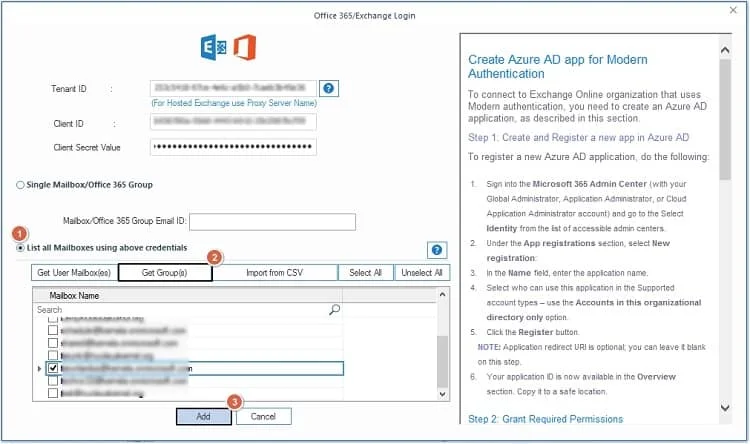
Step 7. Both the source and the destination mailboxes are added. Now map the destination mailbox against the source mailbox and click Set Filter and Migrate.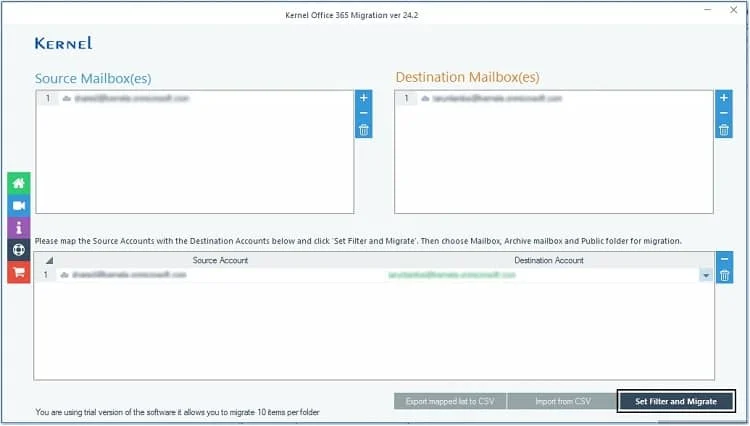
Step 8. Click Migrate to continue.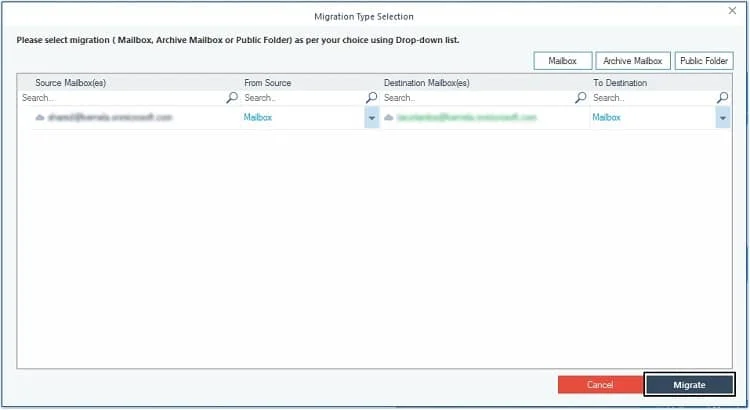
Step 9. You can select the added mailbox folders for migration and apply necessary filters, like Date Filter, Item Type Filter, Exclude Deleted folders, Exclude empty folders, and Skip Previously Migrated Items (Incremental). Select the checkbox saying Select if migrating to Office 365 Group and finally click I am OK, Start Migration.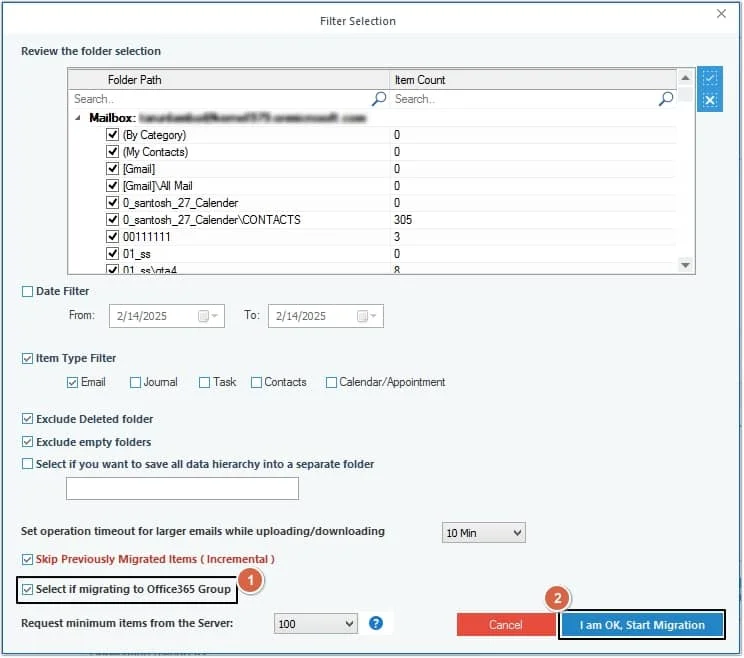
Step 10. Select the checkbox saying check the option to migrate all folders of PST/Mailbox to mapped target Office 365 Group (see above information) and click OK.
Step 11. The migration will get started, and the tool will display its progress.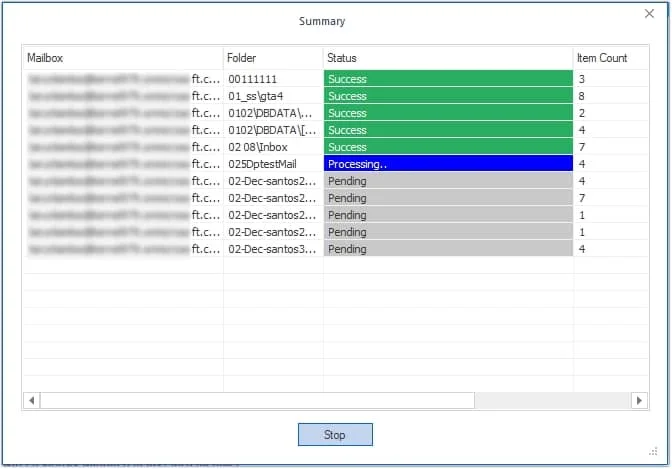
Step 12. After a couple of minutes, the message showing that the migration is completed pops up. Click OK.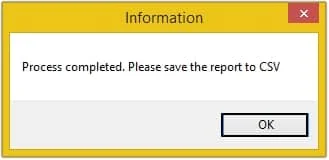
Step 13. To store this migration report in CSV format, click Save report to CSV option. After that, click OK to complete the task.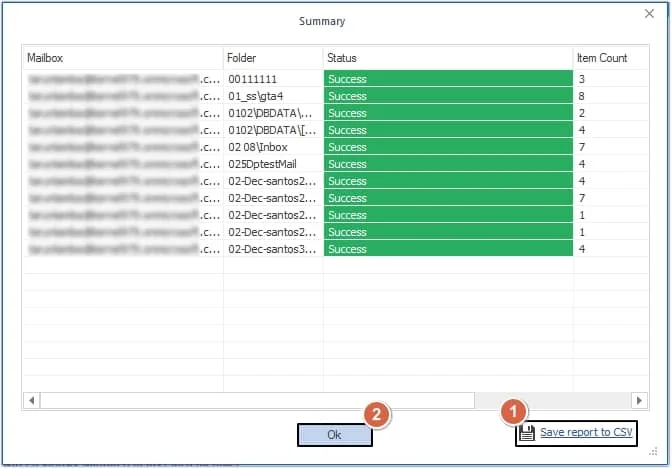
Conclusion
The direct process to migrate Office 365 Shared Mailbox to Office 365 Groups comes with drawbacks, hence creating hindrances for users. That’s why using professional software like Kernel Office 365 Migration software is recommended. This software provides you with an easy and secure way to move shared mailbox to Office 365 groups. Moreover, you can even perform Office 365 group to Office 365 group mailbox migration using this tool.
FAQs
Q. What should be considered when manually converting Office 365 Shared Mailbox to Office 365 Groups?
A. Make sure all the essential permissions and admin rights are available to securely migrate Office 365 Shared Mailbox to Office 365 Groups without any hassle.
Q. How can I migrate Office 365 Shared Mailbox to Office 365 Groups with PowerShell?
A. You can use the below listed command to move Shared Mailbox to Office 365 Groups:
New-MailboxImportRequest -Mailbox GroupMailbox@yourdomain.com -FilePath "C:\path\to\exported\emails.pst"
Q. Does the software support incremental migration?
A. Yes, you can perform incremental migration with Skip Previously Migrated Items (Incremental) option.
Some crucial migration like Shared mailbox to Office 365 group needs more than just precaution. There is no chance of any leniency or misjudgment. A single error can be catastrophic for the business. It is better for us that we used this software an