In a recent query, a user was asking for a quick solution for migrating contacts from Exchange mailboxes to Office 365 mailboxes. Of course, manual solutions are available, but we do not suggest them as they are quite long, complex, hard to perform, and also include risks of manual errors and data loss while migrating contacts. Rather, a completely reliable third-party software would be a helpful suggestion from us. Such a solution must ensure that exact data is migrated without any glitches and shortcomings.
How to Migrate Exchange Contacts to Office 365?
Migrating Contacts from Exchange Mailboxes to Office 365 Through Kernel Migration for Exchange – Express Edition
- Make bulk migration of contacts from Exchange on-premises mailboxes to cloud destination an easy task by installing Kernel Migration for Exchange – Express Edition software on your system. Let us know how easily it migrates contacts.
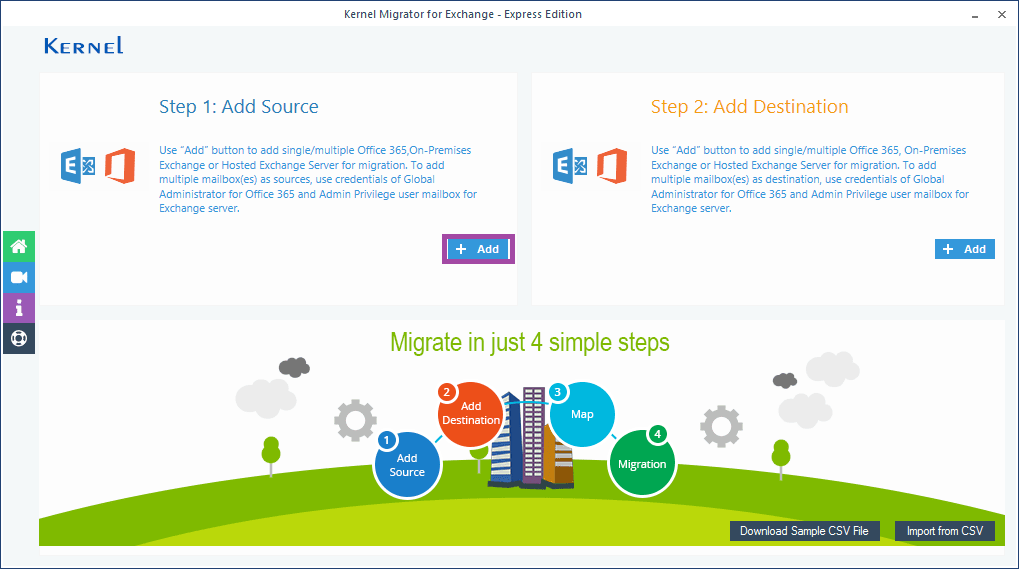
- On the next screen, provide the Exchange Server login credentials and details. After putting the login details like domain name, username, password, etc., select the List all mailboxes using above credentials option to add multiple mailboxes; click Get User Mailbox(es) option and then select the desired mailboxes from the list. Once selected, click on Add to add them. Note: You can also assign impersonation rights to the user mailboxes by selecting the checkbox against this option.
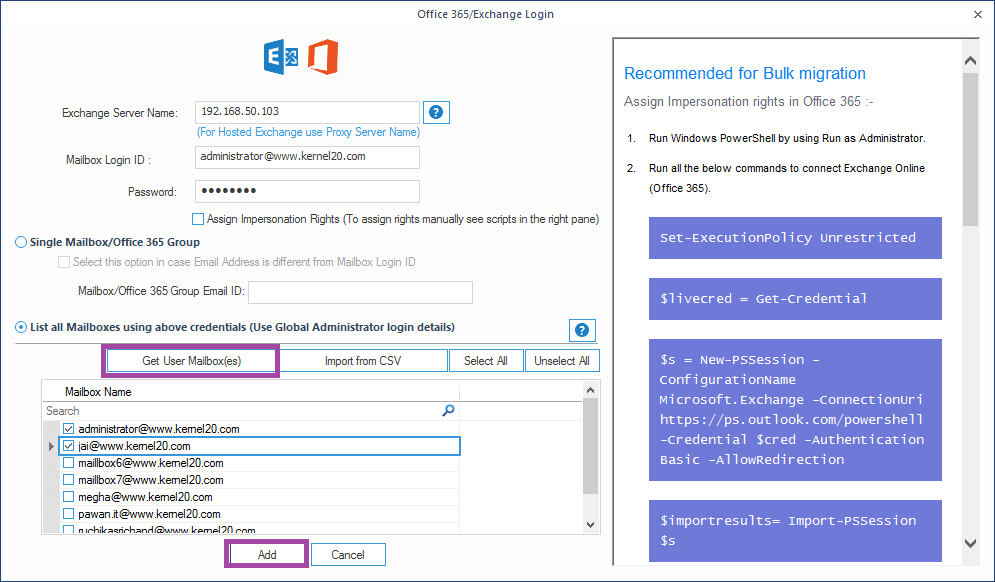
Note: Here, for giving an example, we have selected only 2 Exchange mailboxes. You can select any number of Exchange mailboxes for migrating contacts. - The selected Exchange mailboxes get added. Click Add under Step 2: Add Destination section to add Office 365 account as the destination.
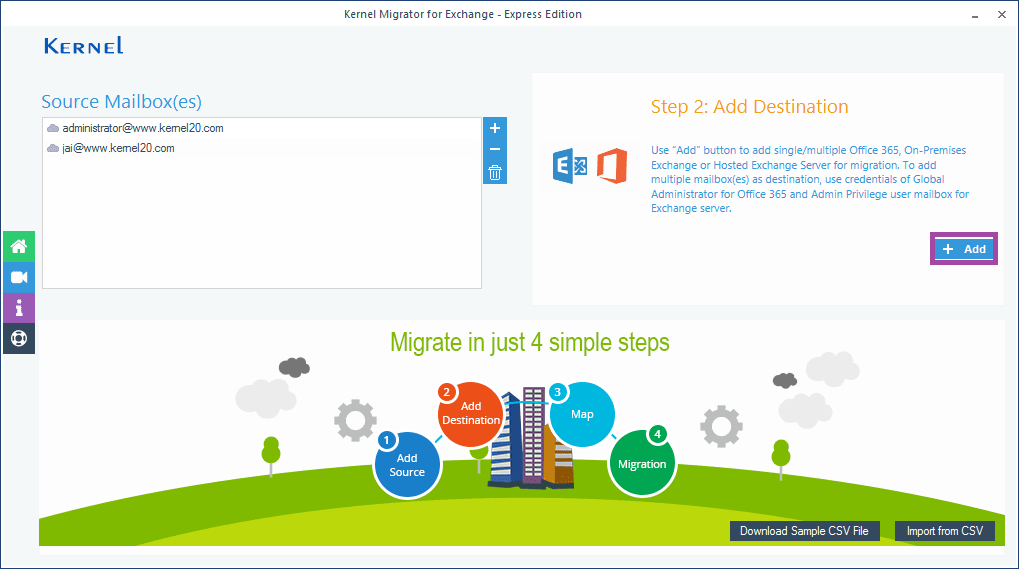
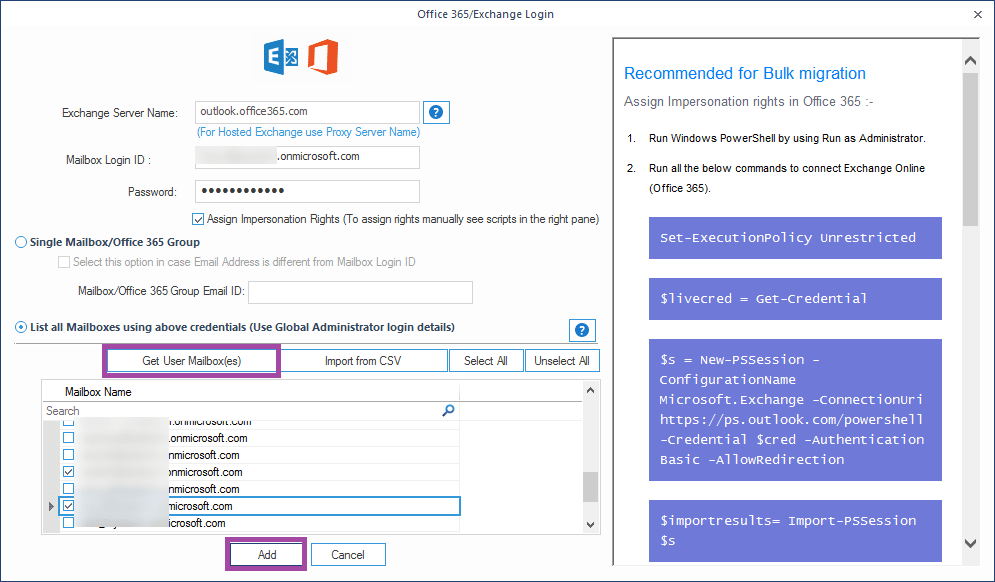
- Add the Office 365 account details, select List all Mailboxes using above credentials option and click on Get User Mailbox(es) option. Select the mailboxes to which you want to migrate the contacts. Click Add.
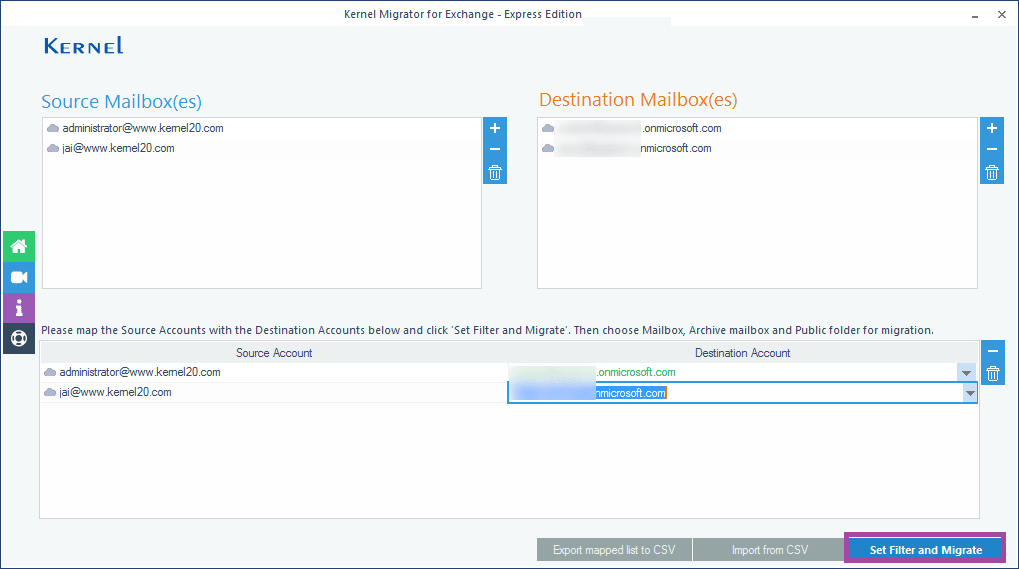
- Map the added source Exchange mailboxes to the target Office 365 mailboxes as per the requirement. Then click Set Filter and Migrate option.
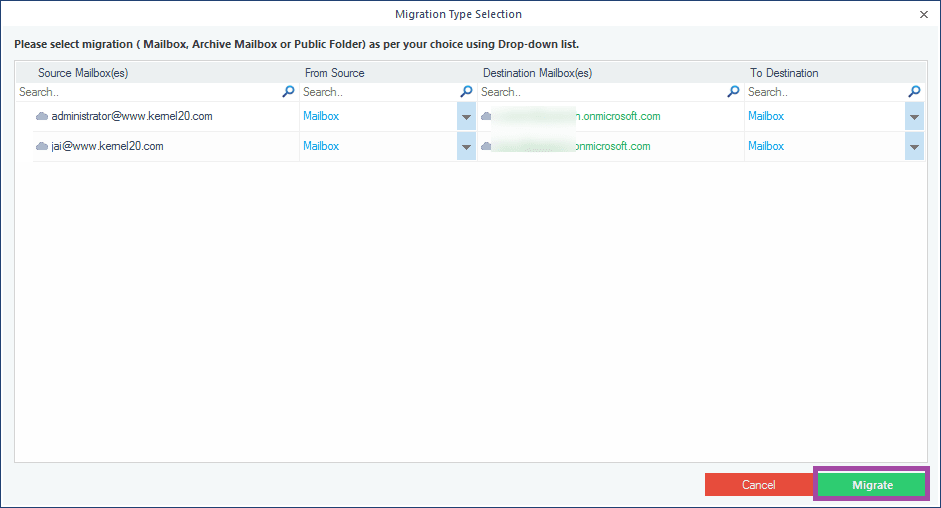
- Click Migrate option to continue.
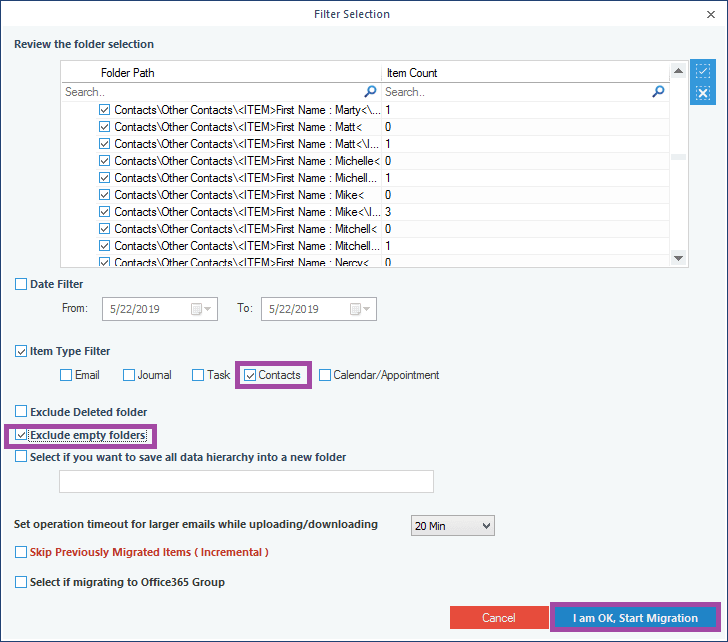
- On this screen, apply filters like folder selection, data range, etc. Under Item Type Filter, select Contacts to move only the contacts from the added Exchange mailboxes. You can also try other options to make the migration easy with options like Exclude empty folders to exclude the folders with 0 items. Apply other filter options as per your need and then click I am OK, Start Migration.
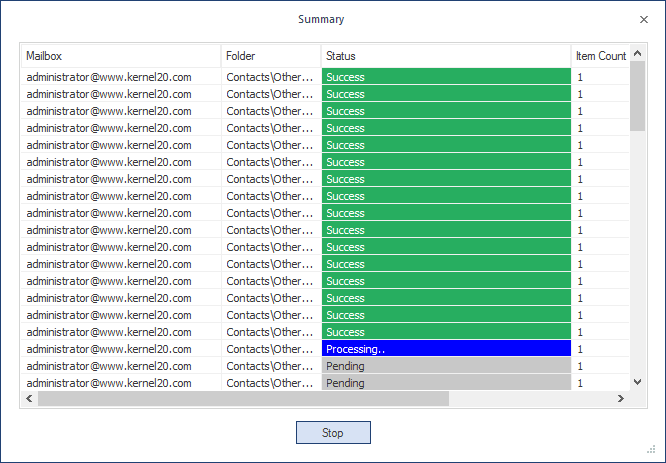
- The migration of contacts from Exchange mailboxes to Office 365 gets started. You can see the live progress of the migration.
- In some time, the migration gets completed. You can save the migration process details in report in CSV format.
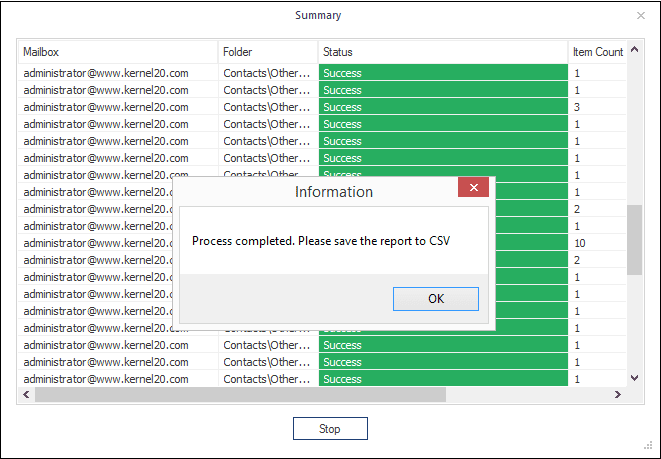
- Therefore, the migration of contacts has been successfully completed without any complications and extra efforts.
Some other advantages of the Kernel Migration for Exchange - Express Edition is listed below:
- Performs migrations between Office 365/Exchange & Exchange/Office 365.
- Migrates entire data from Mailboxes, Archive mailboxes, Public Folders and Groups
- Performs automatic migration using CSV file
- Extensive support to all Exchange Servers versions and Office 365 plans
- Allows manual mapping between source and destination mailboxes
- Trial version is available free for users to understand the software features
So, try the professional Kernel Migration for Exchange – Express Edition rather than the complex manual methods to migrate Exchange contacts to Office seems a wise decision.
Conclusion
Users may want to migrate contacts from on-premises mailboxes to Hosted Exchange mailboxes. For doing this, the manual method is quite complex, and even a slight mistake can result in the failure of migration. So, perform On-premises Exchange to Hosted Exchange migration with a secured and advanced tool like Kernel Migration for Exchange – Express Edition is preferred.


The Express Edition is good for the selective migration when you need to migrate only the selected folders. I have used the software multiple times to migrate different folders and it has worked fine each time.