


Individuals using Exchange/Microsoft 365 accounts in Outlook might be familiar with the OST file, which stores mailbox data offline. An OST file is a copy of mailbox data created automatically on your system. OST files are profile-oriented, which means you cannot access or read them without the original profile. Therefore, if you don’t have access to a specific profile of the OST file, you can neither read it nor import it to any other platform manually.
But, with the help of automated solutions, you can convert OST files to PST format and access it via MS Outlook.
Here, we have highlighted the situations when it becomes crucial to convert OST file to PST, as well as we discussed how you can import OST to Outlook 2016 quickly using manual and OST to PST Converter.
Top reasons to convert OST files into PST
There could be various scenarios that require OST to PST conversion. Some of the most common reasons could be:
- When the server is down, the Outlook OST file becomes orphaned; then it is required to convert OST files to PST and later import data from that PST file
- Exchange database files are inaccessible due to corruption or server crash.
- When backing up a few Exchange mailboxes.
- When you plan to close an Exchange account and want to access the mailbox items later, export all the mail items to a PST file and you can then use these later by importing the PST to your Outlook email client.
Manual method to import OST to Outlook 2016
With the Import/Export feature of Outlook, one can import their OST files to Outlook. Make sure your Outlook is connected to MS Exchange before you use this method. Here’s how you can access your OST file in Outlook:
Export OST to PST
To use the manual method, you’ll first need to convert your OST file to PST. Follow the given steps:
- Launch MS Outlook and go to the File tab.
- Click Open & Export and then Import & Export.
- Select Export to a file and then click Next.
- Select the Outlook data file (.pst) and then click Next.
- Select the folder to export to the file, click Next, and then Browse to define the file location.
Import PST to Outlook
Let’s now proceed to import the PST file into Outlook. Your mailbox will then be in your Outlook account.
- In Outlook, go to File > Open & Export > Open Outlook Data File.
- Select the PST file converted in the previous steps and click OK.
This will show you the PST file added to your mailbox in Outlook application.
This method is suitable to import OST to Outlook versions 2019, 2016, 2013, and 2010. However, if you are unable to import the OST file, it symbolizes that the file you’re using is either damaged or corrupt. But don’t worry as we’ve got you covered. Using the OST to PST converter tool, it’s easy to hold control even of your corrupt mailbox items.
Using proficient tool for OST to PST conversion
The manual method of importing OST to Outlook 2016 and the upgraded version 2019 takes a lot of time and is monotonous. It might be complicated for non-tech users and not as effective in all situations. Henceforth, it is important to use a professional tool like Kernel for OST to PST converter software.
![]()
To restore and convert your files using these tools, there is no need to establish connection with the Exchange Server. The tool not only imports OST files, but it also convert OST to MBOX, PDF, DBX, EML/MSG, etc.
Follow the steps given to proceed with the seamless conversion of OST files to PST.
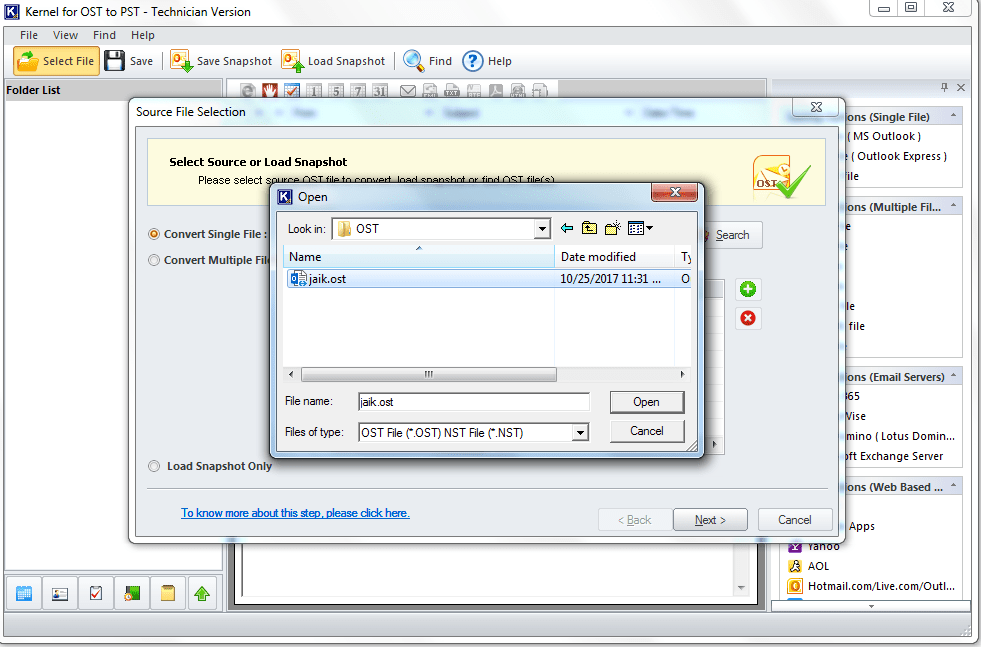
- As soon as you install the tool, you will get this welcome screen, select an OST file by clicking on the Browse button.
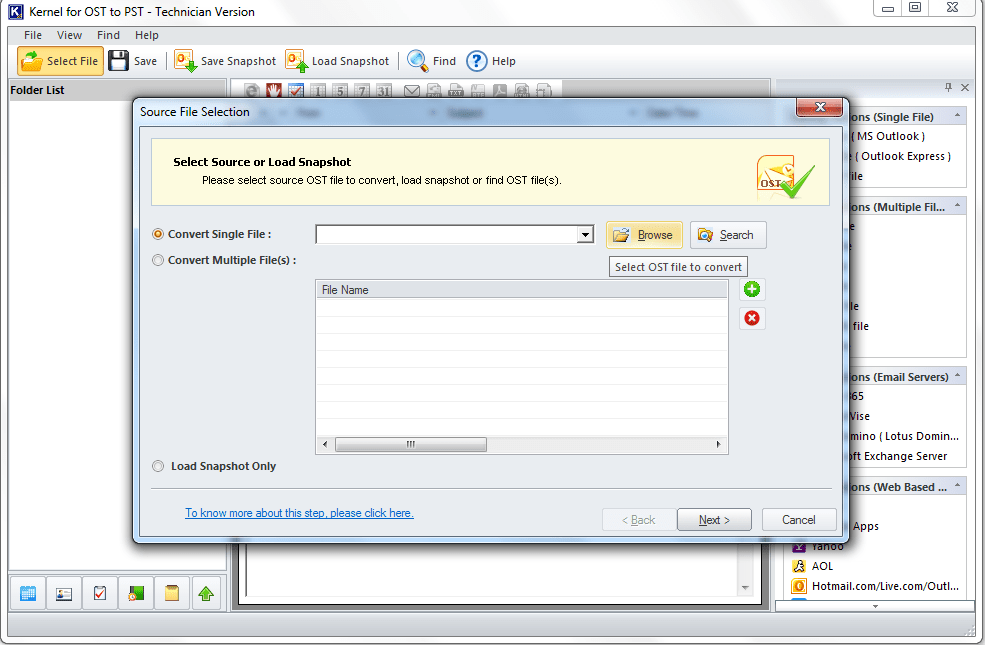
- Once the file is added to the tool, click on Open.
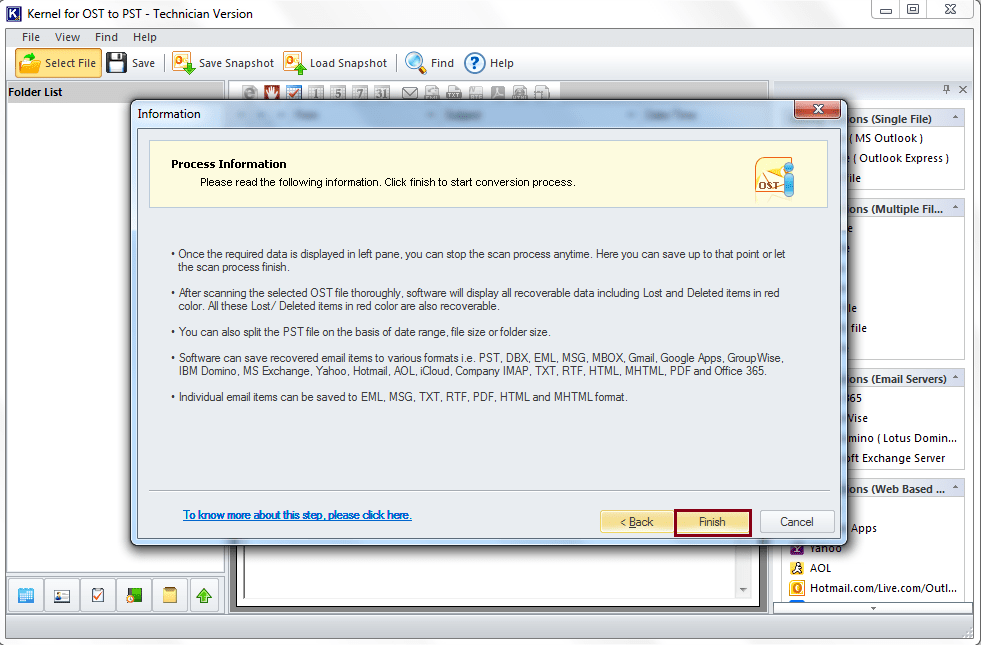
- Once the file is ready, click on the Next button to proceed.

- In the next step, the tool will show you the information about the whole process. Click on the Finish to see the mailbox contents.
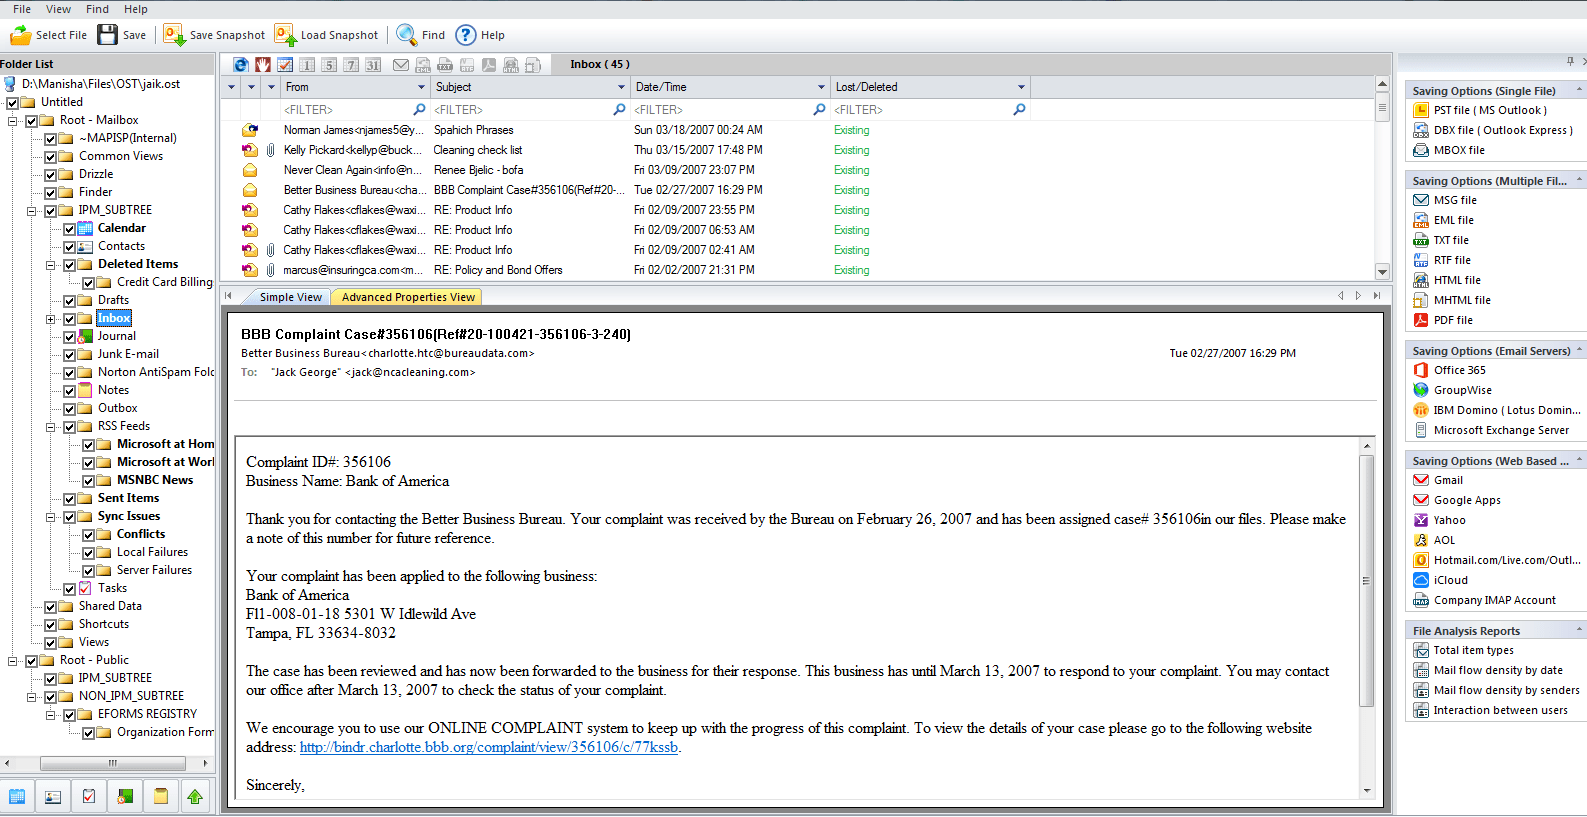
- Here, you can preview the emails, files, or other items. Just click on the desired file item and have its preview.
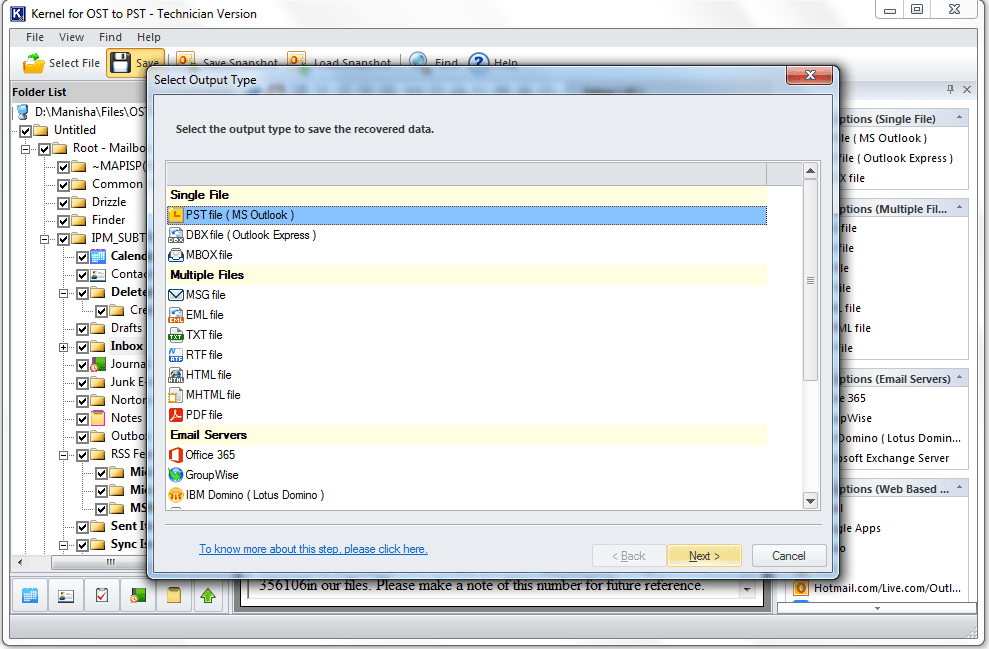
- Because you are going to import OST TO Outlook 2016, in this step, you need to select the PST file (MS Outlook) as the saving option and then click on Next.
- Apply filters as per your requirements and proceed by clicking on Next button.

- Here, you can split your PST files and attach a prefix to the store name. It will help you to manage your files more conveniently, click on Next.

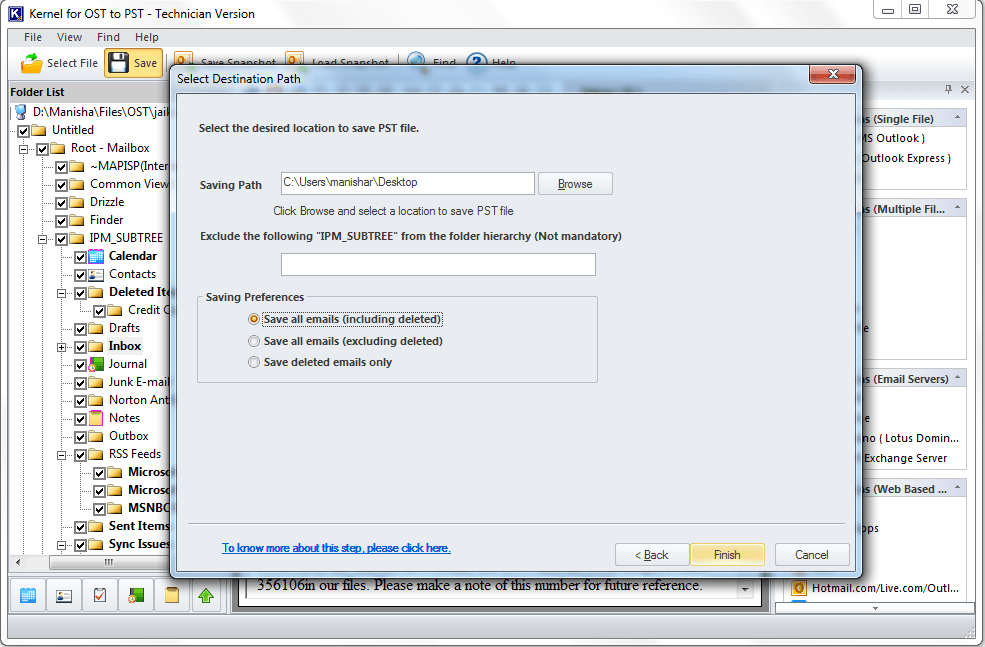
- Select the destination path and Saving Preferences, click on Finish.
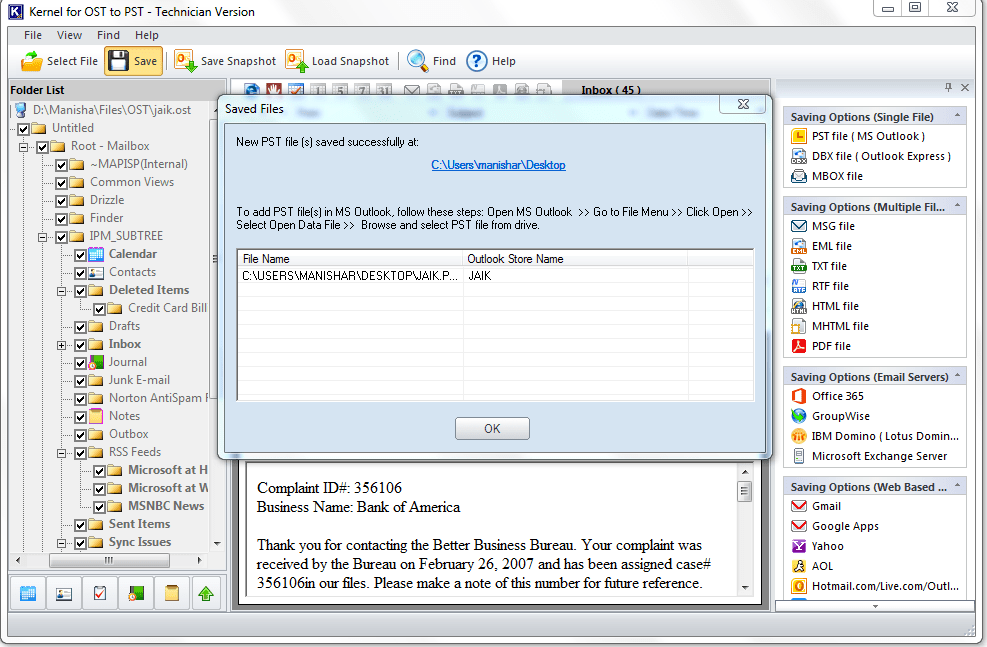
- Once done, click on Ok.


Conclusion
OST files store critical data from your mailbox and inaccessible, orphaned, or corrupt OST files can't be opened using manual methods. To access such files in Outlook, you need to first convert to PST files and then import PST to your profile in Outlook application. Use Kernel for OST to PST to repair and convert your OST files into PST with complete integrity and consistency in mailbox data.
![]()
For manual upgrade, you will need to import the whole OST files to Outlook; but with the software, you will only need to convert only the essential emails.