


Generally, an email address is meant for a single user with direct one-to-one communication. But a business requires some shareable place where many people can utilize a single email and process it for one-to-many or many-to-one communication. Shared Mailbox from Office 365 changes the availability feature of a mailbox as multiple users can access it and manage it better.
All users with an Outlook mailbox email address may access available, and accessible Office 365 shared mailboxes. The shared account must be set up by an admin account, who may adjust permissions by inviting collaborators through the account settings. Mailbox permissions are available when adding collaborators: full access, send as, and send on behalf.
When different people in an organization share a mailbox to send and receive emails, there are higher chances of a data breach. Also, it's possible that your colleagues can accidentally or purposefully delete some emails which might be important. You can still find the deleted data in the trash, but it will not stay there forever. So, it’s necessary to keep a backup of your data.
Why it’s necessary to take a backup
There are multiple reasons which force us to take a backup of Office 365 Shared mailboxes. Some of the major ones are listed below:
- To prevent data loss of your shared mailbox.
- You can easily export mailbox files to different locations.
- To prevent data from any kind of corruption.
- Saved all the Office 365 mailboxes, including mailboxes, archive mailboxes, and public folders, etc.
Method to backup Office 365 shared mailboxes?
There is no any direct method to perform Office 365 shared mailboxes data backup process. But you can use Kernel for Office 365 Backup and Restore tool that helps you back up and recover your shared mailbox data.
![]()
![]()
Some prominent advanced features of this tool
It is a powerful tool that can back up and restore all your Exchange/Office 365 mailboxes, including the shared mailboxes. It is enriched with some great features, which include:
- Saves Exchange/Office 365 mailboxes as PST without the help of Outlook.
- Works well with on-premises/hosted Exchange & Exchange Online.
- Filters mailbox data based on date, item type, etc.
- Preserves the original hierarchy of mailbox folders.
For a better understanding of the usefulness of this tool, let’s have a look at the working process of this tool.
Backing up shared mailboxes in Exchange Server or Office 365
The software has been developed with advanced algorithms and a user-friendly interface. So, it is easy to back up and restore mailboxes for non-technical users with this tool. To create a backup of your shared mailboxes, follow these steps:
Note: If you want to back up multiple mailboxes, then you need an Office 365 account with administrative privileges.
- Download the tool and install it on your system.
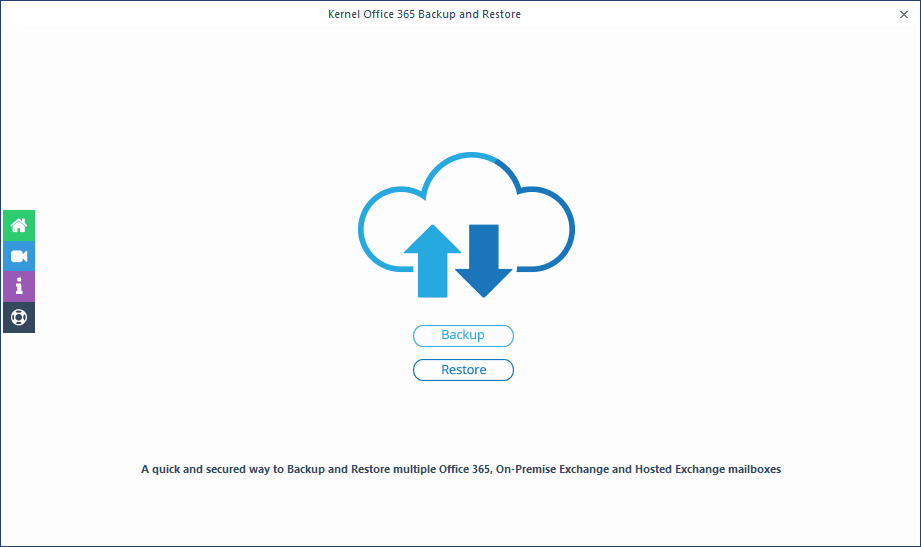
- In the home screen of the tool, click on Backup.
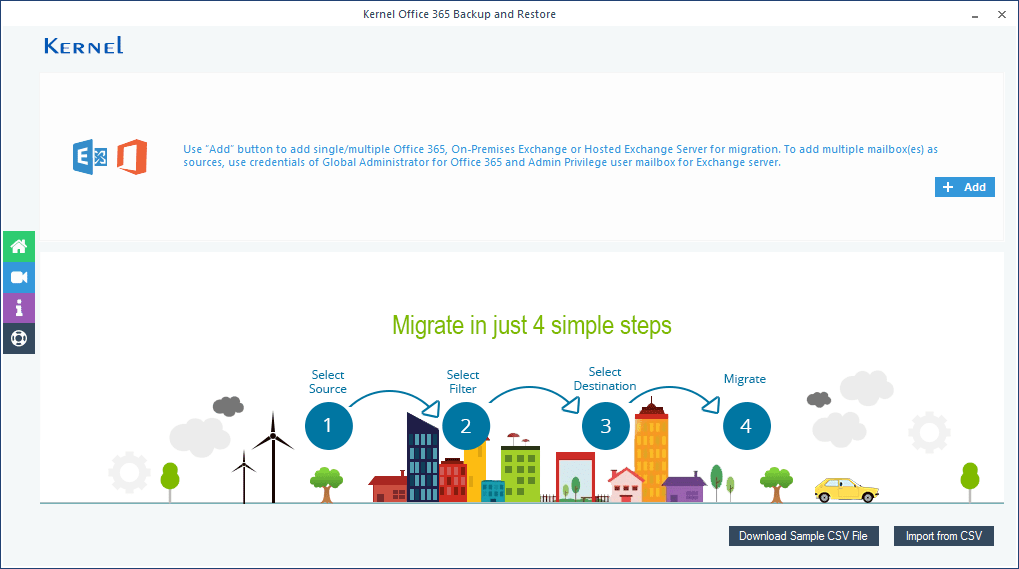
- Click Add to sync the source account from which you want to backup mailboxes (Exchange Server/Office 365).
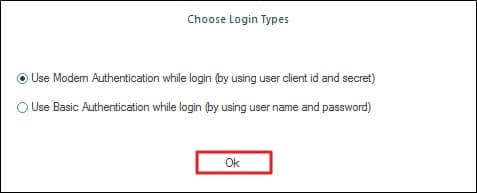
- Select the login mode from the given modes accordingly.
- Enter the administrator account credentials and select the option “List all mailboxes using above credentials,” then click “Get User Mailboxes” button. All the mailboxes will be displayed in the tool.
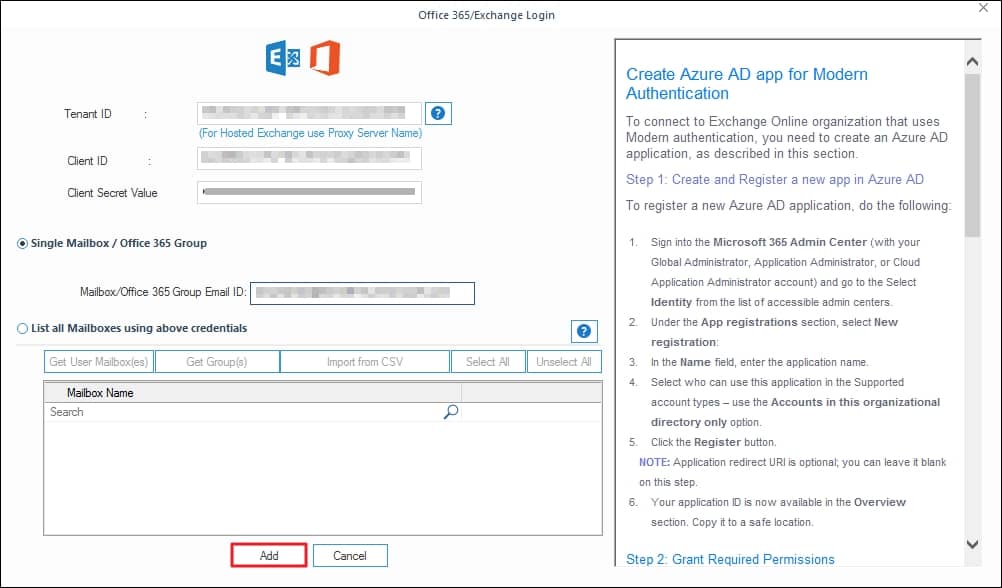
- In Office 365, primary mailboxes and shared mailboxes are listed separately. This tool displays all the mailboxes together, so search and select the Shared mailbox separately. You can choose primary mailboxes as well, and then click the “Add” button.
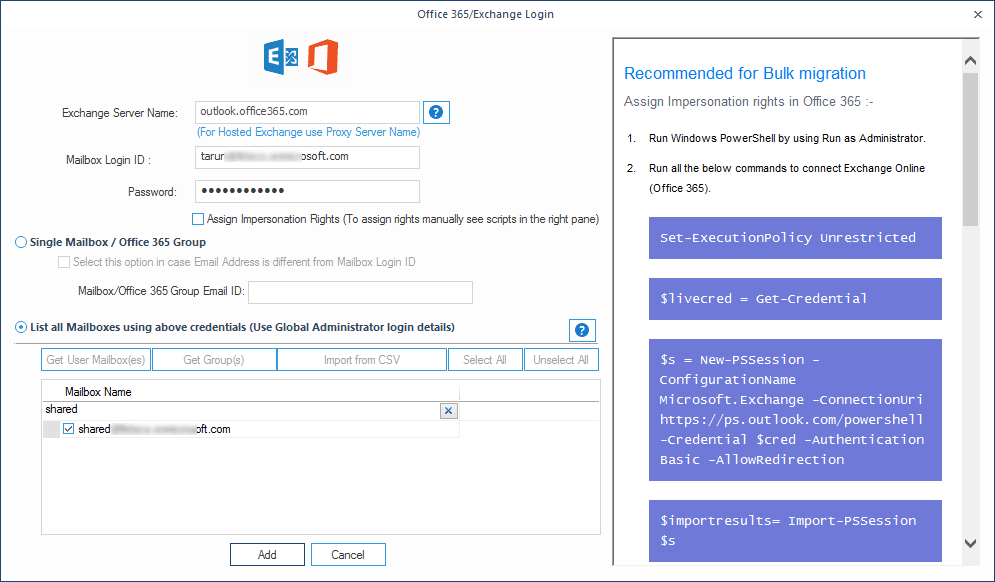
- The shared mailbox will be added to the tool, click Set Filter and Migrate.
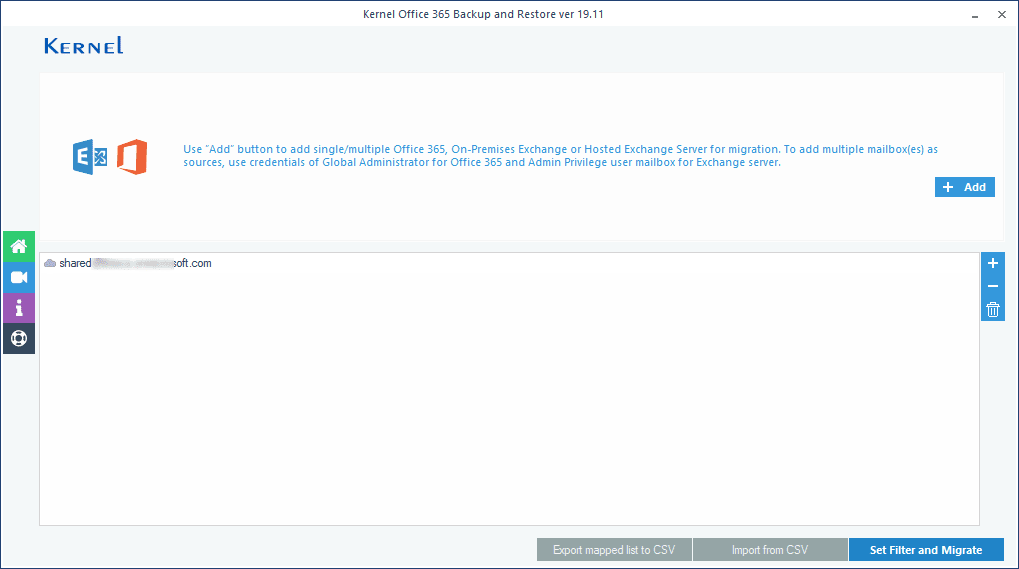
- Now, select the option to migrate the shared mailboxes, and click “Migrate.”

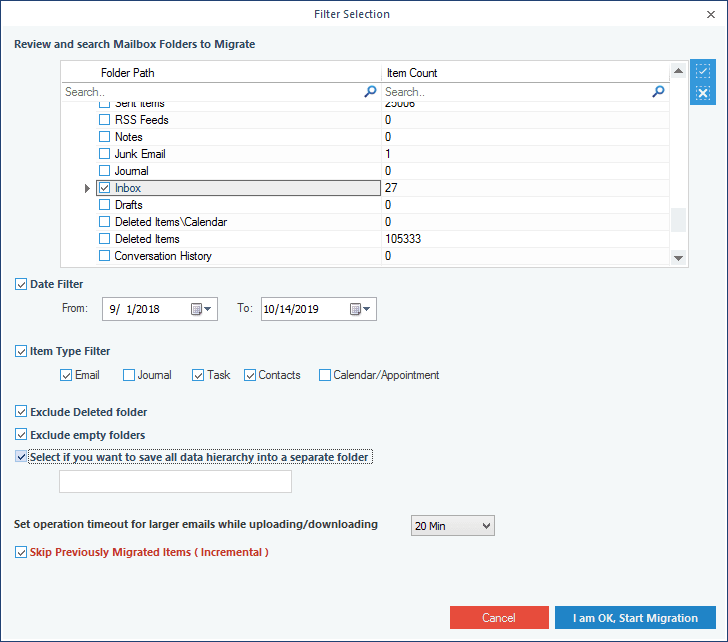
- If you want to set any filters before migrating the mailboxes, then choose the filters from the “Filter Selection” window. After selecting the filters, click “I am OK, Start Migration” option.
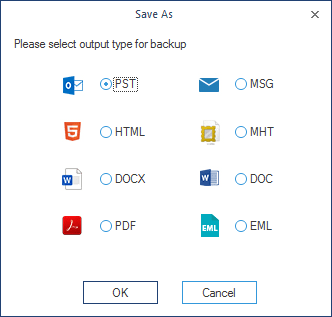
- A pop-up window will appear on the screen with saving options, select PST and click OK.
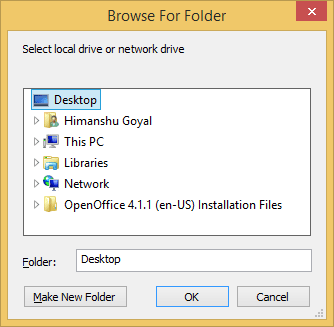
- Select the location to save the backup PST file and click “OK.”
- It will take some time for the backup process to complete depending on the size and number of the mailboxes. once the backup process is complete, the tool will display “Process Completed.” Click “OK” to finish the process. If you want to save this information in a CSV format, then click “Save the report to CSV.”
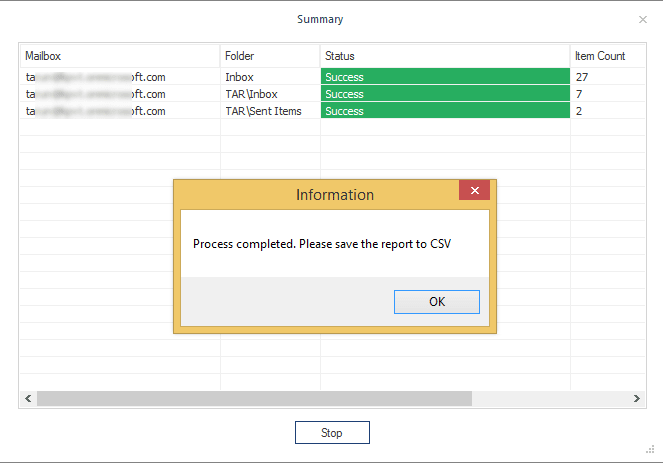


You can see all the Office 365 shared mailboxes in separate PST files to the specified location.
Final Words
The team members frequently use shared mailboxes to achieve work goals. However, organizations don’t want to lose their shared mailboxes. So, we have covered the best possible solution to back up Office 365 shared mailboxes. To initiate the migration process, use the suggested Kernel Office 365 Backup and Restore. Its advanced features help you to recover specific files and folders of Office 365 data.
![]()
Everyone should use such a tool whether they are using Office 365 for personal or professional purposes.