Salesforce is currently a leading Customer Relationship Management tool used by most businesses globally to manage their sales, marketing, and customer services. However, managing business over a cloud-based platform is not as easy as it seems to be. Businesses and IT administrators have to regularly monitor and implement the best data security practices to keep their critical data safe from heinous competitors and cyberattacks. Extracting data from Salesforce is one of the best practices that most organizations follow to safeguard their Salesforce data.
In this article, we’ll learn reasons to export files from Salesforce and then move ahead to find out how to export data from Salesforce.
Why do you need to export data from Salesforce?
There can be innumerable reasons within an organization prompting to export data from Salesforce. Here, we’ll learn a few of them to see why this export is preferable.
- Backup crucial business data.
- Integrate Salesforce (CRM) with a third-party system.
- Extract Salesforce data to a spreadsheet for reporting or analysis purposes.
- To meet regulatory compliances set by government guidelines.
- To export all data from Salesforce and migrate to another platform.
Methods to export data from Salesforce
You can export data from Salesforce using either of the two available manual methods or turn towards the smart and professional third-party Salesforce export files tool.
The manual methods to export files from Salesforce include using Salesforce Data Export Service and Salesforce data loader. While both methods have their advantages and disadvantages, Salesforce Data Export Service does not allow the selection of particular data fields for export, and Salesforce Data Loader does not allow you to schedule Salesforce export files. Apart from this, both methods require the user to have some technical knowledge to perform the process, which otherwise often leads to huge data loss. Native solutions of Salesforce data backup do not allow the export of metadata. This is why most businesses choose a professional tool like Kernel Salesforce Backup to export all data from Salesforce.
An automated tool to export data from Salesforce
Kernel Salesforce Backup and Restore tool is one of the pioneers in the list of best cloud backup tools. It streamlines the process to export files from Salesforce through an easy-to-understand interface. Here are some of the efficient features of the robust Salesforce backup tool:
- Backup Salesforce data and metadata with no size limitations.
- Export contacts from Salesforce for easy data analysis and sharing.
- No change in the integrity and structure of data during cloud data extraction.
- Rename files if two or more files are found with the same name.
- Supports Salesforce data restore along with the backup.
- Secured method to connect with the Salesforce organization.
Automated steps to export data from Salesforce using the software
Let’s move ahead and learn the stepwise procedure to easily export data from Salesforce:
Step 1. Download and install Kernel Salesforce Backup and Restore tool on your system.
Step 2. Once done with the installation, launch the tool.
Step 3. From the given Cloud Storage modules, click on Salesforce module.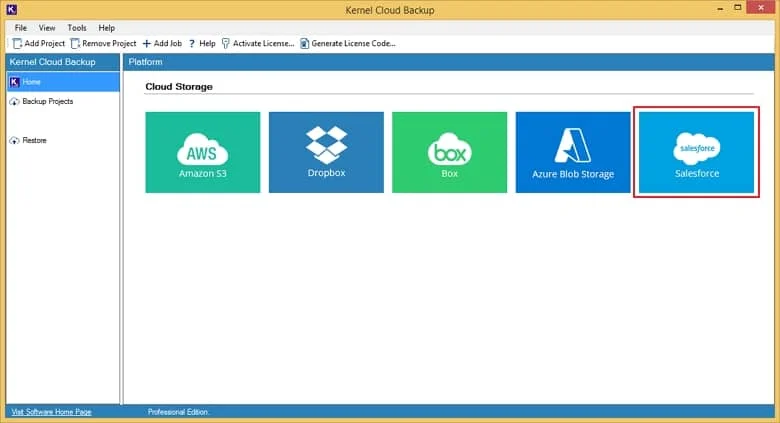
Step 4. Define a Project Name, enter a Job Name, and then click Next to create a new project with a linked new job.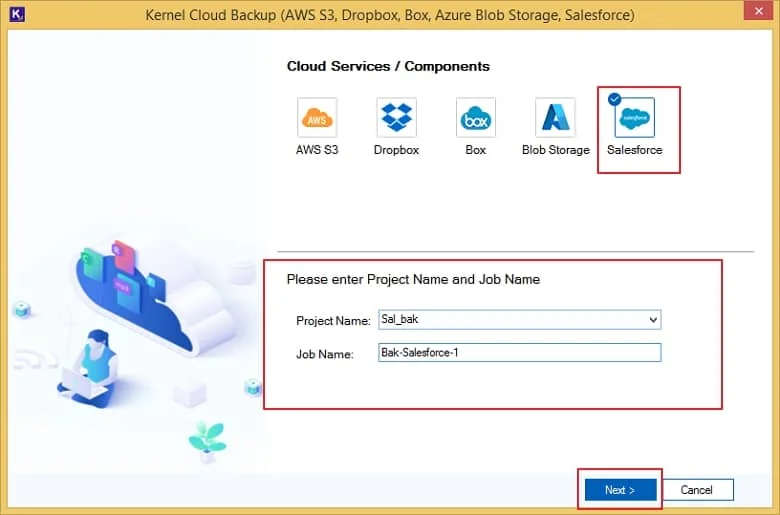
Step 5. The tool will show a message asking if you want to create a new project with the name provided in the previous step. Select Yes to proceed.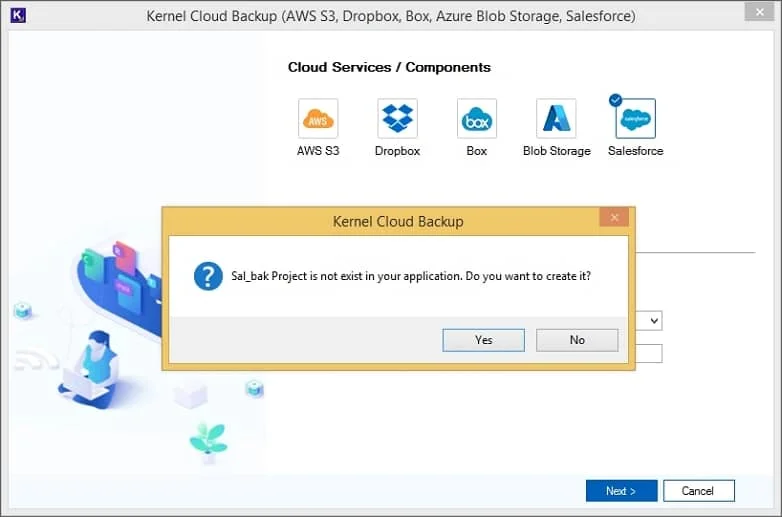
Step 6. Now, on the connection details page, provide the asked credentials (Domain URL, Client ID, and Client Secret) to connect the tool with the Salesforce account. Click Next.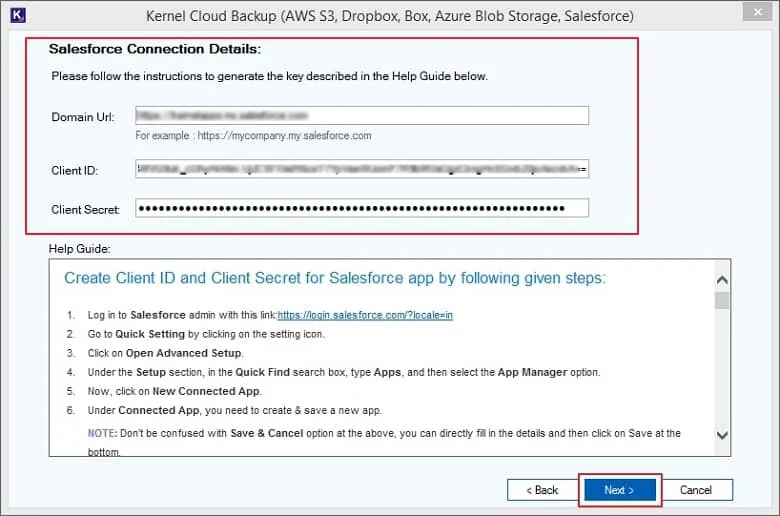
Step 7. Select Yes if you want to save the credentials to skip the hassle in the future.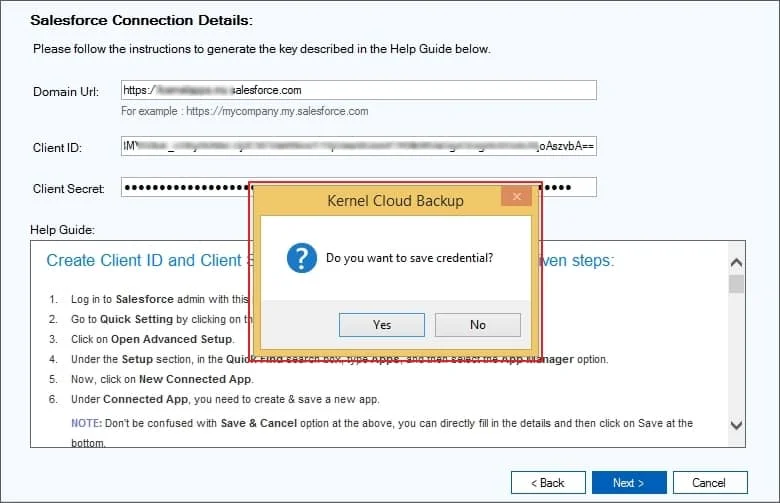
Step 8. In the next screen, select Browse to provide a path to the saving location of the file on your computer’s local or network-attached storage.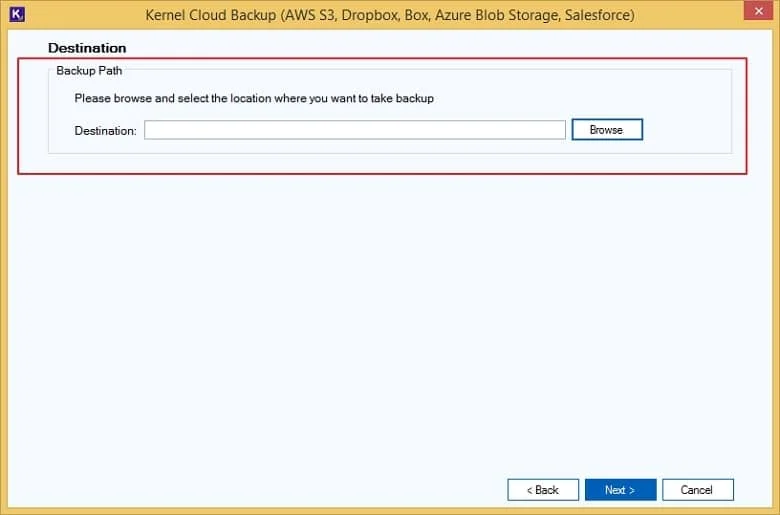
Step 9. Select if you want to Make New Folder or choose an existing one to save Salesforce backup data.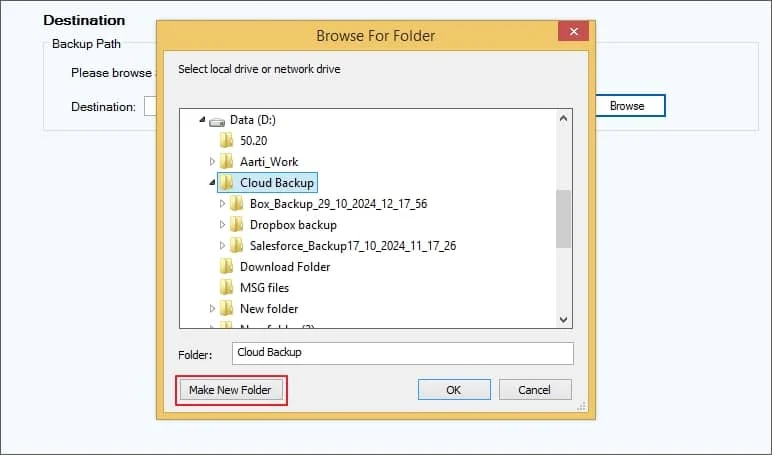
Step 10. After providing the path, click Next to continue.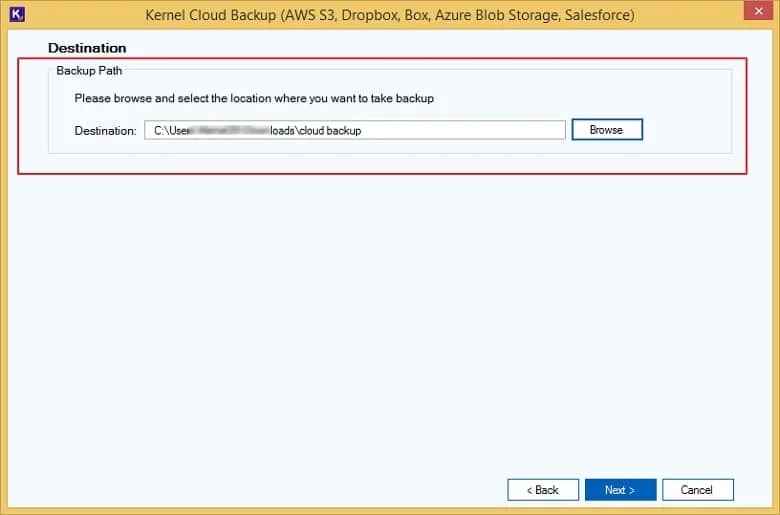
Step 11. Here, you can choose to Execute Immediate or Schedule the process to export files from Salesforce. Click Next to start the process.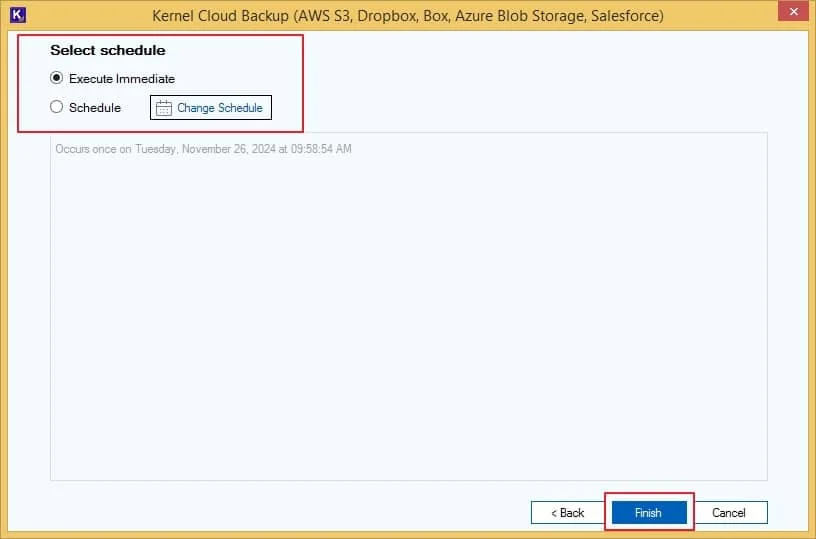
Note: If you choose to Schedule, you can adjust the settings to run the Salesforce data backup process once, daily, weekly, or monthly on regular basis.
Step 12. This will initiate the Salesforce backup, and you can see the progress report by clicking on the project name (mentioned on the left pane) and the recent job (on the right pane) that was recently created.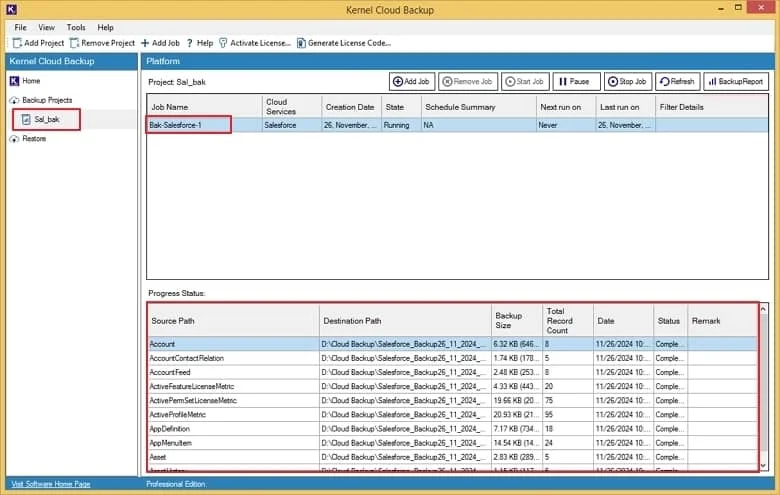
Step 13. Once the process is completed, the process will be in ready state. Click the Backup Report button to view the report that shares details about the complete Salesforce export files process.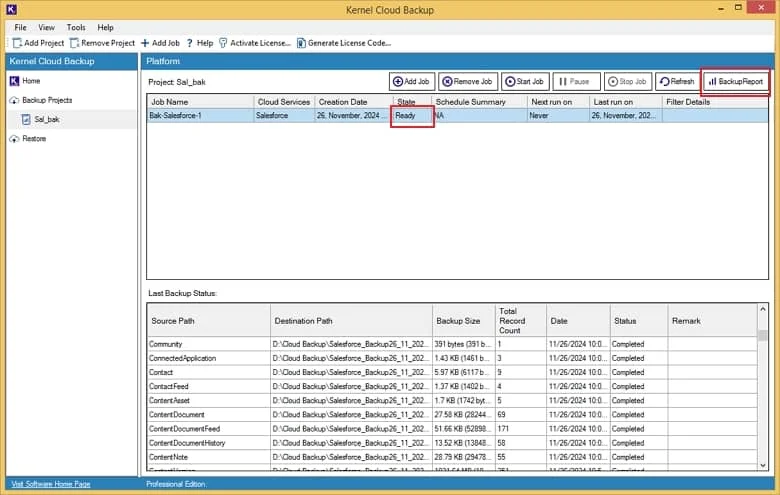
Step 14. Save the Session details (showing Session Number, Started At, Ended At, etc.) to CSV or click on View Details to find the summary details.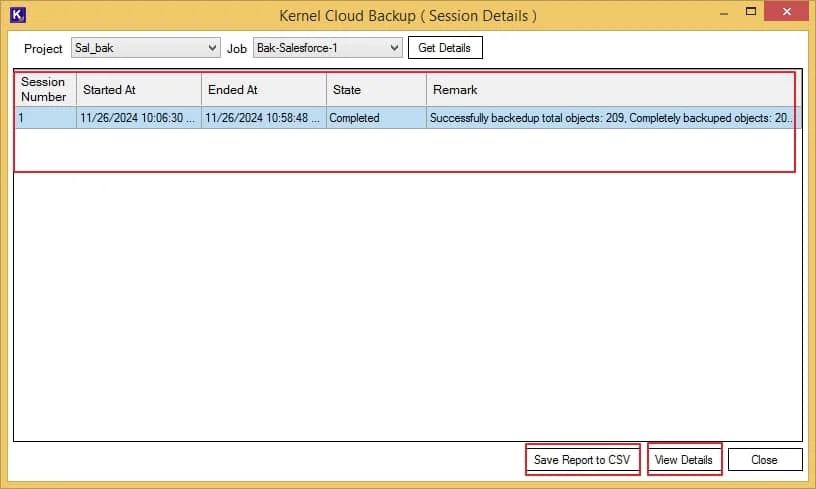
Step 15. You can save this Summary, displaying information like Source Path, Destination Path, Backup Size, etc., to your system for future reference or to analyze the complete backup process.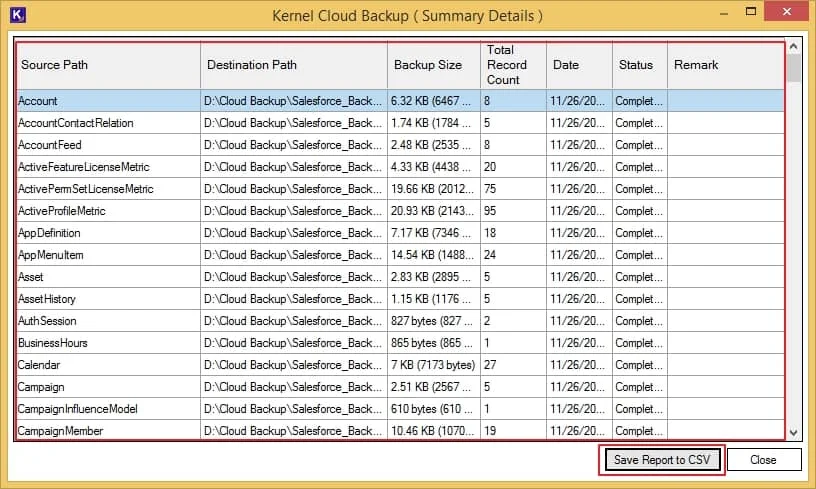
Conclusion
Regular backup of Salesforce and other cloud platforms is the key to ensuring business continuity. Going with the manual approaches to perform cloud data backup can have adverse effects on the productivity of the business. Therefore, it would be a wise decision to use the recommended Kernel Salesforce Backup and Restore tool to seamlessly export all data from Salesforce. You can also use this tool to restore your Salesforce organization using existing backups from your system.
Frequently Asked Questions
Q. What are the available approaches to export data from Salesforce?
A. There are several different ways that can be used to easily backup Salesforce data. Some of them involve:
- Use of Salesforce export wizard to export data to CSV, Excel, or XML formats.
- Salesforce Data Loader that allows you to export, import, delete, and update Salesforce records.
- Salesforce Reports is another method that supports extracting up to 2000 records.
- Salesforce APIs involve advanced mechanisms and require coding experience.
- Use of third-party data export/ backup applications.
Using these few methods, it will be easier for a user to export data easily.
Q.How do I export Salesforce data to Excel spreadsheet?
A. Salesforce has a built-in Export service that allows easy export of data from Salesforce to Excel. Furthermore, you can use Salesforce export APIs and Reports to export the data to a spreadsheet.
Q.Why do you need to export data from Salesforce?
A. There are many reasons for backing up Salesforce data, including:
- To create reports for analysis and reporting purposes.
- Regularly backup your organization’s data.
- To abide by data privacy and protection compliance.
- To transfer data from Salesforce to another organization.


