


More and more organizations are moving towards SharePoint today because of its centralized management. It’s more reliable for managing your website and storing your essential data in it. Moving from the public folders of Exchange to SharePoint can be difficult, but learning about the proper approaches streamlines the process.
Before going into the details of public folder to SharePoint migration, it is crucial to know about public folders, SharePoint, and a SharePoint migrator tool like Kernel Migration for SharePoint. It may reduce your anxiety related to any SharePoint migrator and give you a powerful option for the migration of public folder.
![]()
![]()
SharePoint for Document Management
Large organizations generate huge amounts of content including documents (online as well as offline), reports, and even communication records. It is crucial to handle all this data precisely, which needs a lot of time and resources. SharePoint stands as a reliable platform for organizations of all sizes providing easy content and employee management with minimum efforts applied.
SharePoint is available as a browser-based platform that significantly enhances overall productivity. It also allows businesses to keep control of the user’s access to a particular site, list, or library.
Here are the prominent features of SharePoint as a collaboration platform:
- Secure document sharing with the team members.
- Enhanced connectivity with each member of the organization.
- Allow creating a comprehensive workflow for a process from beginning to end.
- Access to other MS Suite components.
- You can create and publish an external website.
When should I migrate Exchange Public Folders to SharePoint?
For large organizations, SharePoint can be handy with its features like Advanced search, workflow management, document management, etc. When you want to increase the collaboration in your organizations, you can easily switch to SharePoint.
How to move Exchange Public Folders to SharePoint?
Exchange Public folders serve as repositories for various data types, including messages, calendar entries, contacts, tasks, notes, etc. So, finding a direct manual procedure to migrate all such data is not an easy task. However, there is a lengthy procedure which you can follow and try to migrate the data. Let’s go through the process once:
Step 1: Create a new PST file in Outlook.
First, to initiate the migration process, you need to setup a new Outlook PST file that helps you to store all your Exchange data in it. In the Outlook application, which is configured with an Exchange account, you should create a new PST file. 
Step 2: Move public folders data to the PST file
After creating a new PST file, you can manually export data from the Exchange public folder to the PST file. You should select only such things which you want to migrate to and leave the rest. The benefit of copying the data from public folders is that if data is lost in the migration process due to any technical error, then you can again access the data from the public folder.
Step 3: Migrate the PST file to SharePoint
After creating the PST file containing files from the public folder, you can transfer the data from PST to your SharePoint account. Start by opening SharePoint in your web browser and go to the respective document library. After accessing the document library, convert the URL of the library to UNC (Universal naming convention).
After converting the URL to the UNC format, you can map the drive to SharePoint. It is done by conducting the drag-&-drop function from PST to SharePoint library. After migration the data, you can refresh the document library, and the data will be present in the list.
More reliable and an automated method to migrate Exchange Public Folder
The above noted manual process may be suitable for data of small size only. But with large data, it will take unnecessary time and energy to complete the process. To save yourself from facing any hardship while you attempt to migrate public folders to SharePoint, use the best Kernel Migration for SharePoint tool. It can fully migrate your documents and folders and place them neatly at the desired folder in SharePoint.
![]()
Here is the functional process of Kernel SharePoint Migrator to migrate Exchange public folder to SharePoint:
NOTE: You can also select Schedule option and run the migration at a convenient time. If you want to migrate public folders to SharePoint when you are not accessing public folders, then you can apply the schedule option.
- Run the SharePoint Migrator software and click the option "Public Folder" menu and select "Public Folder to SharePoint"
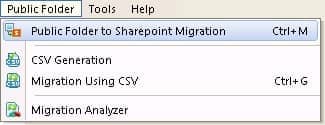
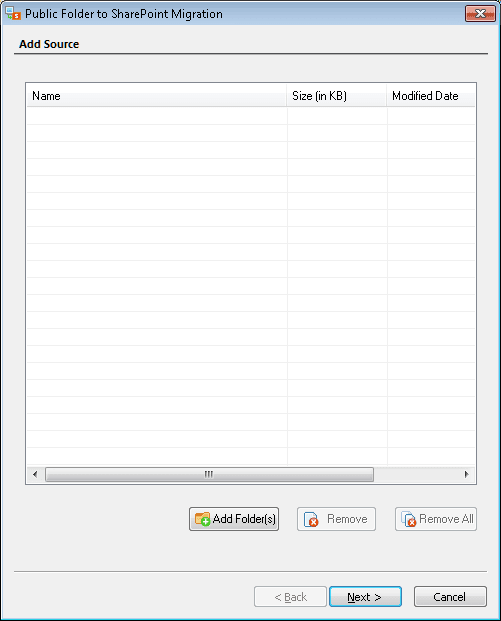
- The Public Folder to SharePoint wizard opens up. Click Add Folder(s).
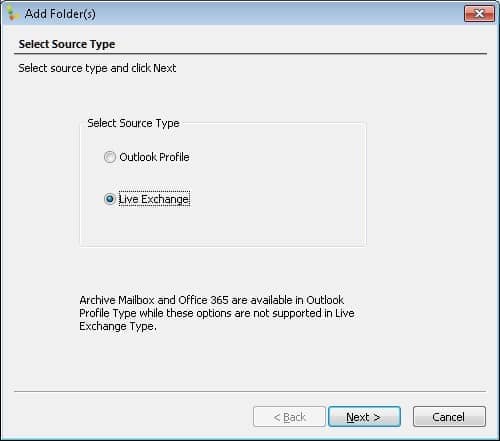
- Select the option "Live Exchange" and click Next.
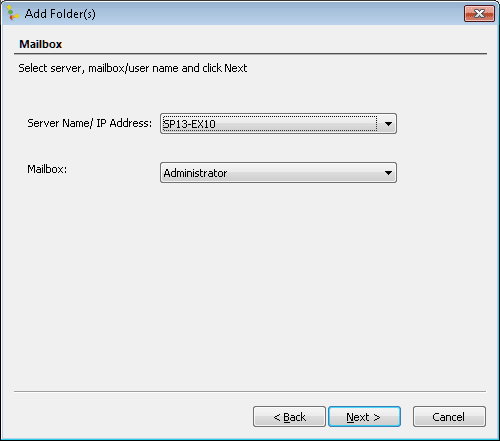
- Select the Server Name and then the mailbox name from the list.
- Select the "Public Folder” and click “Select."
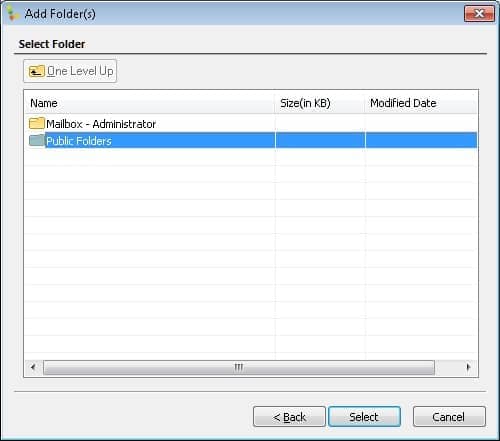
- After selecting the public folders, click Next.

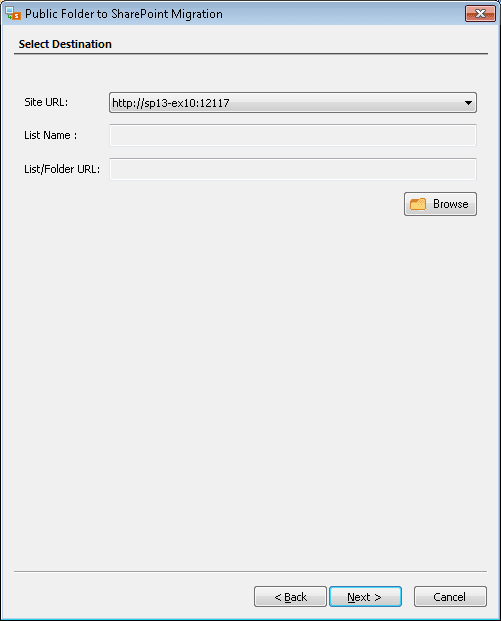
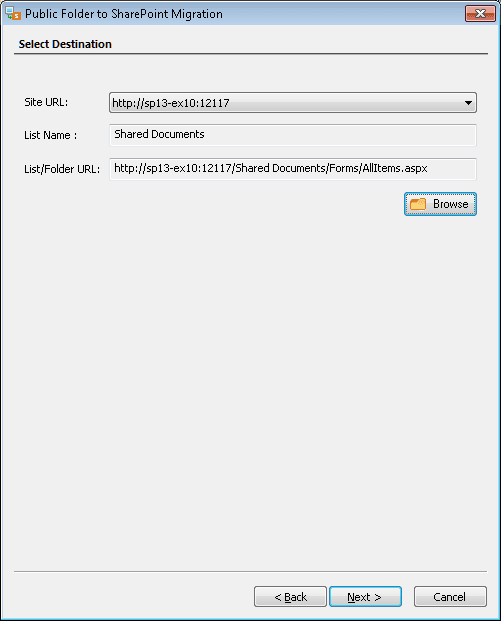
- Click the Browse button to browse the selected SharePoint Site and select a destination list, library, or folder.
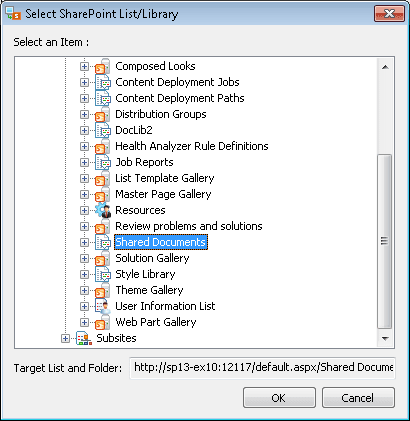
- Expand the List and Libraries to find the desired location.
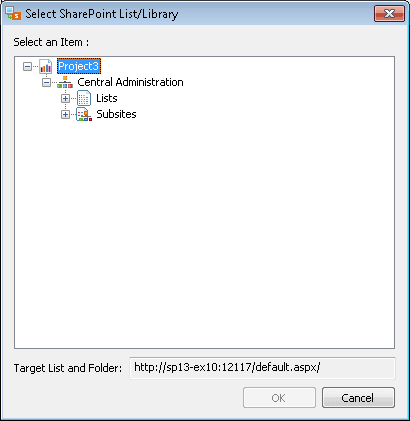
- Select the desired folder and click OK.
- Click Next.
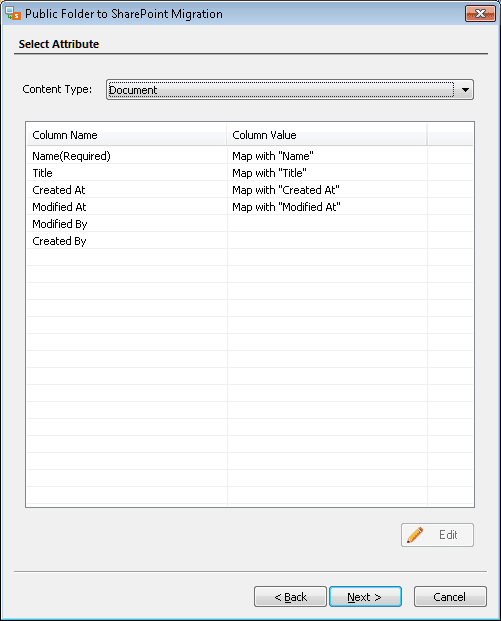
- The migrator will first try to map the attributes of the content automatically. It will leave the fields blank if the relevant attribute is not available on the mail. You've to map such blank attributes. Also, you can modify the already selected attributes. To do this, select the attribute and click Edit.
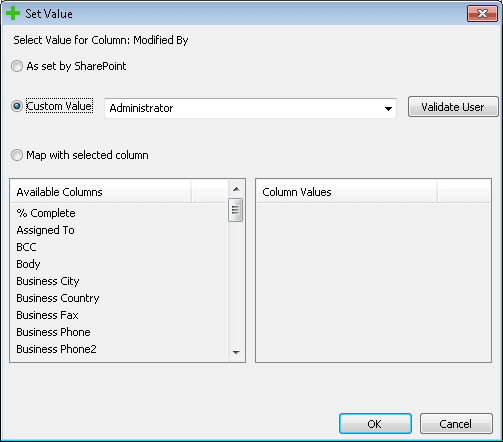
- Set the value of an attribute with the desired column. Then Click OK.
- After verifying the attribute, the tool will bring back to the previous content migration wizard, which will display the modified attributes. Click Next.
- Select the desired Copy Option and filters (among Date, File, and User).

- The next window will let you migrate SharePoint permissions easily and user groups. Click Next after checking the required option. There are multiple types of permissions in SharePoint environment, and you can migrate to each of them.
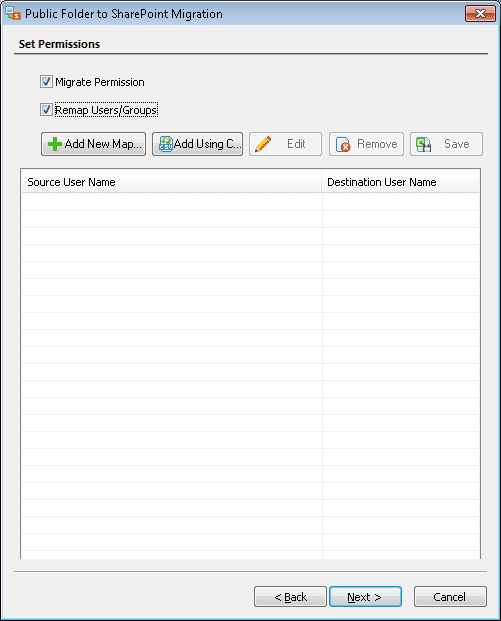
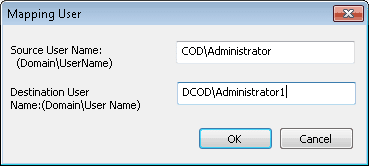
- To remap, add the source username and the destination username.
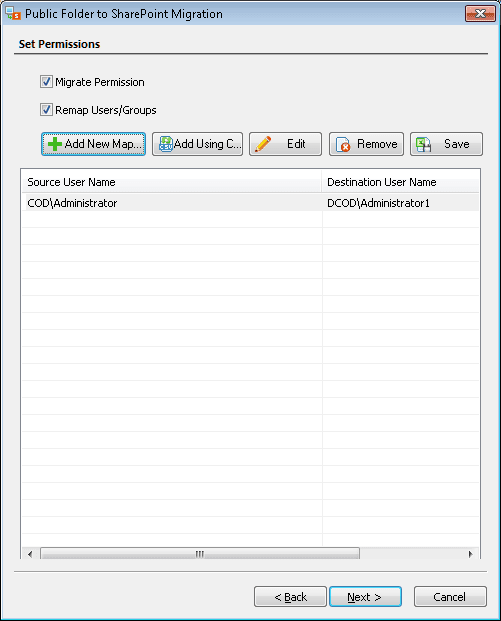
- The source and destination user named are listed. Click Next.
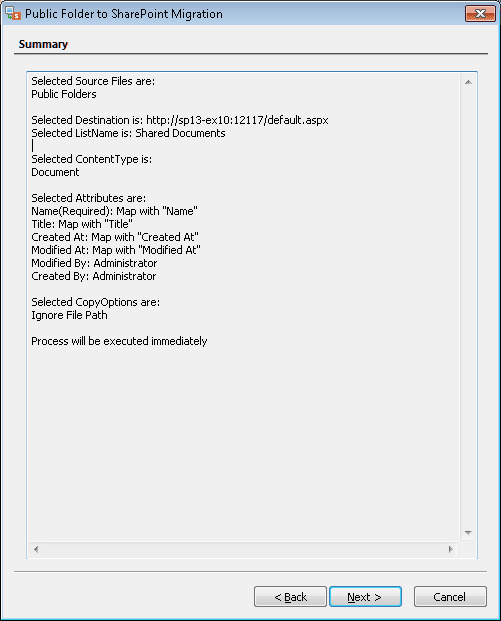
- Click "Execute Immediate" option to start the migration instantly.
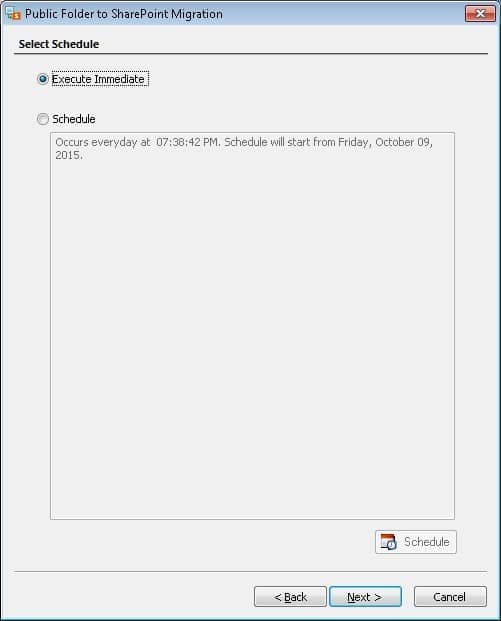
Note: You can also select Schedule option and run the migration at a convenient time. - A basic summary of the migration will be displayed to you. Click Next.
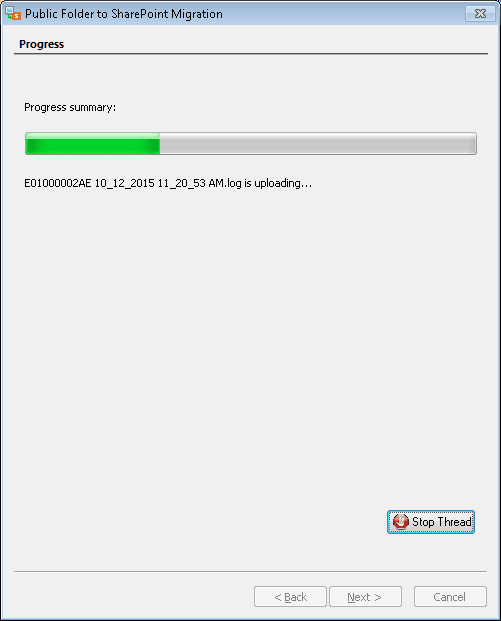
- The migration starts.
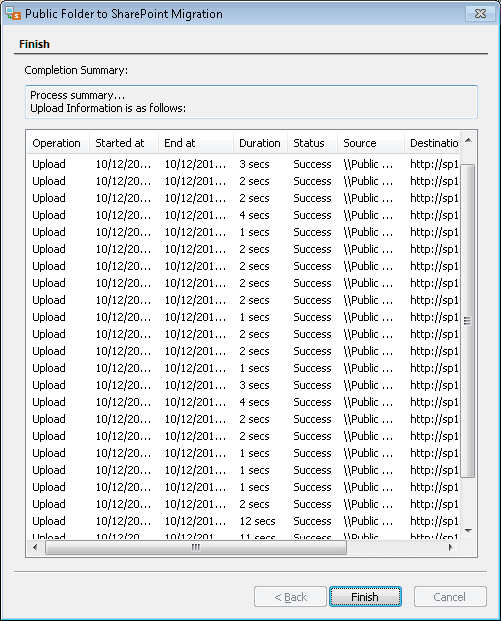
- After a successful migration, the tool will present a migration report with complete information and status of each item.


Conclusion
Manual migration of the Exchange public folder to SharePoint can be challenging, but Kernel Migration for SharePoint executes the process efficiently. We recommend you take a quick trial of this tool and see how it migrates public folders to SharePoint while maintaining the safety and integrity of your data. Apart from Exchange public folders, you can use the tool to migrate SharePoint and File System data to the SharePoint.
![]()

I have scheduled the migration for the public folder multiple times. I got the desired results each time and after the completion of migration, there was a migration report too.