Here is a step-by-step guide that explains how to migrate mailboxes from IMAP to G Suite:
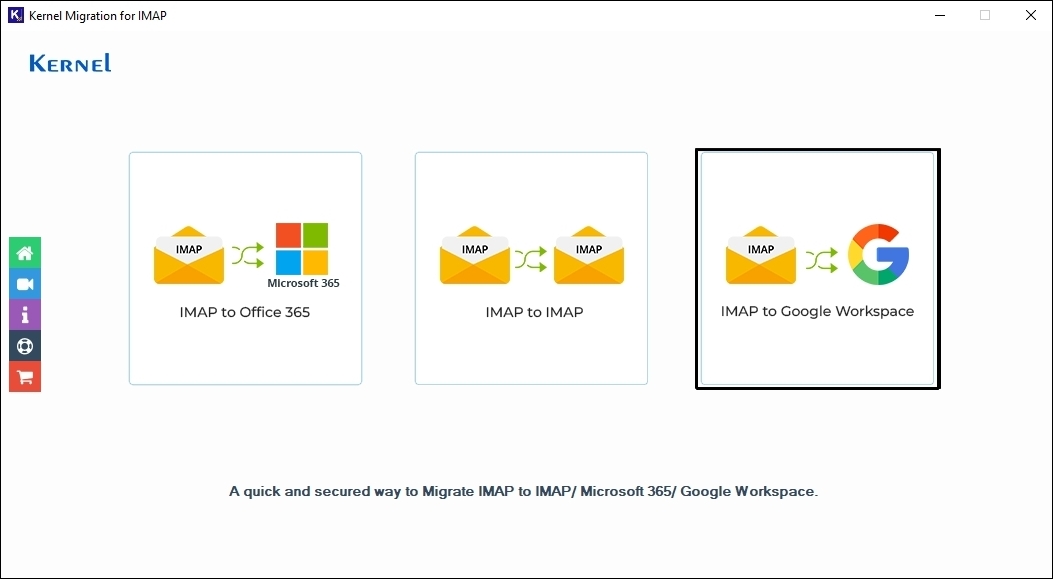
Step 1: Launch Kernel Migration for IMAP tool on your system. This brings you to the home screen of the tool. Here, click on the IMAP to Google Workspace option.
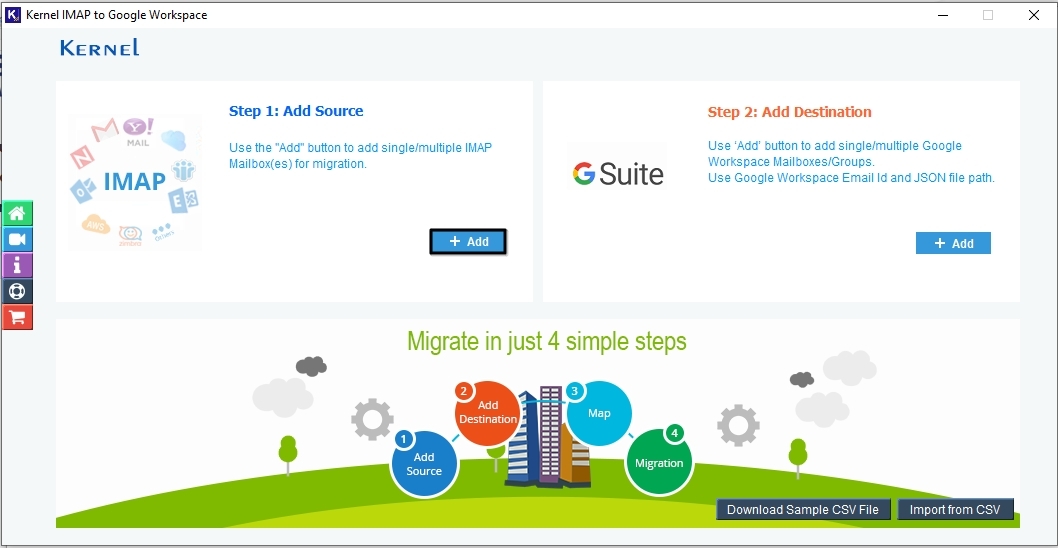
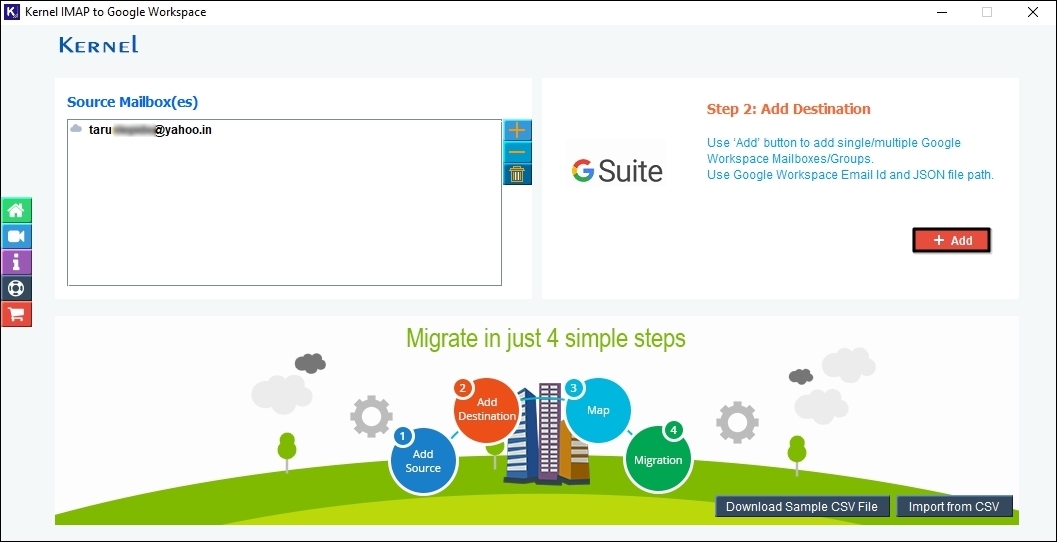
Step 2: In the next window, click on the Add button in the Add Source pane.
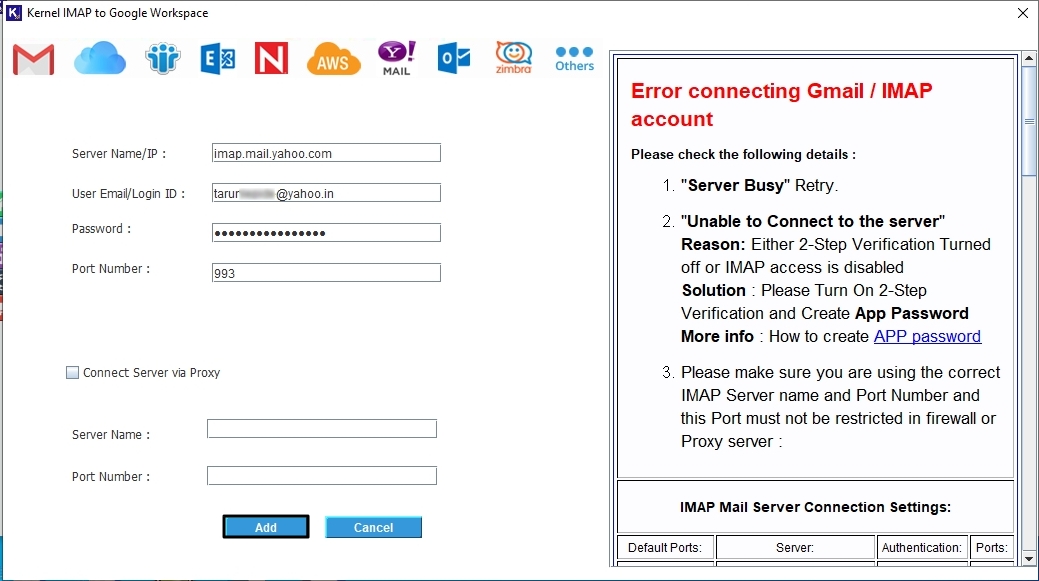
Step 3: Provide the login credentials as asked. Input the Server Name or IP address, User Email or Login ID, Password and the Port Number, which is 993 by default. Click on Add to add the source.
Step 4: Just like source, click on the Add button in the destination pane and then enter the destination (Google Workspace) details.
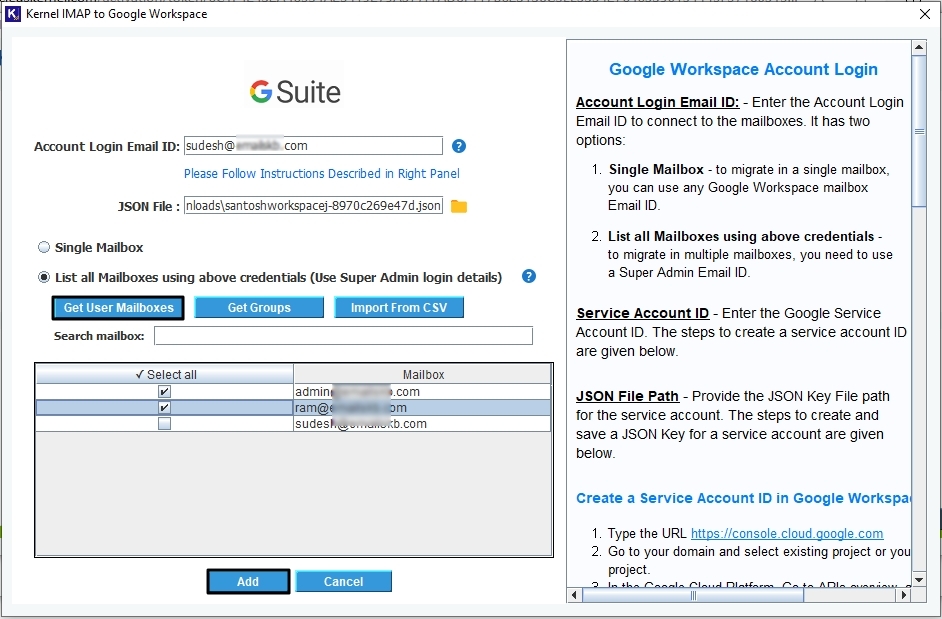
Step 5: Enter Google Account Login Email ID and provide the JSON file path. Select Single Mailbox or List all Mailboxes using above credentials (Use Super Admin Login Details) then either click on Get User Mailboxes or Get Groups as per your requirement. Click Add.
To learn how to get G suite login details or to create a JSON file, you can follow the guide given on the right side of the screen.
Step 6: Once you add source and destination mailbox, the tool will ask to perform mailbox mapping. Select the destination account from the drop-down list and then click on Set Filter and Migrate button.

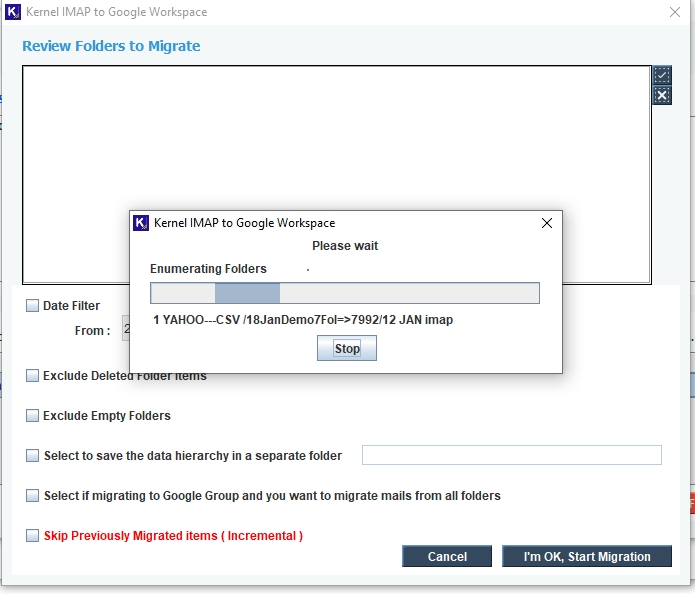
Step 7: Tool will begin Enumerating Folder to load the entire source IMAP mailbox in the original hierarchy (tree-like structure).
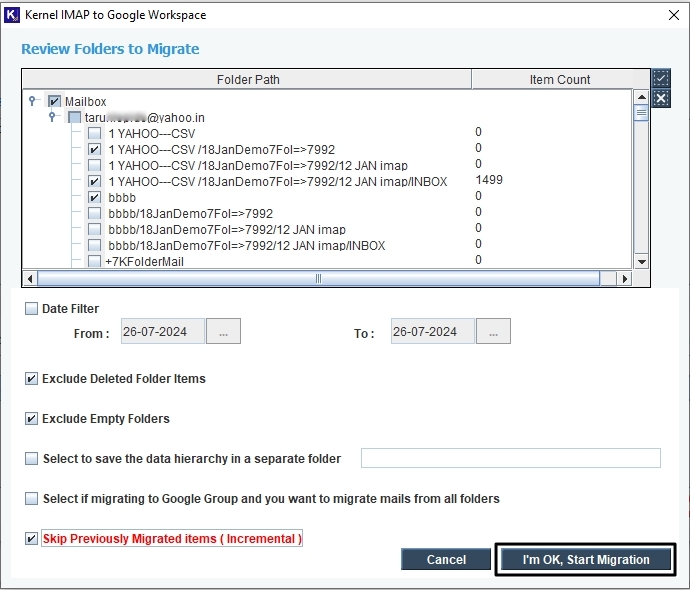
Step 8: You can select or deselect any folder(s) from Review Folders to Migrate page according to your data requirements at the destination. Apply the desired filters to move only the required data to G Suite account. Specify the preferred date range, mark the checkboxes as per your requirements:
- Exclude Deleted Folder Items,
- Exclude Empty Folder,
- Select to save the data hierarchy in a separate folder,
- Select if migrating to Google Group and you want to migrate mails from all folders, and
- Skip Previously Migrated Items (Incremental).
Click ‘I am OK, Start Migration’.
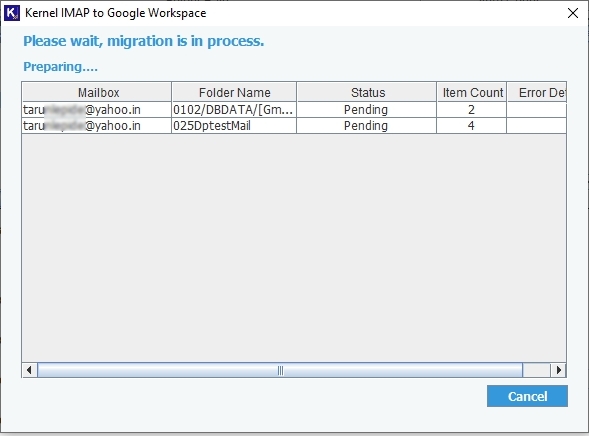
Step 9: The migration process has now started, and you can see the process details and ongoing status of the transferring folder.
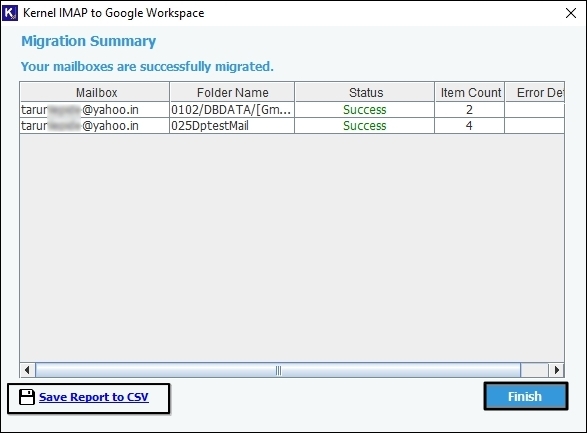
Step 10: Once the migration is completed, a dialog box will open with the message Migration is completed. Save the migration report to CSV file.
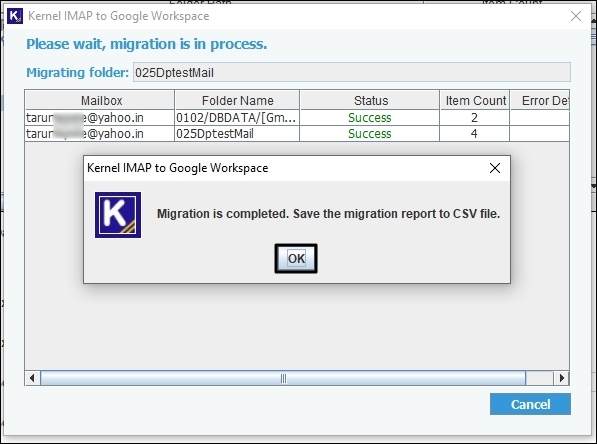
Step 11: Click OK and you can download the CSV file to get insights into the migration logs for future reference. Click Finish to complete.