How to migrate IMAP mailboxes using Kernel Migration for IMAP software?
Follow this guide step by step to perform migration of mailboxes from one IMAP server to another using Kernel Migration for IMAP.
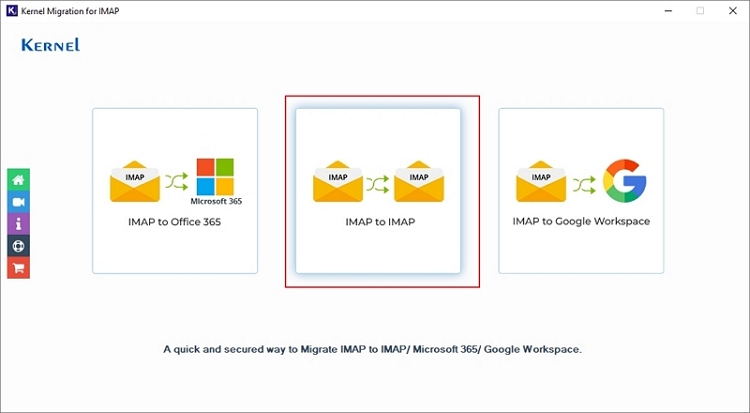
Step 1: Run Kernel Migration for IMAP tool in the system. On the home screen of the tool, you will see three options:
- IMAP to Office 365
- IMAP to IMAP
- IMAP to Google Workspace
Here, click on the 'IMAP to IMAP’ option to proceed with the process of adding source and destination.
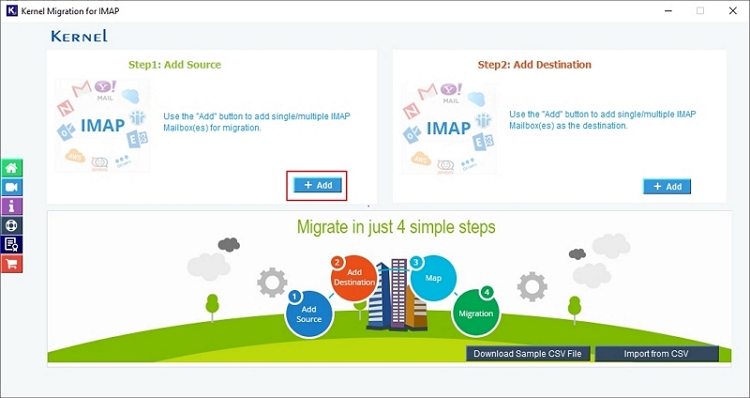
Step 2: This brings us on the new window. Click on the + Add button in the Add Source pane to connect the tool with IMAP server-based account.
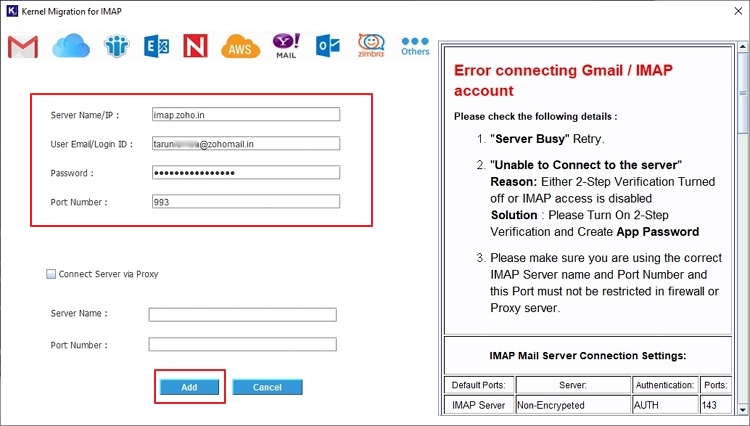
Step 3: In the next screen, provide the required login details.
- Type either the Server Name or the IP address of the IMAP server you want to move mailbox data from.
- Provide User Email address or Login ID & Password of the email account
- We have put the default Port Number for simpler connection. You can change it (if required) according to the IMAP server you select.
Click Add button to connect the source.
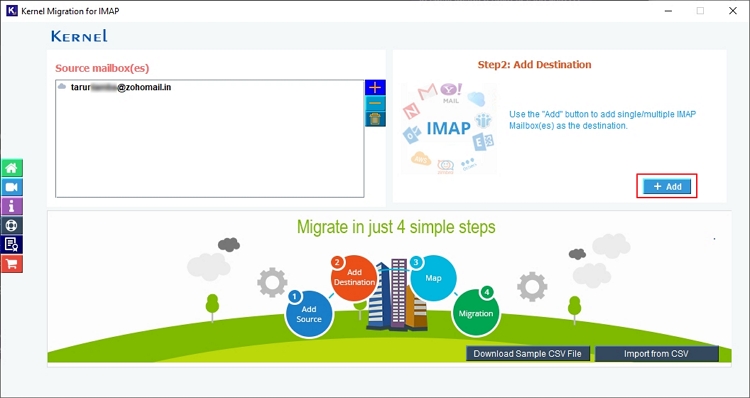
Step 4: Now click on the + Add button for adding the destination account in the right-pane of the window to migrate to another IMAP mailbox.
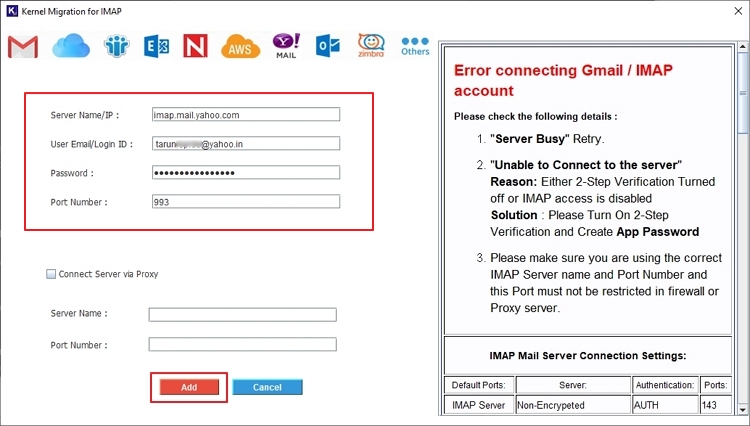
Step 5: Now, just like the source connection, provide the login details of destination IMAP account for connecting destination with the tool. Enter Server Name/IP address, User Email/Login ID and Password and Port Number of the IMAP account where the source mailbox's content will migrate. Click Add.
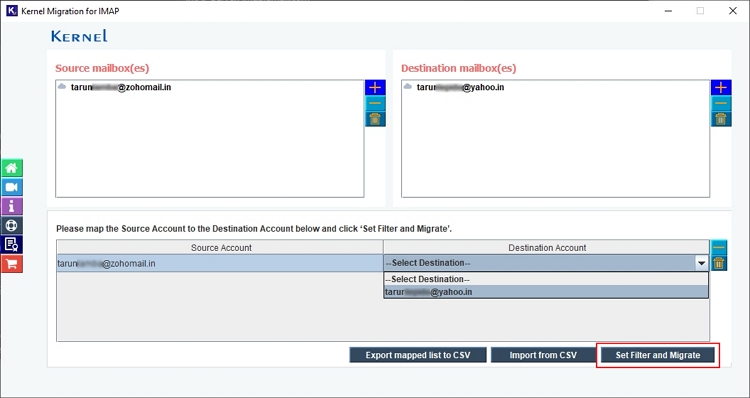
Step 6: The screen will show the connected source and destination IMAP accounts in both the respective panes. Below source and destination mailboxes, map the Source account to the Destination account by selecting from the dropdown list.
Then click on ‘Set Filter and Migrate’ option.
Step 7: The tool will start 'Enumerating Folders' process. Wait till it successfully loads the entire source IMAP mailbox with all the folders arranged in the same hierarchy as in the source mailboxes.
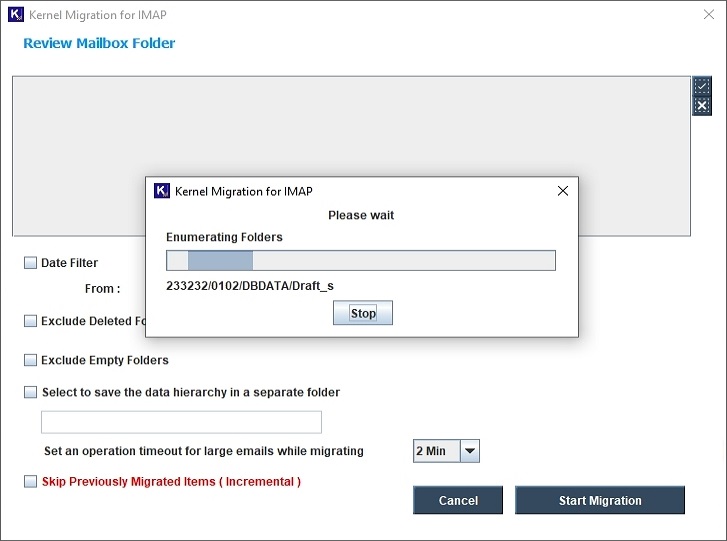
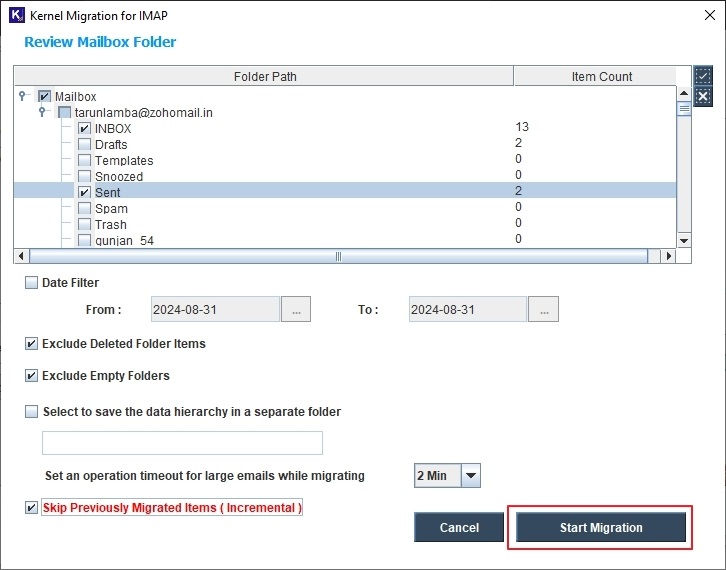
Step 8: After enumeration, a new window opens. You can select the preferred email folders from the 'Review Mailbox Folder' and deselect the one you do not want to take to the destination. Apply the required filters from the list:
- Select to apply the date filter to migrate data for a particular time period.
- Mark the box Exclude Deleted Folder Items to skip migrating deleted folder items to the destination.
- You can select to Exclude Empty Folders if you don’t want empty folders in the destination IMAP mailboxes.
- Select to save the data hierarchy in a separate folder to organize data precisely.
- Set an operation timeout for large emails while migrating to allow continuity in migration process.
- Skip previously migrated items (Incremental) to migrate only new email data and avoid duplicity.
You can access any filter based on your migration need. Then, click ‘Start Migration’.
Step 9: Migration of IMAP to IMAP mailboxes has started, and you can see the ongoing status of the transferring folders on the screen. Click Stop to terminate the process before completion.
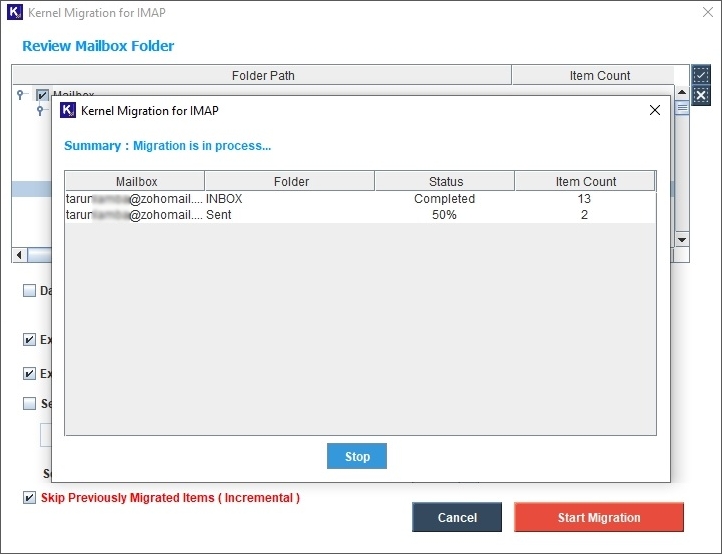
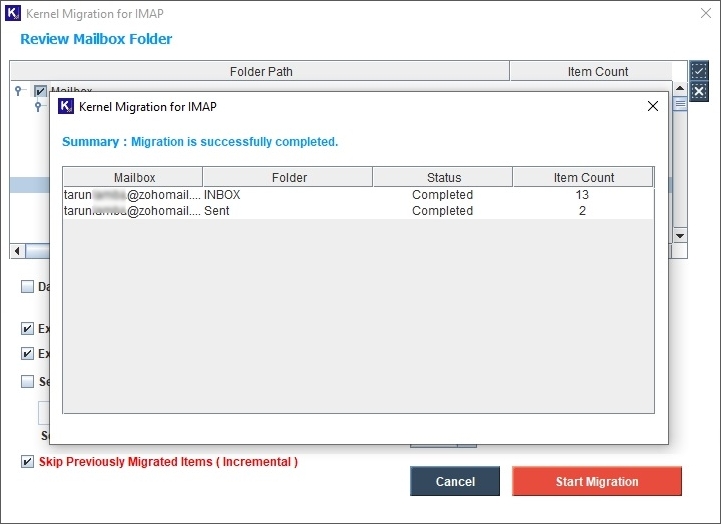
Step 10: Once the migration is completed, you can review all the completed mailboxes with their status and item count.
