Microsoft 365 is a suite that provides various tools, applications, and services contained within itself and ensures enhanced collaboration, communication, and security. It is the foremost famous cloud platform across many businesses, professionals, and individuals. Outlook is also a part of Microsoft 365 suite and a widely used email client that supports several email protocols like IMAP, POP3, SMTP, etc. Every email protocol has its own set of rules and regulations for sending and receiving messages. However, the POP3 email protocol downloads emails to a device and allows access to mail after downloading (offline), which reduces internet and time consumption. These features compel users to switch or set up POP3 settings for Office 365. So, let’s delve into the way to set up Microsoft Office 365 POP3 settings after analyzing its advantages.
Why configure POP3 settings for Office 365?
Configuring Microsoft 365 POP3 settings is highly advantageous because of its enormous features and services. Some of the crucial features are mentioned below:
- POP3 allows users to save emails from a server to an email client.
- Reduces server space and load if you have limited server storage space.
- Facilitates quick access to emails because they are already downloaded.
- Relatively easy to manage and use.
- Enhanced data security from server trespassing.
After evaluating the benefits, let's explore a step-by-step guide to effectively set up POP3 settings for Office 365.
Steps to set up POP3 settings for Office 365
This section provides a straightforward stepwise procedure to set up Outlook 365 POP3 settings. Follow the below-mentioned steps and configure the O365 POP3 settings without any hassle:
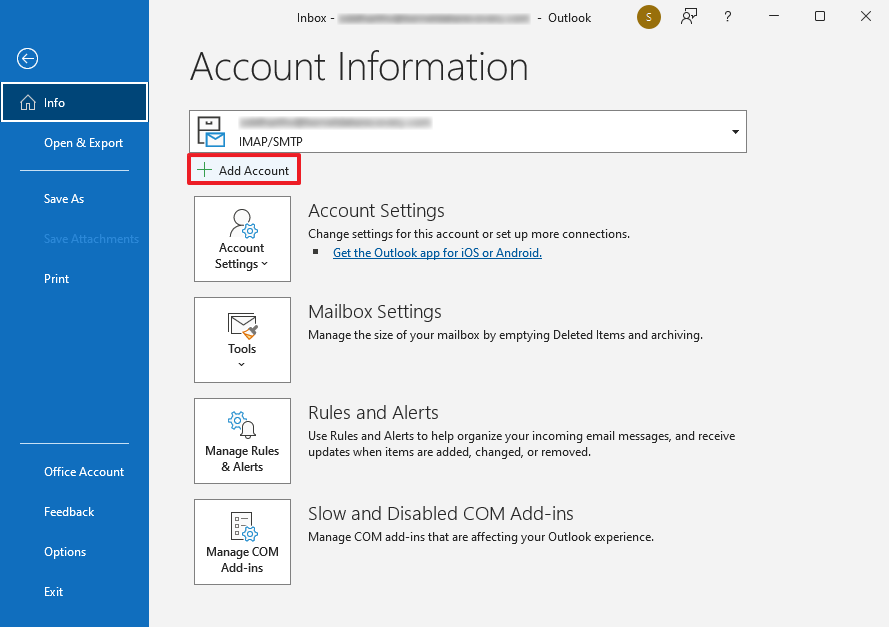
- Open Outlook, go to the File tab, and click Add Account.
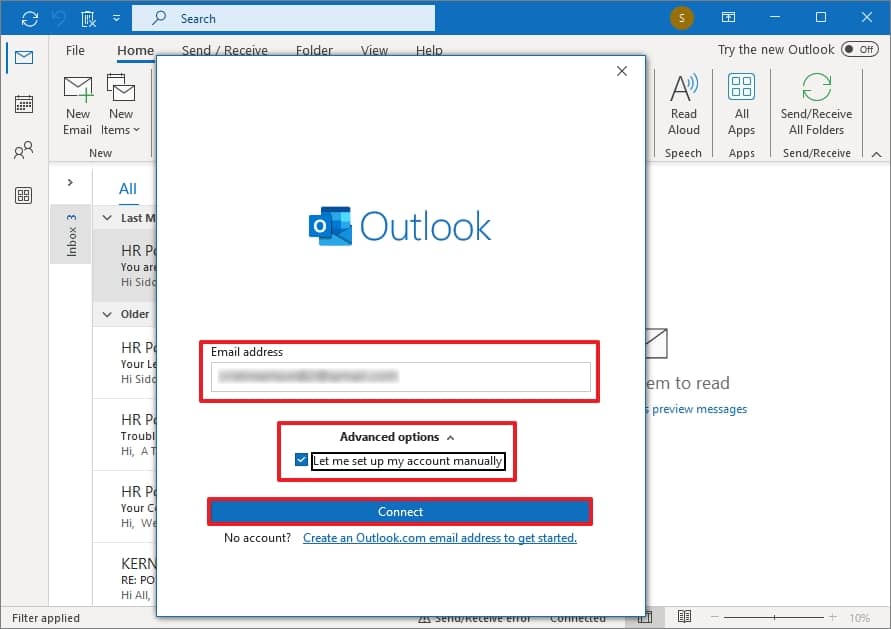
- Enter your email address, check the Let me set up my account manually drop-down of Advanced options, and click on Connect.
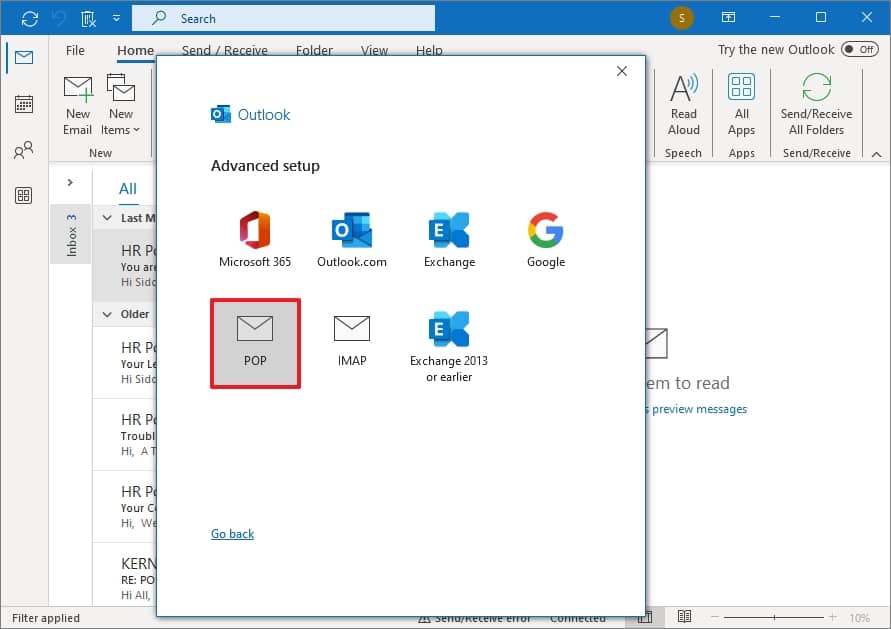
- Choose the POP option under the Advanced setup.
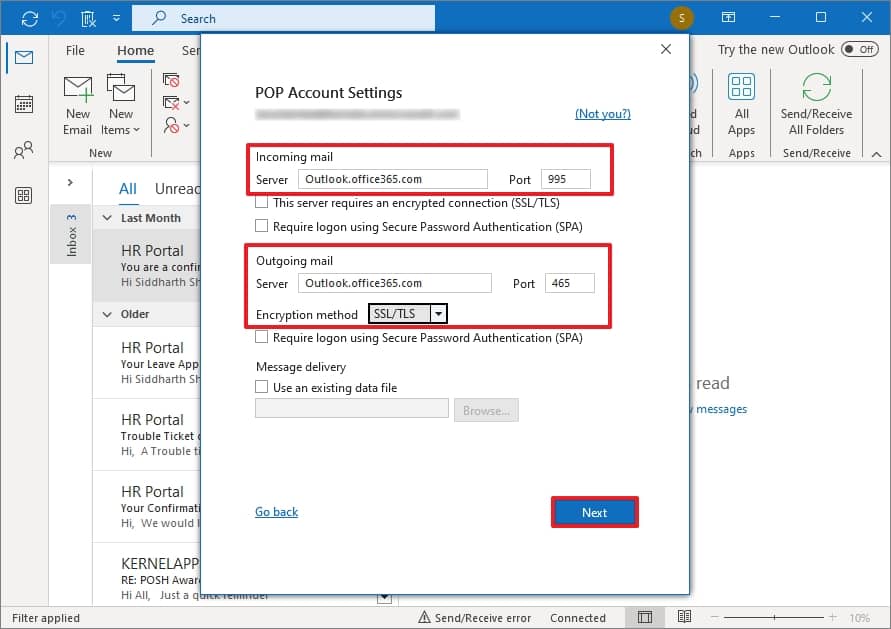
- Enter the inputs below and click on the Next button.
- Incoming mail Server: Outlook.office365.com
- Port: 995
- Outlook mail Server: Outlook.office365.com
- Port: 465
- Encryption method: SSL/TLS
- Enter your account password and click on the Connect option.
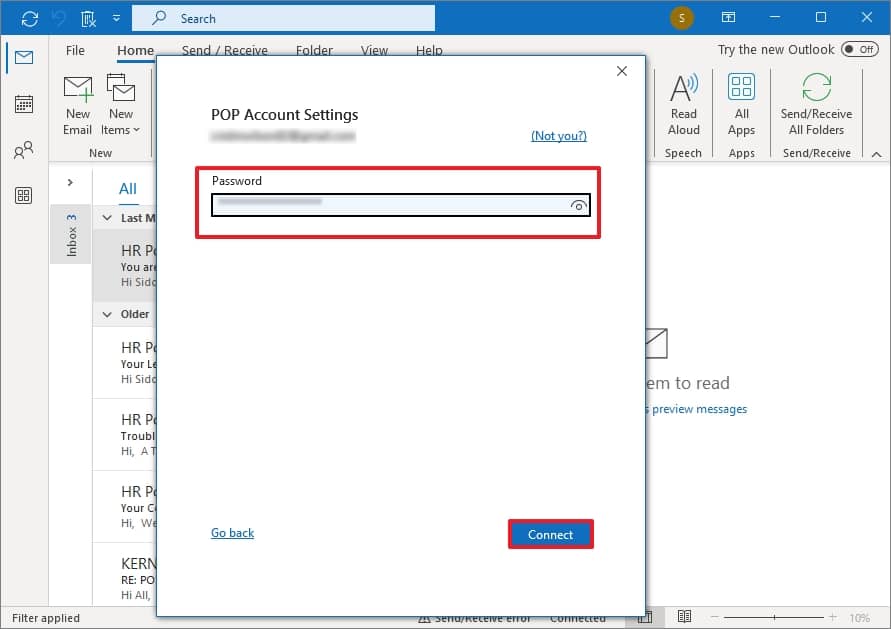
After a completion message, you will find that your account has been successfully configured with O365 POP3 settings.
This method is efficient in configuring the Microsoft 365 POP3 settings. However, having a backup of the email data ensures security and preserves your data from disastrous situations like data loss, breaches, etc. However, it is challenging to back up Office 365 manually. So, to tackle this situation, advanced and professional Kernel Office 365 Backup and Restore software is recommended for best data backup strategies.
This software backups Microsoft 365, On-premises Exchange, and Hosted Exchange mailbox data and saves them in PST, MSG, PDF, DOC, DOCX, EML, and HTML formats in just a few simple steps. It Office 365 backup software facilitates many advanced features like split resultant PST files, incremental backup, selective data backup, etc., while maintaining workflow and data safety.
Conclusion
Hence, we’ve performed a simple stepwise procedure to effortlessly set up Outlook 365 POP3 settings. However, users must backup and restore Office 365 data using the recommended Kernel Office 365 backup and Restore software. It allows you to save Office 365 emails to desktop in easy steps with complete data integrity. This tool is efficient and user-friendly, with smart interfaces and navigation points. Download the demo version now to check the efficiency of the utility.

A simple tool to Backup Exchange/Office 365 mailboxes to PST & Restore them
