Microsoft Outlook is one of the top-notch email clients nowadays. It's not just dependent on sending and receiving emails to others. Even by configuring your Exchange account in MS Outlook you can easily share a note, attachment, calendar, and folder with your team. Shared folders are those folders that used to be sharable to your team on the same Exchange Server.
The shared folder makes working easier for a team, allowing quick communication and collaboration with access to shared data. It is a great way to collaborate with other people working towards the same goal. However, at times, opening these folders can get a little confusing. In this article, we'll discuss the right ways to open a shared folder in Outlook, and with this, you can start collaborating with your team by opening their shared folders!
Note: To open another person’s shared folder, ensure that the person has permitted you to access it.
In this section, we will provide a detailed step-by-step process to create a shared folder in Outlook, what permissions you have to assign them, and how to open that folder.
How to create a shared folder
To initiate the opening of a shared folder in Outlook, first, you need to create a shared folder in MS Outlook. Creating a shared folder allows your teammate to access its content. Create a shared folder by these below steps:
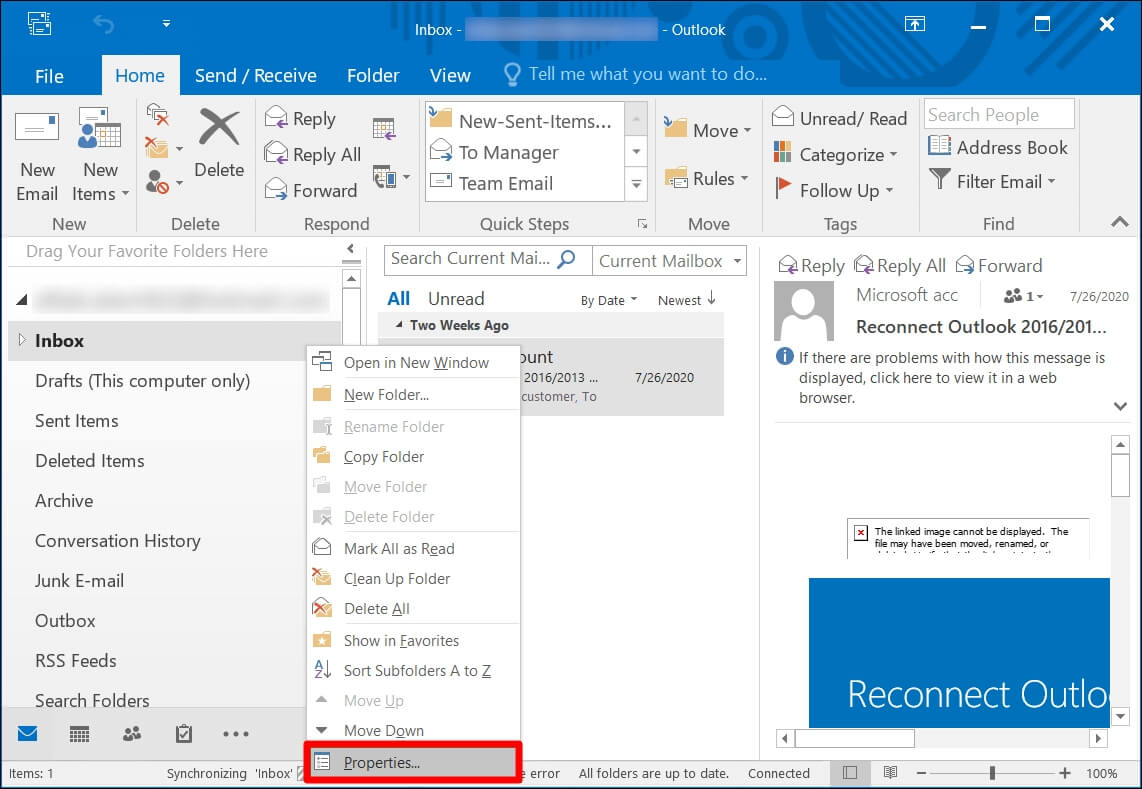
- Open MS Outlook and select the folder that you want to share.
- After selecting the folder, right-click on it and select Properties.
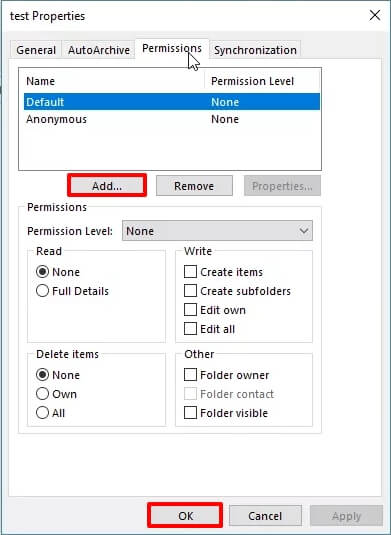
- Once the Properties window appears on the screen, select the Permissions tab.
- On the Permission tab, click on Add.
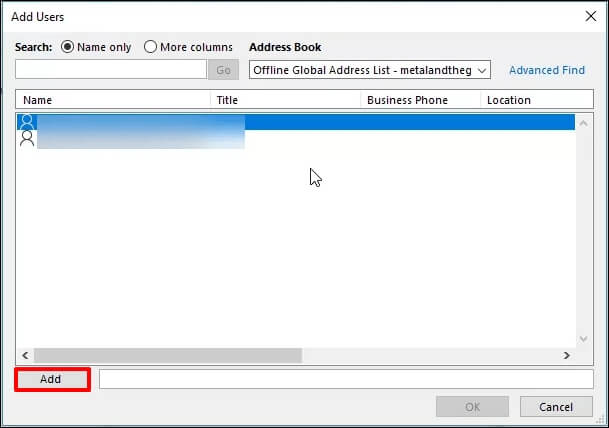
- The list of email addresses on the server will appear on display; select the email addresses with whom you want to share a folder,then hit Cancel.
- In the Permission tab, check who has permission to access the folder.
- Shared folders have multiple types of access levels; you can select the level of access for the folder. In the Permission level category, use the drop-down menu to select the level.
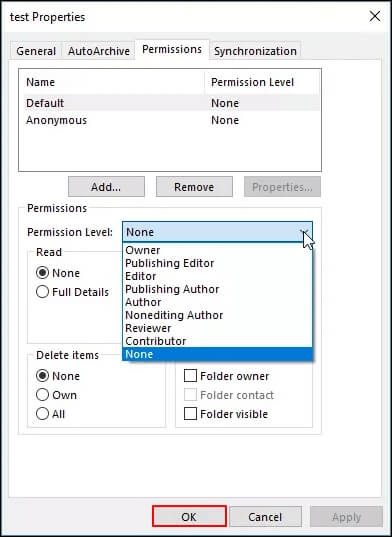
Note: Sharing folders with other members does allow them to open and view the content in it, but they are not allowed to send emails on your behalf. While setting permissions for shared folders, you can determine how much access you want to give to a specific user.
All the users added to that shared folder can read, create, edit, respond, start meetings, or delete items depending only upon the permissions you grant them. You can set the following permissions for users who will have access to the shared folders:
- Owner – They have full access to the mailbox to create, read, delete, and modify all the items. In addition, an owner can also grant permissions to other users.
- Editor – They can create, read, edit, and delete all items in the folder.
- Publishing Editor – They have all the same permissions as an editor, additionally create subfolders.
- Author – Authors are enabled to create and read items and edit & delete items that you have created.
- Publishing author – They are granted all the same permissions as an author but also allowed to create subfolders.
- Reviewer – They are only allowed to read items.
- Contributor – They are permitted to create items.
- Custom- The owner has all the rights to decide the actions that these users can perform.
- None – Users under this permission category cannot perform any activity or open a folder.
Opening a shared folder will help you access your team's work and manage the workflow in your organization. Follow the steps mentioned below to open a shared folder.
- Close Outlook and restart it.
- Now, go to the File tab and click the Account Settings section.
- From the menu, select Account Settings, and then select the Email tab.
- Ensure that the right added account is highlighted to the shared folder.
- Now, click Change, and then click More Settings in the right corner.
- Go to the Advanced tab and click Add.
- Type the email address with the permission and click OK to go to the previous window.
- On the Change Account Wizard, select Next and then click Finish. Now, close and restart MS Outlook.
- The shared folder will display in your mailbox list on the left-hand side along with other folders.
And that’s how you can easily open a shared folder with MS Outlook.
If you go through the above-mentioned steps and are unable to open your shared folder; then your Outlook PST might gets corrupted. Corruptions can damage your PST file and face issues like error 0x8004060C of Outlook, which results in not opening your shared folder. To avoid such issues, you can use the advanced Kernel for Outlook PST Repair software to repair your damaged PST files.
Conclusion
Outlook has made work easier by providing various useful features. One of them are the Shared folders which allow users working on the same project to easily edit, create, send, respond, and read items. This ensures quick and effective communication without any delays. Shared folders can be simply opened, and the method has been discussed at length above. However, permissions of the folder decide the actions which the users can take.