Microsoft Outlook is a popular email management tool to store all your crucial data under one roof. You can use Outlook to easily send and receive email messages. Outlook offers a wide range of intelligent features to enhance its users emailing experience. One such outstanding feature is attaching a business card with your emails.
The process of creating a new business card in Microsoft Outlook 2016 is also quite easy and short. You can choose the desired card layout, images, contact fields, and graphics as per your needs to create your own customized business card. Explore this guide and find out the methods for creating business cards in Outlook.
What are the benefits of using Outlook business cards?
Following are some reasons why business cards are beneficial in Outlook:
- You can establish a professional identity by sharing your business card with others.
- By sharing a business card, you can create a good brand name and value.
- A business card makes it easy to share your business information with others.
Steps to create business card using Microsoft Outlook
The method to create business cards in Outlook email client is outlined below. Follow the steps carefully:
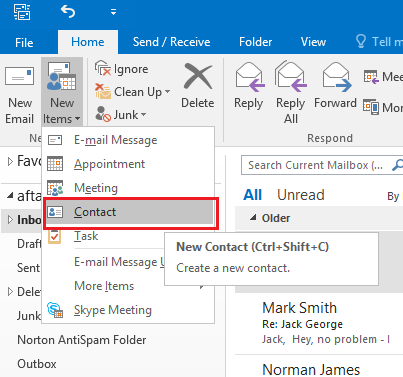
Step 1. In Microsoft Outlook, go to the Home tab. In the New Items group, select the Contact option.
Step 2. To create a business card, click the Business Card box.

Step 3 . In the Edit Business card box, under Card Design, provide the details like layout, image, image area (in percentage), and image align information.
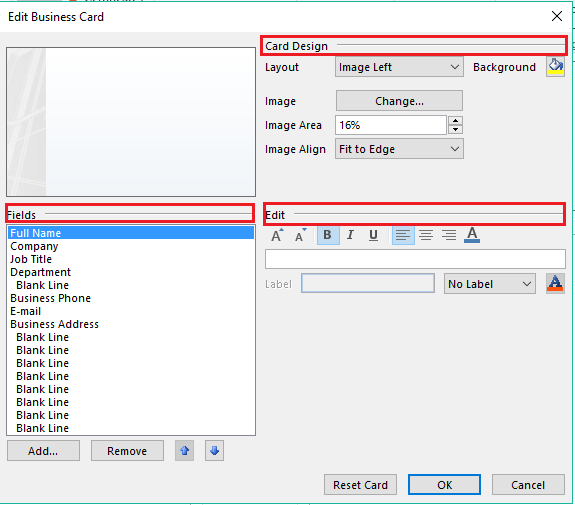
- A particular color can be selected using the Background option.
- To add an image and logo, just select image option to select images, size it and position as per your convenience.
- To add and remove different stuff, you can use the Fields option.
- If you want to remove an item, then go to Fields, and click Remove.
- Positioning the text on the card is also quite easy: click any field under the Fields option, and by using the UP and DOWN arrows on the keyboard, place the field anywhere you want it.
Add or edit an image in the business card
The Electronic Business Card in Outlook not only incorporates the business details but also an image to make it more attractive. This is how you can add an image to the business card.
Step 1. After opening Outlook, go to Contacts and open it.

Step 2. Click View, then go to Change view and choose the Business card option.
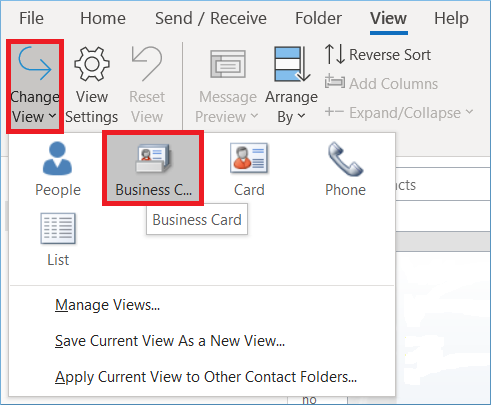
Step 3. Choose the business card whose profile picture you want to change and double-click it.
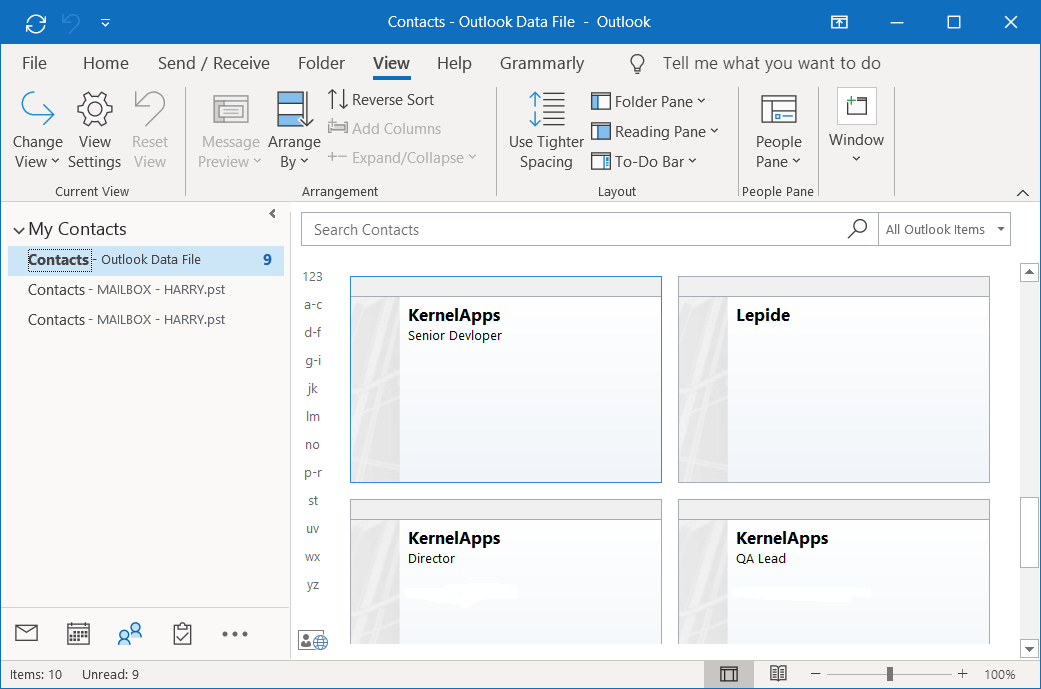
Step 4. You can either double-click on the picture icon or choose Options > Picture > Add Picture.
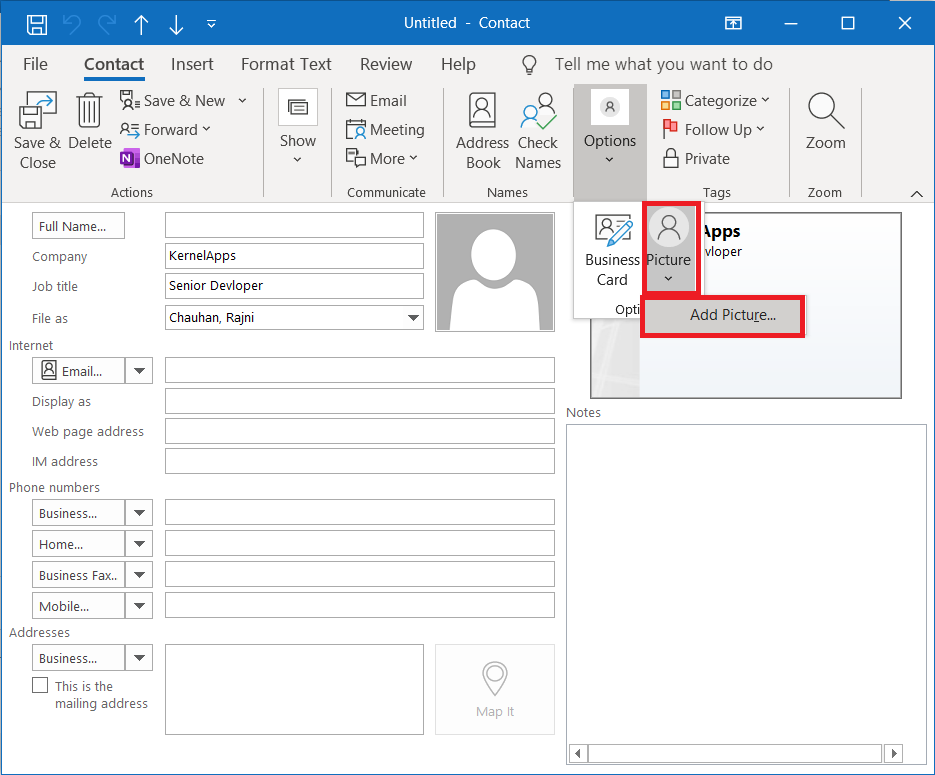
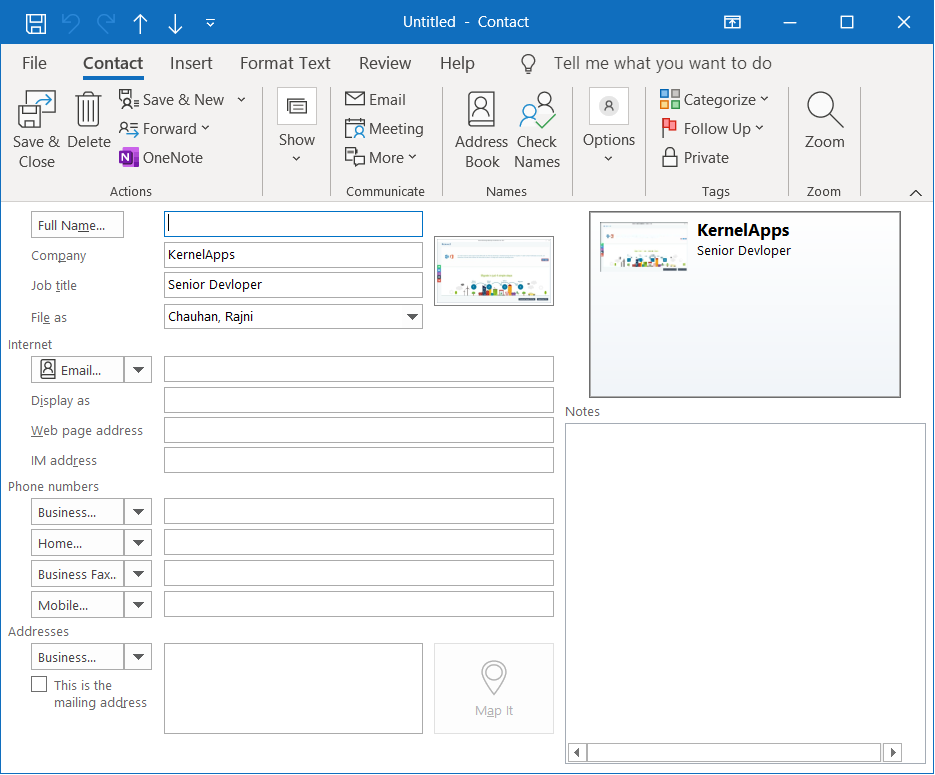
Step 5. Browse the picture that you want to have on the Business Card and add. It will be the display picture, and whenever you add the Business card, the selected Picture would be on its profile.
Steps to save business card you receive
Whenever you receive a Business Card in an email message, you will have to save this Business Card to your Outlook contacts. If your contact list already includes a contact with the same name, you’ll have the option to update the existing contact or create a new one.
Step 1. In Outlook, double-click the Business Card in the open message to open it. You can see it will open as an Outlook Contact.
Step 2. Now click Save and Close to save the Business Card to your Contacts folder.
Note: You can also update the information of selected Contact
Steps to send business cards using email
Business cards can be shared with contacts and others using email messages. This card fulfills the purpose of sharing corporate or personal visual identity like a paper business card. If the user is using Microsoft Outlook 2016, 2013, 2010, and 2007, then the business card will appear exactly as the sender has sent it.
Step 1. Firstly, include a Business Card in an email message
Step 2. In a new message, click on Attach Item and select Business Card which you want to share, and then click a name in the list
Step 3. Click the OK button to send the Email.
Note: With versions earlier than Outlook 2007, the user will see the business card as an image. But a .vcf file is attached with the business card. The .vcf file can be opened and information will be saved in the contact list.
Conclusion
Creating and sharing a business card in Outlook is an easy task. The whole process of creating a card is completed in a few easy steps. However, if you ever face any difficulties or errors in Outlook, and your PST files become inaccessible, you need to take help from a professional tool. We recommend using Kernel for Outlook PST Repair software. It is one of the best PST repair software to fix your Outlook issues instantly.

