PST (Personal Storage Table) files are mainly used to store emails, contacts, calendars, and other necessary data all in one place. PST files contain crucial information, which needs to be kept at a secure location.
For some reason, organizations need to access PST data in other email platforms, which is quite difficult for users. To access PST data in another email client, you need to change the PST file format to another format, like EML.
Multiple organizations use the EML file format to store email conversations and other crucial information. It is one of the popular file formats that stores email messages. EML file is a versatile format and is supported by a wide range of email clients.
In this article, we will cover why convert PST to EML file format and reliable methods for PST to EML conversion, with an easy step-by-step guide.
Instant Solution
Don’t waste your time on lengthy manual solution. Try Kernel PST Converter to instantly convert PST to EML, while keeping your data safe and intact.
Why convert PST to EML files?
There are various reasons why you need to convert PST files to EML format. Some of the major reasons are as follows:
- EML files are compatible with multiple email clients like Thunderbird, Entourage, Apple Mail, etc., making it a handy and easy-to-use format.
- EML files are used to store single messages, which makes them an easily shareable format.
- EML files are a lightweight file format compared to PST files.
- There is a lower chance of facing corruption in EML files, which makes it a secure file format.
- EML files are helpful when you need to migrate your PST file data to another email client.
- To archive single essential emails in a lightweight file format.
Approaches to convert PST to EML files
There are two different approaches to convert PST to EML. You can either use a manual method or an advanced PST to EML Converter for error-free conversion. Here is a detailed step-by-step guide for both approaches:
Manually convert your PST file to EML format
To convert PST to EML manually, you need to perform the process in two parts. First, import Outlook emails to Thunderbird and then convert the imported emails to EML format.
Part 1 – Import PST to Thunderbird
Here’s how to import all your essential emails from Outlook to Thunderbird:
Step 1: Launch Thunderbird email client on your system.
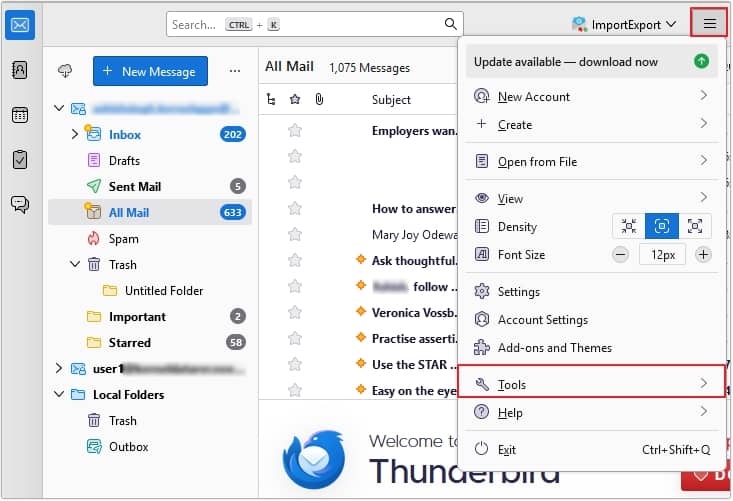
Step 2: Click on the three bars located at top right corner, then click on the Tools option.
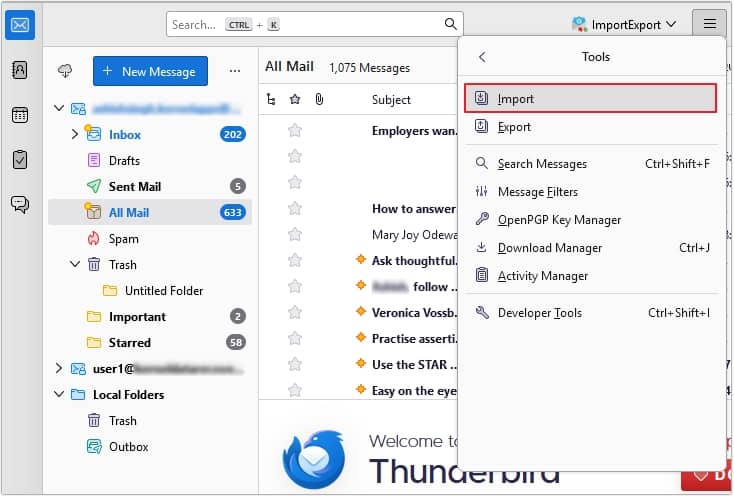
Step 3: Select the Import option from the list.
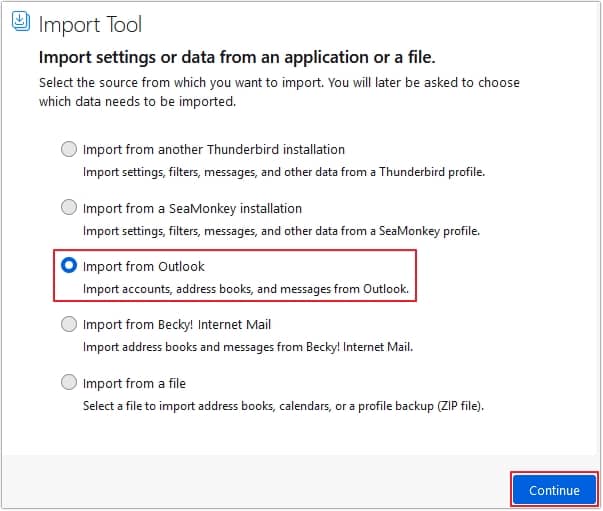
Step 4: Now, click on Import from Outlook, from the source list, then Continue.
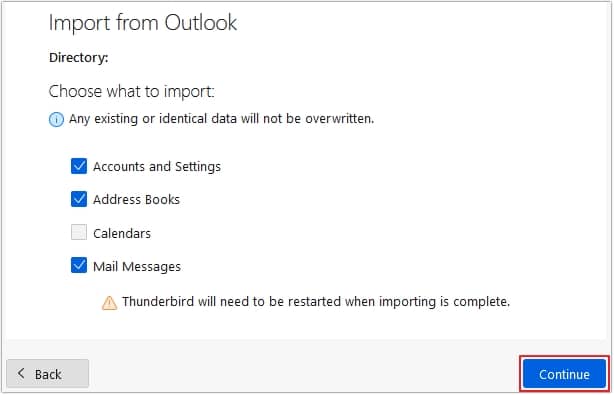
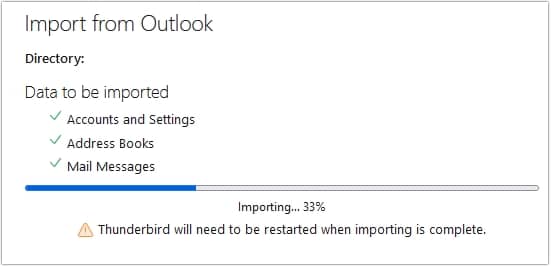
Step 5: Choose the data you want to import, then click Continue.
Step 6: The Thunderbird email client will start importing Outlook data.
Part 2 – Convert Imported Emails to EML Format
Once all the data has been successfully imported into Thunderbird, you can select the emails that you want to convert to EML format by following the steps below.
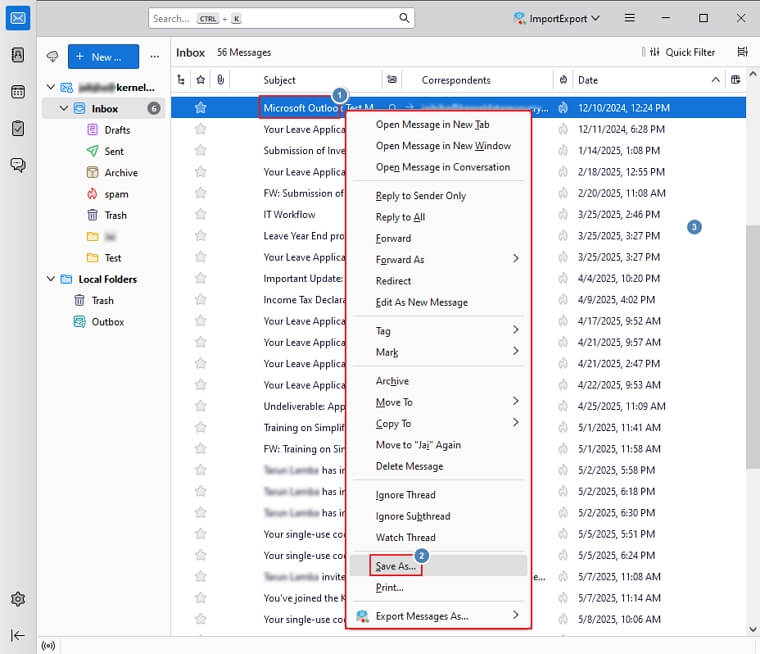
Step 1: Open Thunderbird, left-click on your preferred mail and click on Save As option.
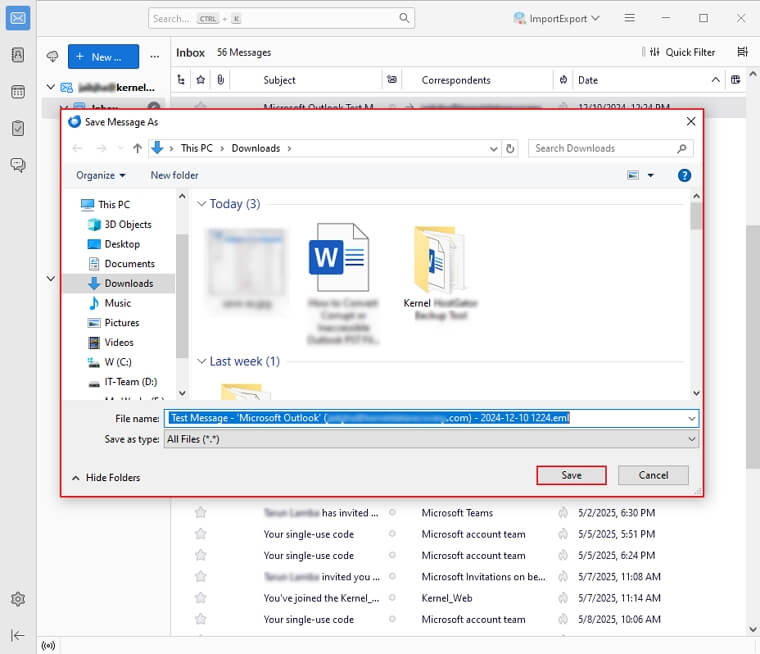
Step 2: In the Save Message As window, select preferred location and Save your EML file.
Limitations of converting PST to EML using the manual method
- Time-consuming process and chances of losing essential emails or attachments.
- Not possible to convert bulk Outlook emails.
- Some parts of emails, like formatting or metadata, may not transfer correctly.
- If something goes wrong, there’s no easy way to recover lost or damaged emails.
Professionally convert your PST file to EML format
The manual method comes with various drawbacks, such as corruption issues, inaccessibility issues, etc. The most advisable way to surpass these drawbacks is to use a professional PST converter software. Use our feature-rich Kernel PST Converter tool to securely convert PST to EML without data loss.
Being a most reliable and efficient PST to EML Converter, it allows you to repair highly corrupt PST files and instantly convert them to required format, including EML. It offers multiple advanced features and has a user-friendly interface to provide an error-free conversion experience. Let's explore the features offered by the software:
- Allows you to convert PST file into EML, MSG, HTML, PDF, TXT, and other formats.
- Provides multiple filters, such as folder name, item type, etc. for selective PST to EML conversion.
- Import PST in Yahoo Mail, Gmail, AOL, Outlook.com, AOL, etc.
- Move PST files to Cloud Server, such as Office 365, Exchange, etc.
- Perform bulk PST conversion with no file size restrictions.
Conclusion
Hope you find this blog helpful in understanding how to convert PST to EML. Make sure to follow the steps of the manual method carefully to achieve accurate conversion. However, we recommend that you opt for the mentioned PST Converter to get 100% error-free PST to EML conversion with guaranteed results.
Frequently asked questions
Can I convert PST to EML without Thunderbird?
No, you cannot manually convert PST files to EML format without using Thunderbird. However, with an automated PST to EML Converter free tool, it becomes easy to convert PST to EML without any hassle.
Can I convert multiple PST files into EML using the manual method?
Yes, you can. But it's a time-consuming process, and there's a chance of data loss. We suggest you download free PST to EML Converter for a 100% error-free process.
Is Kernel PST converter software secure to convert PST files to EML?
Yes, it is one of the most secure tools that easily converts your PST to EML and other formats to safeguard your data from severe corruption.