Exchange online is the ultimate component of the Office 365 suite. It stores all your mailboxes, including emails, calendars, notes, and appointments. Many organizations use Exchange Online to do their day-to-day conversation or business deals. To keep their data safe and secure, organizations need to do regular backups of Exchange Online mailboxes. After taking the backups, you can easily restore that data in any Exchange Online account.
In this article, we will discuss the methods to back up Exchange Online mailbox data to PST. Here we will brief both manual and automated solutions that can help you export Office 365 mailbox to PST.
Why is it necessary to back up Exchange Mailboxes?
Multiple scenarios often ask for Exchange mailbox backup, such as:
- To export the data to Outlook PST.
- To backup Exchange data for compliance requirements.
- To export Exchange mailboxes to Office 365 in the form of PST.
- To access the Exchange mailboxes in case of emergency.
These reasons are enough to tell you why it is necessary to have a backup of Exchange mailboxes. Now, let’s move ahead to the manual methods to back up Exchange Online mailboxes to PST.
Download Kernel Export Office 365 to PST as the instant solution to take unlimited backup of Exchange Online mailboxes to simple PST files.
Method 1: Use eDiscovery Export method to export mailbox items to PST
Office 365 has multi-advanced features that can give you seamless data management services. To export the whole mailbox items to PST you can use the eDiscovery export method for Exchange Online backup. It’s the only method that can protect your Office 365 data or migrate Office 365 data to MS Outlook.
Follow the steps to export Office 365 mailboxes to PST using eDiscovery Export tool (you need to have eDiscovery Manager’s permission to perform these steps).
- Step 1: Login to Office 365 portal and open the Office 365 Admin Center.
- Step 2: Click Admin Centers to expand it and click Security and Compliance.
- Step 3: In Security and Compliance, go to Search and investigation, and click Content Search. Click plus (+) button to start a New Search, supply a Name for the backup file and click Next.
- Step 4: Select Search everywhere and then select Exchange. If you want to export specific mailbox data, use Custom Location Selection, click the plus (+) button and add the mailbox you want to export data from.
- Step 5: This step will take you through all the filtering options. In case you want to export all data, do not change the default set filters. Click Search when you are done.
- Step 6: Click Start Export when the Search wizard completes the background search.
- Step 7: Next, a pop window will appear, giving several options. Choose the options and click Start Export once you are done with the settings.
- Step 8: Click Download exported results (under Export results to a computer) after the data export wizard finishes.
- Step 9: Now, you will receive a system-generated special export key. Copy this key using Copy to clipboard, as you will need this in the next step.
- Step 10: This is the last step. Paste the copied key (from the previous step) in the space provided. Also, browse to the location where you want to store the downloaded PST files. Click on Start to begin the export and close the application once the process is done.
This method might seem straightforward, but it is very complicated to execute and time-consuming. Additionally, it cannot guarantee 100% results. So, instead of this, you can move to another option, where you can use the automated software to perform the backup process.
This method might seem straightforward, but it is very complicated to execute.
Method 2: Using a professional tool
The above-mentioned manual method is a little bit risky with a high chance of data loss. If you don’t want to take any risk, then you must use an automated Kernel Export Office 365 to PST tool that saves Exchange/Office 365 mailboxes in PST file format. It has advanced filter features that can back up your selective data from Exchange Online.
Follow the below-mentioned steps to back up Office 365 mailboxes.
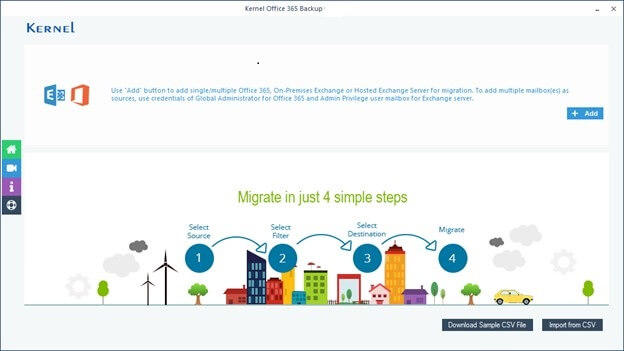
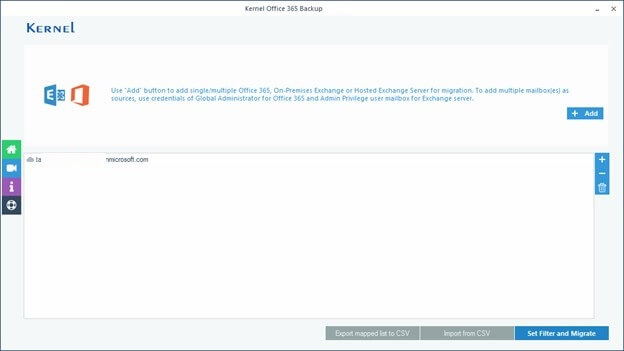
- Step 1: Launch the software and click on Add to choose the Office 365 account.
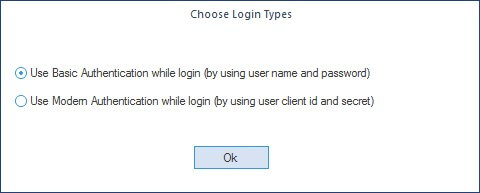
- Step 2: Choose the login method to link your account, then hit OK.
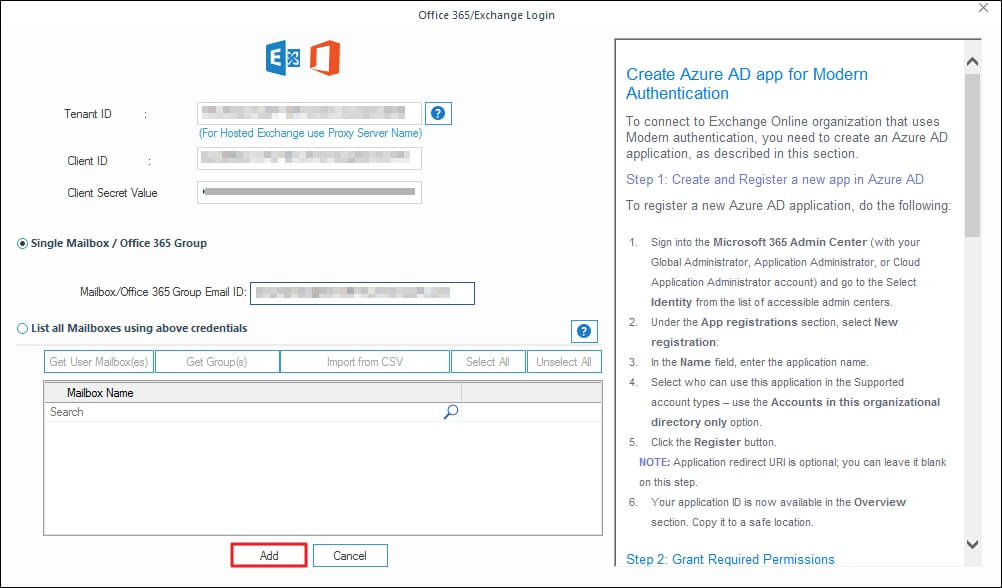
- Step 3: Enter the credentials of the Office 365 account and click on the Add button.
- Step 4: Select the mailbox account and click on Set Filter and Migrate to extract mailbox items.
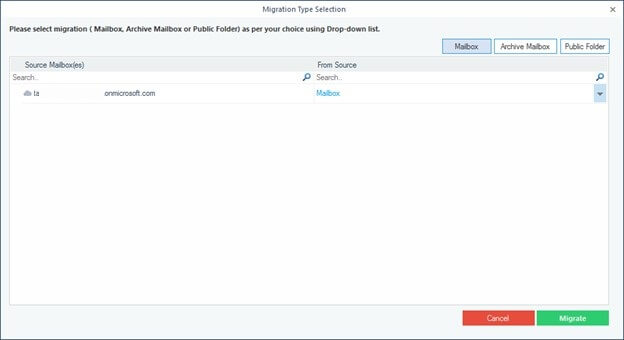
- Step 5: Select your mailbox folders from Mailbox, Archive Mailbox, and Public Folder, and click on Migrate.
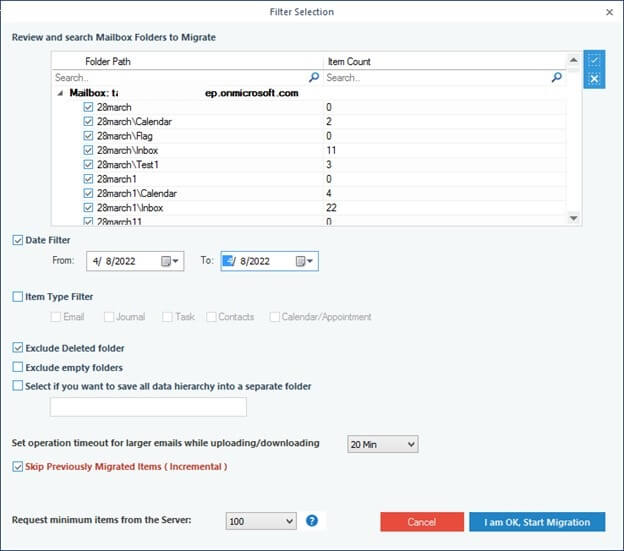
- Step 6: Apply the required filters to save the mailbox data selectively. Finally, click on I am OK, Start Migration.
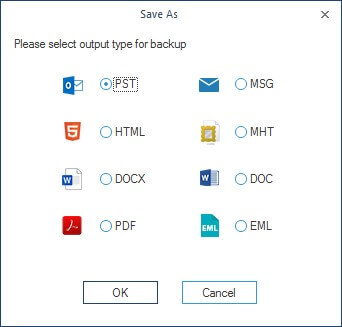
- Step 7: Select PST as the output format and click on OK.
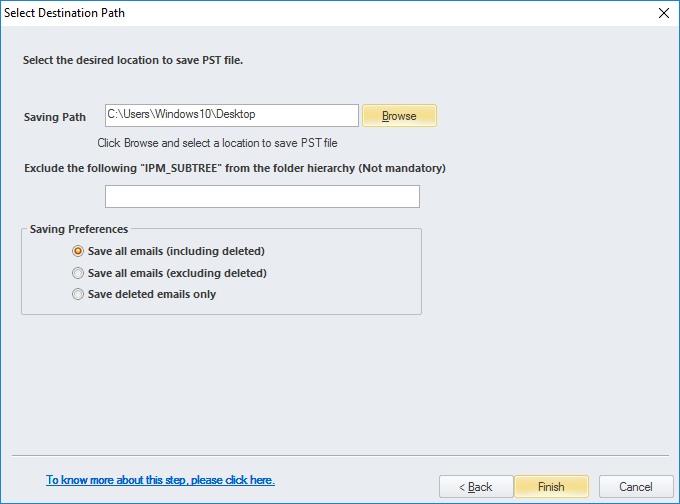
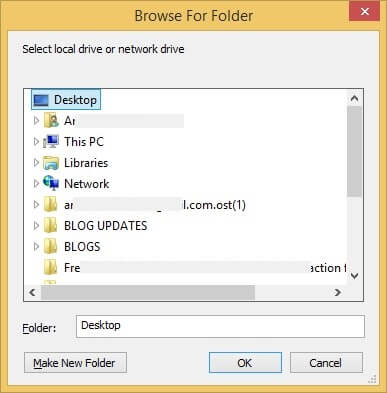
- Step 8: Provide a saving destination for the PST file anywhere in your system and select OK.
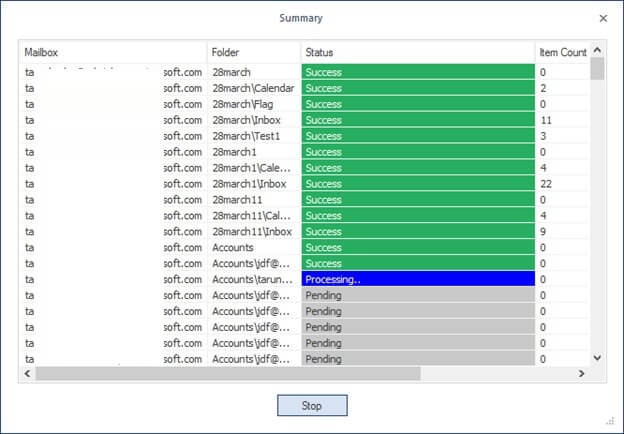
- Step 9: It will successfully back up all the mailbox items into a PST file.
It is the simplest method to export Office 365 mailboxes to PST file format.
Conclusion
Backing up Exchange Online mailboxes is necessary to keep your Exchange database secure. It will protect your data and give you seamless accessibility from anywhere. So, we have mentioned the manual method to take backup, but the manual method cannot give you the desired results.
That’s why, to get a satisfactory result, use the recommended Kernel Export Office 365 to PST tool. It will easily back up all your mailbox items in the original hierarchy.

Kernel Export Office 365 to PST
Backup Office 365/Exchange online mailboxes to PST without Outlook