Step by step guide to backup Google Photos
Here are the simple steps to backup Google Photos using the Kernel Google Photos Backup tool.
Step 1: Download and install the Kernel Google Photos Backup software.
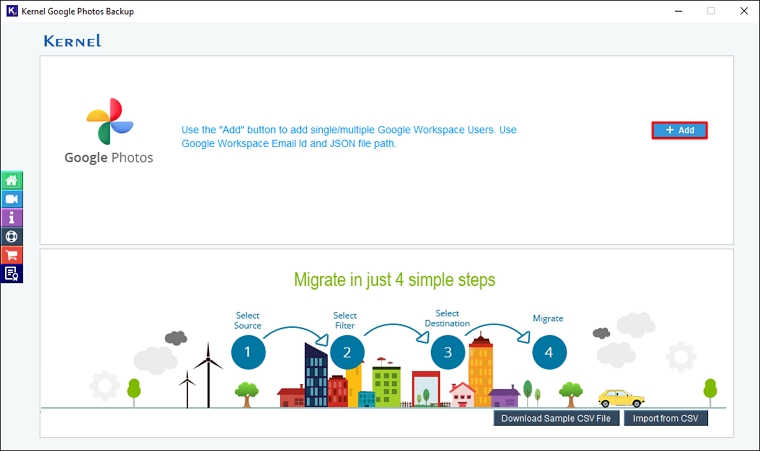
Step 2: Launch the software and click on “+Add” on the homepage.
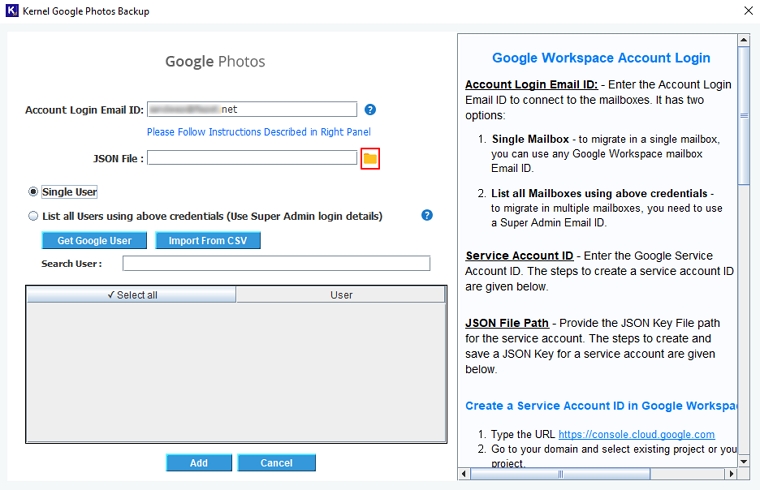
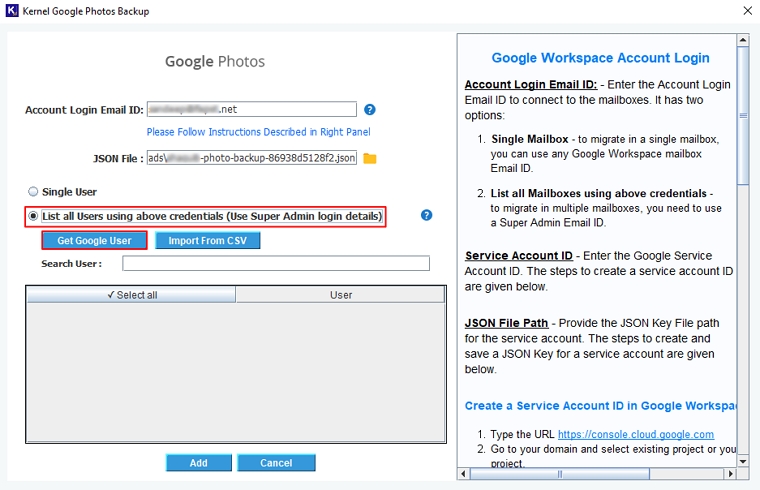
Step 3: In the Google Photos login wizard, enter the Account Login Email ID and click on the JSON Key Folder icon.
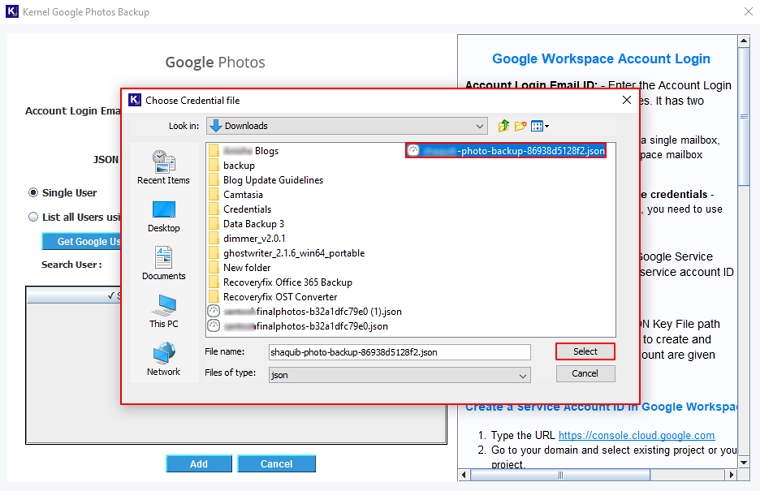
Step 4: Select the JSON key from the local drive.
Step 5: Click on List all Users using above credentials (Use super admin login details) and click on Get Google Users.
Note: To back up a single Google Photos user mailbox, click on Single User.
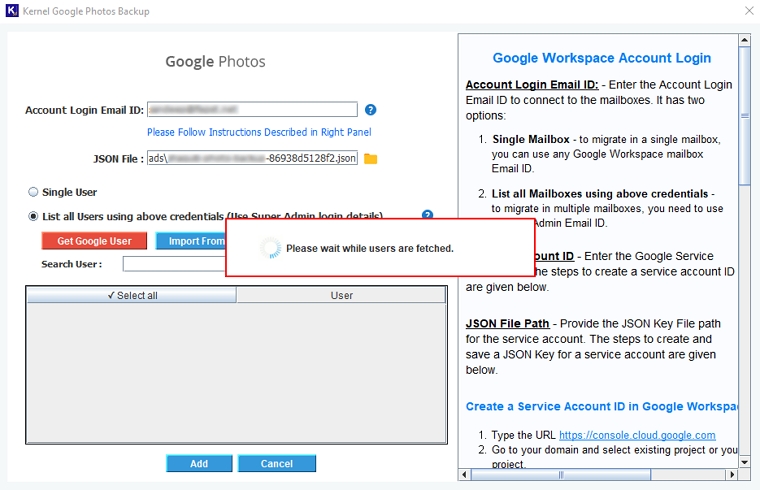
Step 6: The software will start fetching users from the selected Google Photos accounts and show the “Please wait while users are fetched” message.
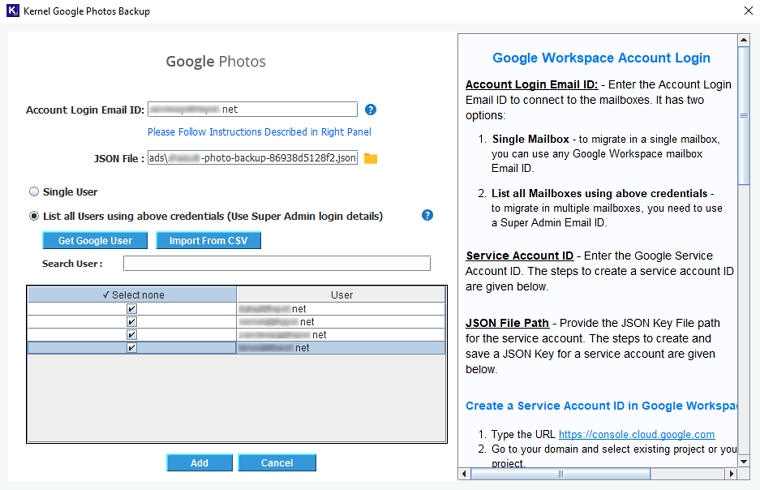
Step 7: The software will list all the users, select essential users, and click Add.
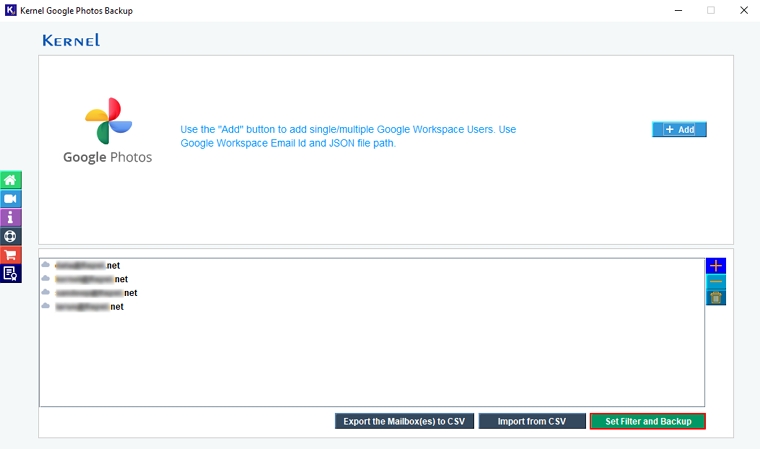
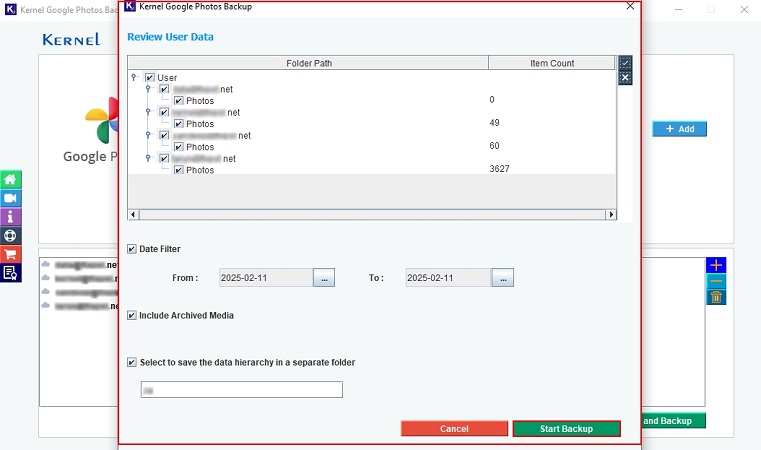
Step 8: In the following window, verify mailbox and click on the “Set Filter and Backup” option.
Step 9: The software will start Enumerating Items from the selected user.
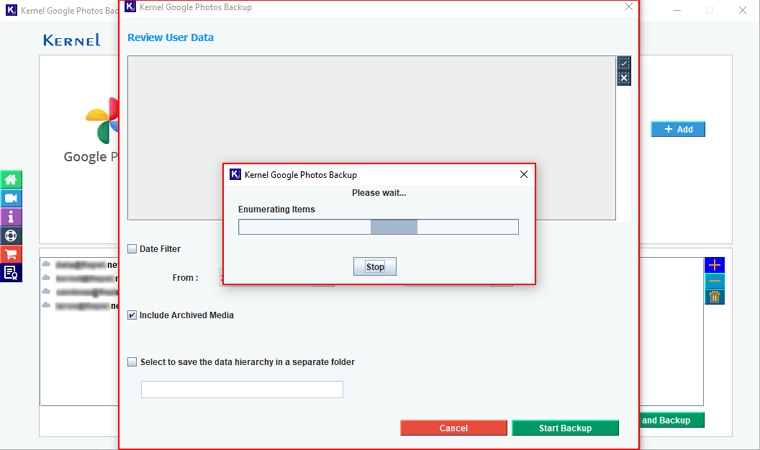
Step 10: In the following window, apply multiple options as per your convenience:
- Review User Data: View the quantity of user's Google photos.
- Date Filter: Select From and To dates to backup specific Google photos according to date range.
- Include Archived Media: It will backup Archived photos and videos.
- Select to save the data hierarchy in a separate folder: Backup your Google Photos into a specific folder on your local drive.
After selecting all the necessary options, click Start Backup.
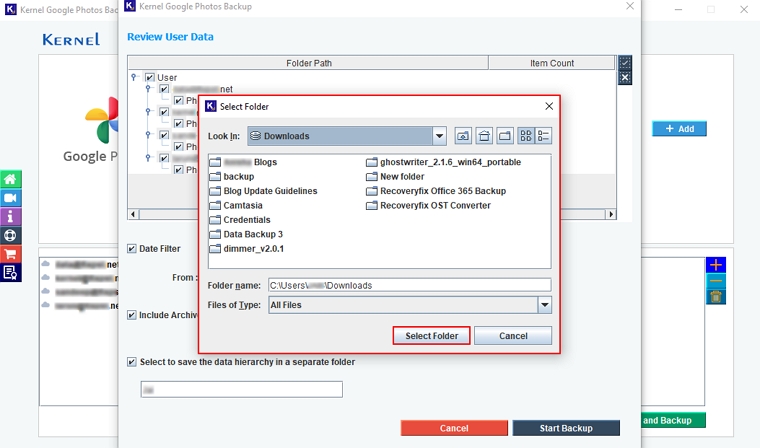
Step 11: Choose the destination and click on “Select Folder” to save the backed up file.
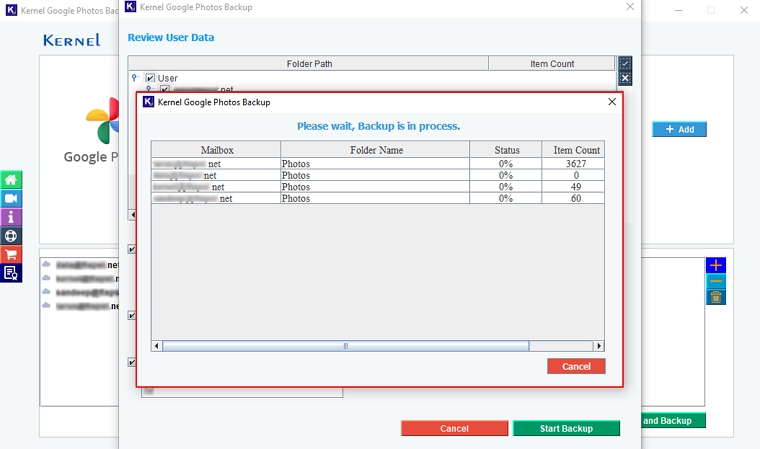
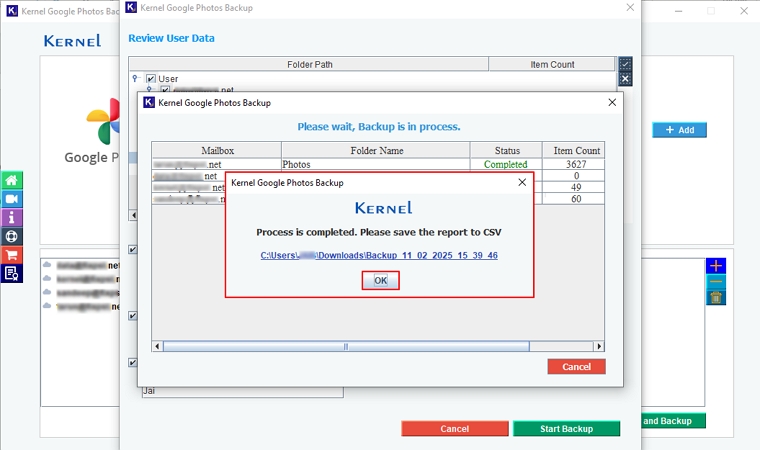
Step 12: The software will start the backup process.
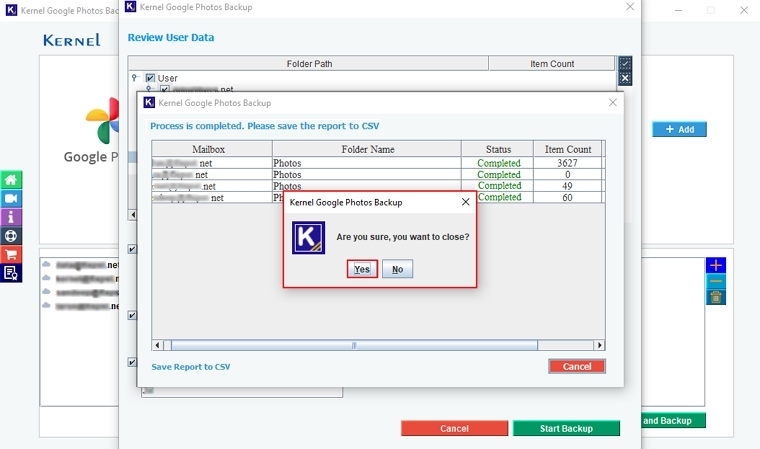
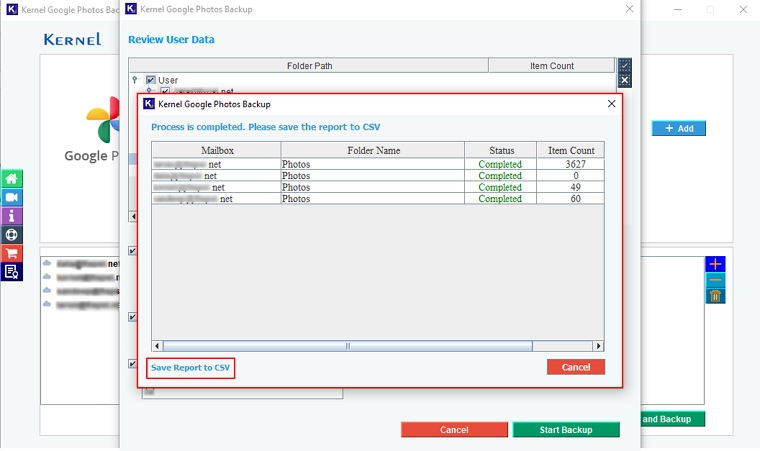
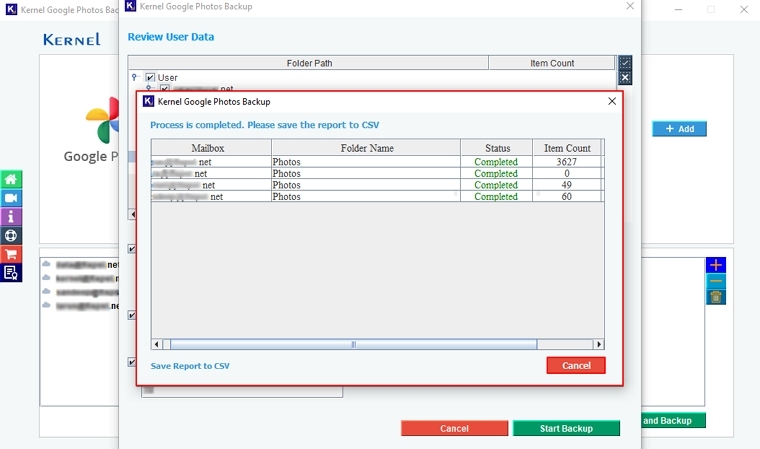
Step 13: Once the backup process is completed, the software will pop up “Process is completed. Please save the report to CSV” message and click OK.
Step 14: To generate and download the CSV file, click on the “Save Report to CSV” option.
Step 15: In the Save wizard, select a folder to Save the CSV file.

Step 16: To exit the backup process, click Cancel.
Step 17: Finally, click Yes to finish the backup process.