The cloud data present in your Box account can be saved locally to a system using our Backup software. It can connect easily with an account and save its data. To conduct the backup, follow the below steps:
Step 1: Launch Kernel Box Backup tool on your system
Step 2: Once the tool is opened, click on the Box module from the home screen.
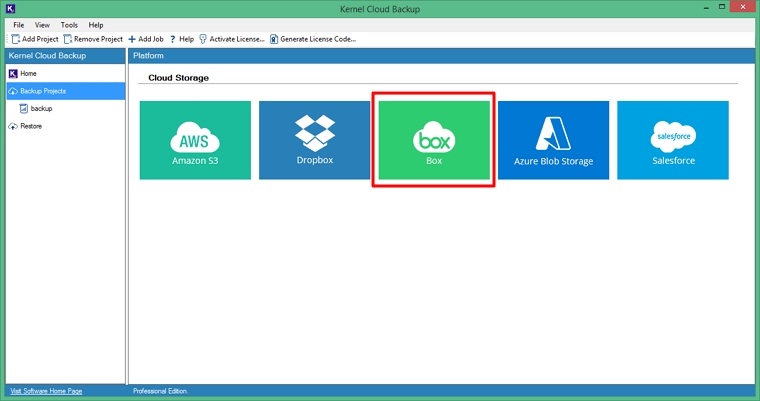
Step 3: In the new wizard, provide a Project Name or select an existing project from the dropdown, input a Job Name, and then click Next.
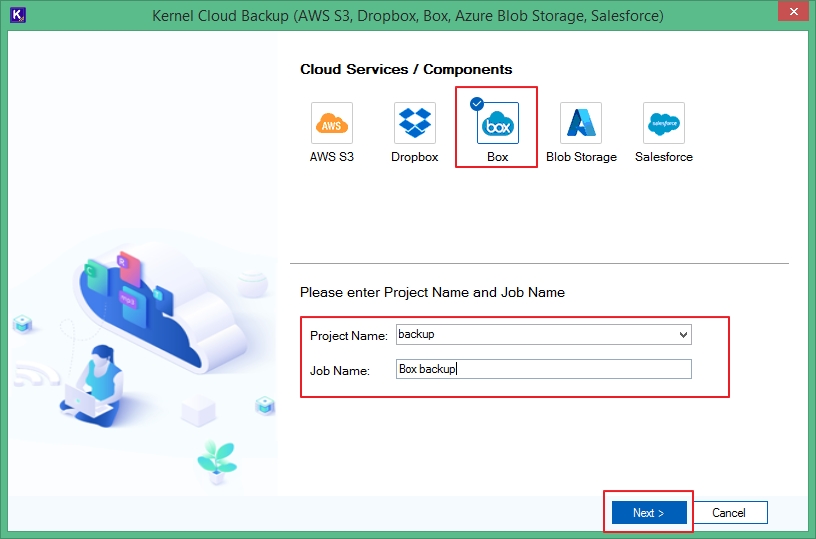
Note: You can also start the process by clicking on the Add project on the top menu bar and then defining the project name. Once a project is created, click on Add Job and then select the most recent project you created and give the job name after selecting the Box module.
Step 4: In the new wizard, choose the authentication mode you want to proceed with from the given two methods:
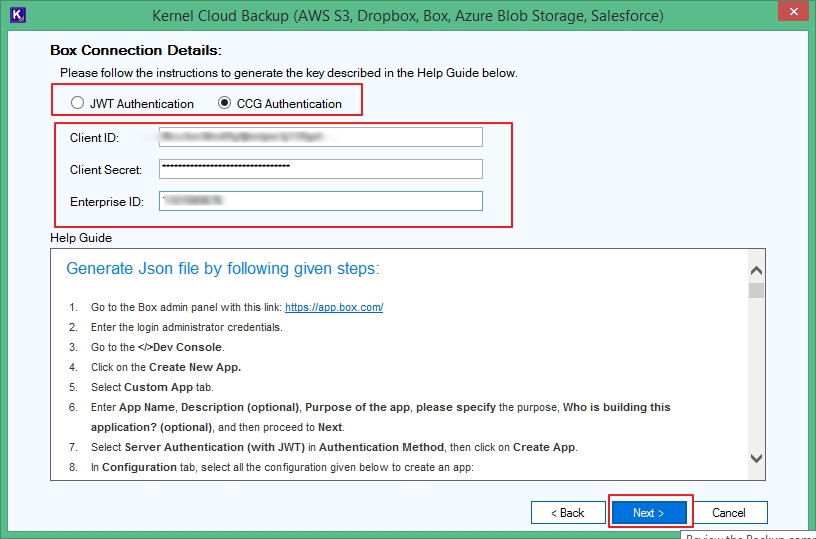
- JWT authentication: Use JSON configuration file to connect with the Box account.
- CCG authentication: Use Client ID, Client Secret, and Enterprise ID to connect the selected Box account.
Step 5: Once entered the details as per the selected authentication method, click Next..
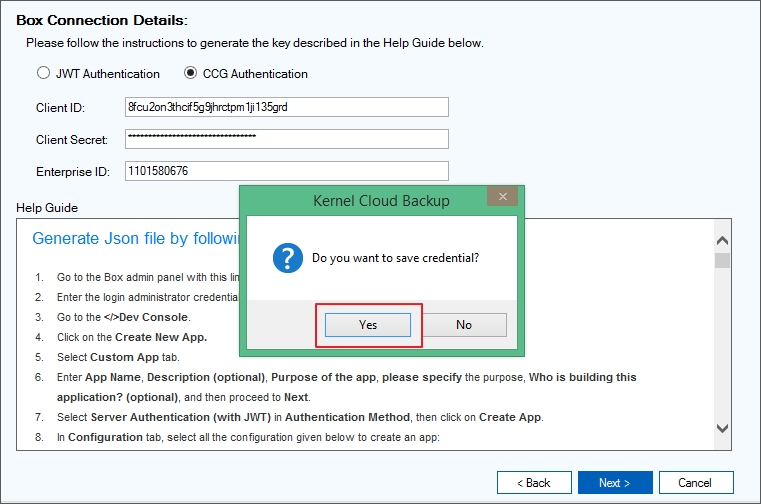
Step 6: On the pop-up asking, "Do you want to save credential?, click Yes to skip hassle of again adding the Box account for future backups.
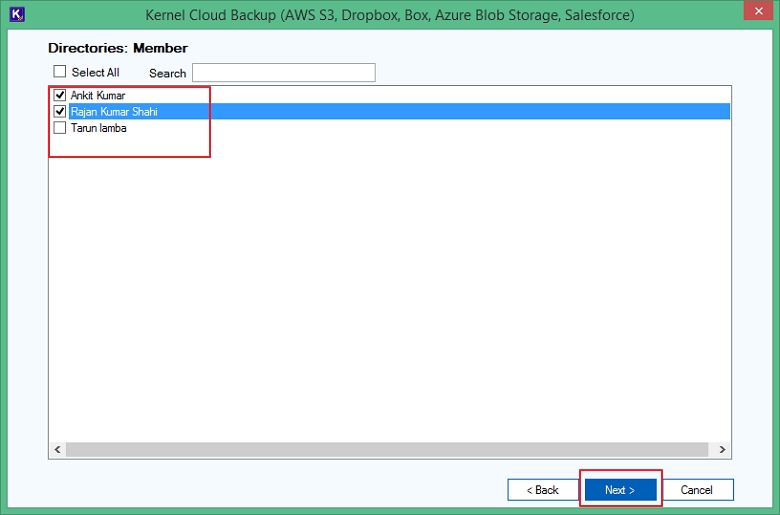
Step 7: You will now see all the Members available in the Box account on the screen. You can select the desired Members who you want to include in the extracted backup at the end. Click Next to continue.
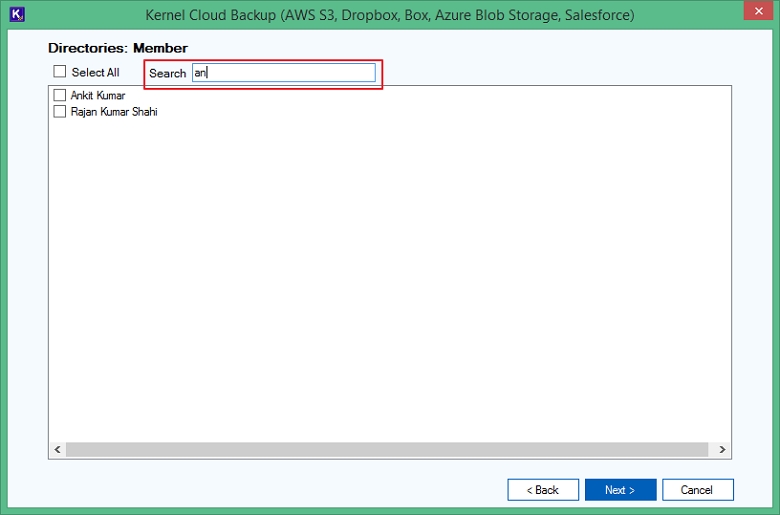
Note: When there are multiple Members, you can use the Search box to find particular Members you are looking to add to the backup.
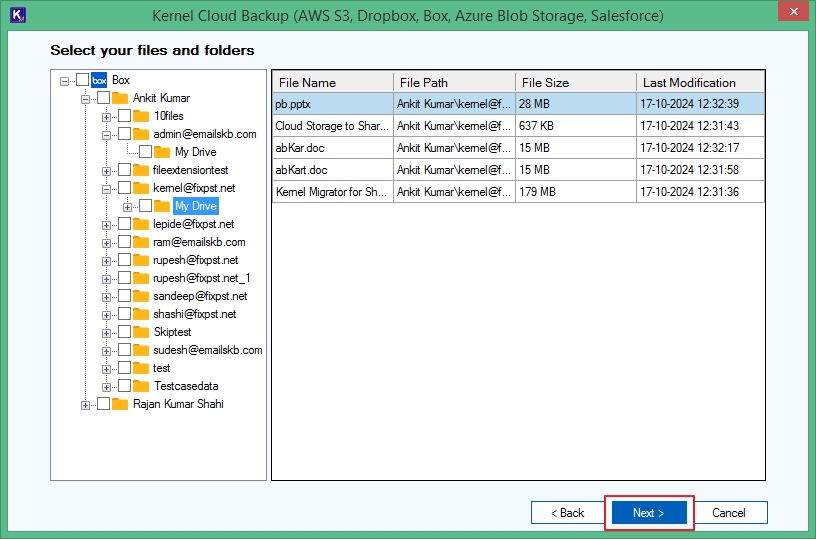
Step 8: You’ll now see the data stored within the Box members according to their original hierarchy. Expand the Members and subfolders to preview the items stored within them on the right pane. Then click Next.
Step 9: After selection of the folders and files, select filters from the available range to ensure only the selective data is downloaded in the backup. Click Next and proceed further.
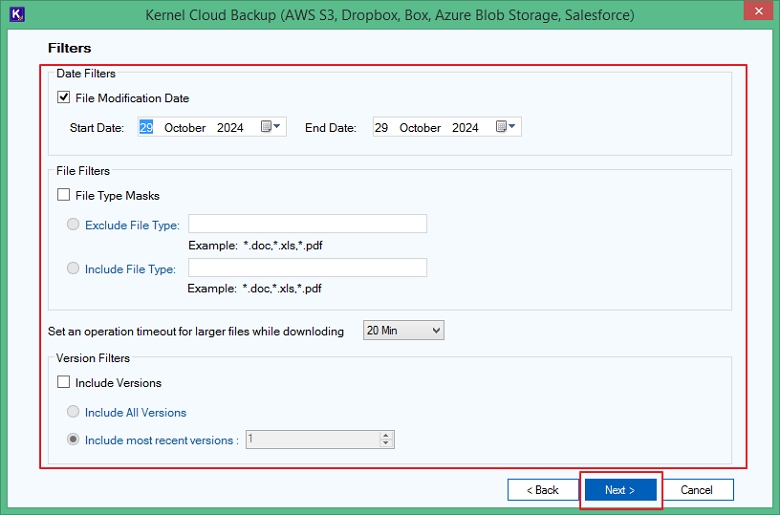
The filters provided in the tool includes:
- Date filters: Provide the file modification date range to backup latest data or extract Box data for a specific date range.
- File filters: Select to provide File Type Masks, i.e. you can mention certain file extensions like .doc, .pdf, .pst, etc. to include or exclude in the data backup.
- Set an operation timeout for larger files while downloading to avoid consuming unnecessary time.
- Version filters: Allows you the flexibility to Include All Versions or Include most recent versions (as mentioned count).
Step 10: Provide the destination path from your system to save the backup file by clicking on Browse button and click Next.
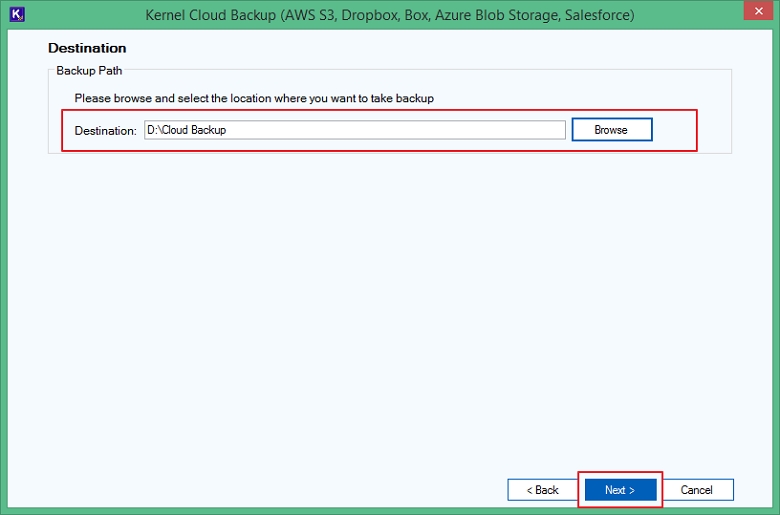
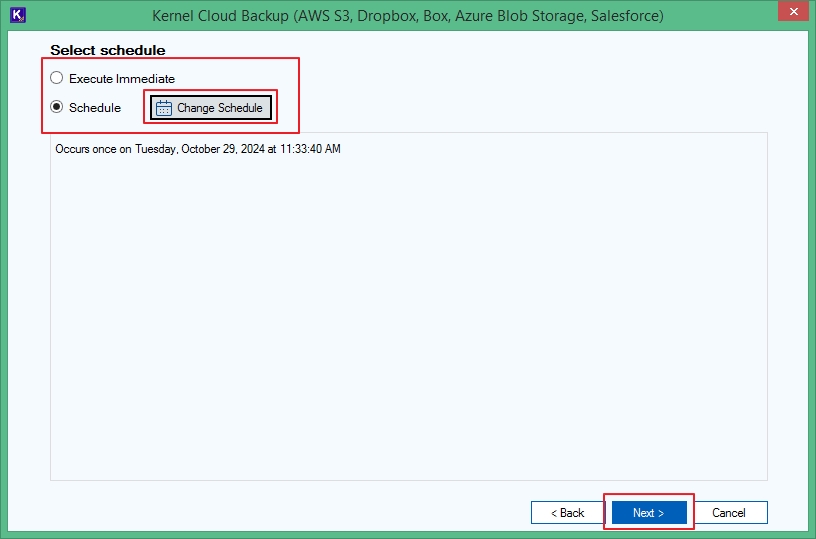
Step 11: You can either select Execute Immediate or Schedule to run the process later according to your convenience. Click on Schedule and then Change Schedule to adjust the time and date for running backup.
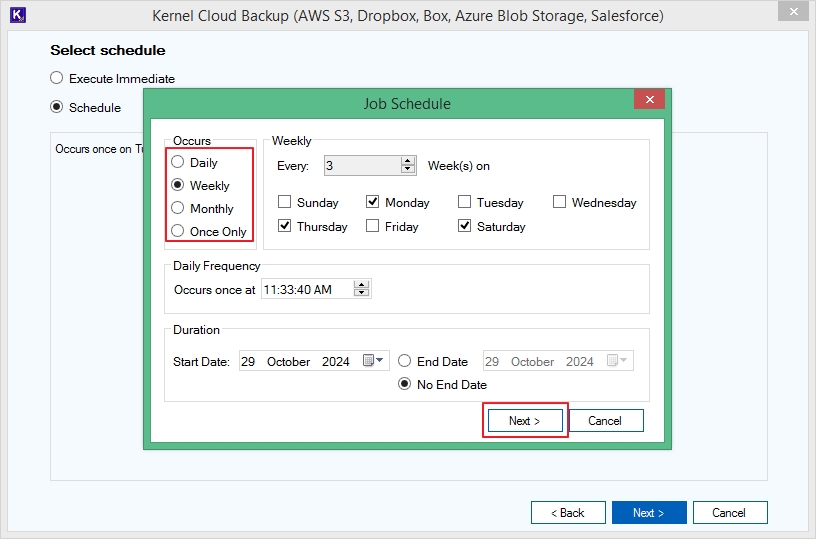
Step 12: From the Job Schedule window, select when you want it to occur (Once Only, Monthly, Weekly, or Daily) and then mention the Duration (Start Date and End Date), then click Next to start the backup process.
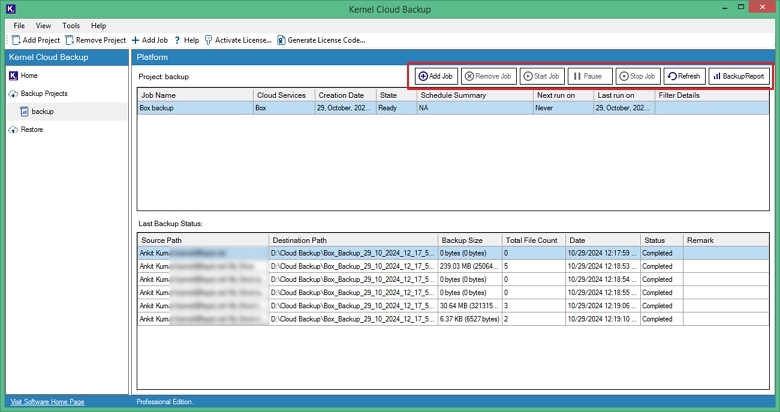
Step 13: This begins the Box data backup process, and you can see the real-time status of the process on the right pane of the window by clicking on Project Name you created below the Backup Projects.
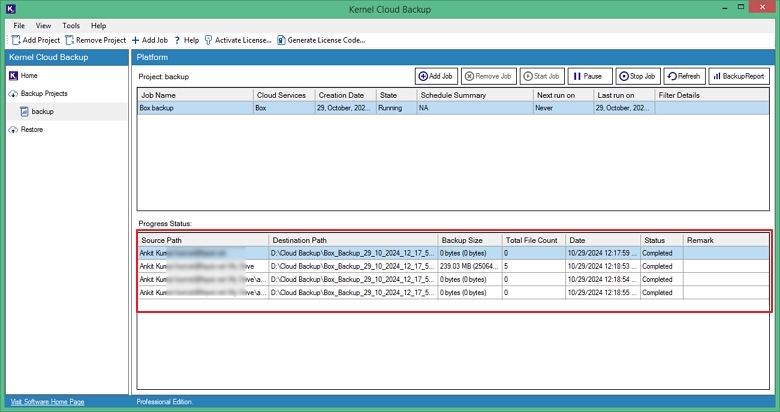
Step 14: Once the process is completed, you’ll see the Job in Ready state. On the same screen, you will see multiple buttons on the top of the job summary as:
- Add Job: Add a new job to the list of jobs running and completed.
- Remove Job: Remove any selected job that is completed from the list.
- Start Job: Start and add any completed job again to the queue.
- Pause: Click to pause a job that is in Running state.
- Stop Job: Stop any running job in between before it comes to Ready state.
- Refresh: Click to get the most recent status of the backup process.
- Backup Report: Get a detailed preview of the items backed up mentioned with their status.
Step 15: You can save the Box cloud backup summary to a CSV file for your reference.
