Read time 7 minutes
Google Drive, a vital component of Google Workspace, is a very useful cloud application. There are trillions of users worldwide due to its reliable services and offerings. It offers about 15GB of free storage to users along with a default storage location for Google Docs, Google Slides, and Google Sheets documents.
In this blog, we are helping users looking for methods to move or transfer their files and folders to Google Drive to access, view and edit files online from any location.
Check out each of the methods carefully and choose the best one for your use.
1ST Method: Importing Files/Folder to Google Drive using Drag-Drop Action
It is a very easy method to import files or a folder to Google Drive. If you want to move files to an existing folder, then open it directly or create a new folder in Google Drive and then open it.
- Sign-in and open your Google Drive.
- Expand or open the folder to which you want to import the selected files.
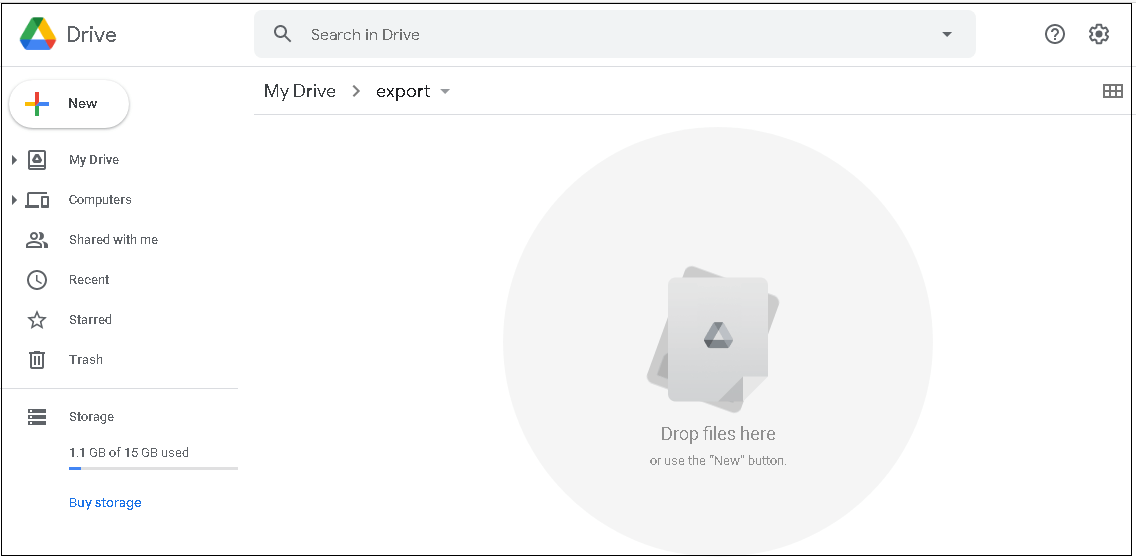
- Minimize the size of the folder from which you want to drag the files to the Google Drive folder.
Select and slowly drag the files from the system drive folder to the Google Drive folder. The result would be like this with the upload status at the bottom corner of the page.
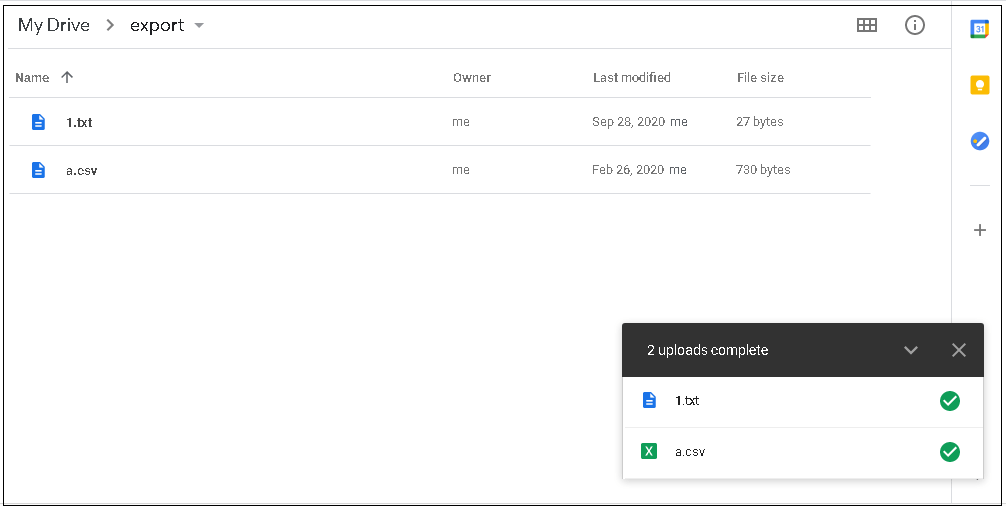
- You can select as many files from different folders one after another and drop them to the Google Drive folder anytime.
The process is similar to the one given above. Just open the Google Drive folder, keep it in full size and then drag the desired folder from the system and drop it to the Google Drive folder. It will soon get uploaded or imported to the Google Drive folder.
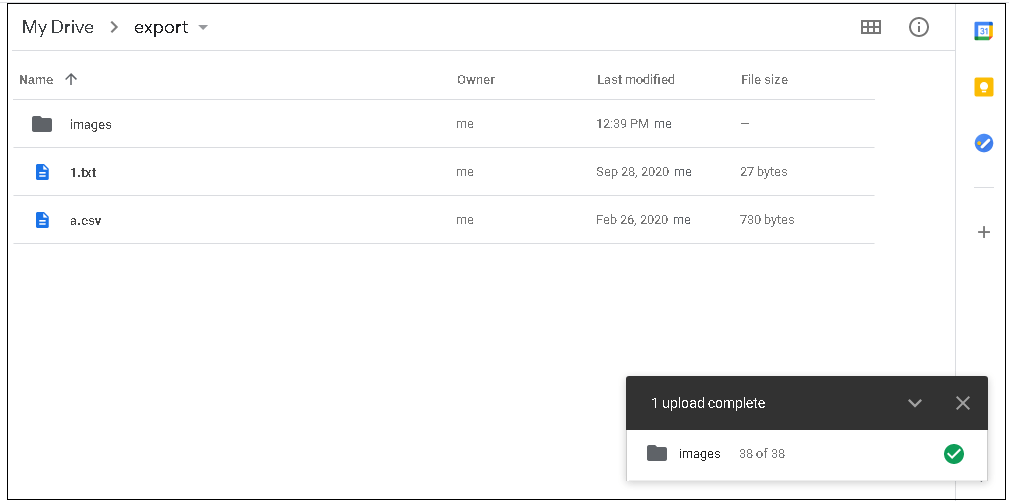
Note: Users can easily drag and drop multiple folders using the Ctrl key to select multiple folders together.
2nd Method: Importing files/folder to Google Drive using the Upload option
Users can find the Upload File/Folder option under the New option in the Google Drive user-interface using which they can upload files or a single folder from the system drive.
- Sign-in and launch Google Drive on your system.
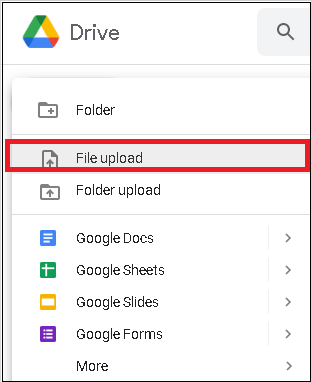
- Click on the New tab from the left panel and then select the File upload option.
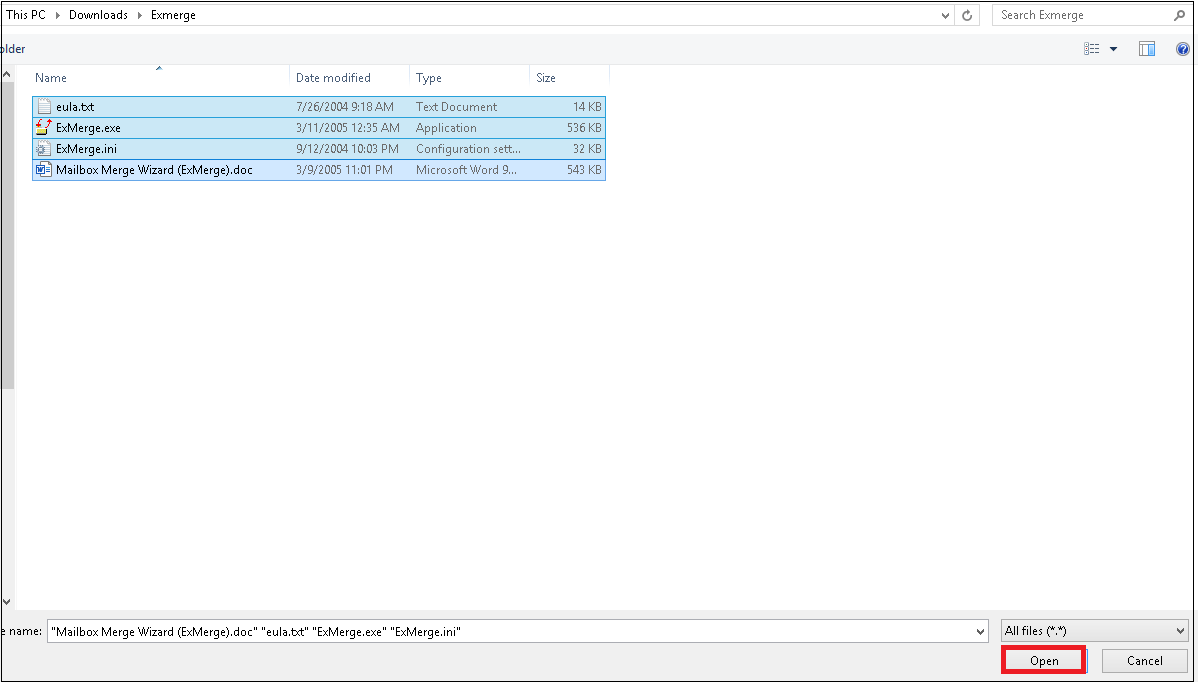
- Next, browse and select the desired files from the system and then click on the Open option to upload them directly.
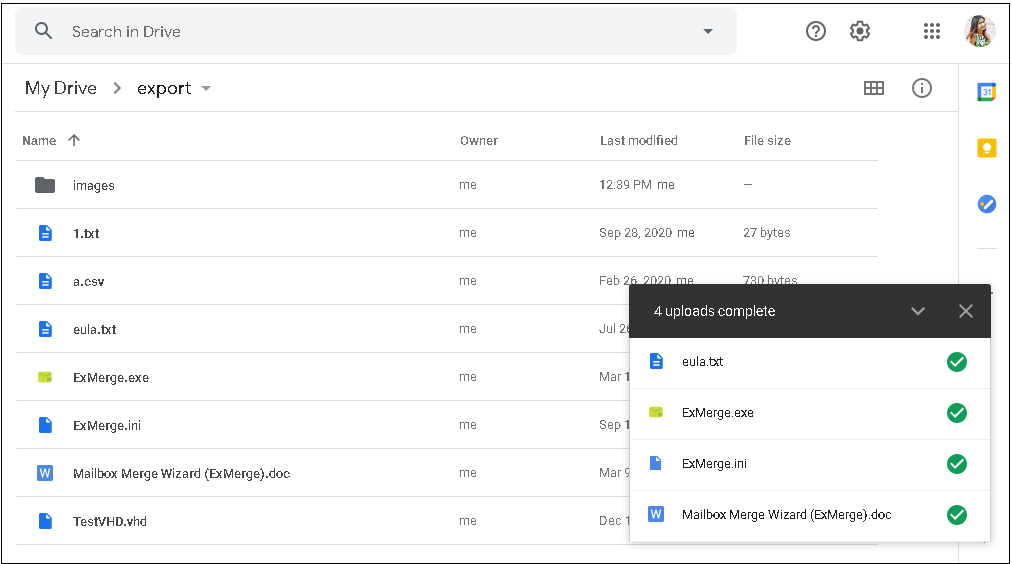
- The files will get uploaded very soon. After that, the file upload status will be displayed.
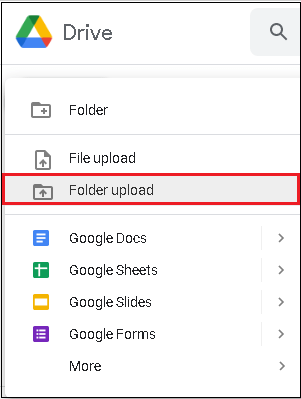
- After launching Google Drive, follow New>Folder upload.
- Choose the desired folder from the system and click on Upload.
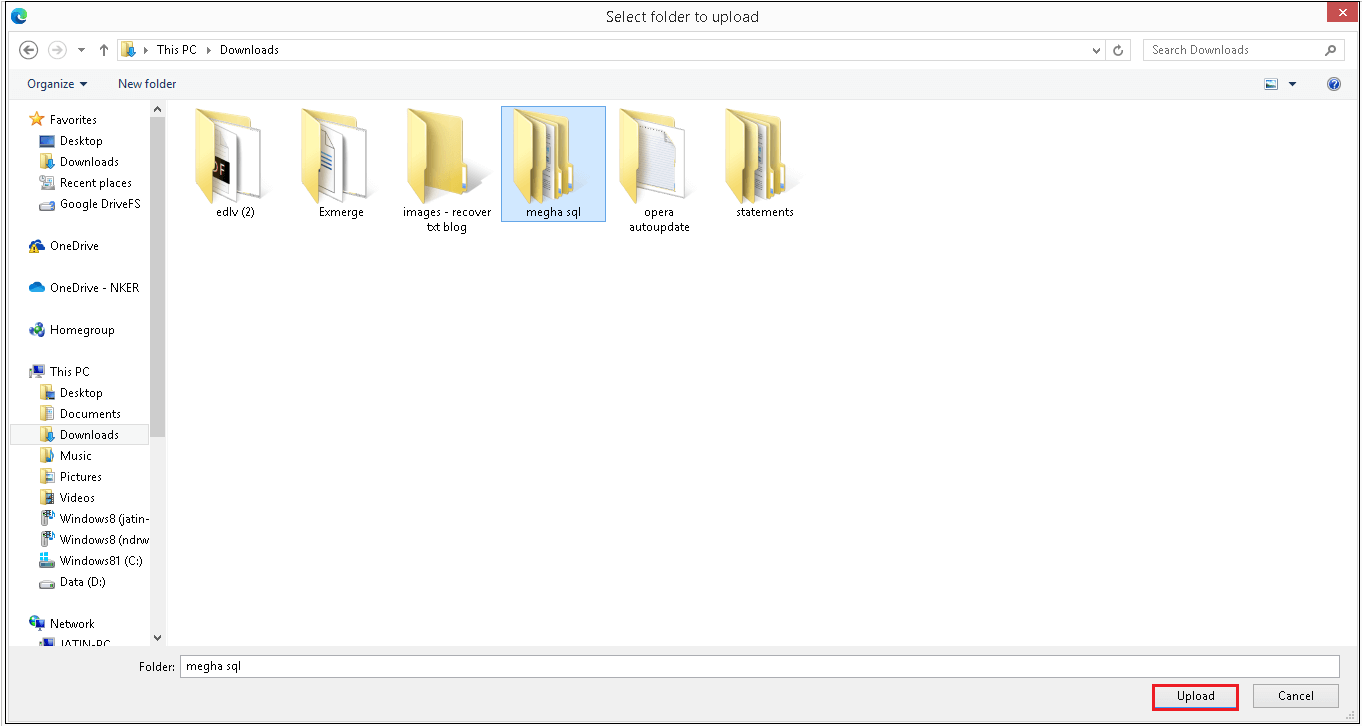
Note: Users can select only a single folder through the Folder Upload option. - Next, a confirmation message may appear with a warning. Click the Upload option to continue.

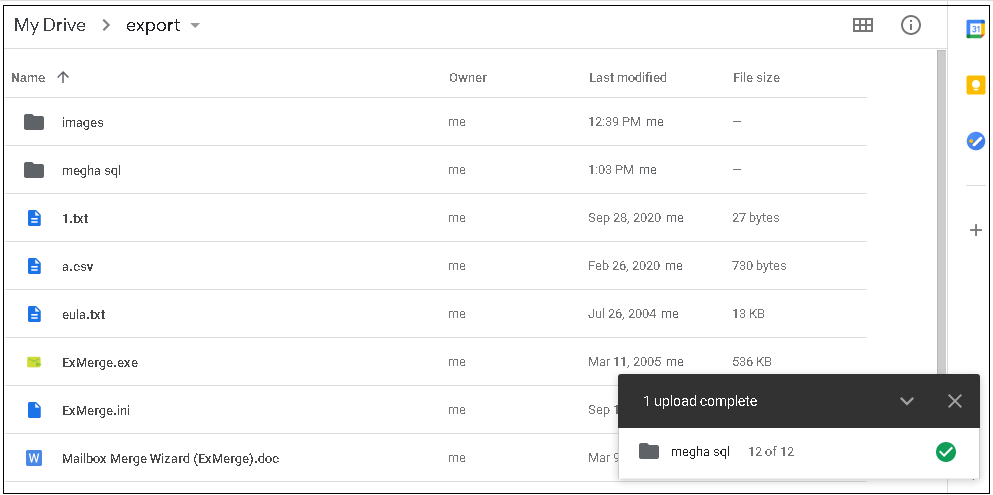
- The folder is successfully uploaded.
3rd Method: Importing files/folder to Google Drive using the Backup & Sync application
This method involves downloading and installing the Google Backup & Sync application on the system, which will automatically create a Google Drive folder on the system. Users can open this folder and drag the files from the system to drop them here. The download page link for the Google Backup & Sync application is – https://support.google.com/drive/answer/2374987
How to move unsupported files to Google Drive?
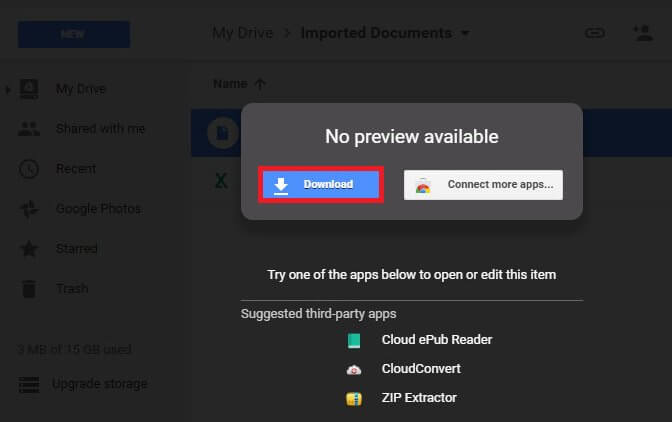
Google Drive supports the upload or import of the unsupported files and formats but does not allow users to view them using the Google Drive interface. Users need to click on the Download option that appears when any user tries to view the unsupported file format in Google Drive. The screen also suggests the third-party applications which can be installed on the system to view the file.
Google Drive users can turn on a setting Convert Uploads by visiting the link – https://drive.google.com/drive/settings and selecting the checkbox saying Convert uploaded files to Google Docs editor format. Click the DONE option at the top right to save this setting.
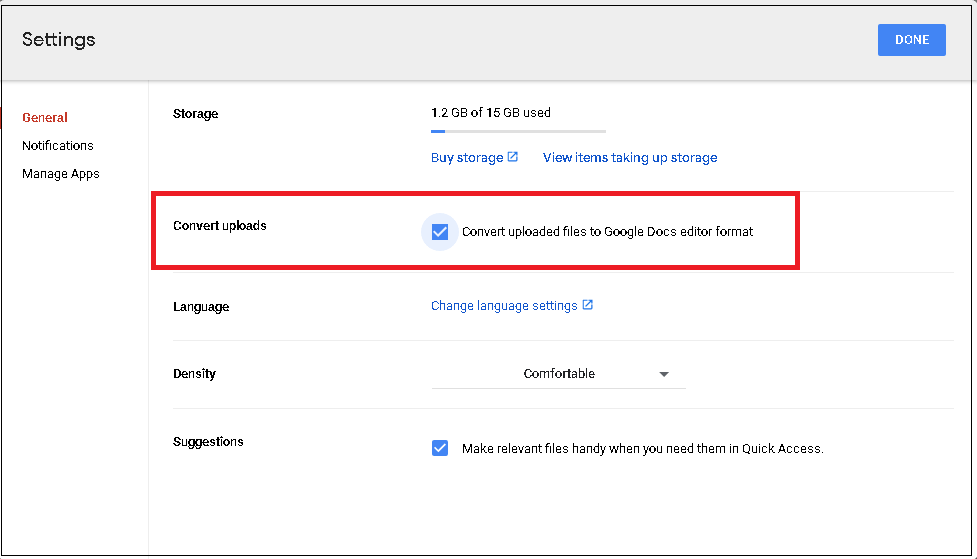
Now the uploaded formats will be automatically converted into the Google Drive supported formats.
Some common file formats/extensions supported by Google Drive are:
.GDOCX, .GDRAW, .GFORM, .GLINK, .GMAP, .GSHEET, .GSLIDES, .GTABLE, .3GPP, .AI, .AVI, .BMP, .CSS, .CSV, .DOC, .DOCX, .DXF, .EPS, .FLV, .HTML, .JPEG, .JPG, .MOV, .MP3, .MTS, .ODS, .ODT, .OGG, .PAGES, .PDF, .PHP, .PNG, .PPT, .PPTX, .PS, .PSD, .RTF, .SVG, .TIF, .TIFF, .TSV, .TTF, .TXT, .WAV, .WMV, .XLS, .XLSX, .XPS, .ZIP.
We got three different ways to import files and folders to Google Drive, and all these methods are free and easy to follow. But there are situations when users need to import files/folders to Google Drive from destinations like OneDrive for Business, another Google Drive account, and File System. A professional Google Drive migration tool is essential in such situations. We would like to suggest Kernel Google Drive Migration software to migrate data to Google Drive from different destinations. It automates and simplifies the migration process considerably, providing advanced facilities like filtering, mapping, and more.


