Read time: 12 minutes
The online cloud storage space OneDrive helps users to store personal or professional data securely. OneDrive serves as a central hub for documents and files, but the need to transfer OneDrive files to another account arises frequently. Whether it’s due to business mergers or personal file organization, transferring data without data loss is crucial.
Users lacking technical expertise struggle to move files from OneDrive to another OneDrive. This blog will guide you to easily transfer data between OneDrive accounts. We will use methods like drag & drop, downloading/uploading, etc. However, manual methods have certain limitations. For efficient data transfer, we will also use a specialized migration tool designed for OneDrive.
Manual Methods to Transfer OneDrive Files to Another Account
The methods given below are 100% reliable and authentic. However, any technical issue can lead to data loss. Therefore, we recommend you to backup your OneDrive files and folder. Working methods used by many organizations to transfer OneDrive data are as follows:
Method 1: Download & Upload Files
It’s a very straightforward data transfer method. Users need to download files from source OneDrive account. Then, upload the files to the destination OneDrive account. The steps to do so are:
Step 1: Go to the OneDrive account from which you need to move the files.
Step 2: Select the files or folders and download them to your local system.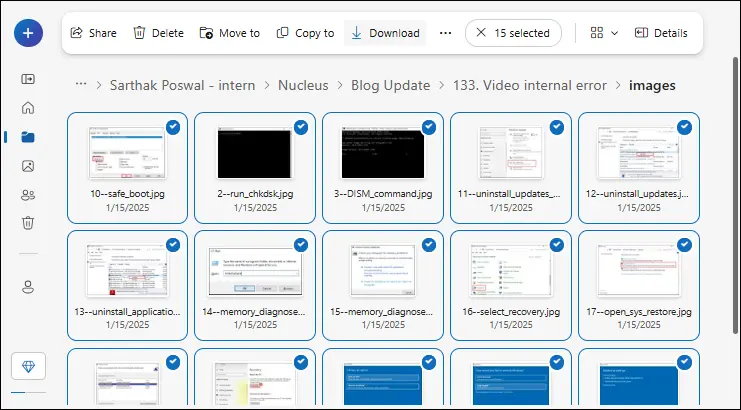
Step 3: Go to the OneDrive account where you want to upload the file.
Step 4: Click on the + icon. Select Upload Files or Upload Folder option.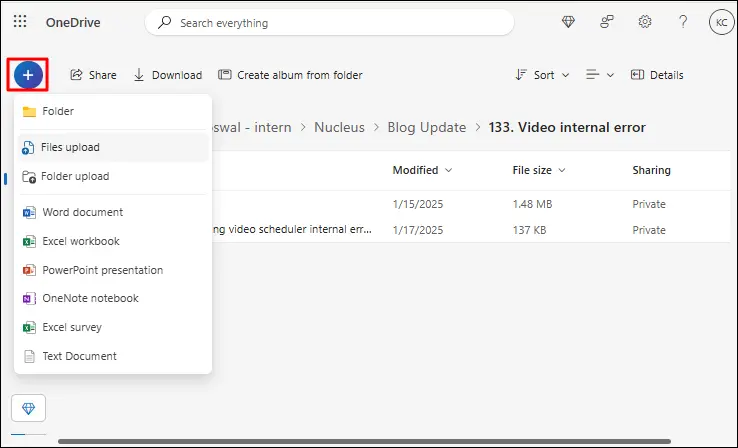
Step 5: Browse to the location where you saved the downloaded files in Step 2.
Step 6: Select the file(s) and click Upload.
Multiple files or folders from OneDrive are downloaded in ZIP format. Users must extract all the file(s) and folder(s) before uploading them to the destination OneDrive account. In the case of a single file, you can download and upload it without any extraction.
Method 2: Share OneDrive Files/Folders
Users can also use the sharing option to transfer file from OneDrive to another OneDrive account. This method doesn’t require the need to download or upload any data. To share your OneDrive data, follow the following steps:
Step 1: Go to your source OneDrive account.
Step 2: Select the files to transfer and click the Share button.
Step 3: In the new dialog box, enter the email of the other OneDrive account. Then, click on the pencil icon and select the permission level as Can edit.
Step 4: Click the Send button to share the files to another OneDrive account.
Step 5: User can also click the Copy button to share the files. Anyone with the link can access the files. The link sharing settings can be modified as per user requirements.
Step 6: Go to the other OneDrive account (destination OneDrive account). Accept the invitation you received from the source OneDrive account. If you choose the copy link method, then paste the link in the URL and open it.
Step 7: You will be able to access the file(s) and folder(s) shared by the source OneDrive account.
Step 8: To copy the data to the destination OneDrive account, select all the shared data and click on the Copy to button.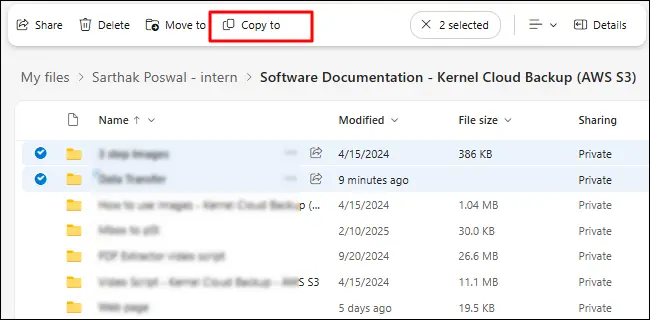
Step 9: Select the folder or path where you want to store the data and click Copy here.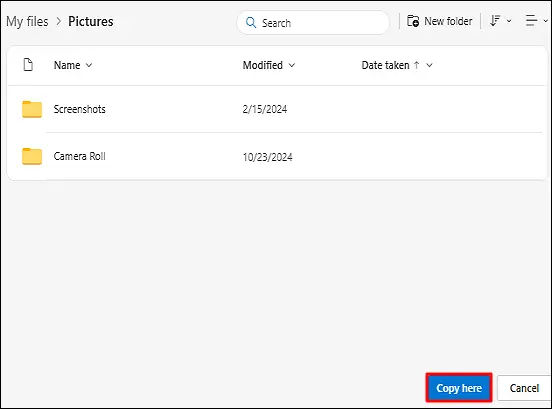
Method 3: Drag & Drop Files Between OneDrive Accounts
Dragging the files from one OneDrive account and dropping them to another OneDrive account is the simplest method to copy OneDrive files to another OneDrive account. Here are the steps for this method:
Step 1: Login and open the source OneDrive account in a browser.
Step 2: Open another internet browser and login with the destination OneDrive account.
Step 3: Open both the browsers side by side.
Step 4: Select the files to move. Drag all the selected files from source OneDrive account and drop them in the other browser (destination OneDrive account).
Step 5: Repeat the same process unless all the files are transferred.
If you have OneDrive desktop application installed, you can use it for the drag & drop method. Open the application and a browser (with destination OneDrive account) side by side. Then, drag the required files from the application to browser.
Important Points to Remember
When you move OneDrive files to another account, take care of the following points to avoid data loss or any data transfer errors.
- A stable and robust internet connection is essential to transfer file from OneDrive to another OneDrive, especially with large files or folders. Insufficient bandwidth can lead to interruptions and data corruption.
- Make sure no other users are actively editing or using the files you want to transfer. Moving and accessing a file at the same time can result in incomplete transfers.
- Keep notice of OneDrive’s file size and upload/download limitations. Microsoft allows a limit of 250GB per file. Exceeding these limits can lead to transfer failures or delays.
- When sharing or copying files, allow or assign appropriate permissions. Incorrect permissions can lead to security and authorization issues.
- Verify that the destination OneDrive account has sufficient storage capacity to accommodate the transferred files. Transferring more data than the storage limit can lead to transfer failures or data loss.
- Some users may face connection errors when accessing the OneDrive data. Try turning off firewall or remove proxy settings to fix “There was a problem connecting to OneDrive” or similar errors.
How to Migrate OneDrive to Another OneDrive with Migration Tool?
Manual methods for moving OneDrive data are helpful for small data size and personal OneDrive accounts. However, sometimes organizations have to transfer data of numerous employees from one account to another. For large data transfers and migrating data between OneDrive for Business accounts, you must use a specialized OneDrive migration tool.
Kernel OneDrive Migration tool is an advanced tool that bypasses all the limitations of manual methods. It’s the best tool to transfer files of any size with complete integrity. Use this advanced software for an effortless data migration. The tool helps to transfer data across different OneDrive for Business accounts. Also, perform bulk migration while maintaining the original folder hierarchy and structure.
Easy Steps to Move OneDrive Files to Another Account
Here’s the step-by-step guide to transfer files from one OneDrive to another account with the OneDrive migration tool:
Step 1: Download, install, and launch the Kernel migration tool.
Step 2: Select and right-click OneDrive for Business option in the source pane. Select Add OneDrive for Business to add the source OneDrive account.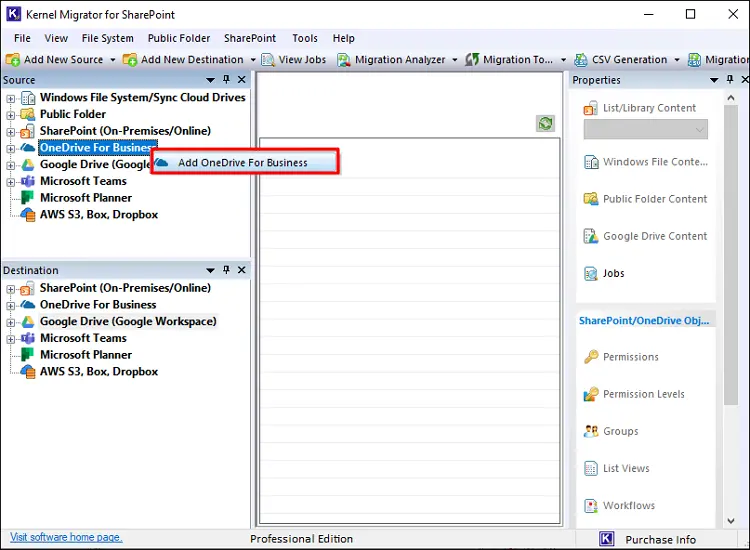
Step 3: Provide a project name and choose a suitable login method (Basic and Modern Authentication). Enter the credentials as per the login method you choose. Click OK to connect.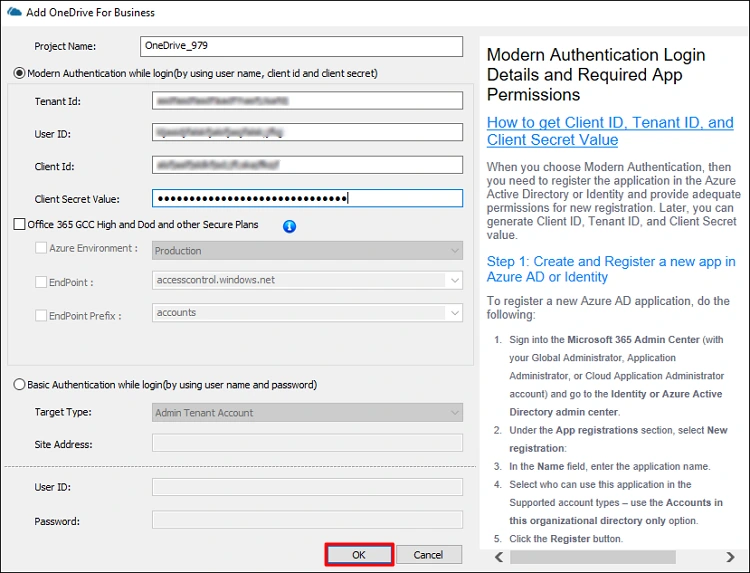
Step 4: In the OneDrive User(s) Adding window, select Automatically Adding and click OK.
Step 5: Right-click OneDrive for Business in the destination pane. Select Add OneDrive for Business to add the destination account just like you added the source account.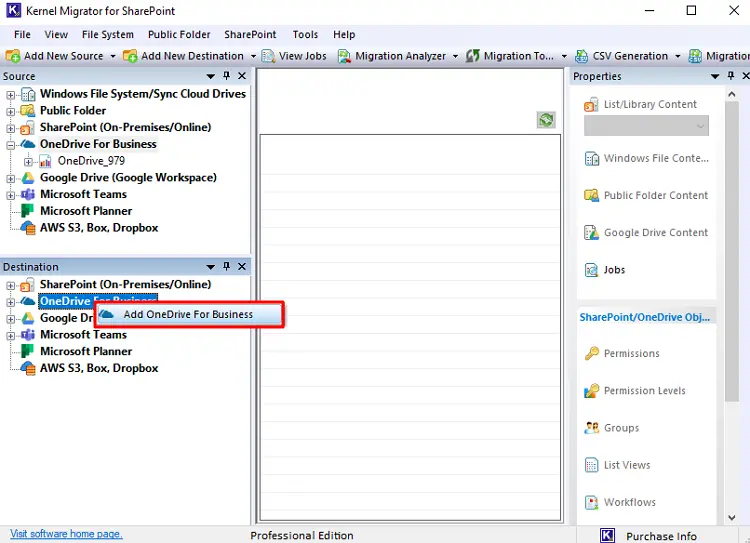
Step 6: Enter the project name, select login method (Basic and Modern Authentication) and provide credentials. Click Ok to continue. When asked for OneDrive User(s) Adding details, select Automatically adding.
Step 7: Expand the OneDrive account in the source pane and right-click Tenant Administration. Choose Migrate To-> OneDrive for Business.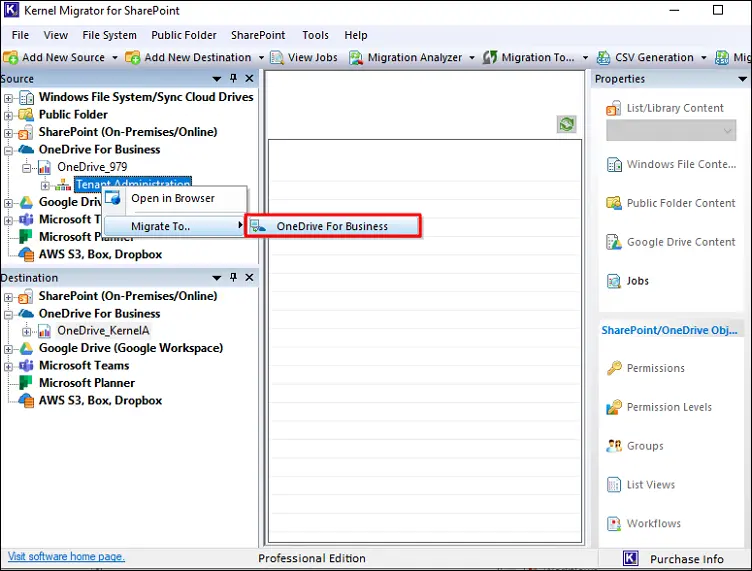
Step 8: The migration wizard will open. To add more users to the list, click the Add User(s) button. To remove a user, select the user and click Remove. Click Remove All to remove all the users at once.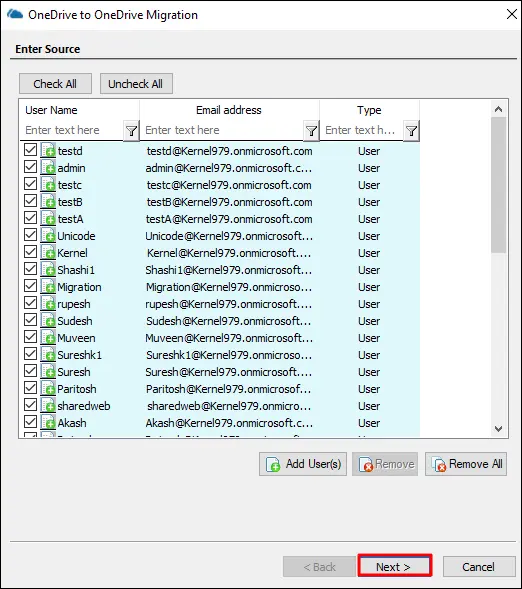
Step 9: Select the destination account by its project name and site address.
Step 10: Map the source with destination. You can also do mapping by uploading a CSV file. Click Map Automatically to map the users automatically.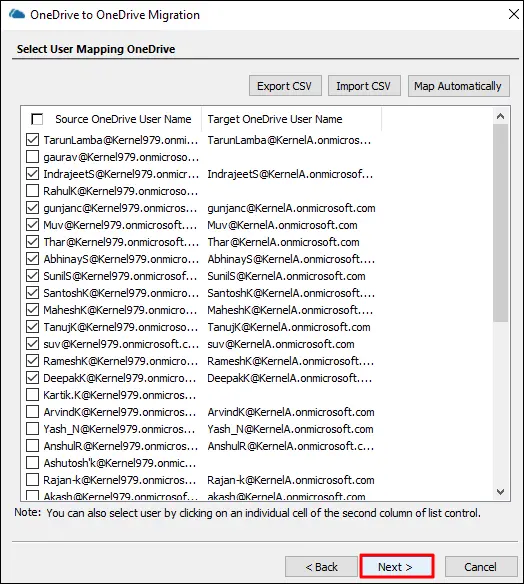
Note: Make sure that all source users are mapped correctly to avoid errors.
Step 11: Use built-in filters to migrate user-specific data only. Then, click Next.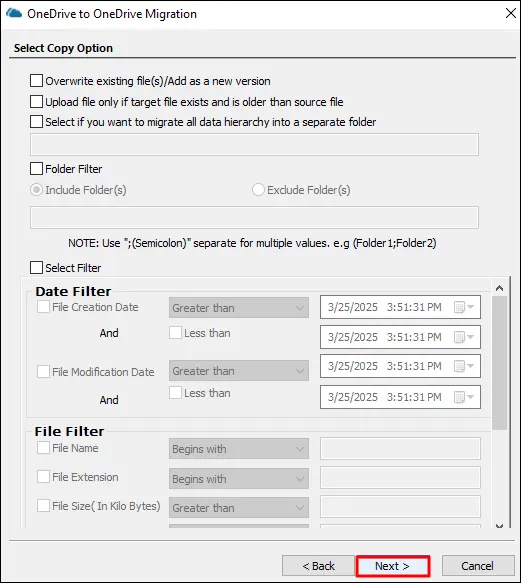
Step 12: Tick the option Migrate Permissions to migrate any existing permissions with the data transfer. If required, you can also do user remapping using the option Remap Users/Groups.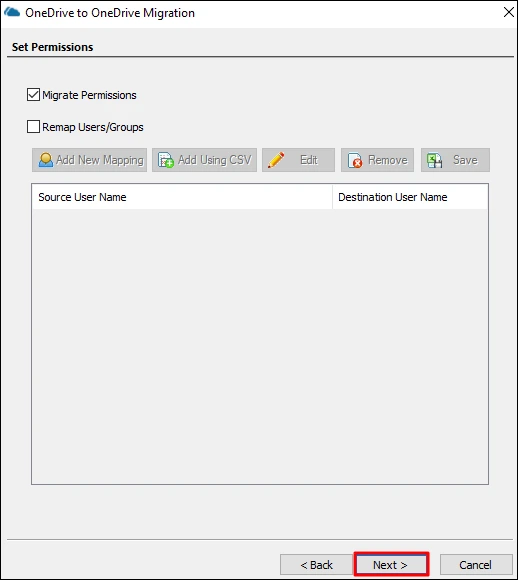
Step 13: Choose the option Execute Immediate to run migration immediately. Select Schedule to configure the migration for a later date/time. Click Next to proceed.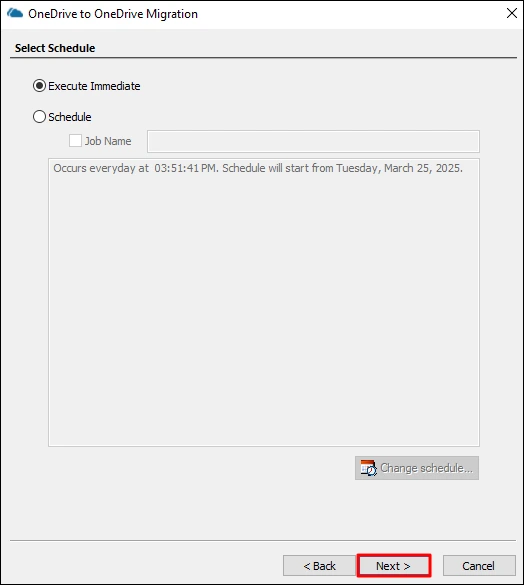
Step 14: Read the migration summary. In case anything is wrong, go back and make changes. If everything is correct, click Next to migrate OneDrive to another OneDrive.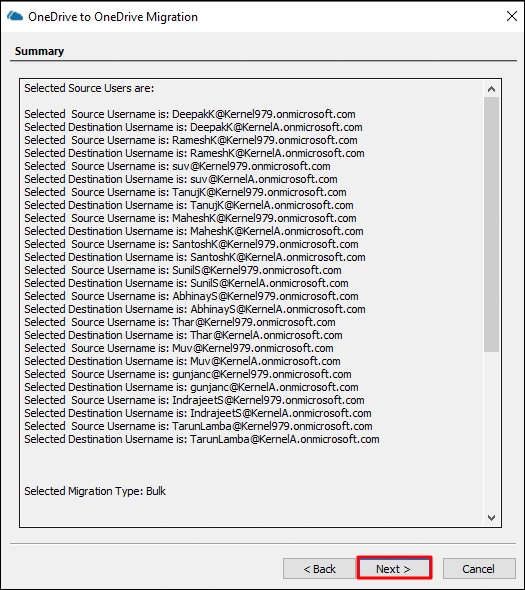
Step 15: The OneDrive migration will begin. To terminate the process in the middle, press Stop Process.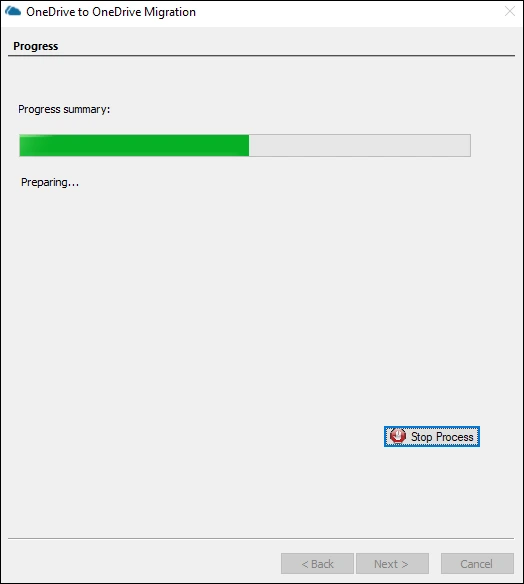
Step 16: After the migration is complete, a completion summary will be available with all the necessary information.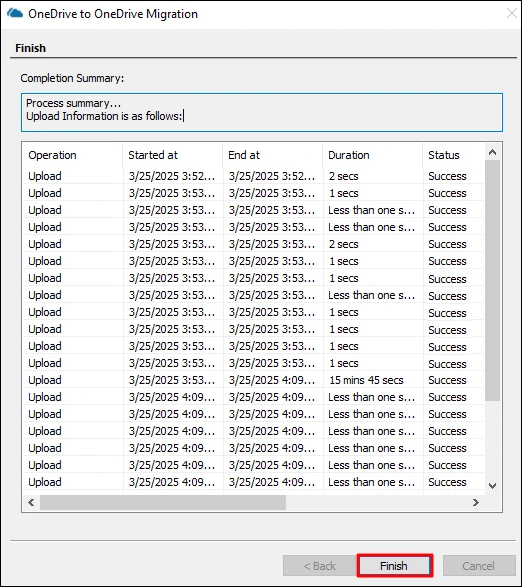
Conclusion
Moving data across OneDrive accounts is a time taking task. For small data transfer manual methods may work. But if you have data of multiple users, then use a professional migration tool to transfer OneDrive files to another account. The tool will automate the data transfer while maintaining original file/folder structure. Additionally, the tool can also migrate SharePoint across different tenants.
Frequently Asked Questions
A: The most common methods to transfer files from one OneDrive to another OneDrive are drag & drop method and download/upload files. Users can also use the OneDrive desktop application to sync files and then move them. However, for effective data transfer, we recommend using third-party migration tools.
A: Simply moving or copying files will not retain permissions. You have to reassign the permission after the data migration. Alternatively, you can use a professional tool that is capable of migration permissions with complete data.
A: When you try to migrate OneDrive to another OneDrive account you have to consider some points to avoid transfer failures. Users must have a high bandwidth connection otherwise, moving large files will take a significant amount of time. Additionally, keep in mind the data download/upload limits during data transfer.