Read time: 7 minutes
SharePoint is a powerful tool that many organizations use to manage their documents, workflows, and team collaboration. One of the key features of SharePoint is its ability to manage users access at different levels. SharePoint has several permission levels that allow users to access, edit, and manage content according to their roles and responsibilities.
However, there may be cases where you need to grant limited access to a specific user or group of users. This is where SharePoint’s limited access comes into play. So, here, in this blog, we will discuss what SharePoint limited access is and how to use it effectively to achieve organizational goals.
What is SharePoint Limited Access?
SharePoint limited access is a permission level that provides users with access to a specific item or folder within the site but restricts access to the rest of the site. This permission level is granted when a user is permitted to access an item or folder within the site but not the entire site or the parent folder of the item. This is useful when you want to share a document with someone who is not a member of the site but needs access to that particular document.
Limited Access never means that a user is blocked or limited. However, when you grant limited access to a user, SharePoint automatically creates a permission level for that user called Limited Access. The permission level is unique to the user and can’t be used for any other group or user.
How to use SharePoint Limited Access?
To grant limited access to a user or group, you must first ensure that the user or group has access to the parent site. Once the user or group has access to the parent site, follow these steps to grant limited access to specific content.
- Navigate to the site where you want to apply for limited access to a specific item.
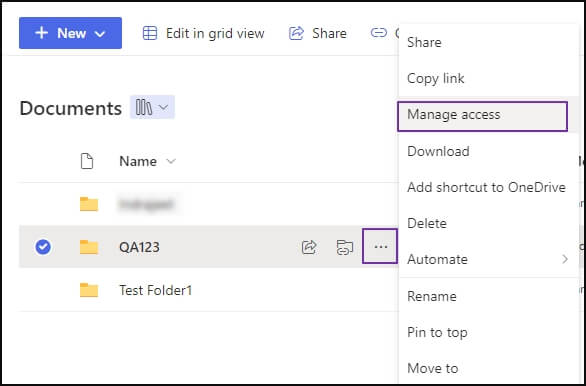
- Click on the ellipsis (…) next to the item (file, folder, etc.) you want to restrict access and then select Manage access.
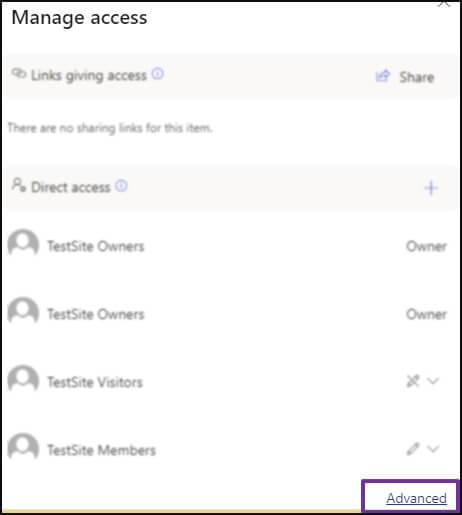
- In the Manage Access panel, click on Advanced in the bottom right corner.
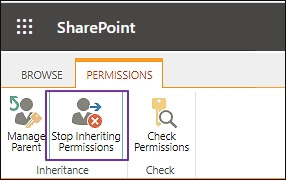
- Now, click the ‘Stop Inheriting Permission’ tab and then click OK on the pop-up to confirm it.
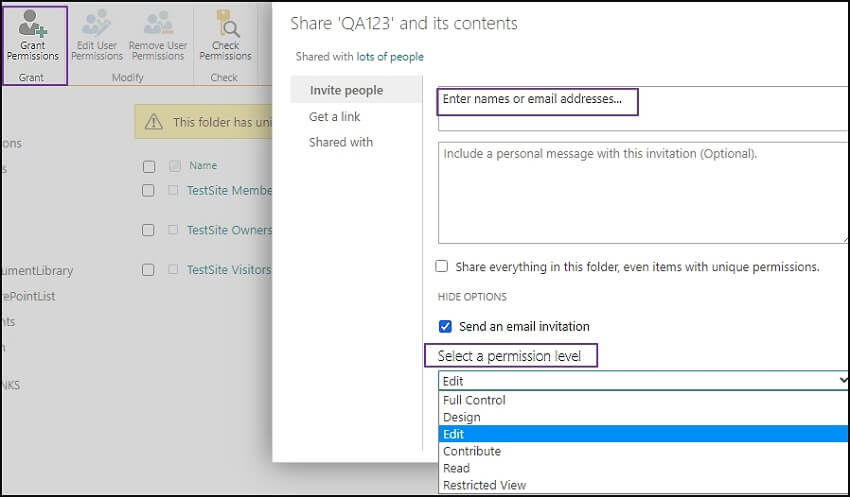
- Once you stop permission inheritance, select Grant Permission and enter the name or email of the user or group. Now, select the appropriate permission level for the user or group.
Note: You can’t assign limited access permission directly to a user or group. Instead, when you assign editing or other permissions to the item, SharePoint automatically assigns limited access permission to the other required locations.
- Click Share to grant limited access to the user or group.
Once you have granted SharePoint limited access permission, the user or group will be able to access the specific content you have granted them access to, but they will not see the rest of the site or library. Later, you can also customize permissions in SharePoint.
How to grant Limited Access to external users?
SharePoint allows you to grant permission to an external user, too. Here’s a brief process to add permission level on external users:
- In SharePoint, go to Site Settings
- Now click on Site Permissions and then Permission Levels
- You can now create a new custom permission level
Use “Add Items,” “Edit Items,” “View Items,” “Open Items”, “View Versions,” and “View Application Pages” to define Limited Access. Don’t forget to uncheck the “Delete Items”.
At document library level: To allow Limited Access to a document library, go to the specific document library where you want to add the users. Remove all previously granted permissions, stop permission inheritance, and add the external users to grant them the custom permissions that you created earlier.
At the folder level: Now, go to the folder to which you want to provide access to the external users. Make sure to stop inheriting permissions, remove current permissions, and now add the users to grant the permission level that was created earlier.
You can ask any one user (external) to log in and then try to access the allotted folder and see if they can access its content except the delete option.
This way, you can add limited access to external users in just a few simple steps.
Best practices for using SharePoint Limited Access
Here are some best practices to effectively use SharePoint limited access.
- Use it sparingly: Grant limited access only when it is necessary to protect confidential or sensitive information.
- Keep track of permissions: Make sure you track who has been granted limited access and to which content.
- Regularly review permissions: Review limited access permissions regularly to ensure that users and groups still need access to the content they have been granted access to. You can easily check SharePoint site access permissions to users and groups.
- Train your users: Ensure your users understand the importance of limited access and know how to use it.
Conclusion
With the strategy-driven practices, you can use limited access effectively and ensure your SharePoint site or library remains secure. Nevertheless, sometimes, we need to migrate SharePoint data, including permissions. One can easily migrate SharePoint permissions using an automated tool Kernel Migration for SharePoint tool. The SharePoint Migration tool is an all-inclusive migration solution that quickly migrates SharePoint data, including site collection, versions, metadata, and list & libraries.
Frequently Asked Questions
A- Sometimes, while managing permissions in SharePoint, we want to remove limited access permission from a particular site or document library. To remove limited access in SharePoint, you can follow the below steps:
- Navigate to the SharePoint site where the limited access permission is assigned.
- Click on the gear icon in the top-right corner and select Site settings.
- Under the Users and Permissions section, click on Site permissions.
- Find the user or group that has limited access permission and click on their name.
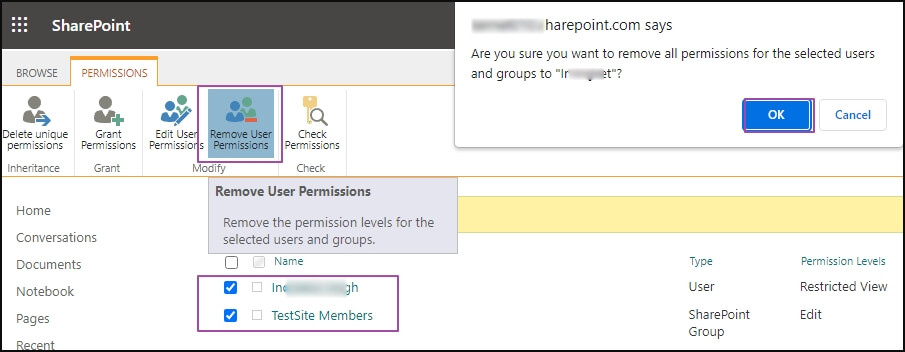
- In the ribbon at the top of the page, click on Remove User Permissions.
- Select the permission level you want to remove and click Remove.
- Click OK to confirm the removal.
A- Limited Access is a type of permission level that provide users with access to a specific subsite, list, library, or document without providing complete control of the site. With this access, users can make changes without affecting the overall site structure.
A- It allows you to regulate the access of particular content on your SharePoint site. You can manage whom and what amount of access you want to provide for folders and files that are sensitive.
A- There are no risk in removing Limited Access permission level in SharePoint. The only impact it makes is that the user will not have access to the specific file or folder once the permission is removed.