How to Save Gmail Emails With Attachments to Desktop?

Written By
Bob Maria
Updated On
May 27, 2022
Read time 6 minutes
Gmail emails contain a lot of sensitive information, but this information is not completely secured. The data can be lost or deleted and can never be retrieved if we do not have any backup.
In this blog, we will share some manual ways to create a backup of your Gmail emails with attachments and save them on other drives.
Google Takeout Tool is a great tool to back up Gmail emails to computer. It works great if the backup required is only with the limited number of emails with attachments. But with a bulk amount of emails, it is time-consuming and might cause interruptions during the backup process.
Below are the steps on how to save emails with Google Takeout.
Step 1: Log in to your Gmail account and select Google Account.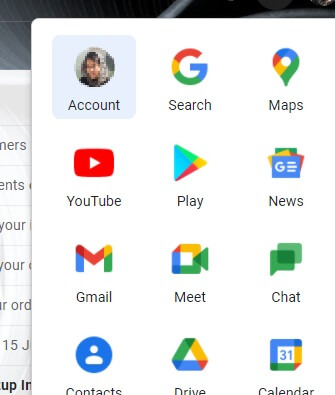
Step 2: Click on the Data & personalization tab on the left pane.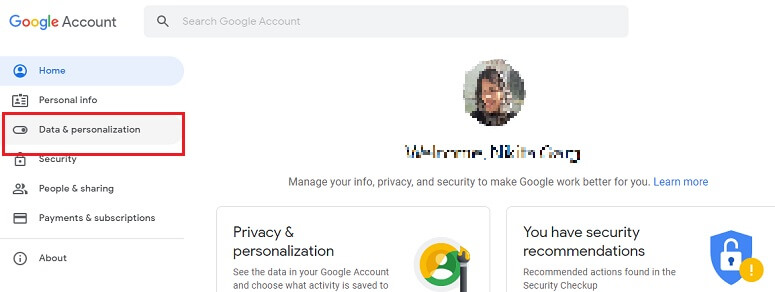
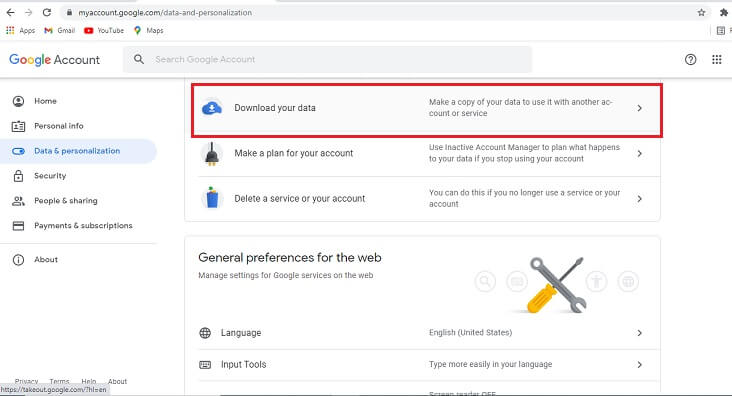
Step 3: Select Download your data.
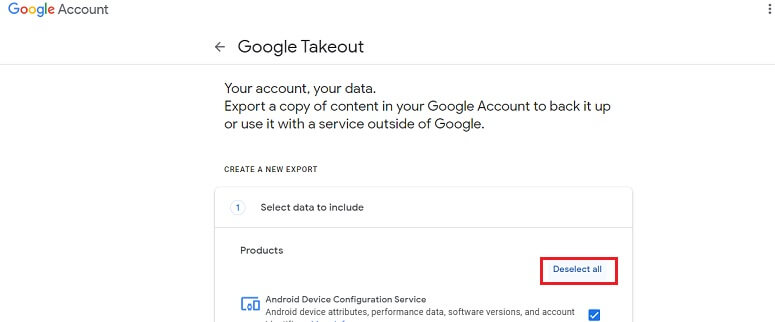
Step 4: You will see all the products are selected by default. Under the Select data to include option, click on Deselect all.
Step 5: Check the box corresponding to Mail and click on All Mail data included. This will open the Mail content options box. All the labels and default folders of the Gmail account are displayed here.
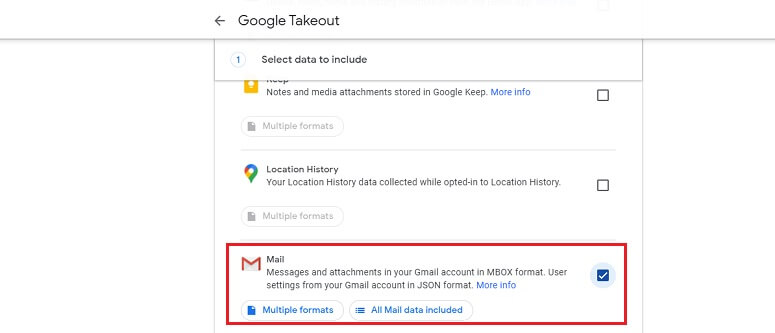
Step 6: Select any folder whose data you want to export. Click OK.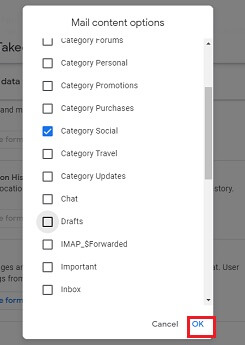
Step 7: Select the data you want to include and click on Next Step.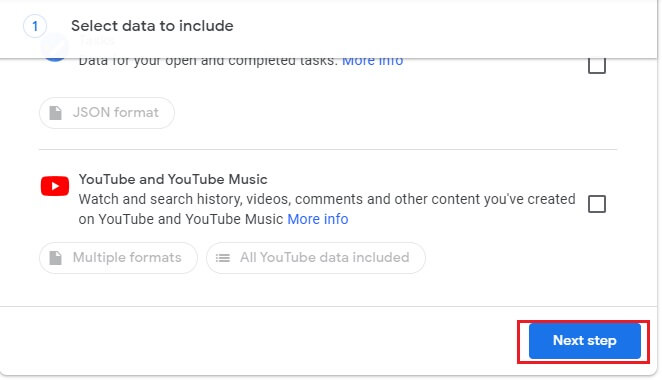
Step 1: Under the Delivery method of Customize archive format box, you will see four options i.e. Send download link via email, Add to Drive, Add to Dropbox, Add to OneDrive and Add to Box. Select Send download link via email.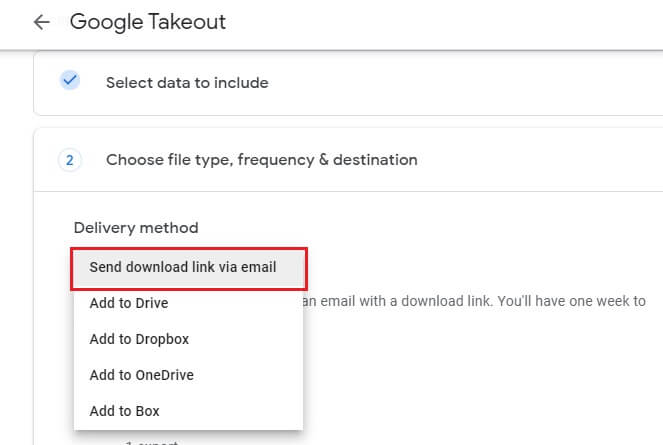
Step 2: To save the archive file on your desktop, you have to select either .zip or .tgz file type. Select .zip format as it is accessible on any Windows platform.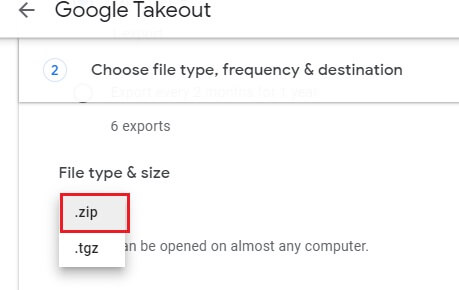
Step 3: Select the archive file size and click on the Create Export button.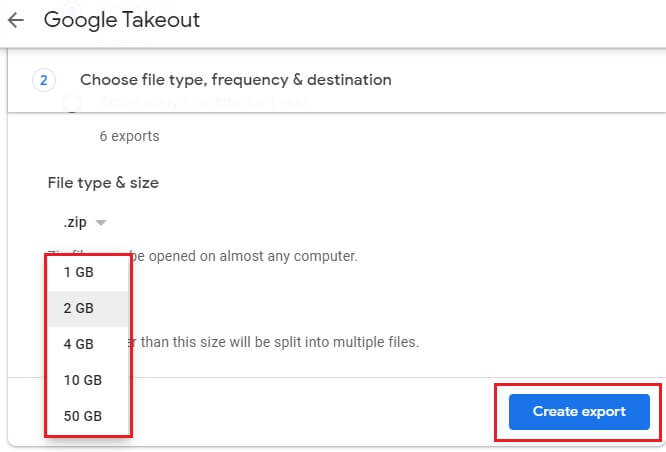
Step 1: Select Download under the Manage your Exports section.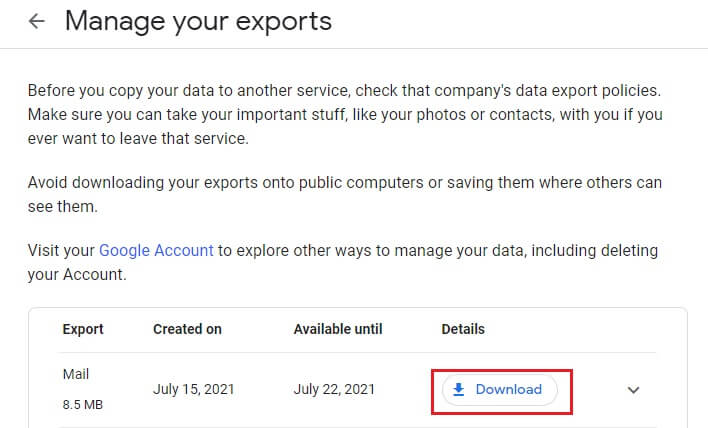
Step 2: You will be redirected to a new tab asking for the password. Enter the password and click on Next. The archive file will be downloaded.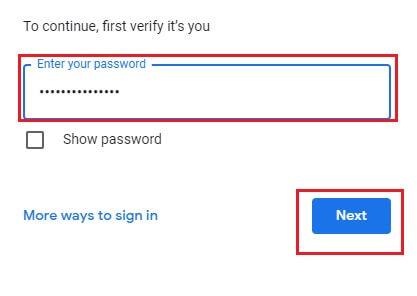
Step 3: The link to the archive file will be sent to your Inbox folder, which is applicable for one week.
Step 4: Open the mail and select Download your files which will work for the next seven days. Extract the ZIP file, which will be available in MBOX format. Import this MBOX file in the supported mail application and view the mail along with its attachment data. 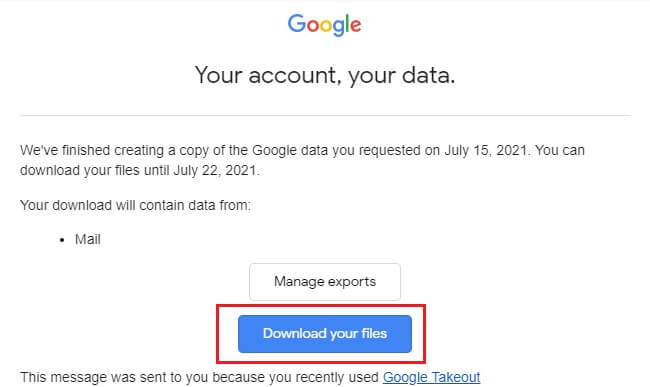
This method has many limitations, and you can save only one email at a time in pdf format.
Step 1: Log in to your Gmail account and open the email you wish to create a backup of. You have to save it as a PDF now.
Step 2: Select the Print all icon.
Step 3: A new window will open with the print option. Set all the settings as per your requirement and click on the Print button. The email will now be saved as a pdf file.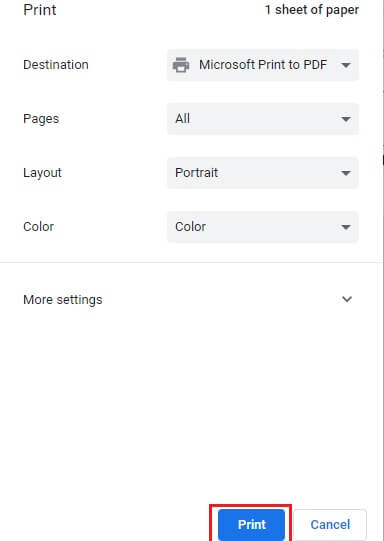
The above two methods are reliable for backup only if there are a few emails with attachments. Otherwise, these methods are time-consuming and have many limitations. Using a third-party Gmail backup tool can make the work much easier. Kernel Gmail Backup Tool is a fine utility that creates a backup of the entire email data from Gmail mailboxes at ease. It can save multiple emails with attachments without disturbing the data integrity in various file formats.