Read time 7 minutes
In the early ‘90s, people didn’t have the privilege to save copies of their photos in digital media storage devices such as flash drive or memory cards. Back then, photos were captured mostly by professional photographers inside their studio. Cameras that time used to have rolls/negatives of images which were eventually printed out in the physical format. Those printed images were then kept safe in photo albums for future generations to cherish the memories. However, printed photos don’t last long; either they fade, speckle, or crack with time.
With digitalization technologies, now we are able to capture high-resolution graphic images, take backups on storage locations, and print images in the desired file size and format. Moreover, with raster graphic editors like Adobe Photoshop, we can even restore damaged photos in their original health. Photoshop offers a wide range of format support and considered to be the best JPEG repair tool for windows systems.
Recover distorted images using Photoshop
In this write-up, we will discuss some significant features of Adobe Photoshop that will help you recover and restore your old damaged photos, even if they are cracked or crippled.
Photoshop is one of the most prominent tools used worldwide to fix distorted images. Developed and maintained by Adobe, Photoshop application is integrated with features like Noise reduction filters, Lab color mode, and several retouch & repair tools that can help you fix pixel density, reduce color and luminance, and correct flaws like spots, blemishes, and red-eye from your photos.
Some common features and functionalities of Photoshop that can be used to fix your damaged or distorted images are listed below.
- Lab color mode – This mode is specifically used to reduce luminance noise, brightness issues, and grey dots from your images.
- Retouch and repair tools – Photoshop has numerous repair tools integrated within, that can help you fix every single detail of your broken image.
- Noise reduction – The noise reduction feature fixes details like spots, grains, shadows, luminance noise, banding, and other irregularities in your image files.
We will discuss all the above-mentioned features in a more detailed manner.
Photoshop – Lab color mode
Like other color modes provided by Photoshop, such as RGB and CMYK, Lab Color Mode is also a widely used color model that allows users to specify any given color by putting numeric values across various channels.
Lab Color Mode is specifically designed based on how human beings see color and contrast in real-life images. With this mode enabled, you can fix brightness, colored spots like black, white & grey, and many other issues causing color disorientation in your images.
The following are the steps to enable Lab Color Mode in Photoshop and thereby reduce luminance noise from your photos.
- Launch Adobe Photoshop. Load the required image you want to alter.
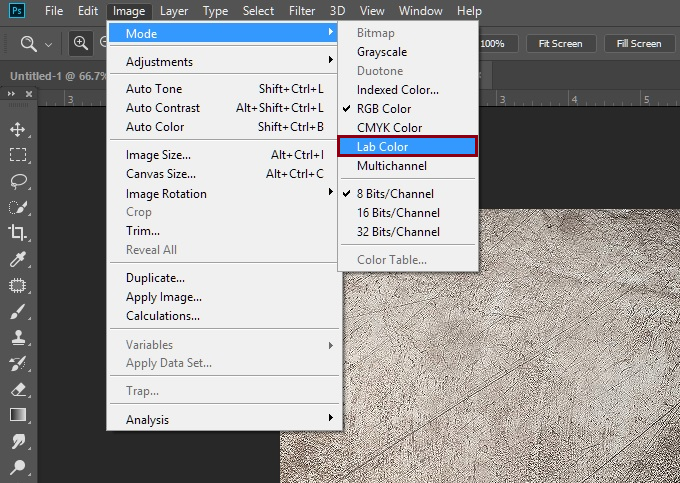
- Go to Image >> Mode >> Lab Color
- Select Layers and drag the current image to the Create New Layer icon in order to create a copy of the original layer.
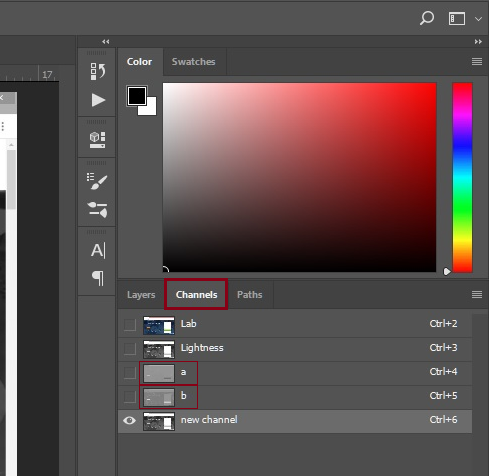
- Now, go to the Channels tab and drag the current image to the Create New Channel icon in order to create a copy of the lightness channel.
- The Channels tab offers two channels, i.e. the Lightness channel (for brightness) and channels a & b (for colors). Select the Lightness channel and modify the values accordingly to reduce luminance noise.
Photoshop – Retouch & repair tools
Photoshop is integrated with several retouch and repair tools that can help you rebuild the image with quality and fix imperfections in your old and blemished photos. Irregularities such as red-eye, spots, scratches can be easily fixed using the retouch tools.
Professional photographers are very fond of using this feature to enhance the quality of the images taken from their digital cameras.
Some of the prominent retouch and repair tools provided by Adobe Photoshop are the Healing Brush tool, Spot Healing Brush tool, Red Eye tool, The Patch tool, Clone Stamp tool, etc.
We will demonstrate the use of one of the retouch tools here to give you a proper understanding of how the tools function.
Consider using the Healing Brush tool to fix imperfection from your image file. Here are the steps one should follow in order to use the Healing Brush tool in Photoshop.
- Click on the Healing Brush tool icon.
- Click the brush sample and set values for desired brush options – Mode, Source, Aligned, Sample, and Diffusion.

- Keep the mouse pointer on the desired area to set the sampling point.
- The existing pixel contents get blended with the changes made.
Noise reduction filters in Photoshop
The Noise Reduction functionality in Photoshop eliminates spots, grains, red dots, halos, shadows, luminance noise, banding, etc. from your image files.
Adobe Photoshop provides two modes to alter or reduce noise in images, namely, Basic and Advanced. Typically, users do not get the expected results in basic mode. Therefore, it is always recommended to use the advanced approach to reduce noise and fix other bugs and disorientation from your images.
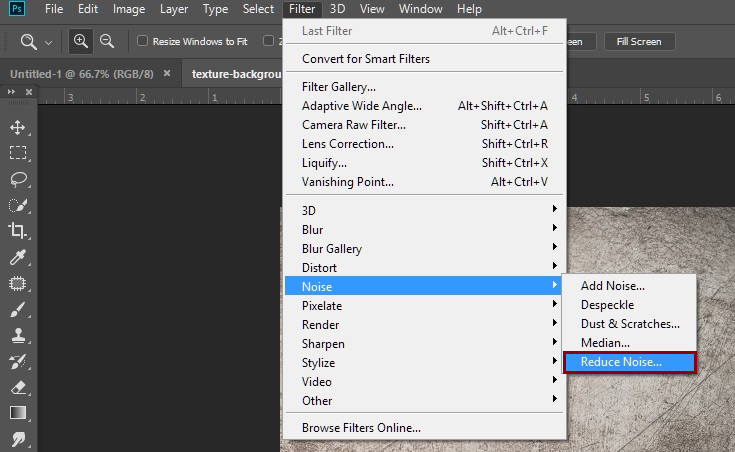
In order to use the Noise Reduction feature in Photoshop, follow the steps given below:
- Go to the toolbar menu located at the top bottom corner of the interface. Then, select Filter >> Noise >> Reduce Noise.
- Then, zoom in & out over the area of the image via the +/- button located just below the image preview.
- Select Basic from the right-hand side pane.
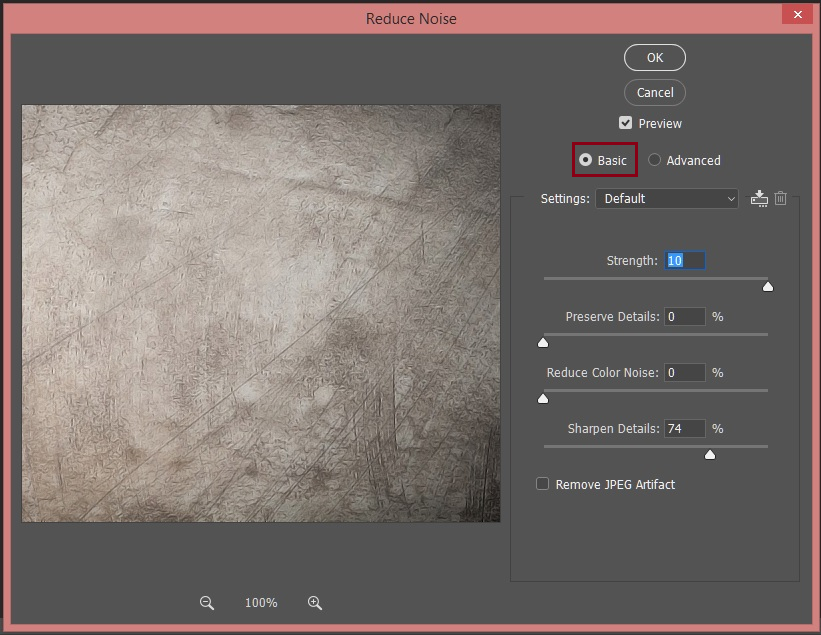
- Set the values accordingly – Strength, Preserve Details, Reduce Color Noise, and Sharpen Details sliders.
- Preview the results and click the OK button located at the top of the interface to save the changes.
Now, if the source file gets corrupt during the process or you come across a situation where the final image gets damaged or corrupted for any reason, what will you do?
Well, it’s common to have corruption issues in image files. If you had kept a backup of your source file, then you can easily retrieve the data back, but what if the final image is the only copy you left with, and its unfortunately corrupted. In such scenarios, you must seek resources in the form of third-party repair tools to fix corruption from your images or if you have a specific format corruption issue, you can opt to free methods available online to repair your image files. For instance, suppose you have an entire folder of corrupt JPEG files then you must seek resources in form of free methods to repair corrupt JPEG files.
Kernel Photo Repair tool is a popular alternative to repair corrupt and damaged photos. The tool is embedded with robust algorithms and is capable of restoring images irrespective of their file size and format.