

Read time 6 minutes
Even the latest Exchange Server versions, like Exchange 2019, are not completely secure, as data loss can happen due to manual errors like accidental deletion, EDB corruption, and access problems in Exchange Server. However, when a mailbox is deleted, it can be restored from Exchange 2019 database, as it is retained for some time. The Exchange retention policy ensures that the deleted mailbox remains in the database till the retention period expires (by default 14 days for emails and mail items and 30 days for mailboxes, which you can also set as per your needs). Once this period is over, the deleted mailbox will be removed permanently.
Once the retention period is expired, you’ll need to find reliable methods like third-party recovery tools to recover deleted emails from Exchange Server 2019. Let us see how one can recover mailboxes in Exchange Server.
How to recover a mailbox from Exchange 2019 after its deletion?
You can restore Exchange 2019 mailbox using the Connect a mailbox option in Exchange admin center. You can connect the deleted mailbox to an existing user account (which is not associated with any other mailbox) in Active Directory or to a new user account. To do this, first find out where the deleted mailbox is located. Run the given command to locate the mailbox:
Get-MailboxDatabase | Get-MailboxStatistics | Fl
- Go to Recipients > Mailboxes in EAC and click More…; now, click Connect a mailbox.
- When the list of the disconnected mailboxes is displayed, click the mailbox that you want to restore and click Connect.
- Click Yes to confirm the action.
- When the list of user accounts is displayed, just select the one that you want and click OK.
The deleted mailbox gets connected to the user account.
You can also connect the disconnected mailboxes using the Management Shell cmdlet. To do that, you can use these cmdlets:
Note: You can use the Get-User cmdlet to find the mailbox you want to connect.
However, these methods do not guarantee success if the Exchange database is corrupt or inaccessible. In that case, you need professional Exchange EDB recovery tool.
Recover mailboxes from Exchange Server 2019 with the tool
Kernel for Exchange Server efficiently recovers inaccessible, corrupt, or deleted Exchange data from corrupted Exchange databases and makes it available for preview. The tool allows saving the recovered mailboxes from Exchange Server 2019 to PST, active Outlook Profile, Exchange Online, or Office 365. Here are some of the offered features of the tool that helps an Exchange Database Administrator:
- Repair mailboxes from offline or dismounted Exchange databases.
- Recover deleted emails from Exchange mailboxes.
- Export data from IMAP servers to PST file, Live Exchange, or Office 365.
- Export all mailbox content including contacts, calendars, emails, etc.
- Simple drag-drop and copy-paste operations.
It is advised to dismount the Exchange database first so that offline EDB file is available for mailbox recovery. Then, visit the software web page and download the trial version if you have not bought it already. After the installation of the tool on your system, launch it, and follow these steps.
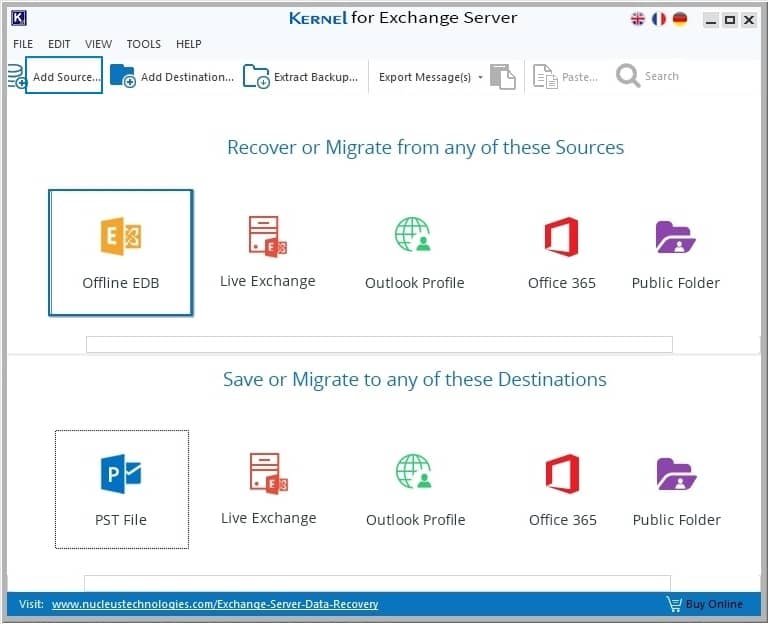
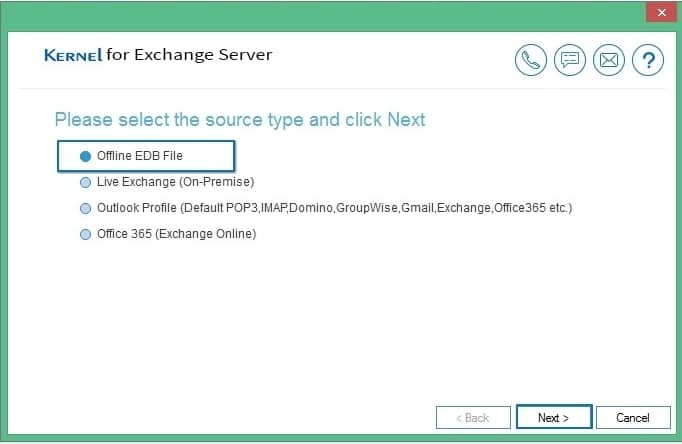
- On the start screen, either click Add Source or Offline EDB to add Exchange 2019 EDB file. In the new window, the Offline EDB file is selected by default, click Next to continue.
- In the new window, the Offline EDB file is selected by default, click Next to continue.
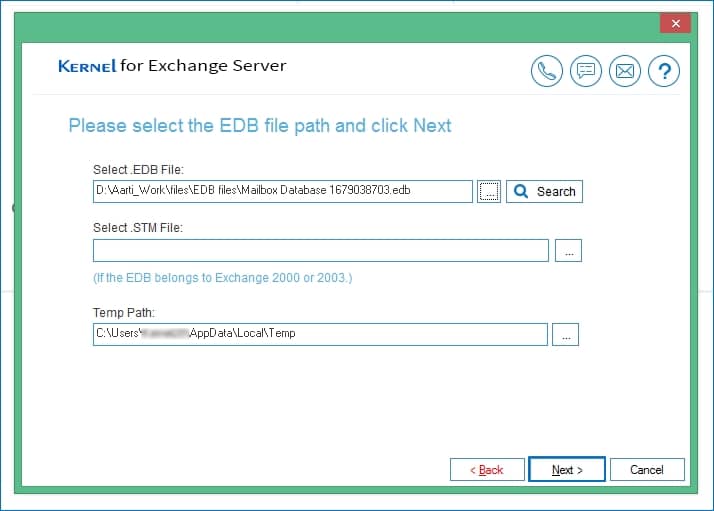
- Now, browse and add the offline EDB file as the source. If you don’t know the EDB file location, you can use the Search option to search for the EDB files in the specified drive; click Next.
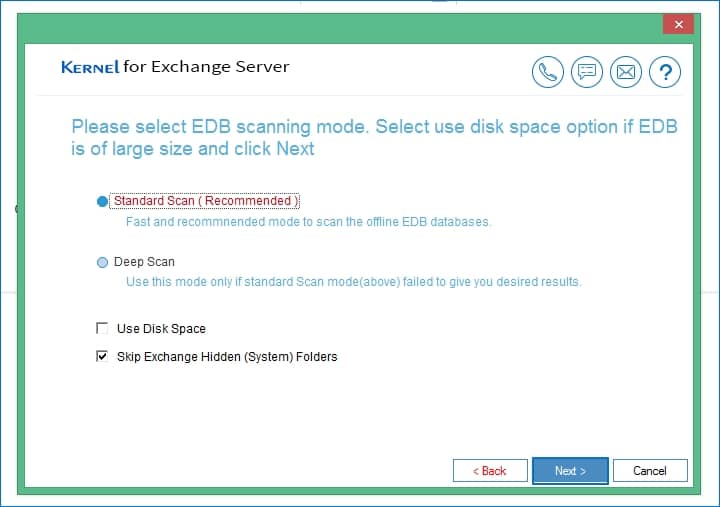
- Choose a suitable scanning mode (Standard or Deep scan) and click Next.
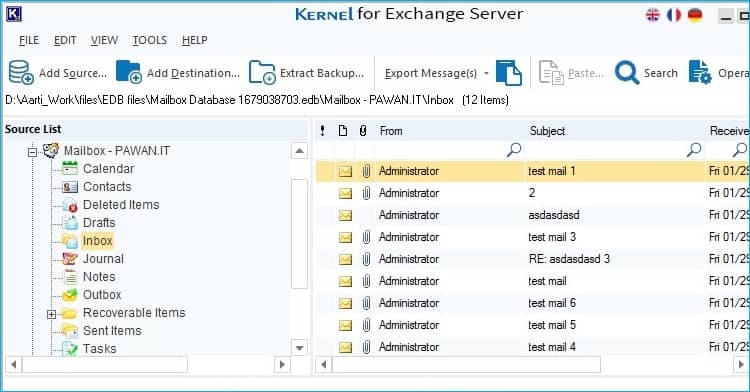
- All the EDB mailboxes, whether deleted, lost or disconnected, are available for preview. You can select any mailbox folder and preview its content.
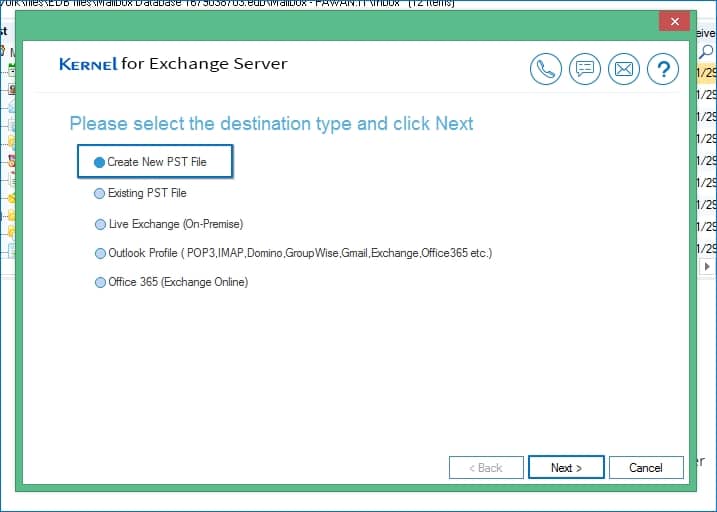
- Now, click on Add Destination to define where you want to take the recovered Exchange Server 2019 mailboxes.

- You have different options for conversion to PST – you can either save data to a new PST file or to an existing one. Choose your option (here Create New PST File) and click Next.
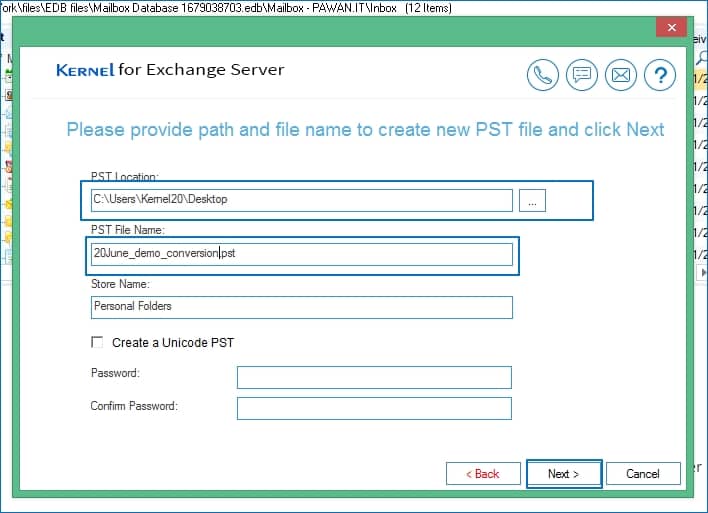
- You need to provide a path to save the PST file. Click on “Create a Unicode PST” if you want to encrypt this PST file to secure the data. Click Next.
- After adding both the source and destination, select any source folder and right-click on it. You can choose from the listed options like Copy Folder, Extract Attachments, Export Message(s), etc.
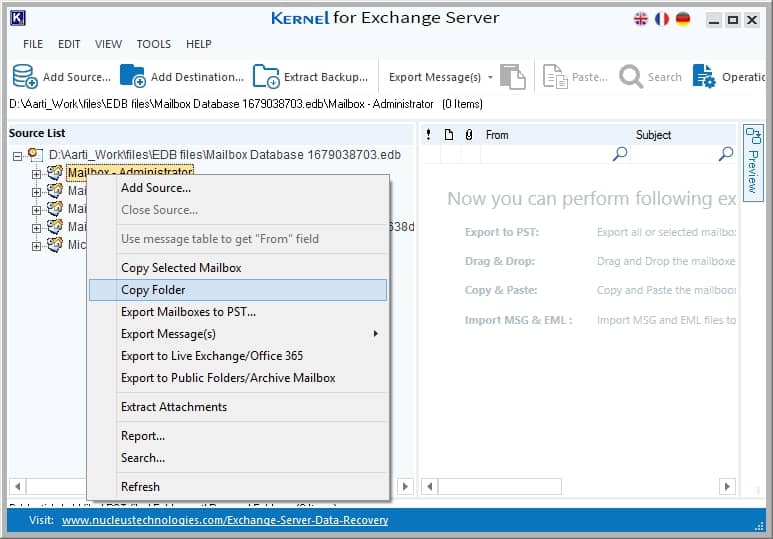
Note: You can also export all the mailboxes to PST directly by selecting Export Mailboxes to PST after placing the cursor at the root folder.
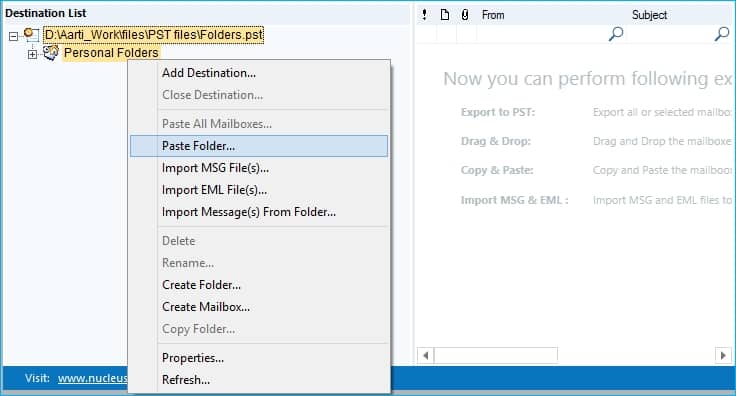
- After you have selected Copy Folder option from the source pane, go to the destination pane and right-click on any folder. Now select the Paste Folder option.
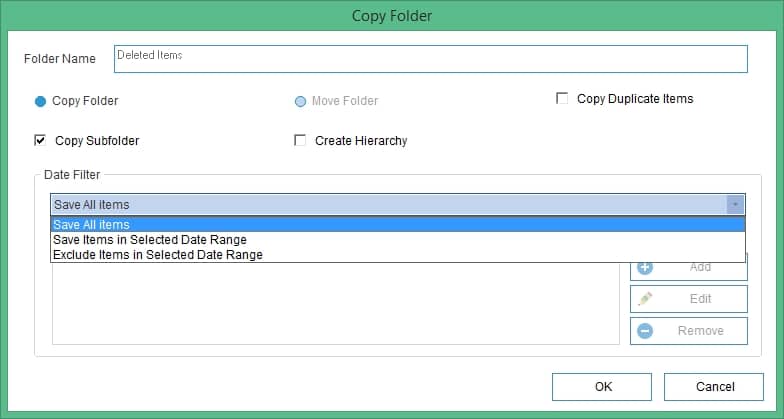
- A list of options and filters will be available for selective saving. Make your choices and click OK.
- The saving process will start and complete quickly, and you can see the pasted content in the destination pane.


Thus, with this you can recover deleted emails from Exchange mailbox and regain holds of your email messages.
Ending words
The accidental deletion and corruption in mailboxes can be a cause of data loss in different versions of Exchange Server. However, deleted mailbox recovery is easy as Exchange retains mailboxes for some time before the permanent deletion. We have mentioned some methods for deleted mailbox recovery with Exchange Admin Center, Exchange Management Shell, and Kernel for Exchange Server recovery tool. Use these methods to recover deleted Exchange 2019 mailboxes.