Read Time: 5 minutes
The most common challenge that Exchange Server administrators experience while repairing the Exchange database is the situation of a downtime. It can hamper the productivity and efficiency of the organization. Dial tone recovery in Exchange 2013/2016 appears as a savior in such cases as it allows continuing email communication with its dial tone portability feature where it replaces original database with an empty database. This temporary empty database is the dial tone database.
What is Dial Tone Portability?
Dial tone portability essentially involves setting up a temporary mailbox for users to send and receive emails when their original mailbox is being repaired or restored. This feature is extremely valuable for businesses as it ensures uninterrupted email communication during Exchange Server failures or database issues.
You can create a temporary mailbox on the same server or on another server within your organization, as long as these servers have databases with matching database schema versions. The Autodiscover feature automatically redirects clients to the new database without requiring manual intervention. As an administrator, after successfully restoring the user’s original mailbox, you can merge the recovered mailbox with the dial tone mailbox.
Dial Tone Recovery – Exchange Server 2013/2016
In dial tone recovery, an empty database is created on a mailbox server, and the failed database is replaced with it. The empty database that you create is referred as dial tone database through which you can send or receive messages while your original database is being repaired.
Performing Dial Tone Recovery
Dial tone recovery is efficient at providing support as uninterrupted communication flow even while the Administrator account is corrupted. Users can regain control of the original database for sending and receiving emails once the database recovers.
The prerequisites for executing the dial tone recovery in Exchange Server 2013/2016 are:
- The user must have Organization Management permissions on mailboxes
- Must have a smaller number of databases on the server than the maximum allowed
Info: Exchange 2013/2016 Standard Edition supports up to five databases per server.
How to Perform Dial-tone Recovery on a Single Server?
Before you begin, make sure you have a user account with the Schema Admin Level permissions assigned for accessing mailboxes. Take backups of your database to have them so that if you need those files in future, you can access them as required.
- Renaming of the existing database folder
To rename the existing database folder, follow the given instructions.
- Login to Exchange Server with Admin-level permissions
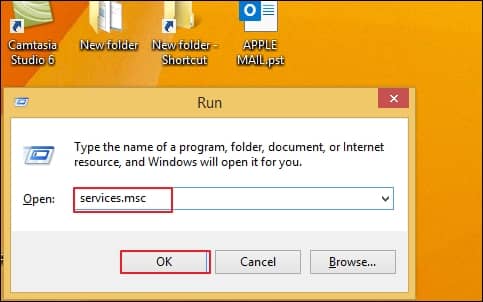
- Press the Windows key + R to open the run window, type services.msc and click OK.
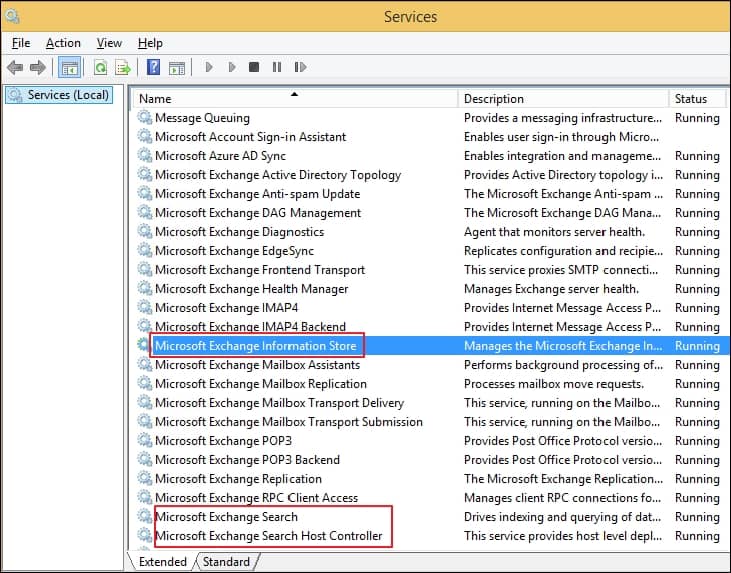
- Halt the below services from running:
- Microsoft Exchange Search Service
- Microsoft Exchange Search Host Controller Service
- Microsoft Exchange Information Store Service
- In the corrupt EDB folder, rename the EDB folder to?NAME_old and the log folder to?NAME_Logs_old
- Now, start all three services again.
- Create empty database
- Open Exchange admin center (EAC) in your browser and try mounting the database.
- If a Warning message shows, click OK to create an empty database.
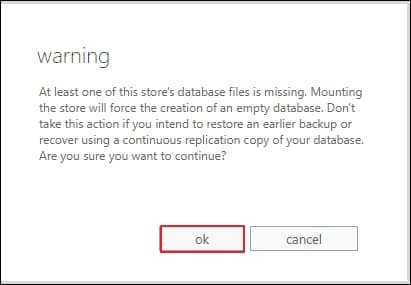
- This will create a new Dial Tone database with the same name.
- You will find the database mounted with other existing databases in the EAC.
Users accessing Outlook to open their mail will see a message prompt asking to restart the application. You can also select to use the temporary mailbox to send and receive emails upon restarting Outlook.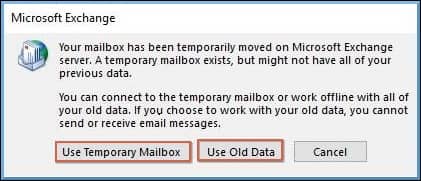
With a temporary mailbox, users can send and receive email messages without disrupting business flow while the database is in the restore process. After the database restoration, users will be able to access old mailboxes.
Dial Tone Recovery using PowerShell cmdlets
Start Exchange Management Shell and run the given commands one-by-one:
- To create a dial tone database, run the command:
New-MailboxDatabase -Name <dial tone database name> -EdbFilePath <enter full EDB file location path>
- To reset the user mailboxes hosted on the database being recovered, run:
Get-Mailbox -Database <database name> | Set-Mailbox -Database <dial tone database name>
- Now, mount the database so that client computers can access the database, and send and receive the messages –
Mount-Database -Identity <dial tone database name>
- Create a recovery database using this command:
New-MailboxDatabase -Recovery -Name <recovery database name> -Server <server name>
Or
To create another recovery database on another server:New-MailboxDatabase -Recovery -Name <recovery database name> -Server <server name> -EdbFilePath “<full EDB file path location>” -LogFolderPath “<full log folder path location>” - Once the data is copied to the Recovery database, copy the log files from the failed database to the recovery database log folder so they can be played against the restored database.
First, mount the recovery database and then dismount it –Mount-Database -Identity <recovery database name>
Dismount-Database -Identity <recovery database name> - After dismounting the recovery database, move current database and log files residing in the recovery database folder to another secured location (it is a preparation step to swap recovered database with dial tone database).
- Now, dismount the dial tone database-
Dismount-Database -Identity <dial tone database name>
Now move database and log files from dial tone database to recovery database folder.
- Further, move the database and log files from the secured location to the dial tone database folder. Once moved, mount the dial tone database again –
Mount-Database -Identity <dial tone database name>
Now, users can access the original database and can send and receive messages.
- Once again mount the recovery database-
Mount-Database -Identity <recovery database name>
- To export the data from the recovery database to recovered database, run the following commands-
$mailboxes = Get-Mailbox -Database <dial tone database name>$mailboxes | %{ New-MailboxRestoreRequest -SourceStoreMailbox $_.ExchangeGuid -SourceDatabase <recovery database name> -TargetMailbox $_ }
- Now, you can dismount and remove the recovery database-
Dismount-Database -Identity <recovery database name>
Remove-MailboxDatabase -Identity <recovery database name>
Verify the move
Now to verify that your mailbox has successfully been moved, open the mailbox Microsoft Outlook and Outlook for Web and check messages.
An Easier Recovery Method
The dial tone recovery process is executable, but don’t you think it is quite complicated? A technical understanding of Exchange Management Shell is required to perform the recovery process. Hence, it would be better if we get a solution that instantly performs Exchange Server Recovery.
It is designed to repair corrupt Exchange databases while allowing the flexibility to save the recovered data to PST and other destinations like Live Exchange and Office 365. It also offers the facility to migrate shared mailboxes and public folders. It is integrated with a Backup Extractor to restore EDB files from Exchange backup files. Convert EDB to PST and offers compatibility with all the latest Outlook and Exchange versions.
You can quickly restore EDB files and directly export its mailboxes to PST without even adding any destination.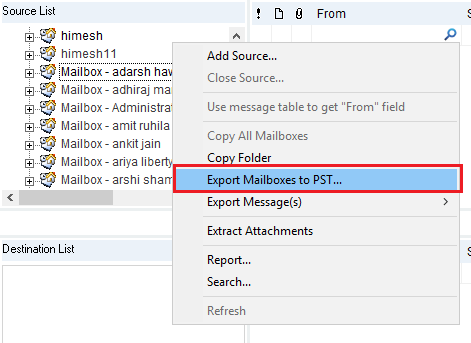
Evaluate the tool yourself with its free version and enjoy quick EDB file repair and its conversion.
Conclusion
If, due to any reason, the Exchange Server breakdown, the resulting downtime will have severe repercussions on the business. This is because it can take many hours to come back online. To avoid this situation, use Dial Tone recovery, which is an advantageous recovery technique.
The manual methods can sometimes feel challenging and risky. However, tools like our software are great for recovering, repairing, and restoring your corrupt Exchange database at your fingertips.