Read time 8 minutes
Considering the necessity of PST file transfer, Microsoft offers two different methods (Drive shipping and Network Upload Method) to transfer PST files to Office 365. Also, many professional tools can help you move PST files to Office 365. However, transferring PST files to Office 365 can be tricky if you’re not using the right approach. Here, we will discuss the manual methods as well as the professional method to transfer PST to Office 365.
Implementing both of them is a bit complicated. Amongst the two methods, the Network Upload method is widely used by organizations to copy PST data to Office 365.
Here, we will be discussing the Network upload method to transfer PST files to Office 365 mailboxes. But, before proceeding to that, let’s highlight some essential points to execute the process.
Download Kernel Import PST to Office 365 an automated tool to move PST File to Office 365/ Microsoft 365 in few clicks.
Things to know before using the network upload method
- You must be assigned with Mailbox Import/Export role in Exchange Online to transfer PST items to Office 365
- Your account must have Office 365 Global Administrator privileges
- Every manual method to transfer PST files to Office 365 requires the installation of the Azure AzCopy tool
- You will have to store PST files in a shared folder.
- By default, the maximum size of the message that can be received by Office 365 is 35 MB
Now, let’s move to the working process of the method to transfer PST files to Office 365 mailboxes.
Using network upload method
The Network Upload method involves multiple steps. Each of these steps performs a separate task that is required to copy PST file to Cloud. The steps that we will be covering involves:
Note: *The first step will be performed only once to transfer PST files to Office 365 mailboxes. After that, you have to perform Step 2 to Step 6 every time you want to move PST mailboxes to Office 365.
Step 1: Copying SAS URL & installing azure AzCopy
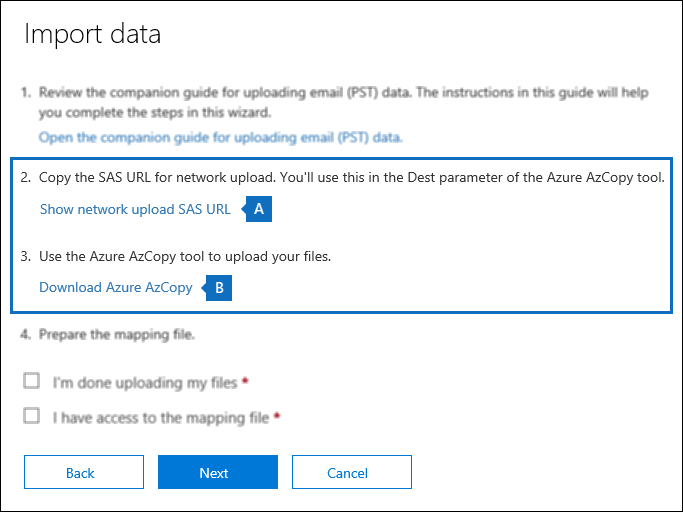
First, you’ll have to download and install the Azure AzCopy tool on your system, which will be used in the next step to upload PST. Also, you’ll have to copy the SAS URL for your organization.
Note: SAS URL is the combination of network URL for the Azure storage location and a Shared Access Signature key that provides the permissions to move PST files to Azure storage location.
For downloading and installing the Azure AzCopy tool and copying the SAS URL, follow the below steps:
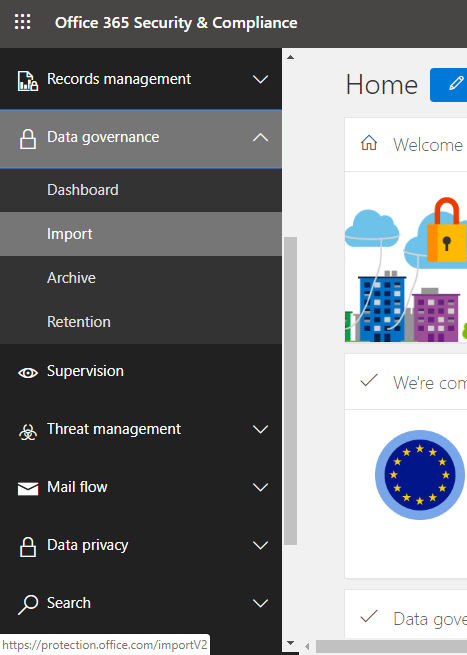
- Visit https://protection.office.com/ and sign in to Office 365 administrator account for your organization.
- Look for Security and Compliance Center in the left pane and click Data governance >> Import.
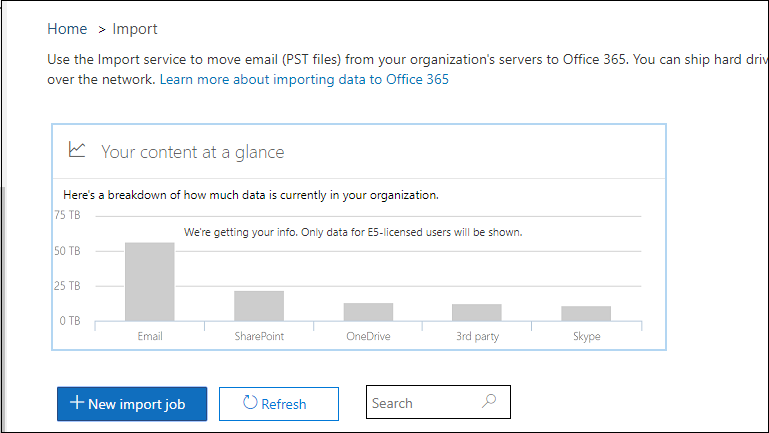
- As the Transfer page appears on the screen, click Import PST files, and then select +New job.
- Now, type a name for the job and click Next. Make sure you use lowercase letters, hyphens, numbers, and underscores because of using uppercase letters.

- From the next page, select Upload your data and then click Next.

- The transferred Data page will appear on the screen, do the following things – copy the secure storage key, and download the Azure AzCopy tool; a pop-up window will appear on the screen, click RUN to install AzCopy.
Step 2: Transfer PST to Office 365
Now, you need to transfer PST files to Azure storage location in Microsoft cloud with the help of the Azure AzCopy tool. To do this, follow the below steps:
- Open the command prompt on your system.
- Go to the directory where the Azure AzCopy tool is installed.
- Run the below command to move the PST files to Office 365:
AzCopy.exe /Source:<Location of PST files> /Dest:<SAS URL> /V:<Log file location> /Y
Here, we have used the parameters to describe the command like Source specifies the source directory where PST file is stored, Dest specifies the SAS URL that you obtained in Step 1, etc.
- Running the command will display the status message of uploading the PST file in progress. A final status message will display the total number of files uploaded to Azure storage location.
If you want to check the list of the PST files uploaded to the Azure blob, then you can use the open-source Microsoft Azure Storage Explorer tool.
Step 3: Creating the PST mapping file
After uploading the PST file to the Azure storage location, you need to create a CSV file to specify the user mailboxes where PST files will be transferred. This CSV file will be submitted after creating a PST transfer job. To create a PST mapping file, follow the below steps:
- Download a sample of the PST mapping file.
- Save the CSV file on your system and use Microsoft Excel to edit this file according to your requirements.
Note: A CSV file must include the following parameters:
Workload,FilePath,Name,Mailbox,IsArchive,TargetRootFolder,ContentCodePage,SPFileContainer,SPManifestContainer,SPSiteUrl
Step 4: Creating a PST transfer job in Office 365
After creating a mapping file, you need to create a PST transfer job in Office 365. Follow the same steps, as mentioned in Step 1 to create a job. And when the transferred Data page appears on the screen, perform the steps as mentioned in the below pictures and click Next.
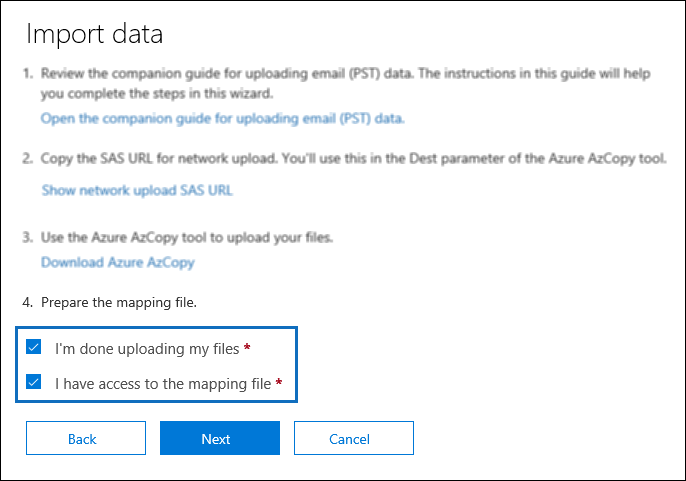
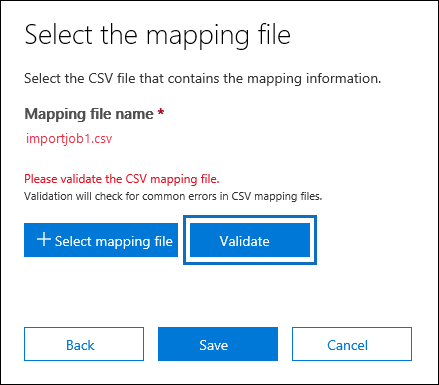
- In the new wizard, upload the CSV mapping file that you created in Step 3. After uploading the CSV file, click Validate to verify the file for any error. Once it is validated, click the Save button to submit the job, and then click Close.
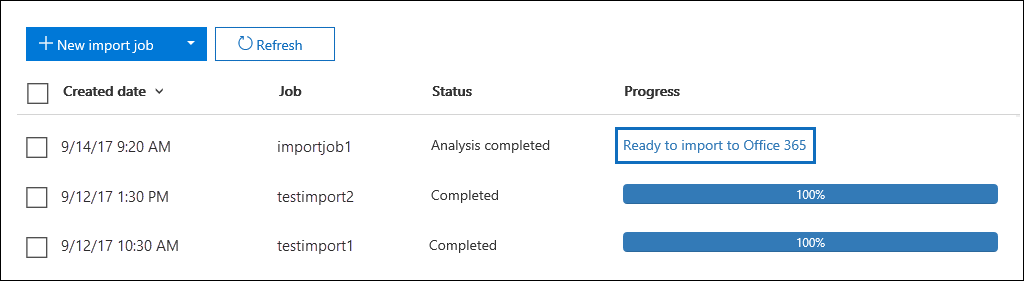
- The status page will appear on the screen displaying Analysis in Progress, and the New job will display in the transferred page list. To refresh the status of the Job, you can click the Refresh button. Once the analysis is complete, the status will change to Analysis Completed.
Step 5: Filtering data and running the PST transfer job
When the data is ready to move, you can select whether you want to copy the entire data or apply specific filters to trim the data. To do so, follow the below steps:
- Go to the Import Page where the job is displayed and click Ready to move to Office 365.
- A flyout page will appear on the screen with the information about PST files, click Move to Office 365 on that page.
- The Filter your data wizard will pop-up on the screen, here select whether you want to copy the entire data or Filter it before copying. If you wish to filter the data, then check how to filter data when transferring PST files. Make your selection and click Next.
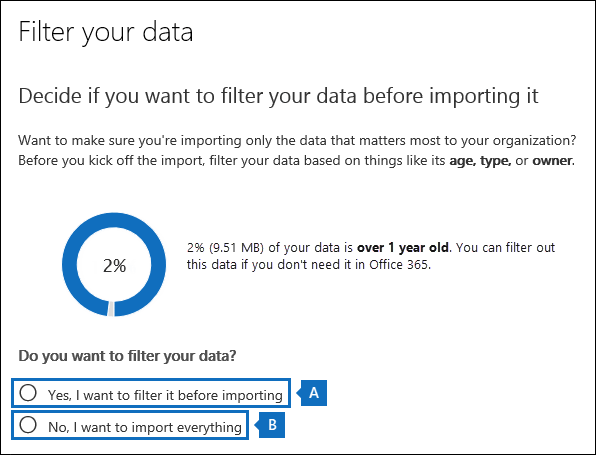
- If you choose to copy the entire data, click Import Data to start the job. Click Refresh to update the status of the job. Once the process is finished, the job status will change to Complete.
All your PST file data will be moved to Office 365 mailboxes; you check the files by opening Office 365 account.
Conclusion
Network Upload is one of the most useful techniques to transfer PST to Office 365. But, as you might have observed that it is very complex, especially for beginners. So, you can use Kernel Import PST to Office 365 tool, which is a better alternative to it for transferring PST files to Office 365. This software comes with advanced filters and functionalities that allow you to transfer PST files to Microsoft 365 based on your requirements.