Read time 10 minutes
SharePoint has solidified its position as the primary platform for secure internal collaboration on a worldwide scale. As Office 365 continues to offer advanced features and capabilities, users who previously relied on on-premises iterations such as SharePoint 2013, SharePoint 2016, and SharePoint 2019 are increasingly opting to migrate their traditional SharePoint deployments to Microsoft 365.
The latest SharePoint versions, such as SharePoint 2016 and 2019, offer great advantages when integrated with Microsoft 365. Consequently, there is a growing interest among users in exploring approaches to move their data from SharePoint on-premises to the Microsoft 365 environment.
What are the benefits of using Microsoft 365?
There are several benefits offered by Microsoft 365 that explain why users want to migrate SharePoint on-premises to Office 365. Some of them are given below:
- Total entourage of MS Office applications: Microsoft Office 365 users have access to a wide range of Office programs, including SharePoint, Microsoft Teams, and Skype for Business. Office can be set up on a variety of platforms, including desktops, tablets, and smartphones.
- Best collaborative center: The networks and teams can simply connect and efficiently handle tasks. It provides robust features, including chat, documents, task delegation, progress monitoring, project schedules, document management, and other utility apps to improve teamwork. After SharePoint on-premises to SharePoint Online migration, entire data will continue to work with its efficiency.
- Greater storage limits for mailboxes: The business-class email service offers a complete experience, a 50GB mailbox for each user, and top-notch calendar tools with an Outlook interface.
- Conferencing and meetings services: Utilize available screen sharing and audio/video conferencing tools to run online meetings. Even with a spotty internet connection, meetings can be attended easily due to efficient features and capabilities of Microsoft 365.
- Innovative analytical apps and enhanced security: While sending files outside the company, strong management ensures that only authorized individuals can access emails and documents. All Microsoft Office 365 platforms are protected against data loss and encryption. The analytics tool’s data analysis and visualization features are also quite helpful, and MyAnalytics and Power Business Intelligence also offer interactive reports. These benefits encourage businesses to migrate SharePoint to Office 365 containing SharePoint Online.
All these are significant reasons for users to migrate SharePoint On-premises content to Microsoft 365, involving SharePoint Online as an integral part. The migration encompasses the transfer of all the site collections, lists & libraries, workflows, etc. Also, the user must work out 4 essential things before migrating SharePoint content.
How to migrate to Office 365 from SharePoint?
Migration between two diverse platforms is not a cakewalk. However, you can opt for either the manual or automated approach to migrate SharePoint to Office 365. In the next sections, we’ll demonstrate how to migrate SharePoint to Microsoft 365 using two different tools: one is powered by Microsoft, while the other is a third-party migration tool. However, we recommend creating a checklist for SharePoint migration to avoid skipping any crucial step.
Method 1. Migrate using Microsoft SharePoint Migration Tool
Microsoft introduced the SharePoint Migration Tool (SPMT) as the migration-based assistance tool that migrates data from on-premises SharePoint to Office 365 (SharePoint Online). It’s simple user interface and basic functionality help migrate complete sites, lists/libraries, and metadata.
The SharePoint migration tool performs incremental in which only the new data will move between the SharePoint accounts from the source data and there will be no duplicity. You can migrate SharePoint On-premises content to Microsoft 365 using the steps given below:
- Download the SPMT tool.
- Install it and sign it with your Microsoft account.
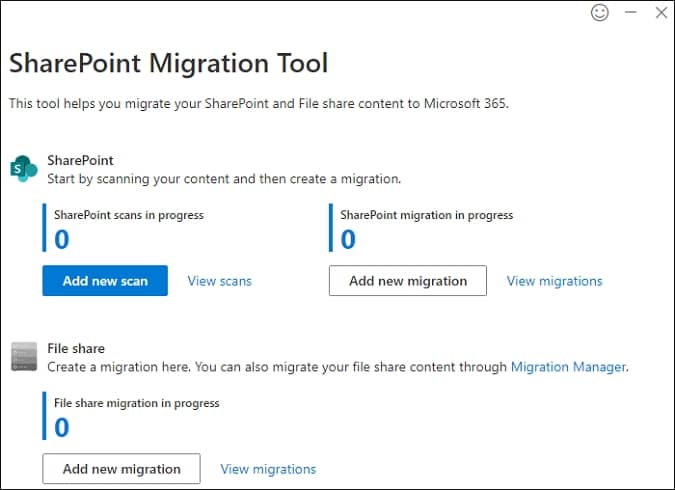
- Click Add new migration to start the migration process.
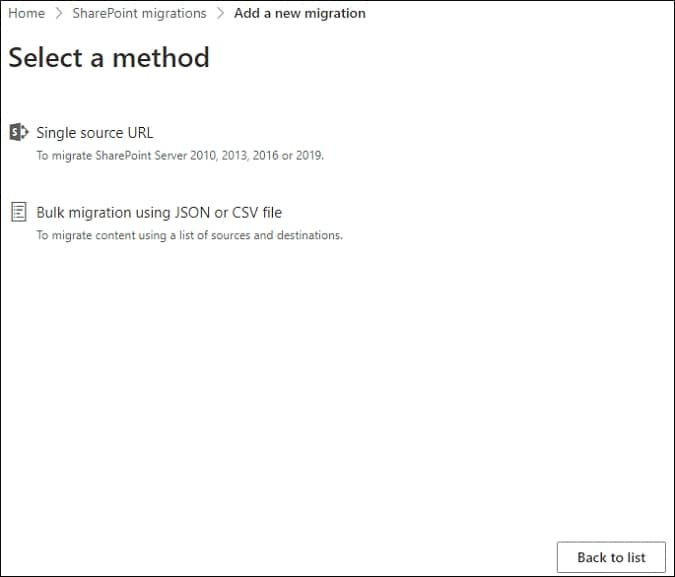
- Under Select a method window, select Single source URL. If you have a JSON or CSV file with a list of sources & destinations, you can choose the second option.
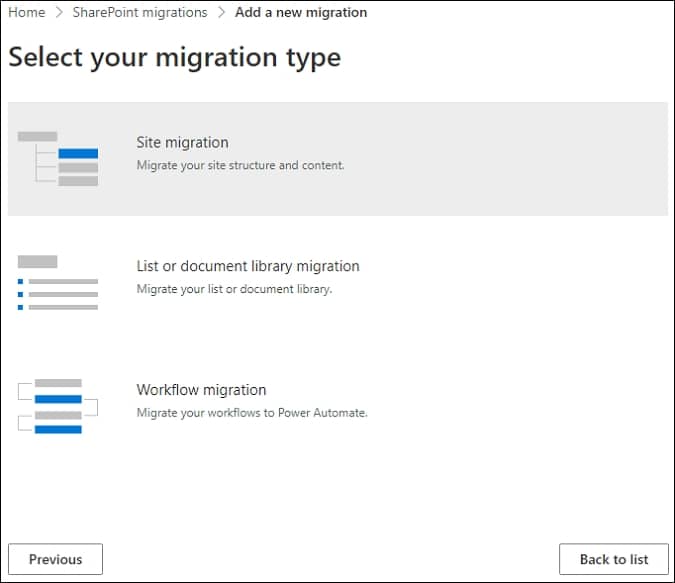
- Now, select a migration type.
- Then, in the next window, enter the source site URL and input the username & password.
- After configuring the source, specify the destination with login credentials.
- When both source & destinations are configured successfully, start the migration.
On-premises versions supported by SharePoint Migration Tool
The tool supports the SharePoint migration to Microsoft 365 from the following servers:
- SharePoint Server 2019 (Public Preview) to SharePoint Online/OneDrive
- SharePoint Server 2016 (Public Preview) to SharePoint Online/OneDrive
- SharePoint Server 2013, SharePoint Foundation 2013 to SharePoint Online/OneDrive
- SharePoint Server 2010, SharePoint Foundation 2010 to SharePoint Online/OneDrive
- Network and local file shares to SharePoint Online/OneDrive
Limitations of SharePoint Migration Tool (SPMT)
Being a lightweight migration tool, the SPMT has all the necessary powers to complete a SharePoint migration to Microsoft 365 from various versions. Still, it is not suitable for moving enterprise-based data, and it has some limitations like the following:
- No support for SharePoint Server 2007.
- It migrates data up to 250 GB.
- There are no filtering, customization, or other adaptive features to stop sizeable and unnecessary data from migration.
- You will get limited information from pre-migration analysis before the software migrates SharePoint to Microsoft 365.
- The migration report also has limited information related to the migrated items.
Method 2. A professional tool for SharePoint on-premises to SharePoint Online migration
We are aware that Microsoft offers free tools to migrate content (sites, lists, libraries, documents, views, version history, web parts) from SharePoint lists and libraries to existing or new SharePoint Online sites. However, these tools may not meet all user requirements and lack flexibility. Moreover, the effectiveness of these solutions varies with the user’s technical expertise and skills.
If you want a successful migration from SharePoint to SharePoint Online without any internal disruptions or size limitations, choose a professional tool, Kernel Migration for SharePoint. This SharePoint migration tool is embedded with robust algorithms to precisely transfer your site data. We present you with a detailed software process with each step required to complete a migration from on-premises SharePoint to SharePoint Online in Microsoft 365.
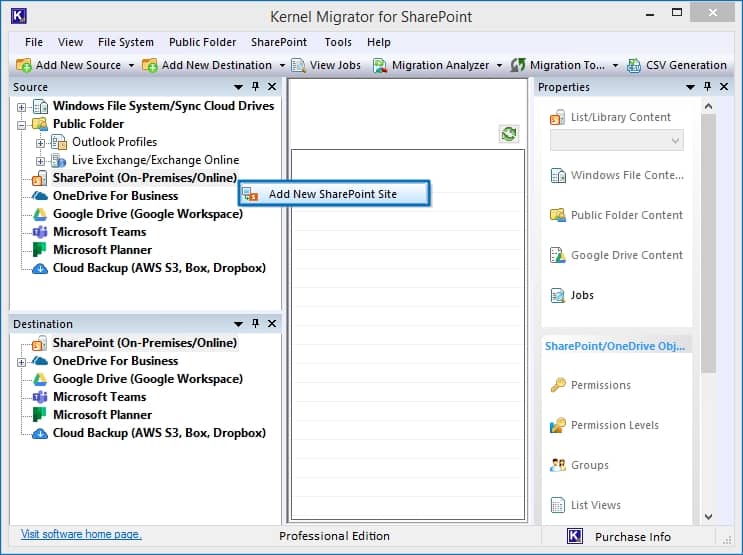
- Open the software, under the Source section go to SharePoint (on-premises/Online) and right-click it. Select, and Add New SharePoint Site.
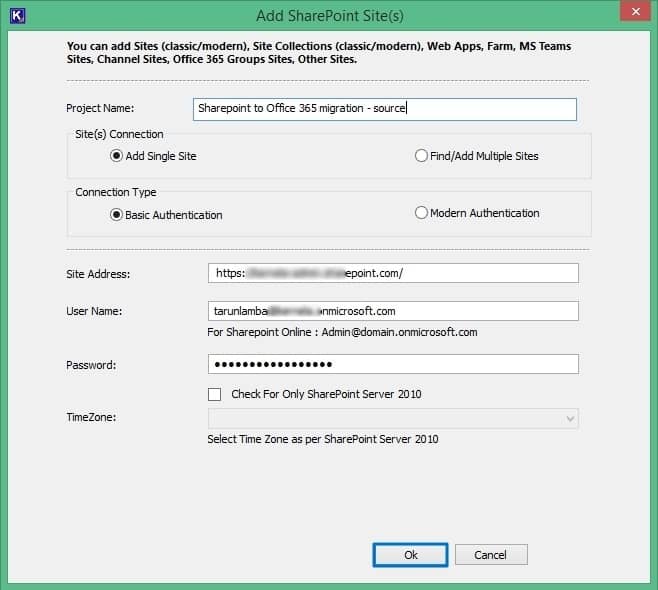
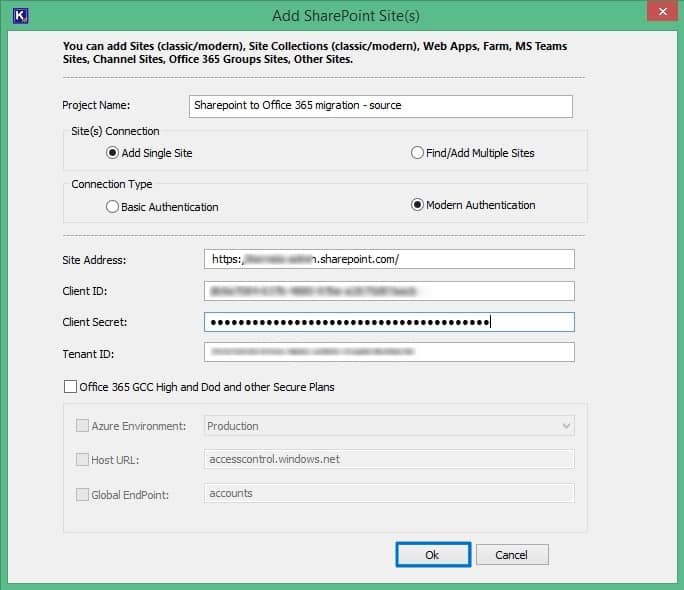
- To add a new site in the source, input a unique project name, Site(s) Connection, Connection Type. Based on the Connection Type, enter login credentials to connect source tenant.
- Basic Authentication: Provide source site address, Global admin User Name, and Password.
- Modern Authentication: Input Site Address, Client ID, Client Secret, Tenant ID to connect with the source. You can find these details in the Azure Active Directory’s App Registration.
- Basic Authentication: Provide source site address, Global admin User Name, and Password.
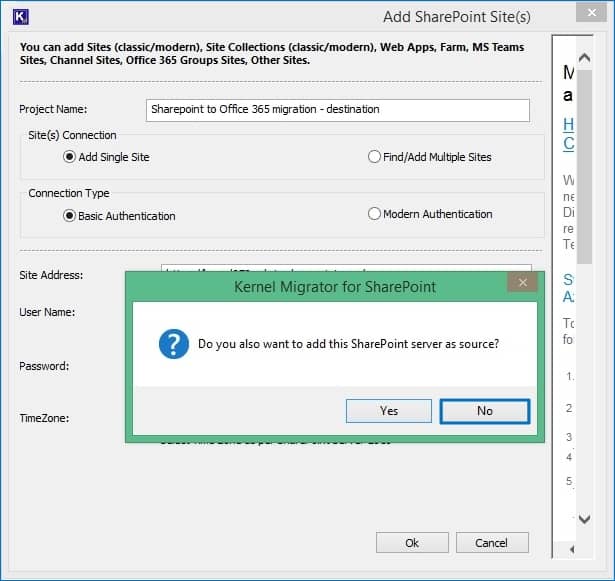
- When the tool asks if you want to connect the source server as a destination too. Click No.
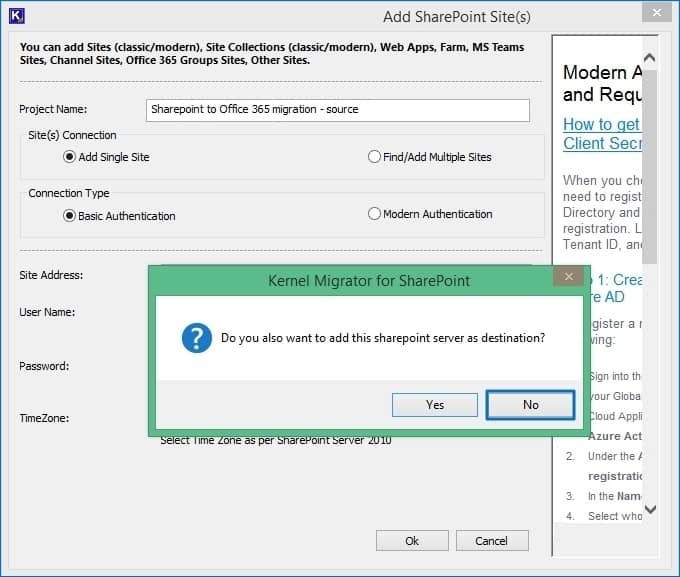
- A new project is connected and added to the Source. Now, go to the destination section and repeat the above steps again to add the destination site.
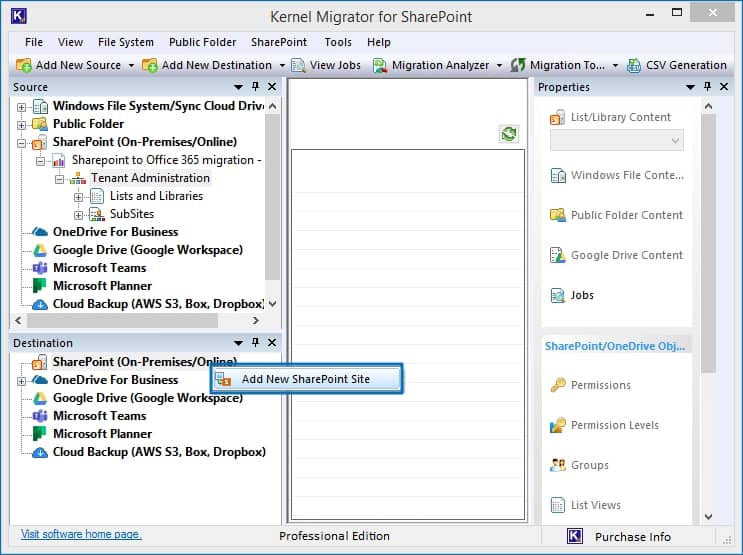
- If the tool asked to select the site as a source too. Click No.
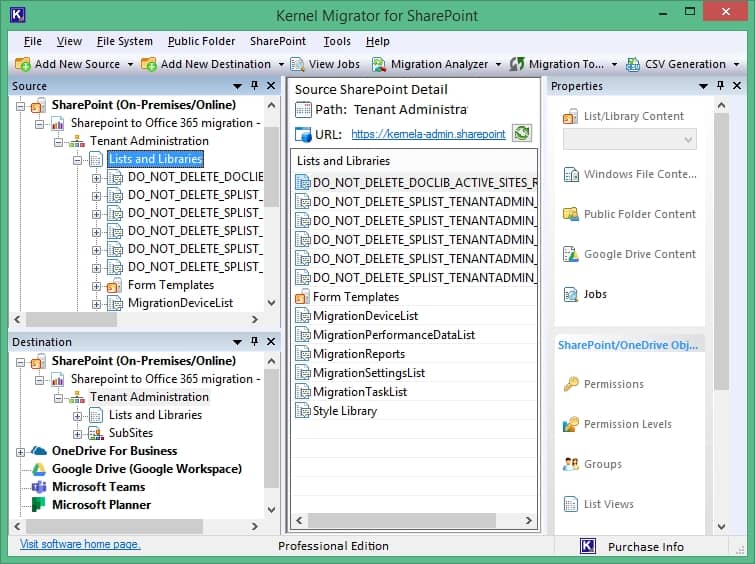
- A project is added in the destination, and you can check the items from both sources and destinations by expanding the Project Name.
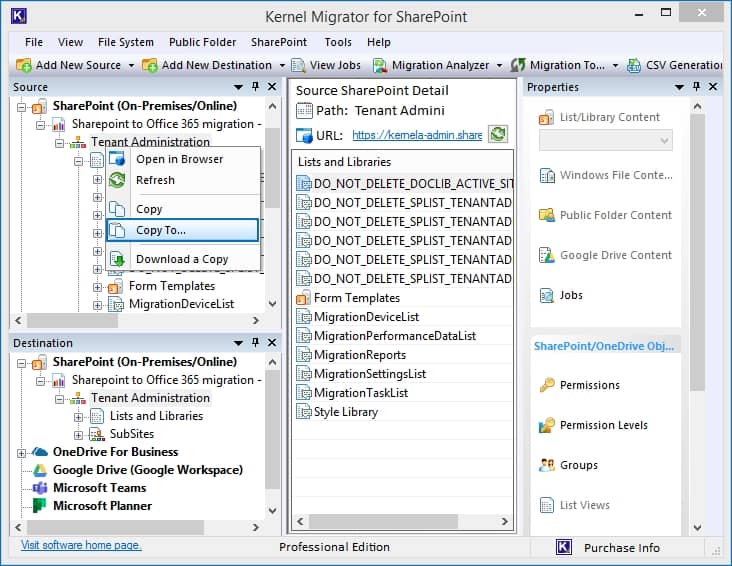
- To start the SharePoint-to-SharePoint Online migration, choose the items from the source and right-click on them. Select ‘Copy To.’
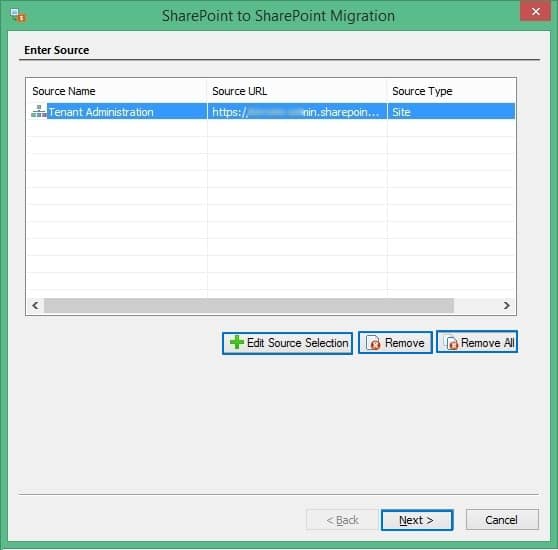
- The SharePoint-to-SharePoint Migration wizard is open. Use Edit Source Selection button to adjust the components you want to move from source. Remove selected items using Remove or Remove All button. Click Next.
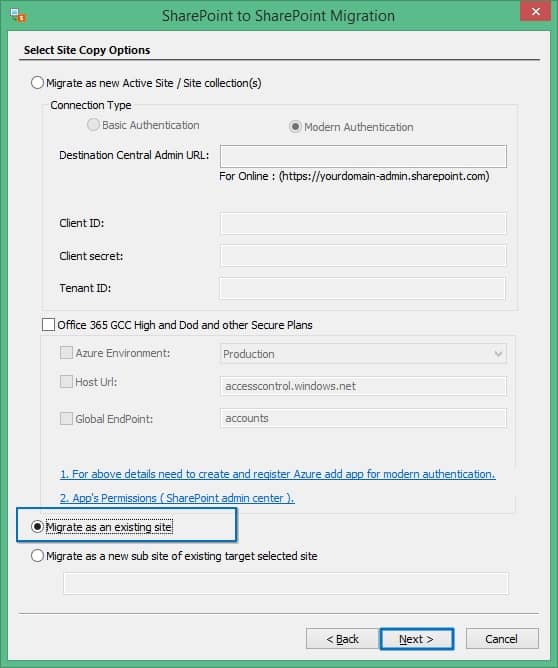
- There are three options for migrating to the site – Migrate as a new Active Site, Migrate as an existing site, or Migrate as a new subsite of the current site. Choose any one and click Next.
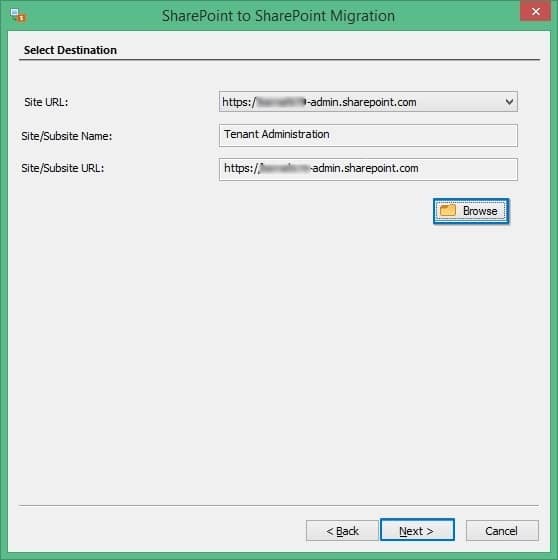
- First, use the Site URL to choose the destination site and click the Browse button to select the subsites. Click Next.
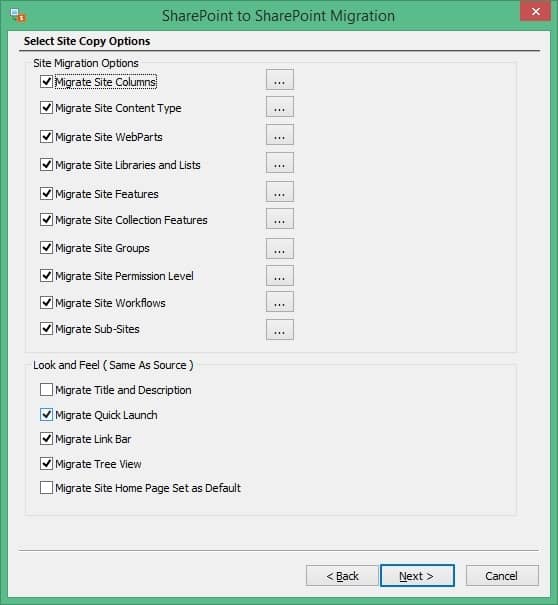
- There are several properties and attributes that you can select from to migrate along with the primary data. Click Next.
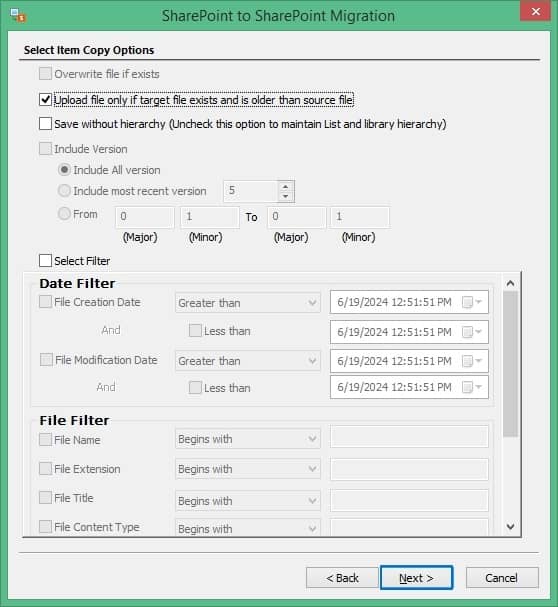
- Apply all the filters that will help in moving only the required amount of data for migration. Then, click Next.
- Choose the option to migrate permissions related to all the items. Click Next.
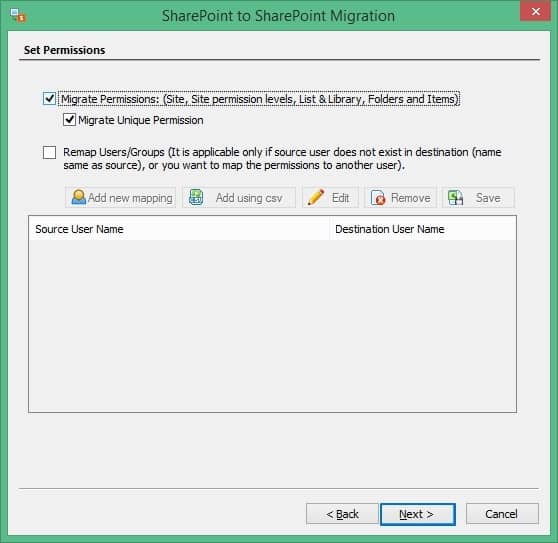
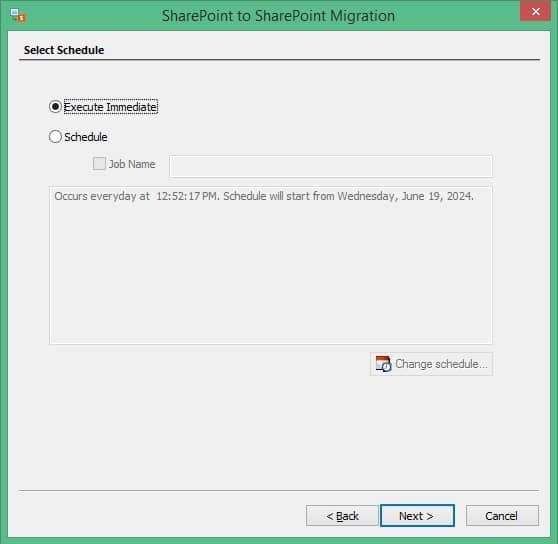
- The tools allow you to schedule the migration if you want. To begin the migration immediately select Execute Immediate and click Next.
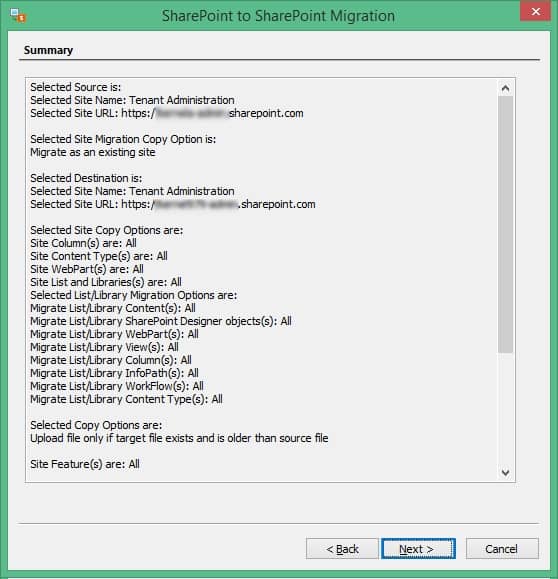
- A summary section shows the selected items for migration, desired destination, chosen features, filters, etc. Click Next to begin the migration
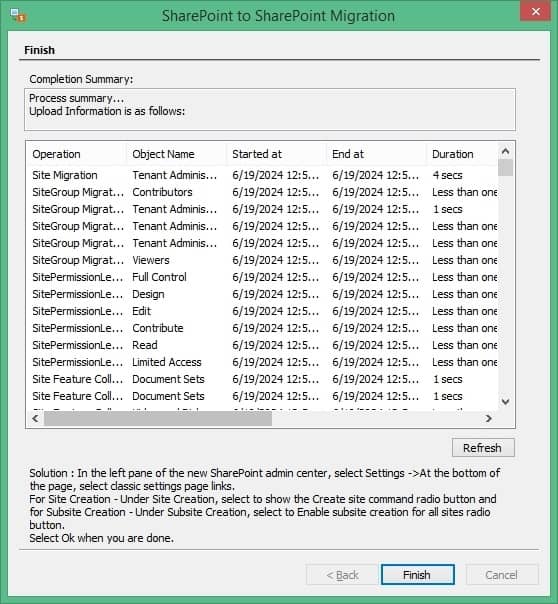
- As soon as the migration is complete, you can see a completion summary showing a clear status of each item migrated. Click Finish.
The tool helps you migrate SharePoint permissions easily. It migrates documents, folders, views, list items, web parts, workflows, etc., from SharePoint lists and libraries to existing or new SharePoint Online sites. All this is done while maintaining complete data integrity and preserving original content hierarchy. This saves the admin from reconfiguring or customizing SharePoint permission again.
It also migrates versions along with the data. Inclusion of filters like date, users, files, etc., makes this tool suitable for selective migration. Users can also migrate public folder data from Exchange on-premises, Outlook profiles, and Microsoft 365. With the easy-to-navigate user interface, even a non-technical person can easily perform migrations, such as migrating SharePoint 2010 to 2016 or 2019.
Conclusion
Apart from using the free SharePoint Migration Tool, there is no other manual method for SharePoint on-premises migration to SharePoint Online. Due to the many limitations associated with the free tool, it is better to use Kernel Migration for SharePoint. It can move unlimited site collections, lists, libraries, and other items from SharePoint. The tool also generates a detailed migration report to verify the status of the data migrated.


