Read time: 9 minutes
Microsoft Teams has gained immense trust among business organizations for all of their internal communication. The user can even share files with others, and the Team Admin can create various channels to discuss specific topics.
After the pandemic, most businesses now have a distributed workforce, and they require a dependable platform for real-time collaboration, chats, video calls, and data sharing. MS Teams fulfills all the expectations of businesses promoting remote work culture. It even allows creating private channels for conducting conversations and discussions among specific people.
Organizations work with scattered workforces, so there can be multiple Teams to meet different requirements. Microsoft Teams offers subscription plans for Business and Enterprise versions, including various features. Organizations often manage multiple tenants with multiple Teams accounts, and when they plan to merge all the Teams together, it’s difficult because the process is tricky. There are no direct or proven techniques to do it. So, stay tuned with the article till the end to learn how you can migrate the Teams data without a hitch.
Why do businesses need to migrate Teams from one tenant to another?
Some common reasons why companies want to migrate Teams from one tenant to another are as follows:
- If the current Team requires an important piece of information present in a previously created Team, you can perform Microsoft Teams migration to another tenant.
- When the subscription of an older Office 365 account is close to the expiry date, and you want to protect the data, you can migrate it to another account.
- If the domain is expiring, then you can migrate the Teams to a new domain.
- When important files are in an existing Team and you want to create a new Teams, you can migrate them.
Why is Microsoft Teams tenant to tenant migration a complex process?
Teams accumulate various components to streamline team handling & collaboration. Involvement of various sections storing different types of data for specific purposes makes it difficult to migrate Microsoft Teams data from one tenant to another. It involves high-end complexity, and here we’ll learn about those intricacies.
- Since there is a lack of APIs in MS Teams, it’s difficult to migrate chats, private and shared channels, and other components easily from one tenant to another.
- When files with outdated permissions are migrated with Teams, there can be issues in accessing the shared files over time.
- When you migrate Teams account with all its files and chats, it needs you to re-configure all the settings in the new destination environment.
- Microsoft Teams app stores its data at multiple locations (like SharePoint team site, OneDrive, and Exchange mailboxes), and when you perform migration, the process will be quite overwhelming.
How to migrate Microsoft Teams from one tenant to another?
Even though it’s quite challenging to migrate data in MS Teams, there are two ways to execute this. You can either proceed with the long and detailed manual method or go by the smarter way with professional third-party tools. Let’s learn this one-by-one.
Manual migration of MS Teams from one tenant to another
You can transfer your Teams content to another account using SharePoint and Exchange Online PowerShell. For easy comprehension we have divided the process into 4 steps. Carefully execute every step to avoid any issue.
Step 1: Restore Teams in destination environment
Before initiating the transfer, it’s vital to ensure that the destination has Teams with a structure similar to the source. It may appear time-consuming, but it is an inescapable step in the process.
Step 2: Add all users assign permissions correctly
Once you create Teams at the destination, it’s time to add all the valid users and assign them required permissions as they were in the old Teams environment.
Step 3: Export SharePoint Team site from source and import the contents to destination
When moving data within Teams, simple copy/paste won’t be useful. So, first, manually download contents of the SharePoint Team site at source and upload the whole data to the Teams at destination.
Step 4: Export and import chat history
Use PowerShell commands in Exchange Online PowerShell to move group chat and channel conversation that exists within Exchange mailbox. Then verify content from Teams chat and group mailbox using the given command.
Now, go to Security & Compliance center and export chat history of each team to the destination.
Even though this manual approach helps migrating Teams content, the entire process of doing this is exhausting. There’s no guarantee of complete data transfer. Hence, skipping hard work and using a migration tool instead would be a better decision.
Automated tool to migrate Teams from one tenant to another
There is no direct manual solution for Microsoft Teams migration to another tenant, but you can use Kernel Microsoft Teams migration software to move Teams data. It recognizes the nuances of a Microsoft Team environment and migrates the data completely.
The Teams Migration tool allows migration of all the information, maintaining permissions, attachments, and the original hierarchy. Unlike PowerShell scripts that are too complex to understand, the easy-to-use interface of the tool simplifies the process of migration without any complications involved.
What does the software migrate?
The software migrates the Team along with the content that is present in it, such as:
- Conversation history: The basic job of the Team is to add multiple users at the same place so that they can chat. Our software migrates threaded chat messages, replies, mentions, links, etc., along with timestamps and their features.
- Channels: Channels are topic-based conversations that admin can create and add members to it. The software migrates the entire channel and the committed chats in it.
- Files: If you uploaded the documents in the files section, you will find them at the destination Team because the software will migrate them.
- Calls: All the details of previously committed calls will be migrated.
- Apps: If you add third-party applications, the software will migrate them too.
- Calendar: The calendar entries will be migrated securely.
Step-by-step process to migrate Teams between tenants
Here is the process to migrate Teams between tenants using our software:
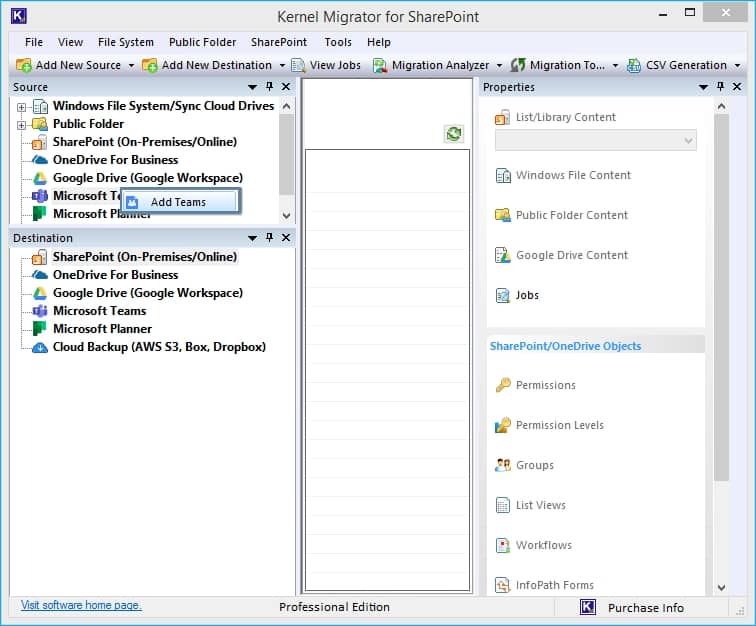
- Start the software and go to Microsoft Teams in the Source section.
- Right-click the Microsoft Teams option and choose Add Teams.
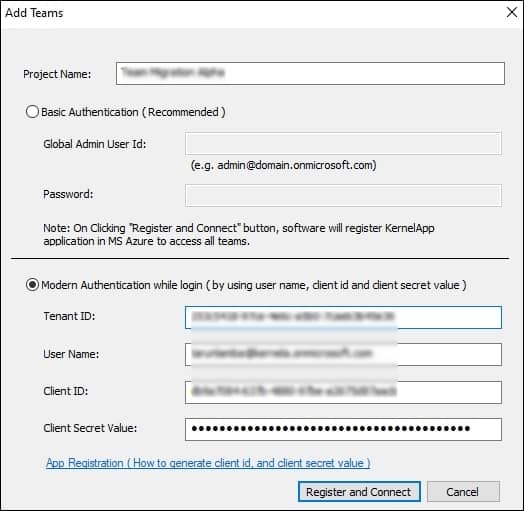
- In the Add Teams wizard, you need to input a project name and details like Tenant ID, Username, Client ID, and Client Secret. All these details are accessible from the active directory in the Azure Portal. The step-by-step procedure to get the credentials is given in the below link-https://www.nucleustechnologies.com/userguide/app-registration-in-azure.html
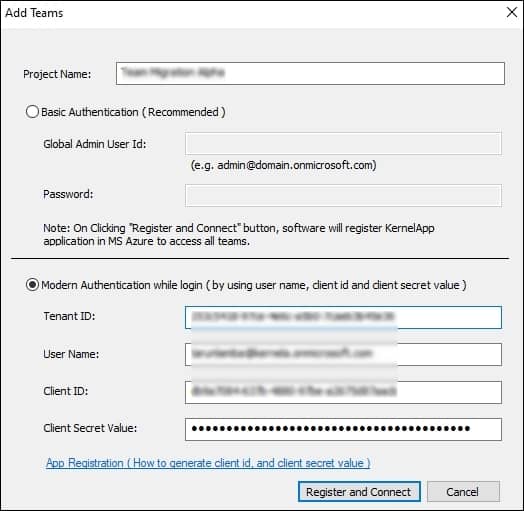
- After inputting all these details, you need to click Register and Connect button.
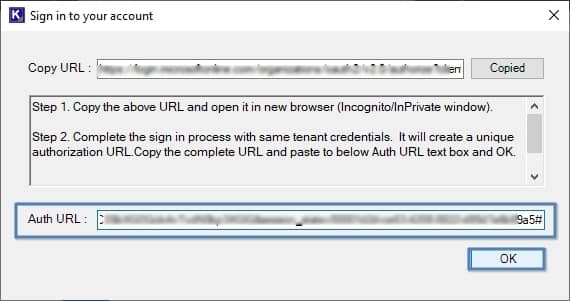
- You will be provided a URL, copy it, and follow the process mentioned below to get the Auth URL.
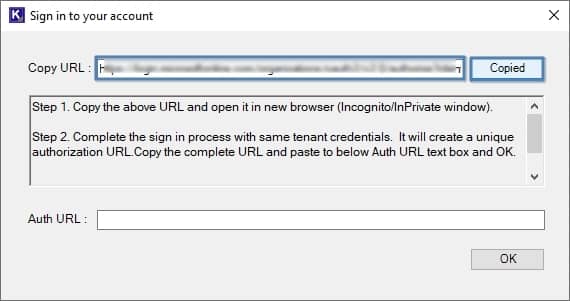
- Launch an incognito tab in any browser, paste the previously obtained URL in the search field, and press Enter.

- Copy the newly generated URL.

- Paste the obtained URL in the Sign in your account window and press OK.
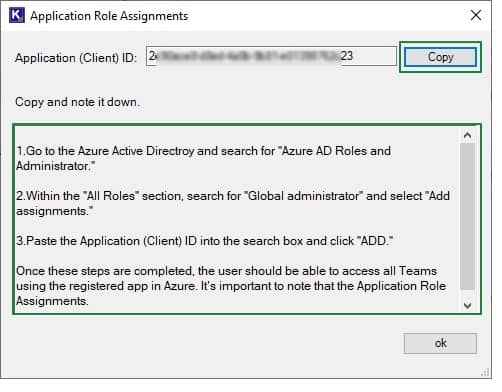
- Copy the Application ID and follow the steps mentioned in the Application Role Assignments window to grant permission in Azure Active Directory. After assigning the required permissions, click OK.
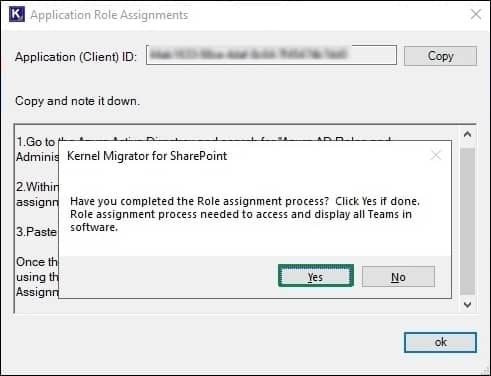
- You will be asked if you have assigned the appropriate permission to add Teams. Click Yes if you have. Otherwise, execute the previous step.
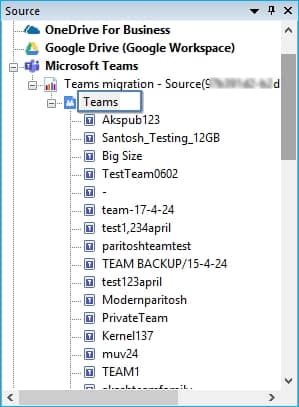
- Source tenant for MS Teams is connected to the software.
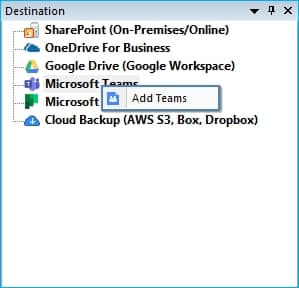
- Now, right-click in the destination section of Microsoft Teams and choose Add Teams.
- Use the same method to retrieve information from Azure Portal and click Register and Connect.
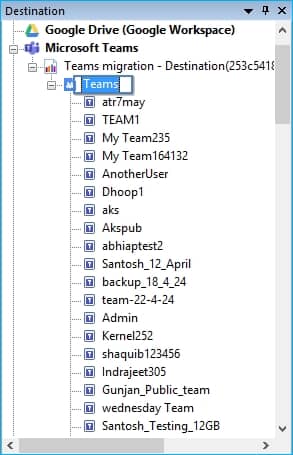
- The software is connected to the destination Office 365 tenant also.
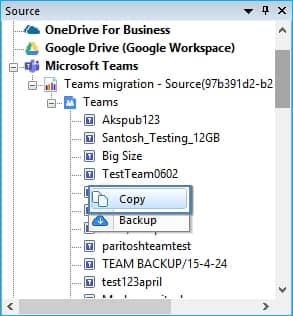
- Go to the source section and copy the Team that you want to migrate.
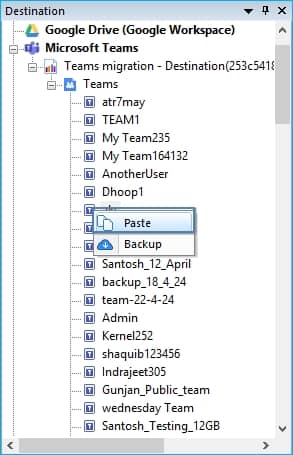
- Go to the destination section and paste the Team there.
- The migration wizard shows you a mapped screen where the same Teams are mapped with the destination Teams. If the Team is not present at the destination, then the color will be red. You can also provide a new Team at the destination.
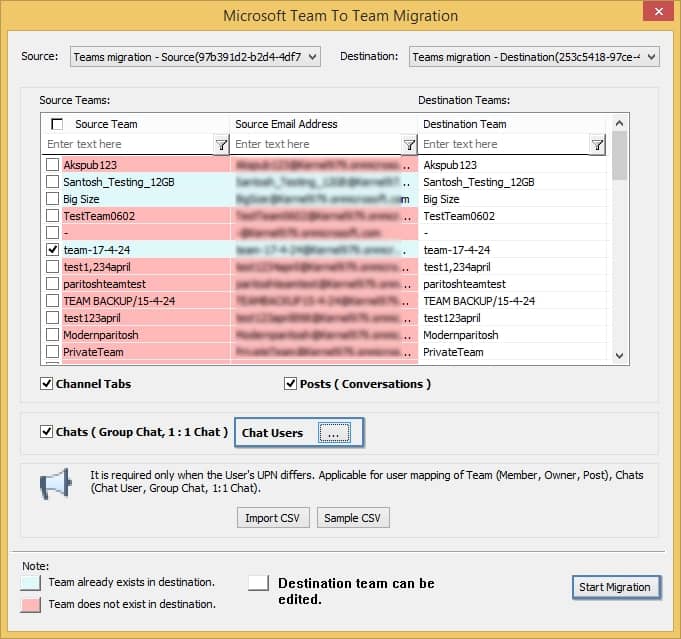
Note: Make sure to select chat users from the ellipsis beside Chats (Group Chat, 1:1 Teams Chat migration) and then either select a CSV file or let the tool fetch users automatically. Click Start Migration.
- The migration starts.

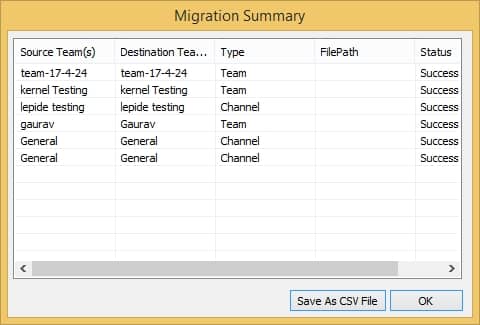
- The Migration has been completed successfully. Click OK.

- The Migration Summary shows the migration status of each Team. You can save the report in CSV format also.
Conclusion
For businesses looking to unify data present at different destinations by migrating Microsoft Teams from one tenant to another, Kernel Microsoft Teams Migration software will make such tasks more manageable. The software lets you select multiple Teams and migrate them completely, including their content like chats, files, attachments, permissions, calls, calendar, and all data in each Team.

