Read time 9 minutes
Qmail is an email transfer agent that enables users to move emails or with the help of a client-server architecture. It was designed as a secure alternative to Sendmail, which was affected by security bugs. But, as people keep moving towards new technologies and services, Qmail users are also looking for a solution to move to Microsoft.
But, looking at the information available over the Internet, there is no direct method that can be used to migrate Qmail mailboxes to Microsoft 365. Though there are plenty of options available, they are of no use to every user.
In this blog, we will discuss how you can migrate Qmail mailboxes to Microsoft 365, and also, we will talk about the reasons behind migrating Qmail to Microsoft 365.
Need to migrate Qmail mailboxes to Microsoft 365
There could be plenty of reasons behind migrating Qmail to Microsoft 365, but users mostly do it due to the advantages of Microsoft 365, such as:
- Microsoft 365 gives you the ability to work from anywhere as it is a cloud-based application and works fine with an Internet connection.
- It gives you access to the latest MS Office applications without any additional charges. Also, you get the latest features without buying new Office applications.
- Microsoft 365 offers better security compared to Qmail.
The above reasons clearly define why moving to Microsoft 365 has become a necessity for users and various organizations.
Disadvantages of Qmail
Qmail is a simple email manager that is easier to use and stable enough to provide a safe environment. But it has many shortcomings that make it redundant to use-
- There is no standard configuration process to handle the account. Overall architecture is written to keep the interface static.
- Qmail is free to use, but it is not open source. It has pretty slower distribution and it is not possible to send binaries to customers.
- The queue structure to maintain the emails is complicated enough to confuse the user.
- it does not support IPv6 internet connection.
- Many settings have hard coded upper limits like outgoing SMTP messages, etc.
Methods to Migrate Qmail Mailboxes to Microsoft 365
There are not many methods to migrate Qmail mailboxes to Microsoft 365, but some general procedures can be followed to import IMAP mailboxes to Microsoft 365. So, let’s have a look.
If we go by the books, then the first method to migrate Qmail mailboxes is to use the IMAP configuration method. And for that, keep some of these basic rules and guidelines in mind, such as:
- Create your users in Microsoft 365 mailboxes before migrating Qmail mailboxes from the source email environment
- Add the domain name to Microsoft 365 account before creating users in the account
You can add users individually or in bulk. Keeping these ground rules in mind before starting the migration process. And after that, you can follow the below steps to migrate Qmail mailboxes to Microsoft 365.
- Collect your source email server name with Outlook on the web
- Generate a list of the mailboxes that need to migrate to Microsoft 365
- Connect Microsoft 365 to your email system before migration
- Make a migration batch and migrate the mailboxes
- At last, verify whether the task worked or not
To know these steps in detail, you can check the official Microsoft documentation.
The second method is pretty useful in migrating Qmail mailboxes to Microsoft 365, as it allows you to import PST to Microsoft 365 quickly. So, here we will first convert the Qmail mailboxes to PST and then import that file to Microsoft 365.
Note: To use this method, you will have to configure the Qmail account with MS Outlook. After creating the PST file for the Qmail account, you will have to set the Microsoft 365 account, and import that PST file to it.
- First of all, configure your Qmail account with MS Outlook.
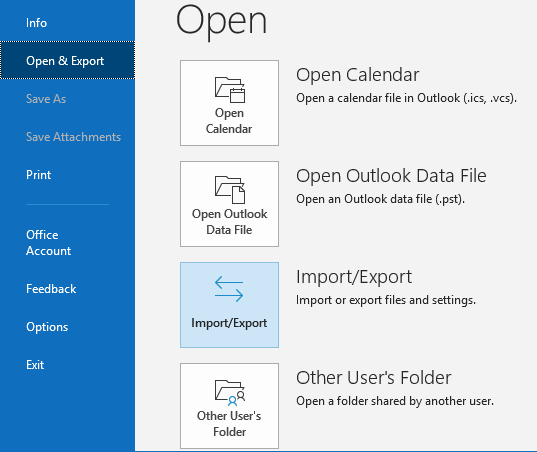
- Once the account is configured, go to the File tab and select the Open & Export option.
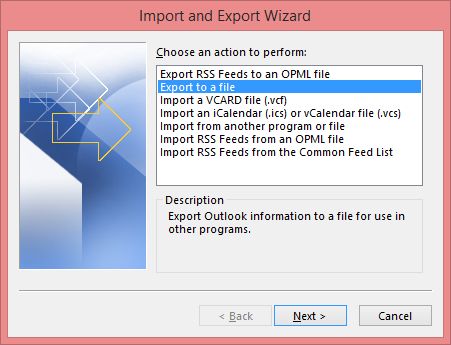
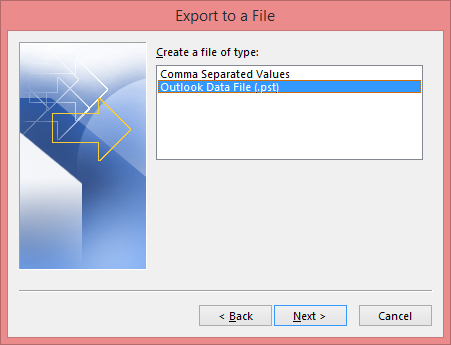
- In the opened window, select ‘Export to a file’ option.
- In the next window, choose the Outlook data file and click Next.
- Now, select the folders or mailboxes to export them to PST.
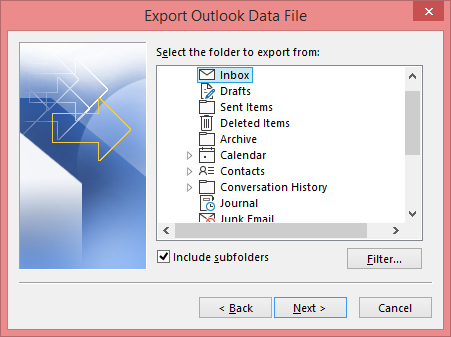
Note: You can also filter the mailboxes based on your requirements. - In the next step, select a location to save the mailboxes by clicking the Browse button, and then click Finish.

Import PST to Microsoft 365
The Qmail mailboxes will be exported to a PST format. Now, you need to configure Microsoft 365 account to MS Outlook. After setting the Microsoft 365 account, import PST to Microsoft 365 by following the below steps:
- Open Outlook and then go to the File tab and select Open & Export.
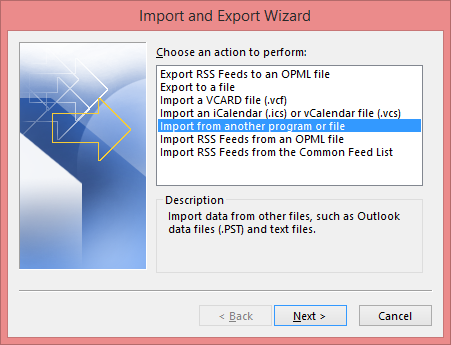
- In the next step, click Import/Export and select Import from another program or file and click Next.
- Now, select the Outlook data file (.pst) option and choose the file that you want to import to Microsoft 365.
- You can also apply specific filters to PST data before importing it to Microsoft 365 and then click Finish.
That’s how you can easily migrate Qmail mailboxes to Microsoft 365 without any issues.
Alternative Solution – Kernel IMAP to Office 365
Kernel IMAP to Office 365 is a unique tool that is specially designed to help you migrate IMAP mailboxes to Microsoft 365. The IMAP to Office 365 migration software can be used to migrate Qmail mailboxes to Microsoft 365 directly with the advantage of applying specific filters to Qmail mailboxes for selective data migration. Also, it follows a simple migration process with minimum steps, which includes:
- Download the Kernel IMAP to Office 365 tool and install it on your computer.
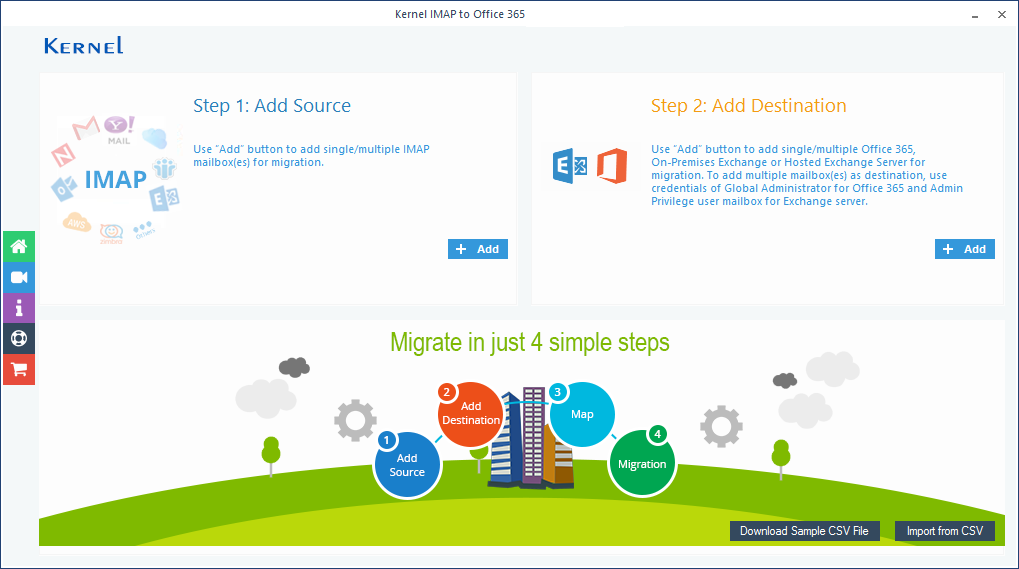
- In the home screen, click the Add Source button to add the Qmail account.
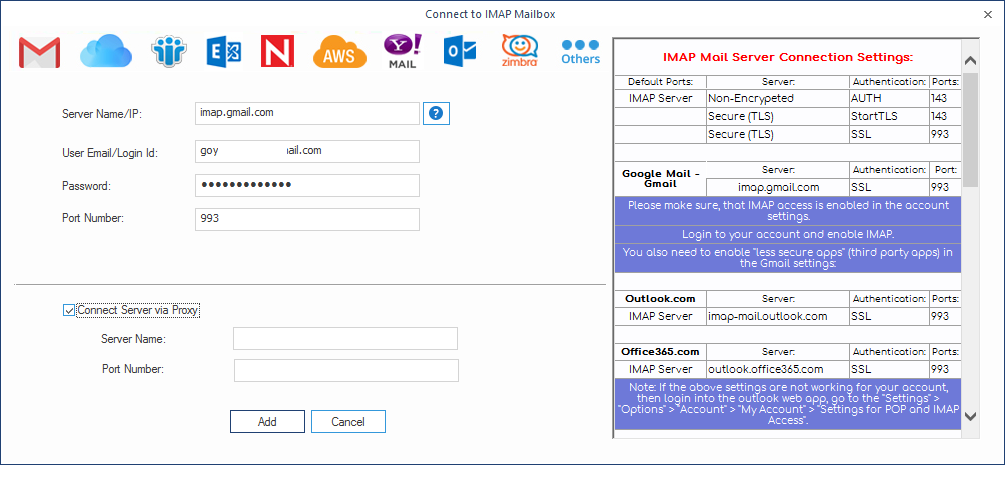
- Provide the credentials for the Qmail account and click Add.
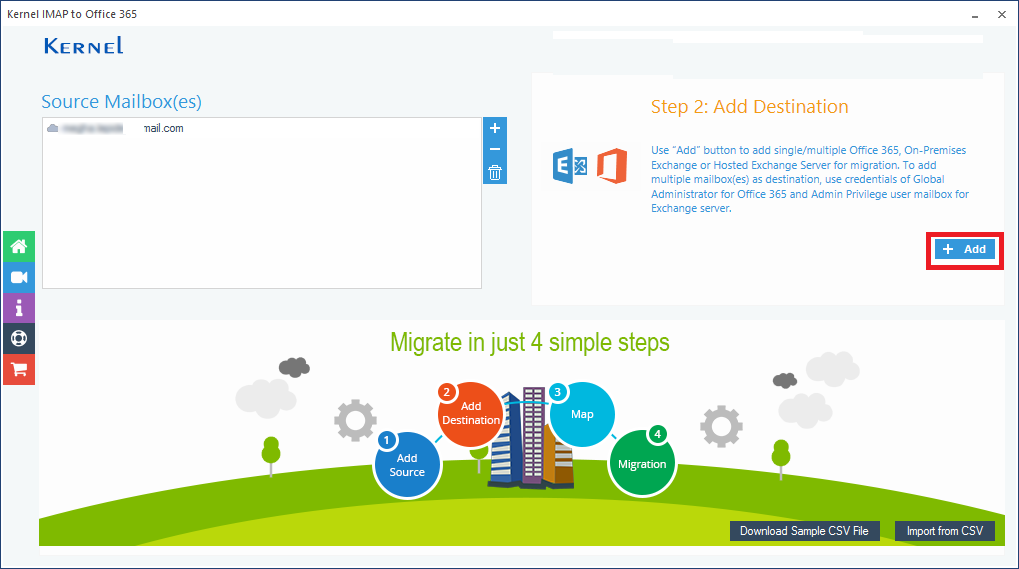
- After adding the Qmail account, click Add in the Add Destination section.
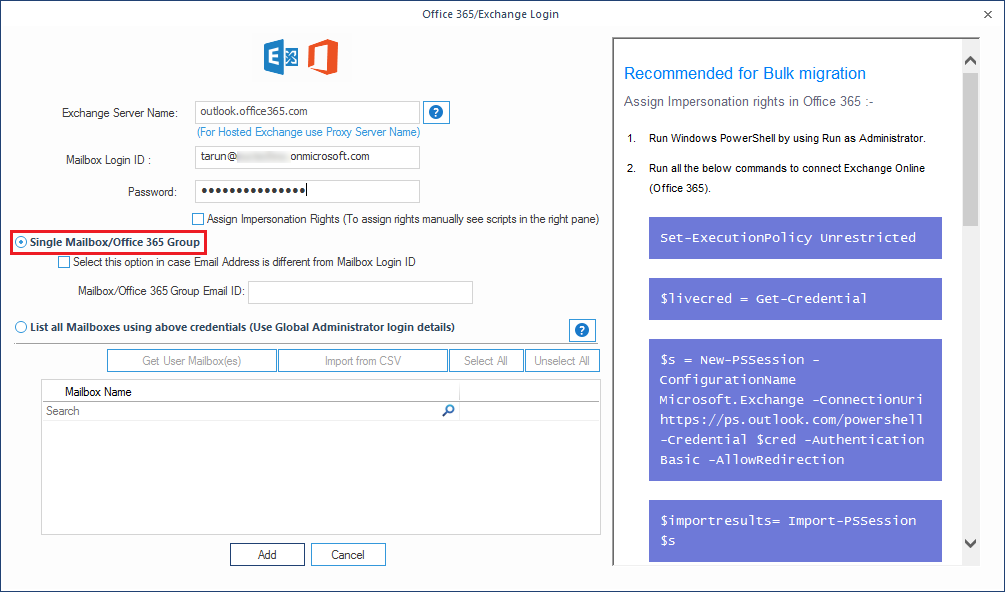
- Enter the credentials for Microsoft 365 account and click Add.
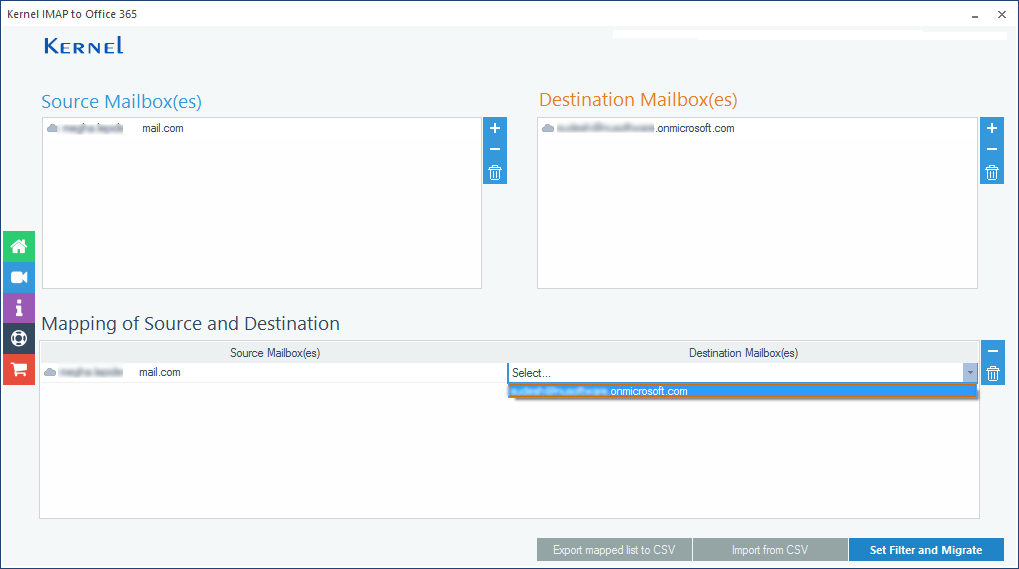
- Once you have added the source and destination mailboxes to the tool, map mailboxes to each other and then click Set Filter and Migrate.
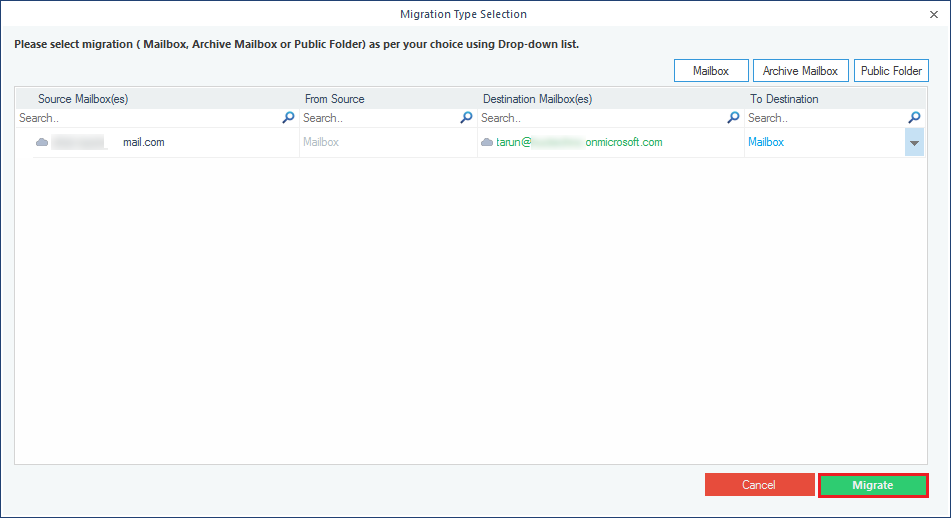
- Now, choose the type of mailbox that you want to migrate to Microsoft 365 and click Migrate.
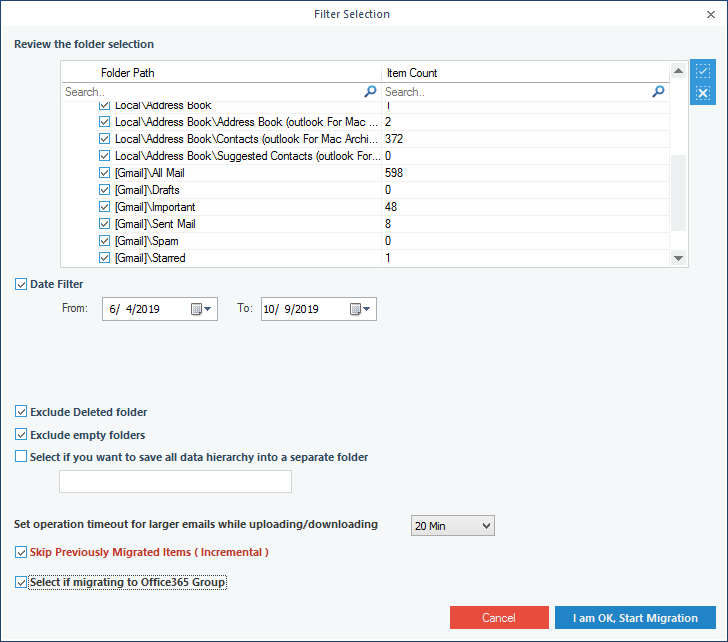
- Apply specific filters to the mailbox as per your requirements and click I am OK Start Migration.
- The software will start migrating the mailboxes one by one. After its completion, a message will appear on the screen confirming the completion of the migration. Click OK to end the process.
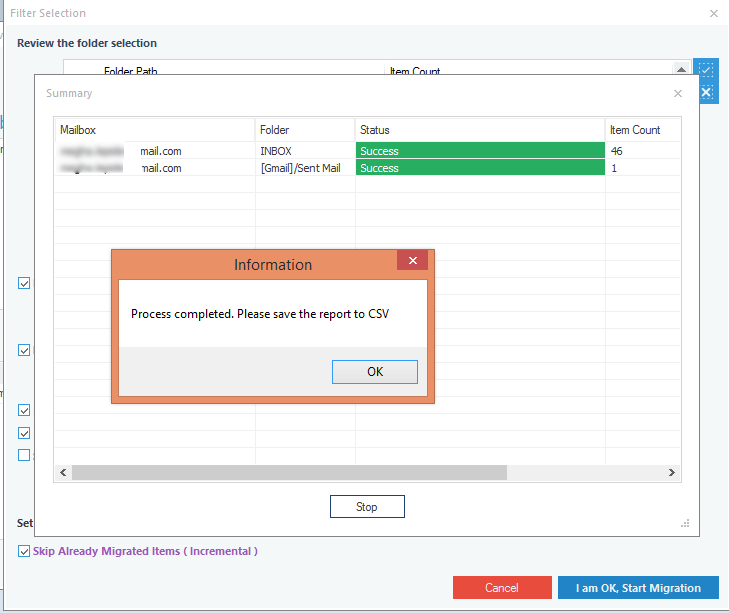
You can save the migration report in CSV format after finishing the task. That’s the easiest way to migrate Qmail mailboxes to Microsoft 365. You can download the tool and use it on your system for a trial.
- The migration software allows migrating mailbox data into Shared mailbox and Public Folders directly.
- It follows the incremental migration to avoid duplicity at the destination.
- The migration report is presented in the CSV file format.
- There are adaptive filters to select the critical content only.
- It is entirely compatible with all the IMAP mail servers like Gmail, Yahoo, AOL, G Suite, Zimbra, GoDaddy, Rackspace, etc.
Conclusion
Qmail works as an email transfer agent that enables users to migrate their mailboxes from one place to another. But there are no direct ways to transfer emails from Qmail to Microsoft 365, which makes it complicated for users to transfer their data. In this article, we discussed how you can migrate Qmail mailboxes to Microsoft 365 quickly with two unique methods. Also, we talked about an automation solution that is ideal for migrating all IMAP mailboxes to Microsoft 365 quickly.