

Read time: 6 minutes
File Share is a collection of shared files stored on a network drive. When a user chooses SharePoint Server as the storage location for their data, it becomes essential to migrate data from its file shares as well. File Server to SharePoint migration can be done for a lot of reasons, including better collaboration, centralized storage, easy file/data sharing, accessibility, and many more. Furthermore, the need for a professional document management tool compels the user to migrate and enjoy the advanced features & benefits of SharePoint.
Users can manually upload files to SharePoint sites or drag & drop the files from a file share to the SharePoint document library. However, it is not ideal for transferring a large volume of data. Let us know the next possible options to move large amounts of data from on-premises file share to SharePoint.
SharePoint Migration Tool – Microsoft utility
Microsoft offers a free in-built utility to migrate file share to SharePoint Online, that too from local file shares. Download the SPMT (SharePoint migration tool) software using the Microsoft website easily. To use this utility, you require the exact location of the file share, Microsoft 365 administrator credentials, and the destination SharePoint URLs beforehand. This tool provides filter options as well, which the administrator needs to set before the migration via tool settings. It also provides the facility of bulk migration via a .csv or .json file. The process takes quite a time to complete, depending on the Internet speed. Also, there is a limitation on the file size. The SMTP tool only allows files of up to 250GB to transfer from file share to Microsoft 365.
Note: After performing the file share to SharePoint migration using SPMT, you can alter the permission settings on the files according to the location of your on-premises data and the synchronization of the Active Directory accounts to Azure Active Directory.
An easier way for file share migration – Kernel Migration for SharePoint
Enterprise-level users can use professional third-party tools to easily move the desired data and permissions from their on-premises file shares to SharePoint Server or SharePoint Online. Kernel Migration for SharePoint follows a relatively simple and direct process for migration and provides flexibility and customization options. Moreover, you can migrate file share to SharePoint Online without putting any size restrictions. A migration job involves various steps. Therefore, to prevent skipping any step we recommend creating a quick SharePoint migration checklist.
Process to migrate file share using Kernel migration tool
Download and install the SharePoint Migration tool on your system. Carry out the following steps for File Server to SharePoint migration (both On-premises and Online) using this advanced utility.
Step 1. Launch the installed tool and connect both source (File System) and destination (SharePoint).
Step 2. Click on File System from the menu and select File System to SharePoint.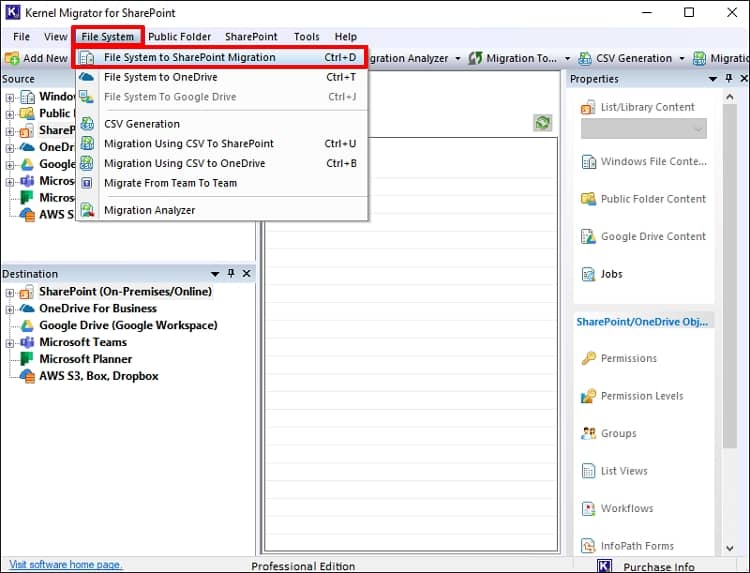

Step 3. Click on the down arrow next to the Add button to select files or folders.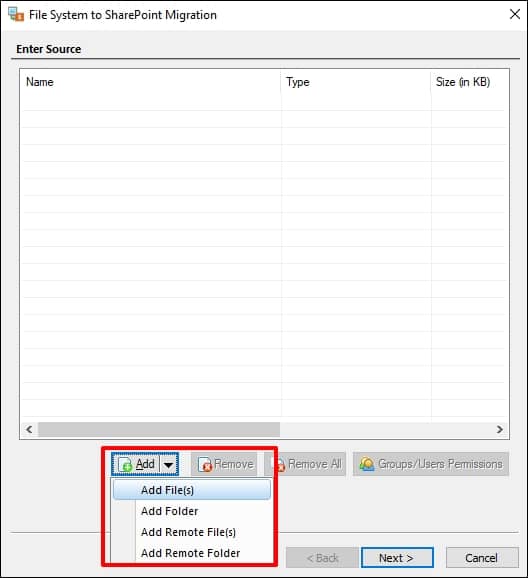

Step 4. After adding the items to upload click Next.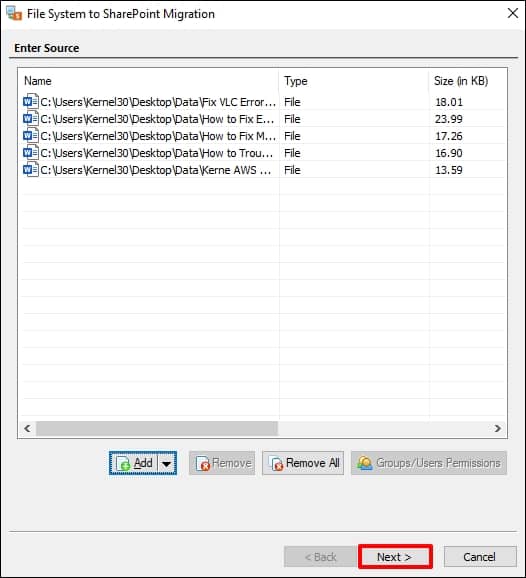

Step 5. Select the destination SharePoint site and click Browse.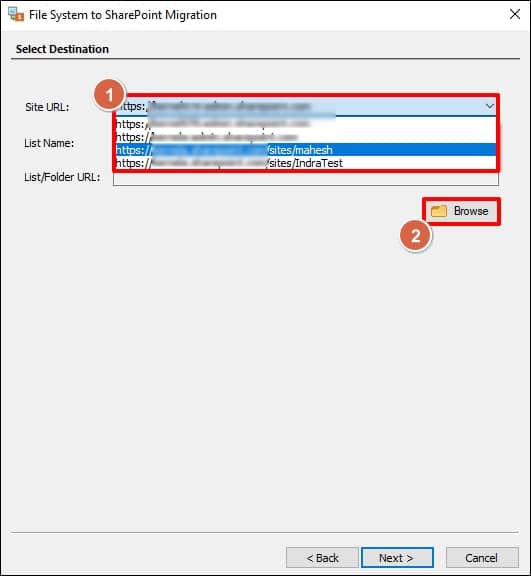

Step 6. Select the library and click OK. Then click Next.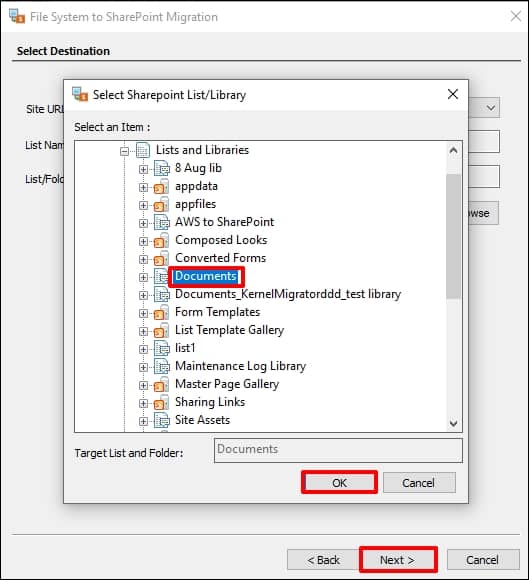

Step 7. The tool will automatically map the attributes. To map them manually, select any attribute and click Edit. Click Next to proceed.

Step 8. Apply the required filters as per your need and click Next.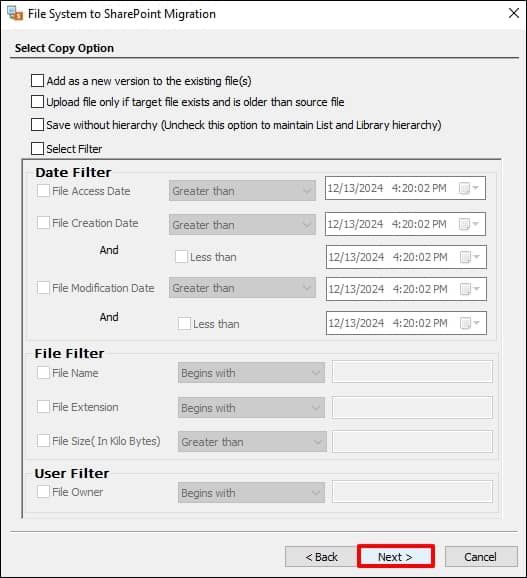

Step 9. At the Set Permissions window, click Next to proceed.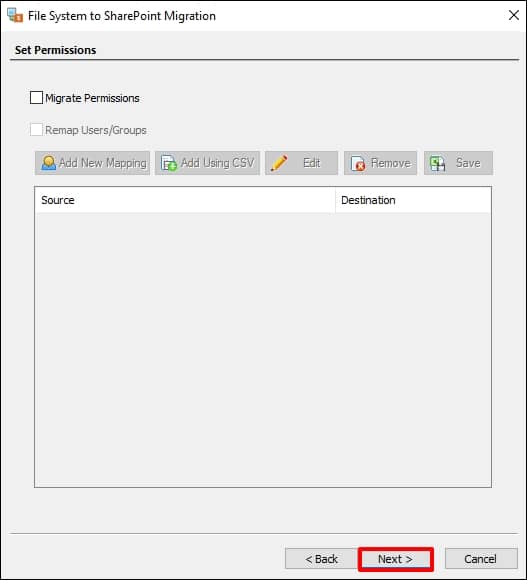

Step 10. To begin the data migration instantly, select Execute Immediate and click Next. To generate a detailed log report post data transfer, select the Generate detail log report.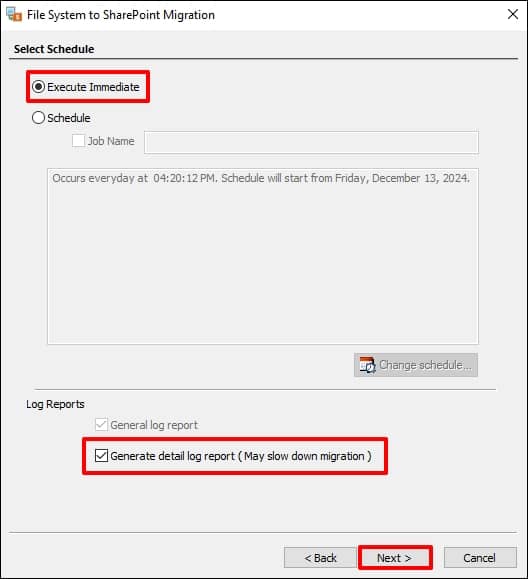

Step 11. To schedule the migration, select the option Schedule and provide a Job name. Then click the Change schedule button to configure the date & time. Finally, click Next to move forward.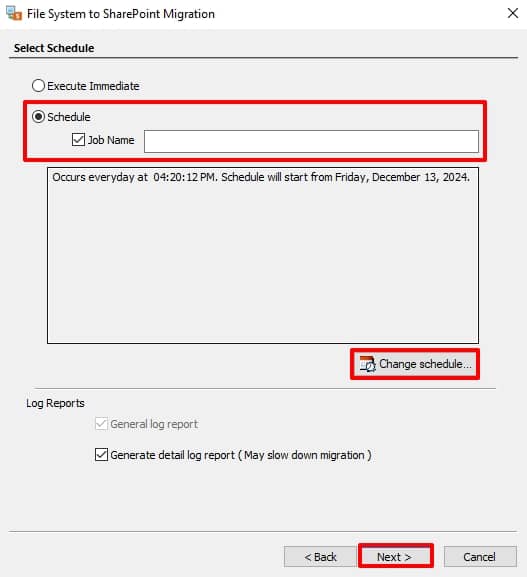

Step 12. The tool will display a detailed summary log of the transfer. Click Next to begin the transfer.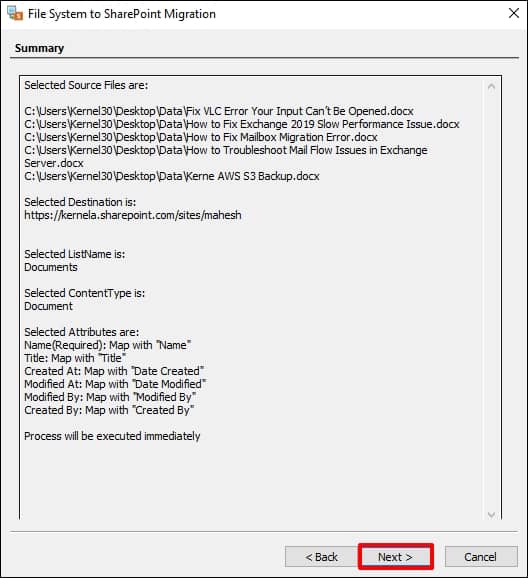
Step 13. When the migration is completed, a detailed report will be displayed. Click Finish to exit the process.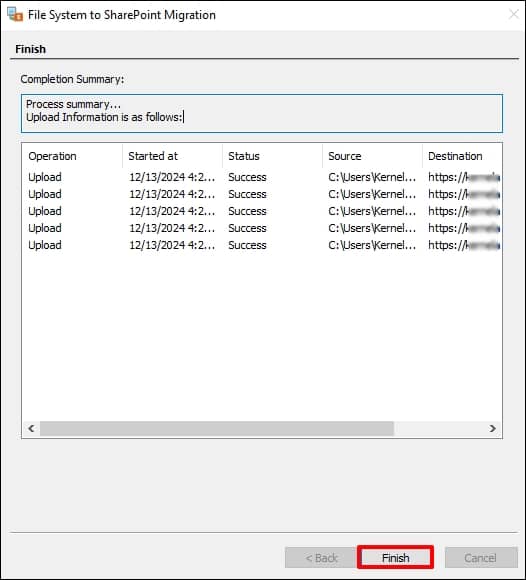

The tool not only helps you to migrate File Share data to SharePoint online from on-premises but also supports migration from different platforms. Some other migration jobs possible with the tool are:
- Migration from SharePoint 2010 to 2013, 2016, 2019 & SharePoint Online.
- SharePoint tenant to tenant migration.
- Exchange Public folder to SharePoint migration.
- You can also move data from SharePoint to Microsoft 365 (SharePoint Online).
- The tool also offers to move data from Google Drive & One Drive directly to SharePoint.
The tool ensures complete data integrity and can easily migrate SharePoint permissions during the migration. It is compatible with all versions of SharePoint Server, Exchange Server, and Windows Operating System.
Conclusion
In the above blog, we have discussed that if we migrate file share to SharePoint then, it makes collaborative document management and team collaboration easy. With the help of SharePoint Migration tool by Microsoft and a third-party Kernel Migration for SharePoint, migrating content in bulk can be done without any hassle. However, the third-party solution provides unlimited data transfer and maintains the data integrity and original file/folder structure, as it was in the file system.