Read time 11 minutes
Deletion is one such function that is very frequently used by Windows users. There is a Del button on your keyboard to delete files and folders. It is a very useful function and comes handy almost every day. But there is a downside as well; we might sometimes delete an image, video, or any folder without thinking through or by clicking on the delete key or touch icon mistakenly. One might say that it is what Recycle Bin is for.
Further, not all the deleted files go to the Recycle Bin, especially the ones deleted through the DOS command line. Also, files deleted by Shift + Delete also don’t go to the Recycle Bin.
In this blog, we are going to cover how to recover such files using Microsoft Windows Recovery Tool. Before we talk more about the tool and recovery method, it is very important to know how file storage file deletion works. Then, we can better understand how to implement file recovery.
What is a File System?
A file system determines how data is stored, retrieved, and managed on a storage device. Without a file system, the Operating System will not be able to store data efficiently, identify where one data end, the other begins, and how to retrieve a specific data item. There are three different file systems supported by Windows Operating System – NTFS, FAT32, and exFAT.
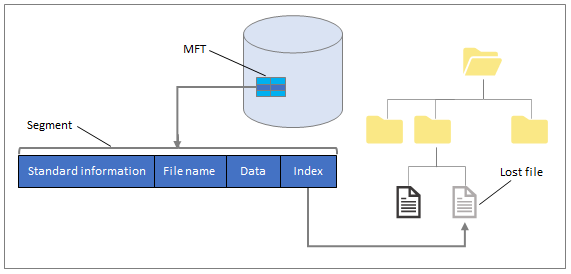
- NTFS– New Technology File System(NTFS) is the latest and default file system on Windows. It uses MFT – Master File Table to store file attributes such as Filename, data, Index, etc. A backup of MFT is also kept for backup and restoration purposes.
- FAT32– FAT32 is an older and more widely used File System but has limitations in terms of efficiency as compared to NTFS. It has a reserved area for basic format information and at least one FAT area for allocation table entry details.

- exFAT– Extensible File Allocation System (exFAT), released by Microsoft, is optimized for USB drives and SD cards and includes some improvements over FAT32.
How does a File System store and delete data?
All these File Systems and even other file systems such as Apple File System(APFS) keep a record of the data related to any file, folder, etc. Whenever a file is created, an entry is made to these records or tables. This information is updated when the file is modified, or the attributes are updated. Now, when a file is deleted, the data of the file is not deleted. But the entry in the file systems is updated to specify that the deleted data can now be used or overwritten. All good file recovery software, including the Windows File Recovery tool, makes use of these entries in the File System to determine and retrieve corrupt or deleted data.
So, by now, you should have understood that the data remains even when a file is deleted or corrupted but is not easily accessible. Further, it is best not to use your system or drive for other purposes until recovery as there are chances of overwriting the data, which will make the recovery difficult.
What is Windows Recovery Tool?
Starting with Windows 10 build 19041, users can use Windows Recovery Tool to recover and retrieve corrupt or deleted data such as files, images, documents, and even folders. This tool can be used to recover data present on a system drive, USB drive, external Hard disk or SD card. It cannot recover data from cloud storage or Network File System. Windows recovery tool supports recovery for NTFS, FAT, exFAT, and ReFS File systems.
Modes of Operation
Windows recovery tool has three modes, and it is very important to know them to be able to use the right mode as per requirement. The three modes of operation are:
- Default Mode– It relies on the Master File Table(MFT) and File Record Segments(FRS) to recover lost or deleted files. Without MFT and FRS, this mode cannot recover all data.
- Segment Mode– Segment mode does not rely on MFT or FRS and makes use of segments, which include file summaries.
- Signature Mode– This mode doesn’t require any File system structure to retrieve data. It searches for the required file types directly. It is best suited for non-NTFS storage devices.
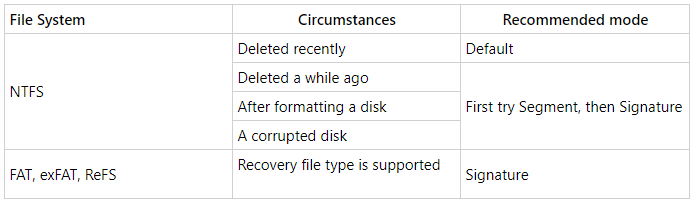
Because of the differences in the functioning of these modes, each is a better fit for recovery in a specific scenario. It is very important to decide the correct mode for the best results.
Microsoft recommends using these modes depending on the File system and circumstances as below:
How to recover files using Windows File Recovery Tool?
It is to be noted that the windows recovery tool is a command line-based tool, and a little knowledge of the command line is a must to use this tool. Let us begin.
- Ideally, the tool should be part of your Windows 10 suite. If not, you can download and install it from the Microsoft store.
- Go to Start and search for Windows File Recovery. Click on the resultant application.
- While starting, the application would request to allow it to make changes to your device. Click on Yes.
- A command prompt window will open up. Now, you just have to enter one command to recover your file in the below format:
winner source-drive: destination-drive: [/switches]
In this command,
- winner refers to Windows File Recovery,
- source-drive refers to the directory path where the required file(s) is/was located,
- destination-drive refers to the path to store the recovered file(s), and
- switches refer to various additional options available which are to be used based on your requirement
NOTE: Source and destination drives must not be the same. Also, the tool will automatically create a folder named – Recovery_
Let us show some examples to cover a range of commands.
1. Default Mode
- To recover abc.docx file in C: drive under Documents folder on a D: drivewinfr C: D: /n \Users\
\Documents\abc.docx - To recover all the jpeg and png files under Pictures folder on a D: drivewinfr C: D: /n \Users\
\Pictures\*.JPEG /n \Users\ \Pictures\*.PNG - To recover Downloads folder from C: drive to a D: drive winfr C: D: /n \Users\
\Downloads\ NOTE: For a folder, it is a must to keep the backslash in the end.
- To recover all PDF and Word files from C Drive to D drive
winfr C: D: /r /n *.pdf /n *.docx - For signature mode, ‘/x’ is to be added in the command.
To find out the supported file types for signature mode
winfr /# - To recover ZIP files from C: drive to D: drive
winfr C: E: /x /y:ZIP
2 . Segment Mode (/r)
For segment mode, ‘/r/ is to be inserted in the command.
3. Signature Mode (/x)
We hope that these examples should have given a better idea on how to frame your command to recover files using Windows Recovery Tool. However, it is not everyone’s cup of tea. There are many other options that need to be learned in-depth to make full use of these commands. It can be a long and inconvenient option for many of us who have never used the command line other than pasting commands as it is.
For those of us who struggle with the commands and are looking for a better and quick method to recover files, we have just the right tool for you.
Recover permanently deleted files with Kernel for Windows Data Recovery
Here we are going to mention a simpler and quicker way to recover deleted files for free. If you were looking for something like this, please keep reading. Kernel for Windows Data Recovery (Free Version) tool is a one-stop solution to recover any type of lost, deleted, or permanently deleted files. This Free Windows Data Recovery Software provides a simple GUI wherein you can just select your drive and recover all the lost or corrupted data in easy steps. With this free version of the tool, you can recover up to 2GB data for free. In addition to that, there are no commands to be learned for using this tool. Operating this tool is so simple that even beginners can use it without any issue. Here we are going to mention the step by step process of how this tool works. Let’s begin:
- Download the tool from the website and install it properly in your system.
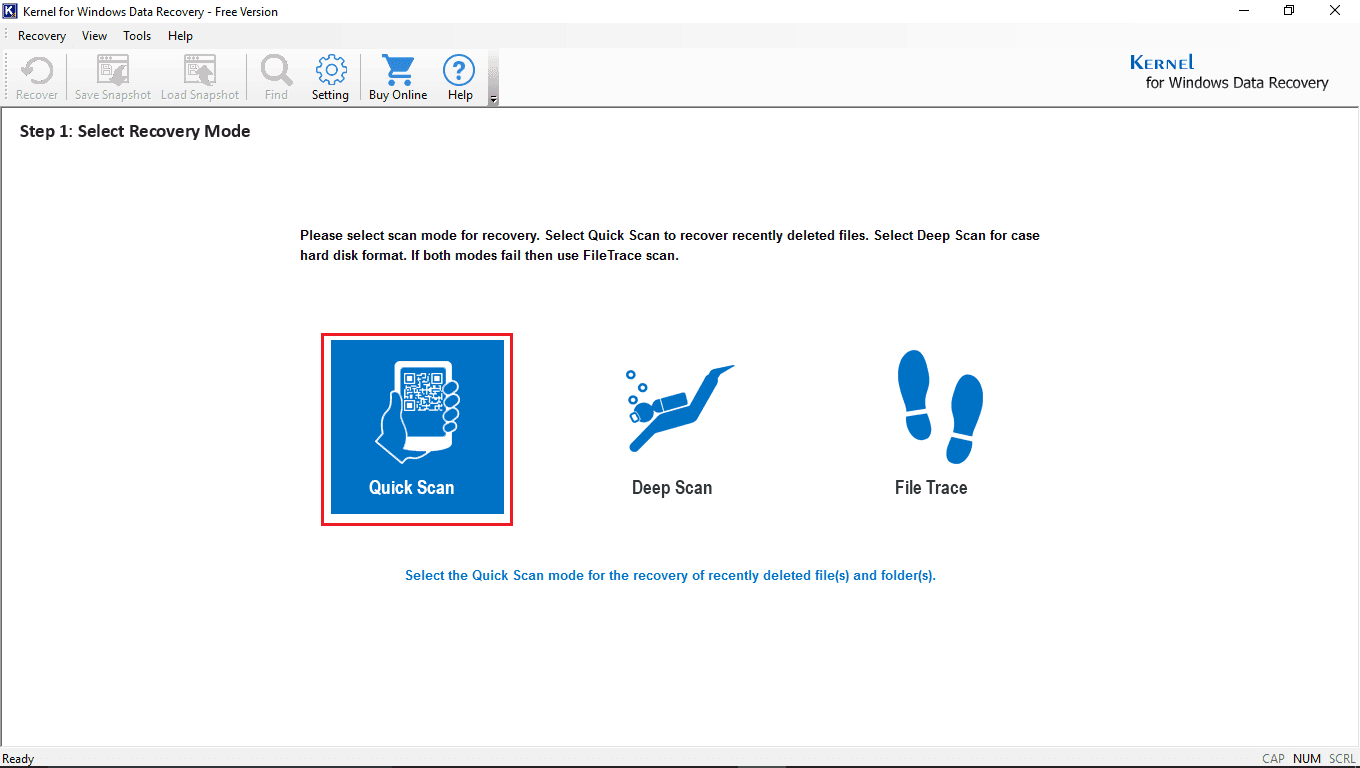
- Once installed, run the tool and in the home screen of the tool, click on the Quick scan or any other required scanning mode.
- Now, from the given drives, select the drive from which you want to recover the deleted data. Click on Next once done.
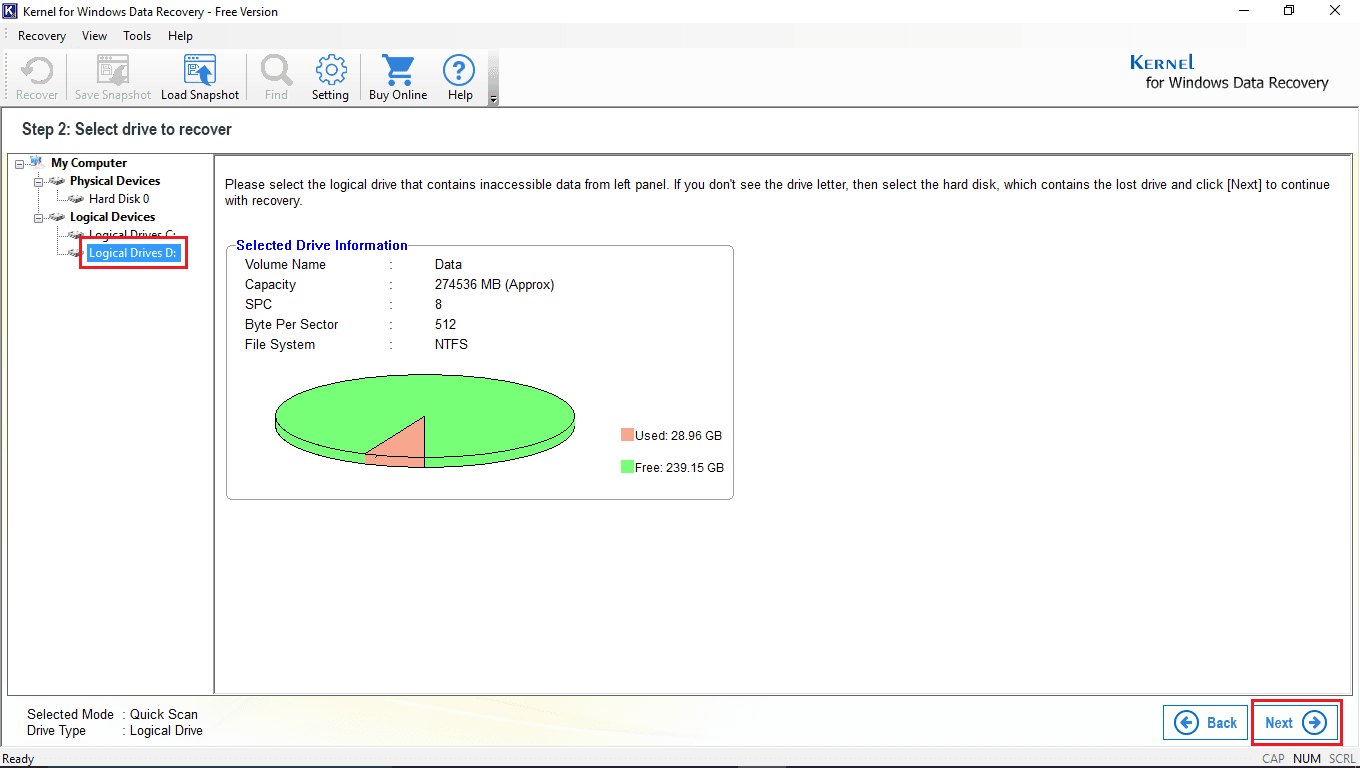
- As you proceed, the tool will show you the disk information; you will need to click Next on that page. Once done, the tool will start the scanning process, wait for the process to finish.
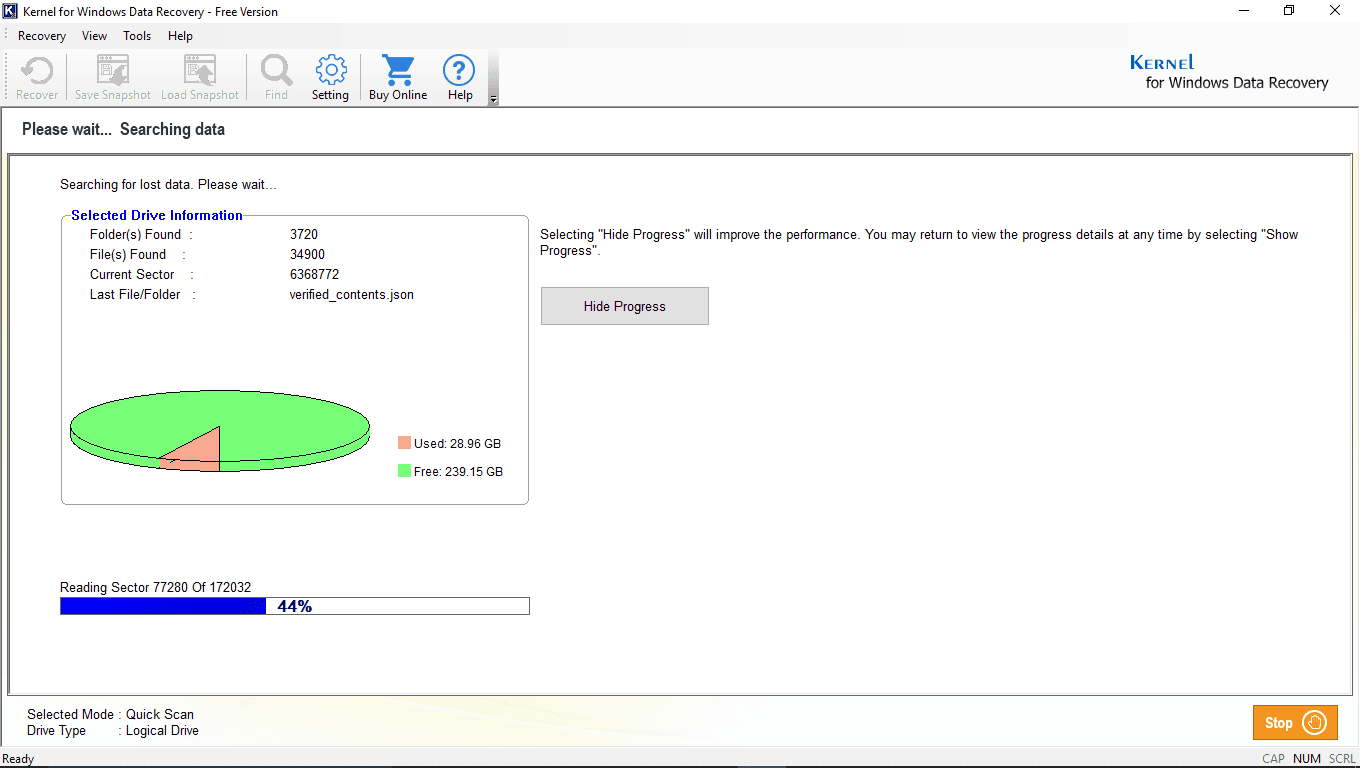
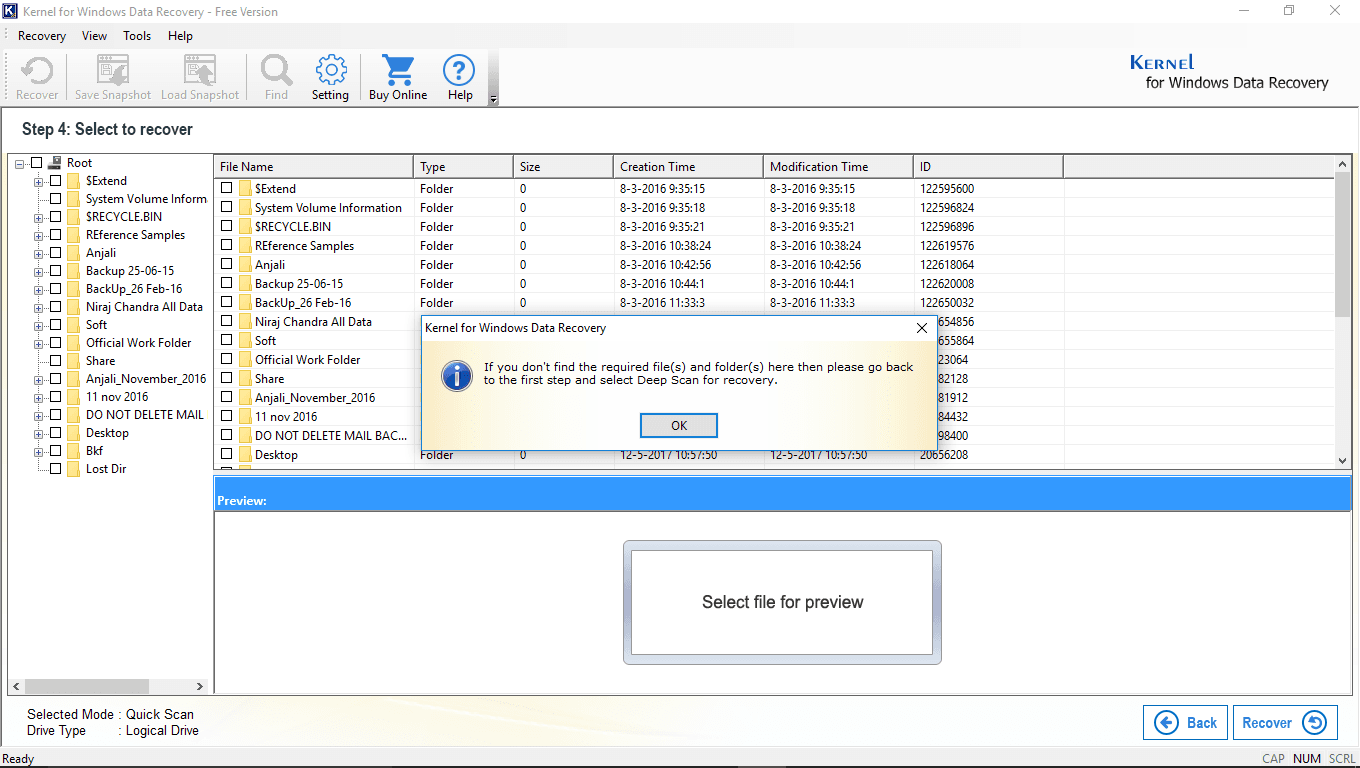
Note: To see the progress, click on the show or hide the progress button. For a faster result, click on the Hide Progress. - Now, you will see that all the files and folders from that particular drive are there on the screen. If there is something missing, change your scanning mode. To proceed, click on Ok.
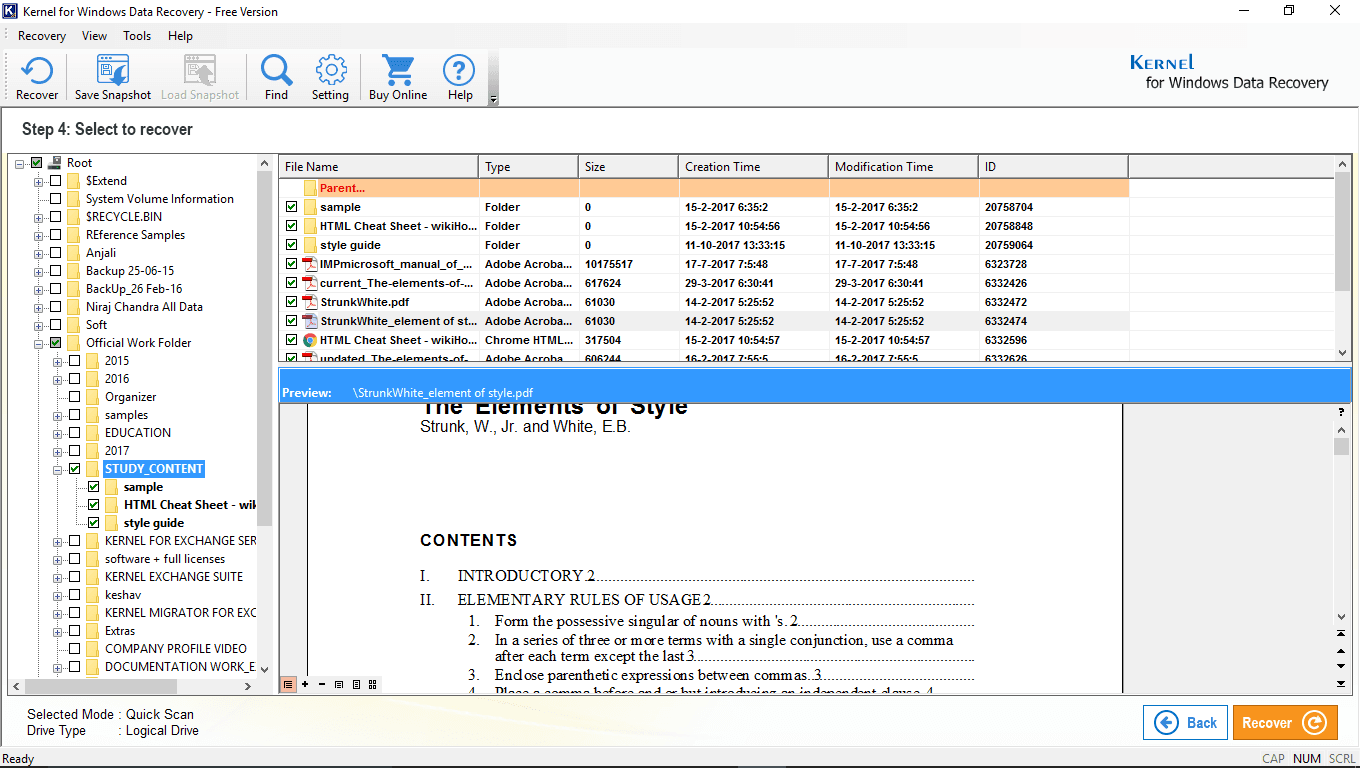
- The files and folders mentioned on the screen, click on any of them to have the preview of the desired files.
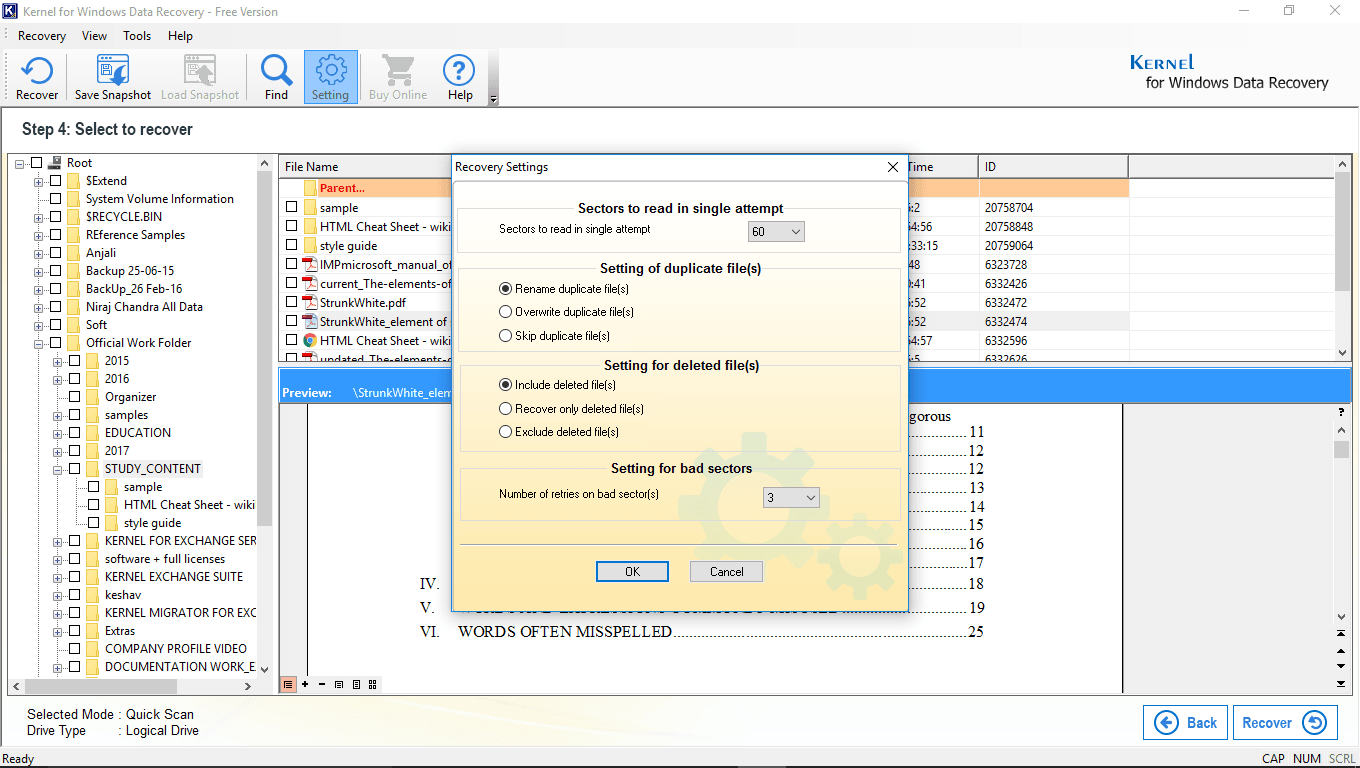
- In Recovery Settings, apply the set filters for duplicate files, deleted files, bad sectors, etc. Once done, click on OK.
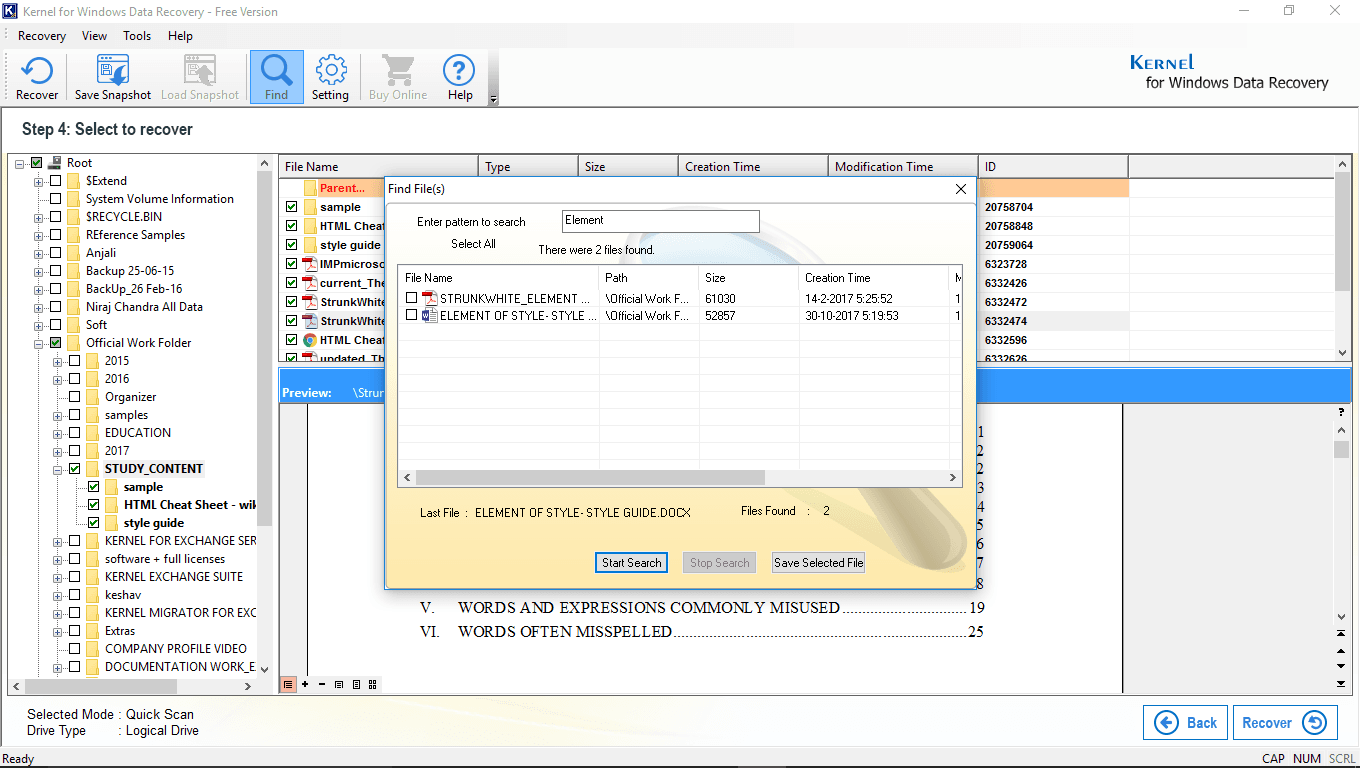
- The tool comes with a Find feature, clicking on which you can look for the desired file. Enter the keyword in the search box and click on the Start Search.
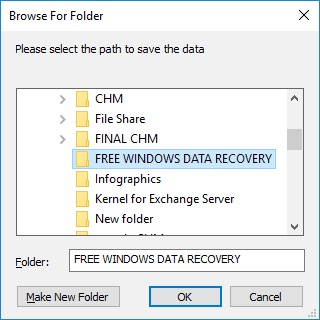
- Now, provide a destination to the files you are going to recover by clicking on the Browse button. Once allocated a place, click on OK.
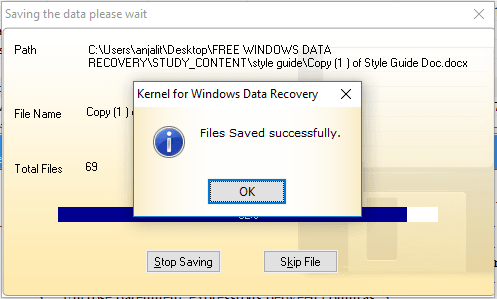
- Wait for the saving process to finish; once done, click on OK to finish.
Conclusion
In this blog, we started with a detailed understanding of what a file system is. We covered three main file systems used in Windows operating systems. Then we explained how file data is stored using file systems. We briefly covered how a file system provides a way for recovery tools to retrieve files that have been deleted or corrupted. Then we moved to the Windows File Recovery Tool and its three modes of operation. Next was the most critical and difficult part, how to use Windows File Recovery Tool. We provided various examples for each operating mode and gave the sample commands for each of those scenarios. In the end, we recommended Kernel for Windows Data Recovery (Free Version) Tool for those who prefer a GUI based and quick solution for recovery of their files and data. We provided the working process of the tool with the help of screenshots for a better understanding. We have also mentioned some unique features of the tool like the Find feature. Hope this blog helped you!