Read time: 9 minutes
OST means Offline Storage table, also known as Offline Outlook Data File. Outlook automatically creates it when you create an account and configure it with Exchange Server. It saves a synchronized copy of your mailbox to your local drive and allows you to access emails, contacts, calendars, notes, and appointments in an offline environment.
However, if your Outlook profile or system is not working properly, in that case, you need to import the OST file into another system or a new Outlook profile to access its content. But Outlook doesn’t support importing OST files directly. So, there are several steps which we need to follow to achieve a successful import process. Initially, you must convert your OST files into PST format to access your mailbox items. Let’s discuss different approaches to converting OST files into PST format and then importing that PST file into Outlook to access its mailbox content.
Major reasons to import OST files into Outlook
There are certain reasons to import an OST file depending on the user’s situation. But the most significant one that compels the user to import OST files are listed below:
- Exchange Server downtime
- Windows Domain Controller got disconnected.
- To migrate data from one system to another.
- To create a backup or archive of email data.
- Exchange Server maintenance
- Repairing Corrupt OST files.
It is important to know where your OST files are stored before importing them into Outlook. So, follow the below steps to locate your OST file.
Locate the OST file location in your system
To move ahead with the process of importing an OST file into Outlook, it begins with locating the exact file in your system. Outlook users usually deal with multiple OST files, which makes it difficult to manage. Still, there are simple methods of finding your specific file. Follow the steps below to locate your file.
- Open Outlook, then click on the File tab.
- Click on Account Settings, then select Account Settings from the drop-down menu.
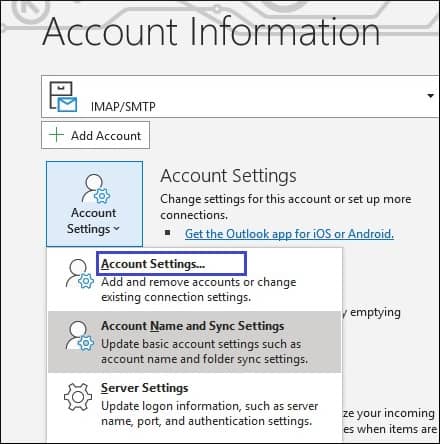
- Now, click on Data files, select your OST file account, and click on Open file location.

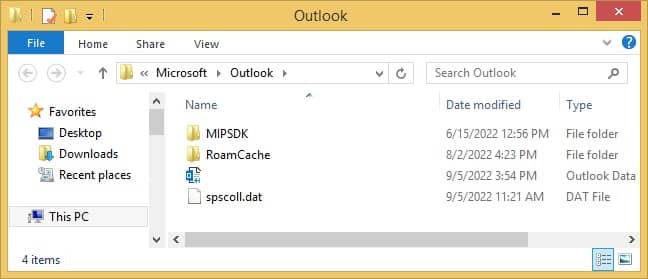
- Now, the new window will open with the default location of your OST file.
Methods to import OST files into Outlook
You can explore the following methods to import OST files into Outlook. To accomplish the task, you must convert your OST file into PST format first and then import that PST file into Outlook to access your mailbox data.
Part 1: Ways to convert OST file into PST
Once you find your OST files in your system, then you need to convert it into PST. There are three different methods to convert OST into PST format. Follow any one of them using its proper step-by-step guide.
- Method 1. Using the Archive feature: Outlook has many built-in features that give its users seamless access to manage their mails efficiently. The Archive feature is one of them that helps you to archive old mails from OST files into PST format quickly. Follow the steps below to execute the task.
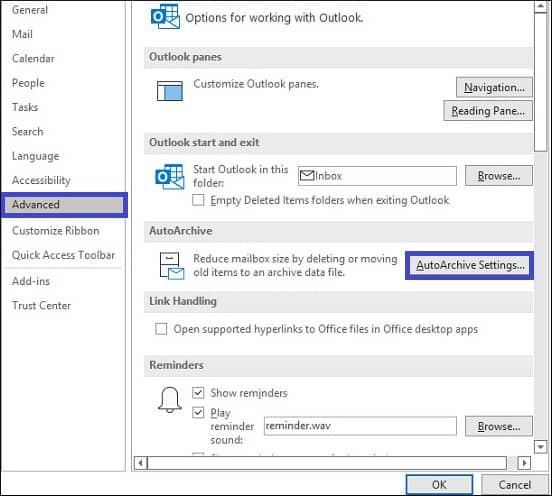
- Open Outlook, then click on the File tab.
- Select Options from the left panel.
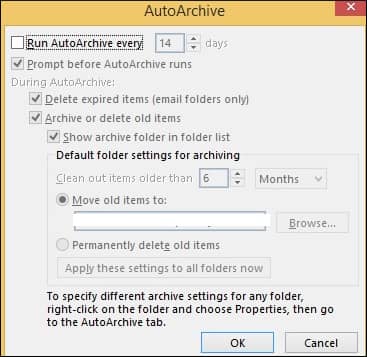
- Select the Advanced option, then click on Auto Archive Settings.
- Now, set up the auto archive settings as per your requirement. Set the day count to run auto archive and set a count to clear old mails.
- After that, click OK, and Outlook will automatically create an OST email archive in PST form.
- You can also ensure the Archive utility works by navigating the location you picked to save the PST files.
- Method 2. Using drag and drop method: It is also one of the best features of Outlook to move OST file items into PST format. So, follow the given steps to move OST files as PST.
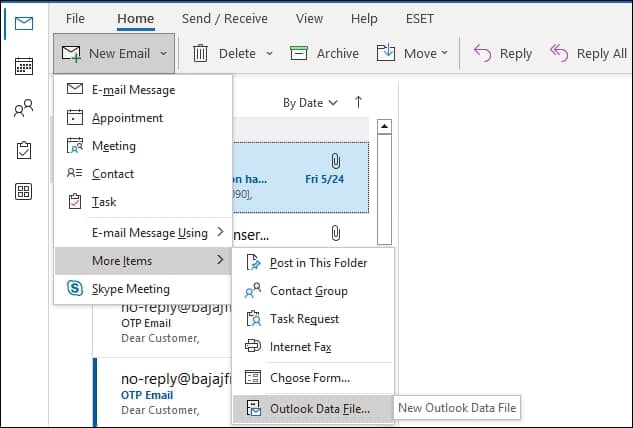
- Launch Outlook, click New Email, select More Items from the drop-down menu, and choose the Outlook Data File option. It will create your new PST file.
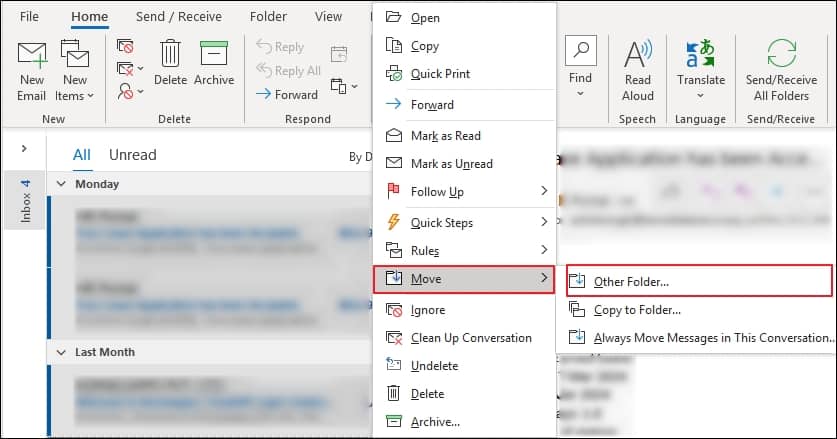
- Choose the emails from the platform and right-click on them to select the Move option > Other folder.
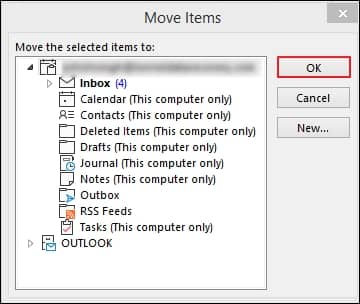
- Now, select the created PST file and click OK to copy the OST file items into the new PST file.
- Launch Outlook, click New Email, select More Items from the drop-down menu, and choose the Outlook Data File option. It will create your new PST file.
- Method 3. Using the Import/Export feature: It’s also an in-built Outlook feature that migrates Outlook messages, items, tasks, notes, etc., in PST format. Follow these simple steps to export the content from Outlook.
- Open Outlook, then click on the File tab.
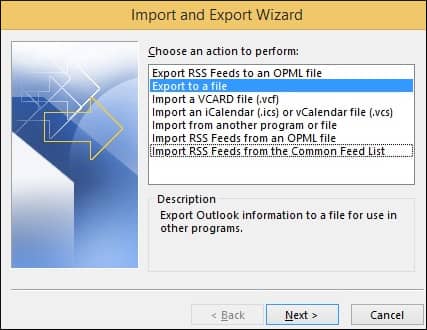
- Select Open & Export and then click on Import/Export.

- Click Export to a file; then click on Next.
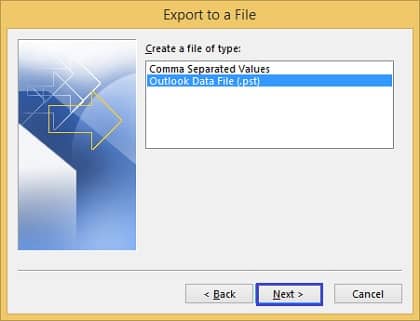
- Now select Outlook data file .pst and click on Next.
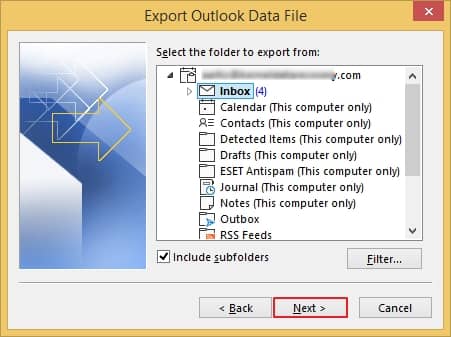
- Now, select the folder you want to export into PST format and click on Next.
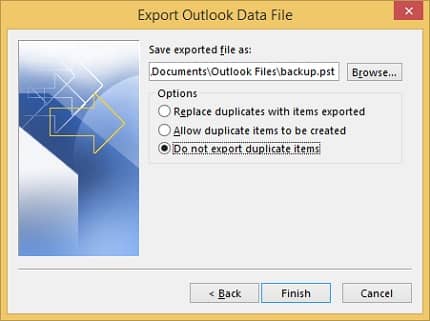
- Browse and select the folder to save your converted PST file and selectDo not export duplicate items option, then click on Finish.
With the above approaches, you can convert your OST file into PST. Then, to access the content of the OST file in Outlook, you need to import the converted file into Outlook.
Therefore, follow the given method to import the PST file into Outlook.
Part 2. Import PST file in Outlook using the Import/Export feature
Upon completing the conversion of your OST file into PST file, now you can move further to import that converted PST file into Outlook. It is the only manual method to import PST files in Outlook. By following the instructions, you can import the converted file easily.
- Launch Outlook, go to File tab and click on the Import/Export option.
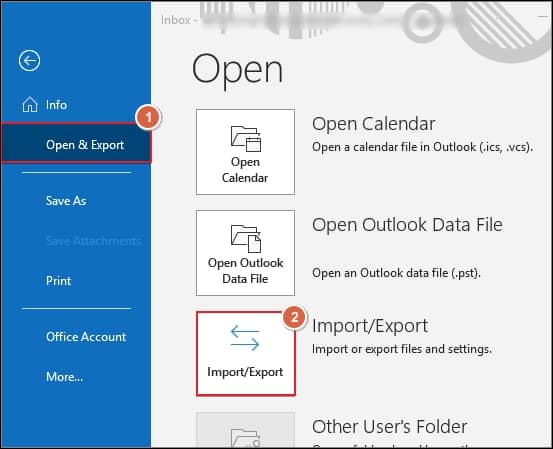
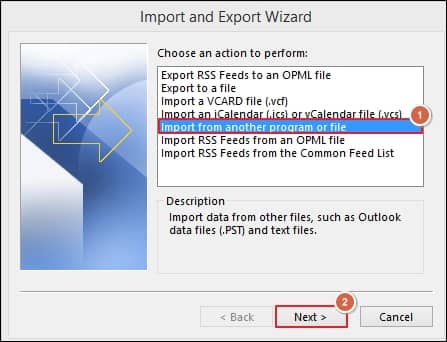
- Click on the Import from another program or file option from the Import and Export Wizard.
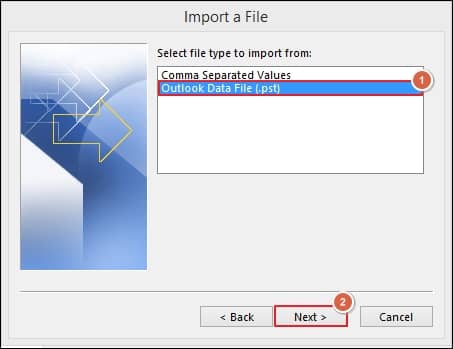
- Select Outlook Data file(.pst) file format.
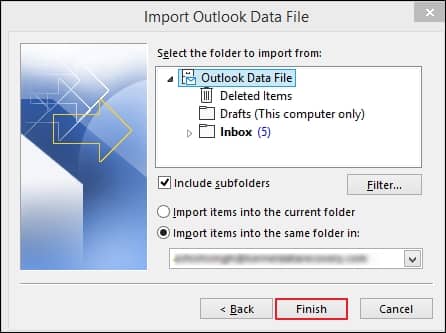
- Browse the location of converted PST file and check the box of Replace duplicates with items imported.
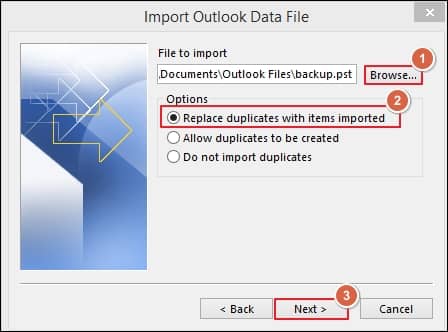
Note: You can create a password to protect your PST file.
- Select the folders to import from with various filters and click on the Finish option.
In this way, you can import your OST file into Outlook. But if your data file is corrupted, damaged, or orphaned, these methods won’t be helpful at all. Also, these methods are time-consuming and complex for beginners. Besides that, there is a high possibility of data loss with manual methods. To avoid these limitations, it is highly recommended to use an automated tool to import OST files into Outlook efficiently.
A professional tool to import OST files
Kernel for OST to PST converter is a reliable, safe, and efficient tool to convert inaccessible or orphaned files. With the help of this tool, you can easily import your OST files utilizing its simple interface & robust features.
It even helps you to retrieve OST file items like emails, attachments, calendars, contacts, tasks, etc., and save them to Outlook PST or Office 365/Exchange Server accounts.
It comes with the following advanced features:
- Converts oversized OST files easily.
- Supports migration of multiple OST files.
- Advanced filters for selective email migration.
- Supports conversion of IMAP OST files.
- Saves OST emails to PST, MSG, EML, HTML, and PDF formats.
- Displays recovered mailbox items in the preview section.
Conclusion
The blog had provided valuable insights on OST files and efficient ways of importing them to Outlook. However, if your Outlook is not connected to an Exchange Server, manual methods are not sufficient. In that case, consider using recommended OST to PST converter for a quick and efficient solution. Take advantage of its free trial version to optimize your experience.
FAQs
A- Converting an OST file to PST makes data recovery possible even if there has been any accidental deletion of user mailboxes within Exchange environment. The data remains accessible even if something goes wrong with the Exchange server.
A- If you use Outlook and have an OST file, you can use the ScanPST.exe tool to retrieve and export any deleted emails from your Deleted Items folder. This can be a lifesaver if you accidentally deleted an important message or file. You can locate this utility by following the location: C:\Program Files\Microsoft Office\root\Office16.
A- If you delete the OST file intentionally or unintentionally, don’t panic, since you won’t be losing any data. This is because files stored on the Exchange Server are easily accessible and can be re-downloaded at any time.