Read time: 7 minutes
“The article is dedicated to the best manual way, i.e. through a LAN cable and Ethernet ports connected to shift or transfer desired content or files from an old system to a new system. Users would also get to know the professional way to recover and move even the corrupt and inaccessible data from their Windows systems.”
Users store tons of file(s) on their computers, name it multimedia files, software packages, add-ons, ISO images and more resulting in GBs of storage space in use.
When it comes to the file transfer from one PC to another, especially in cases of new PCs, even the thought of the task punches you. Data transfer speed is important in such a situation, as total data transfer time depends on the mode of transfer and the medium used. If you opt to choose the lethargic medium, file transfer can become hefty and frustrating.
In this article, we’ll walk you through on how you can transfer your file(s) from one PC to another faster with no additional and expensive equipment.
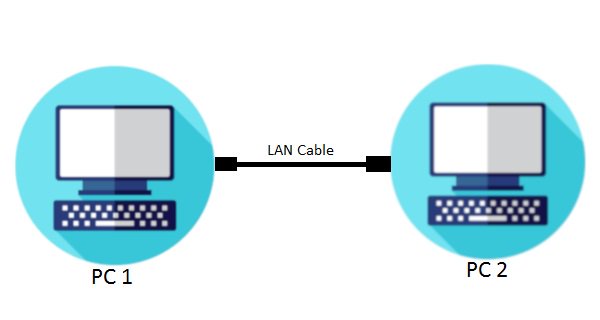
Transfer file(s) between two PCs using LAN cable
LAN Cable has been one of the oldest media for data transfer from one computer to the other by connecting them with Ethernet ports.
Data transfers are faster through a LAN Cable, and it works on all versions of Windows. LAN Cable eliminates the need of plugging in and removing out the Pen drive every time you want to transfer file(s). Also, you do not need to depend on Wi-Fi connectivity. Irrespective of the type of data you wish to transfer, LAN Cable gives the maximum speed possible, and you do not need high technical skills as for configuring a network to make use of Wi-Fi.
Setup the LAN connection between the two PCs
Follow the steps below to setup the LAN connection between the two PCs:
- Connect the LAN Cable to both the computers.
Note: You can use either crossover cable or ethernet cable (on a modern PC it doesn’t make any difference). Next, you have to turn the Sharing Options on both computers.
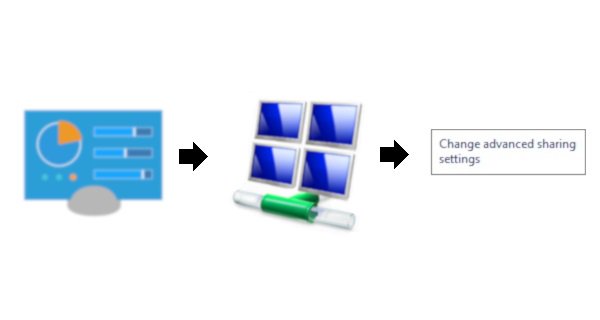
- Open Control Panel > Network & Sharing Center > Change advanced sharing settings.
- Under public folder sharing, select the radio option Turn on network detection, and select Turn off password protected sharing. Then click Save changes.
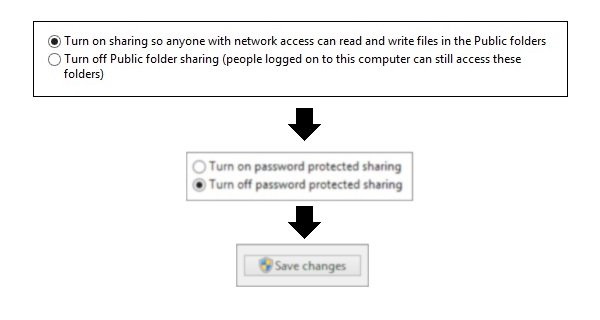
Note: Turning off the password protected sharing might create a security risk, so once you’re done with the data transfer, turn it on again. Now, in this step, we’ll bring both the computers on the same network.
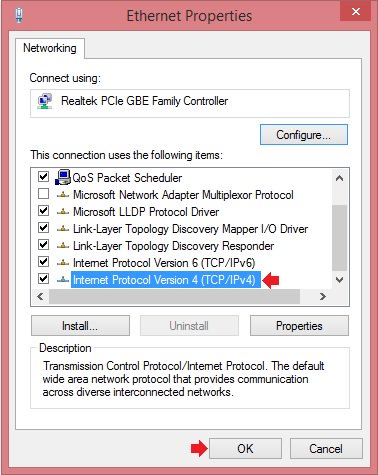
- Open Control Panel > Network and Sharing Center; you will see Local Area Connection or Ethernet.

- Click and go to Properties. Select Internet Protocol Version 4(TCP/IPv4) and click on the Properties button.
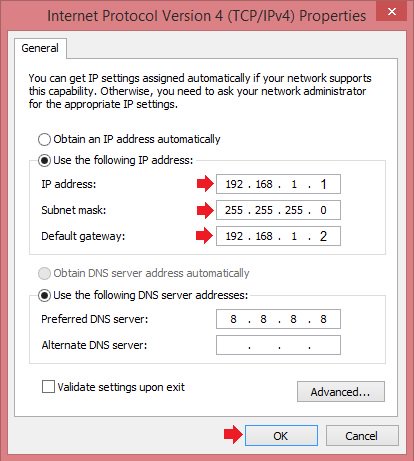
- Under “Use the following IP address,” put the following values on the first computer (PC 1):
- IP Address: 192.168.1.1
- Subnet Mask: 225.225.225.0
- Default Gateway: 19.168.1.2
- On your second PC put in the following values:
- IP Address: 192.168.1.2
- Subnet Mask: 225.225.225.0
- Default Gateway: 192.168.1.1
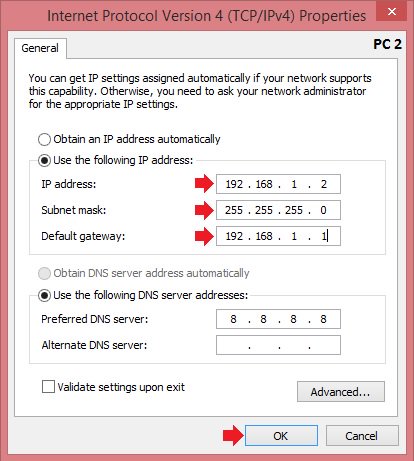
Note: We’ve kept the Subnet Mask same, but different IP addresses.
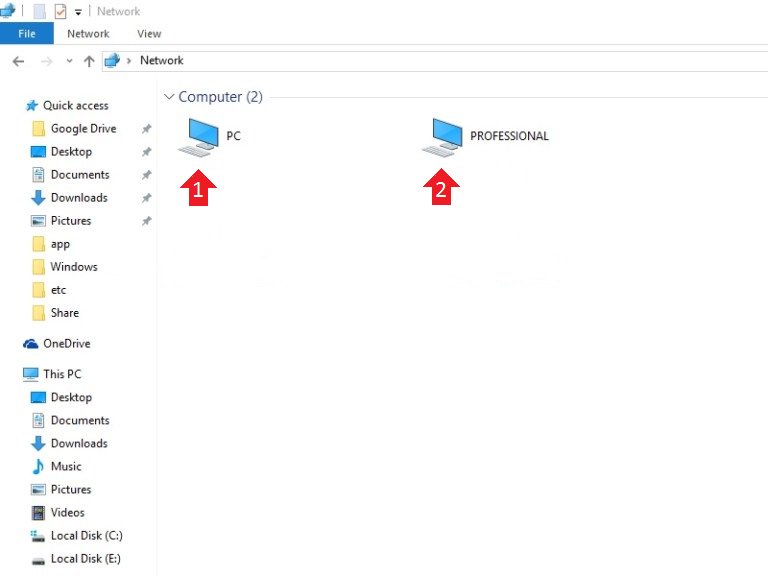
Now, open Windows Explorer and double-click Network folder. On successful connection, you’ll see names of both of your PCs as below.
Share the target folder(s)
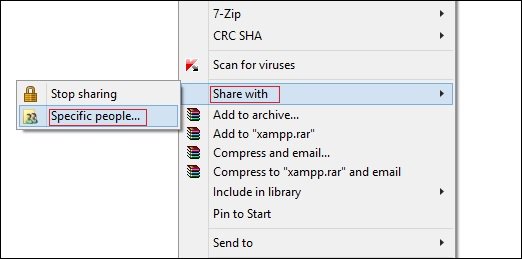
- Select the folder(s) or file(s) you wish to transfer to your new PC, right-click on it > click Share with > select Specific people.
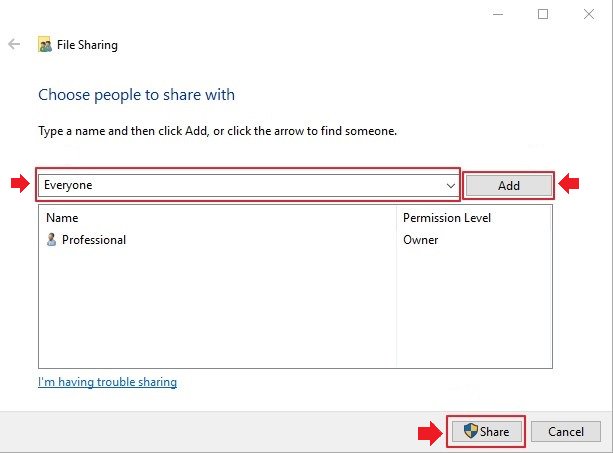
- In the File Sharing window, select Everyone from the drop-down menu, click the Add button, and click Share.
That’s it; you’ve successfully connected both of your PCs and shared the file(s) or folder(s) which you want to transfer. Now, copy the file(s) to transfer and paste them on the second PC.
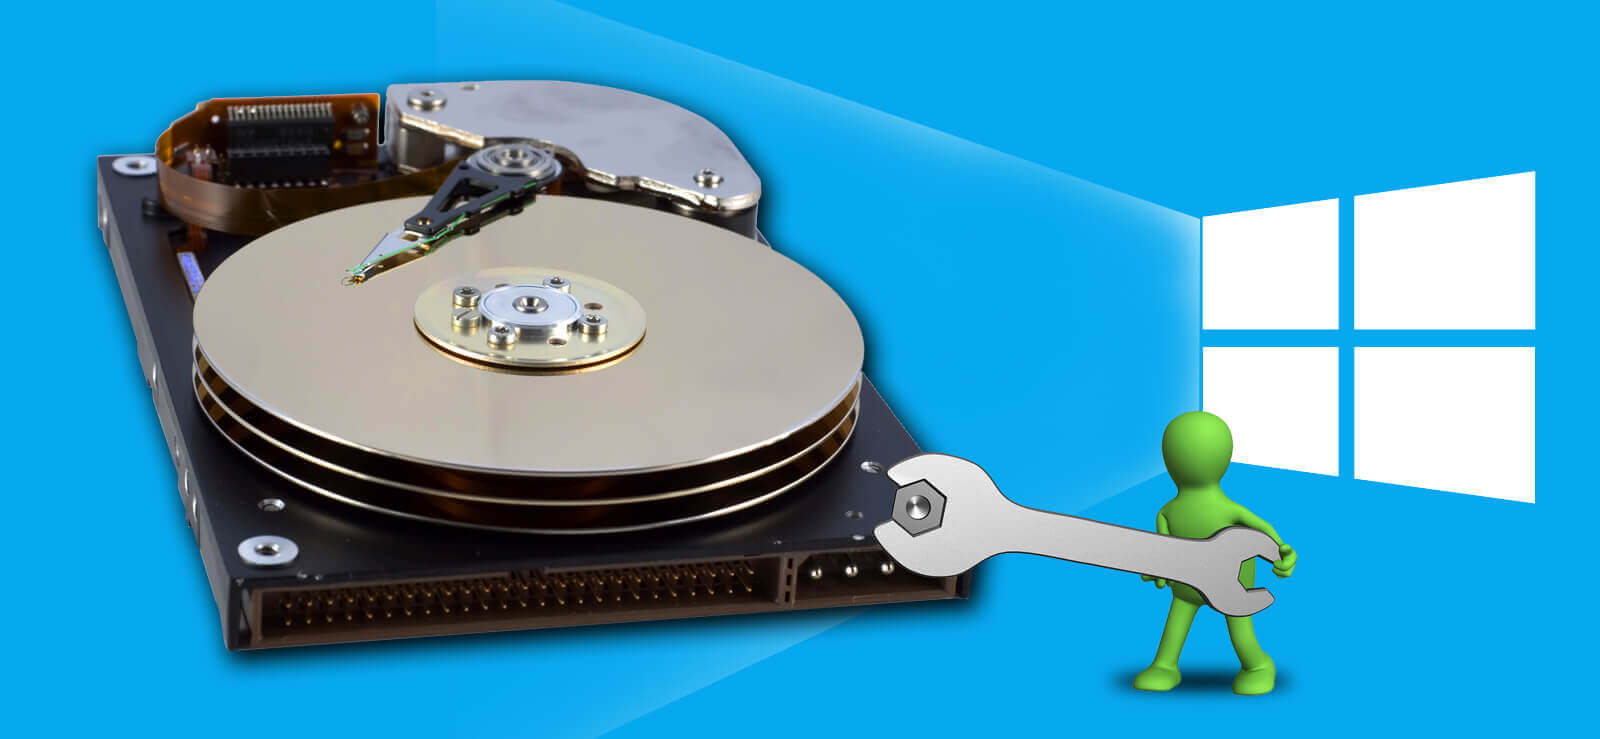
How to transfer files when Windows data is inaccessible?
When data is inaccessible, you need to use a Windows data recovery tool. Kernel for Windows Recovery is an amazing tool for dealing with data recovery issues which users face. The tool can recover your valuable data from corrupt or damaged hard disks, pen drives, floppy disks, flash drives, etc.
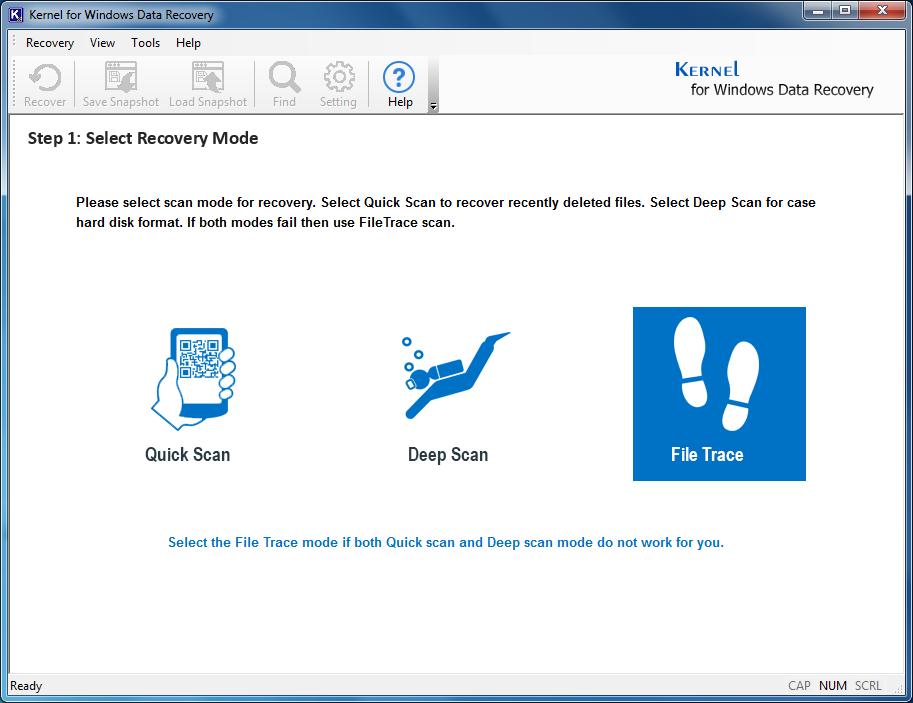
Crashed hard drive data recovery tool by Kernel can save you from all kind of data recovery scenarios name it corruption, file or disk damage, mistakenly deleted file(s) or folder(s), etc. Kernel for Windows Data Recovery tool’s best feature is that it allows previewing file(s)/folder(s) upon completion of disk/drive scanning. The user can decide whether to recover the whole data or part of it.
Conclusion
Transferring data from one PC to another can become frustrating and time-consuming if you don’t know about the right methods. Transferring data with the help of an external HDD or Pen drive could be possible options, but comparatively the transfer speeds would differ. So, the easiest method would be to use a LAN Cable.