Read time 6 minutes
Office 365 is the favorite destination of the majority of business organizations when they think about a suitable cloud platform. It has become a dominant player in the cloud business and businesses are migrating their data at a rapid speed. However, there are multiple precautions which you should take care of while migrating the data; otherwise, there can be some unwanted errors.
In this article, we will go through one significant error, i.e., unauthorized error 401, which does not even let the migration started. The error message can be seen as the following:
The request failed. The remote server returned an error: (401) Unauthorized.

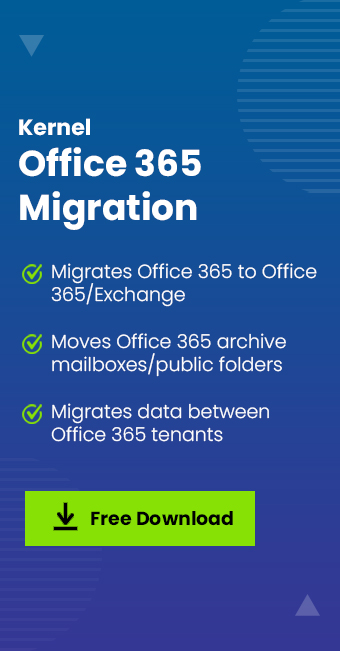
To migrate your Office 365/Microsoft 365 data securely, try Kernel Office 365 Migration tool. It is a quick and accurate tool for all Office 365 Migration task.
Reasons behind unauthorized error 401
If you are facing this kind of error, then there may be multiple reasons behind this issue. Here are some of them listed below:
- The user ID is different than the UPN (User Principal Name): If the Office 365 account which you are using is different from the UPN from the Active Directory, then you will have to face the error.
- MFA (Multi-Factor Authentication) is enabled for Office 365: If Office 365 has multi-factor authentication enabled for the account, it is not easy for a manual method to access the mailbox easily.
- The Username and Password have incorrect spelling: The spelling of the username and password of Office 365 is not correct.
- The domain of Office 365 is not registered with the DNS of Microsoft: Many times, the user creates an Office 365 account and tries to start the migration instantly. Then the error may occur, because the domain of Office 365 may not be registered with the Microsoft DNS.
Tactics to resolve the unauthorized error 401 during Office 365 migration
If you are facing this error, then you may try to use the following solutions to rectify the problem:
- Update the Administrator credentials.
- Edit the Migration Endpoint in the Exchange Admin Center. Try to check complete details of the batch migration and edit the information.
- If the Password of the Administrator account is too complicated, then reset it.
- Assign the Global Administrator credentials to the Office 365 account.
- Choose a different Office 365 account for the migration.
Professional solution to resolve the unauthorized error 401 during Office 365 migration
After making all the appropriate changes to the Office 365 account, the error should be removed, and the migration should also be smooth. But if you still are facing the same error due to UPN settings and there is no manual method to solve the problem, then use a professional Office 365 migration tool which can bypass all the technicalities and perform the migration on your terms. Kernel Office 365 Migration is the best-suited migration software which can access the email ID along with the UPN ID and complete the migration. Here is the brief procedure for Office 365 data migration:
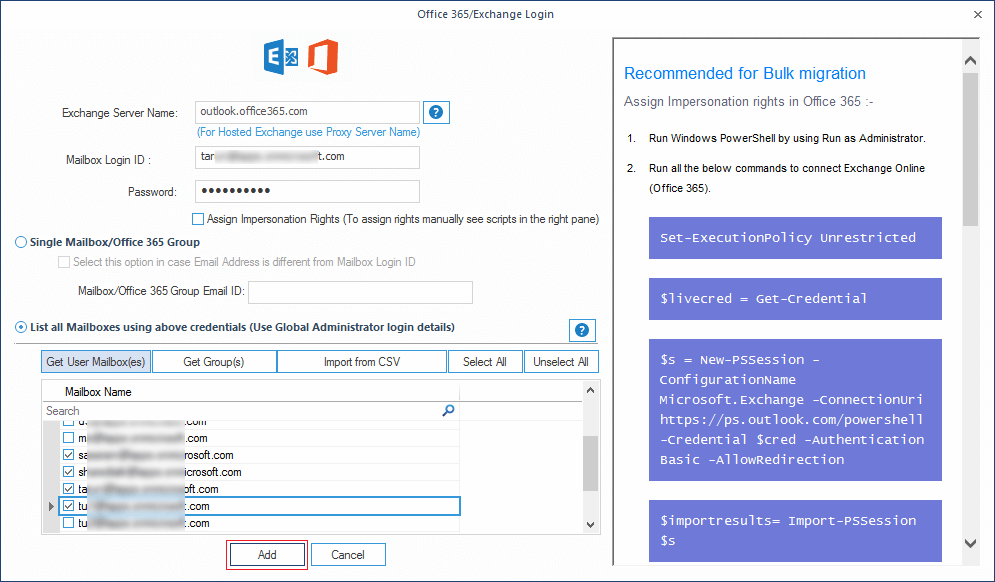
- After successful installation, run the software and click the Add button to select the source.
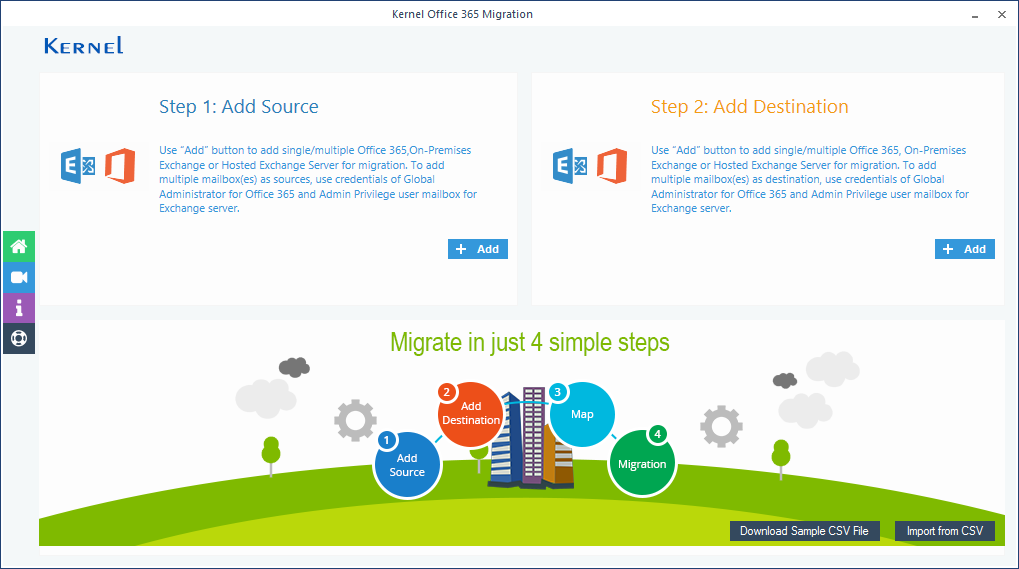
- Input the credentials of the source account and click the Add button. Single Mailbox/Office 365 Group option is selected by default. To migrate multiple mailboxes, select the second option.
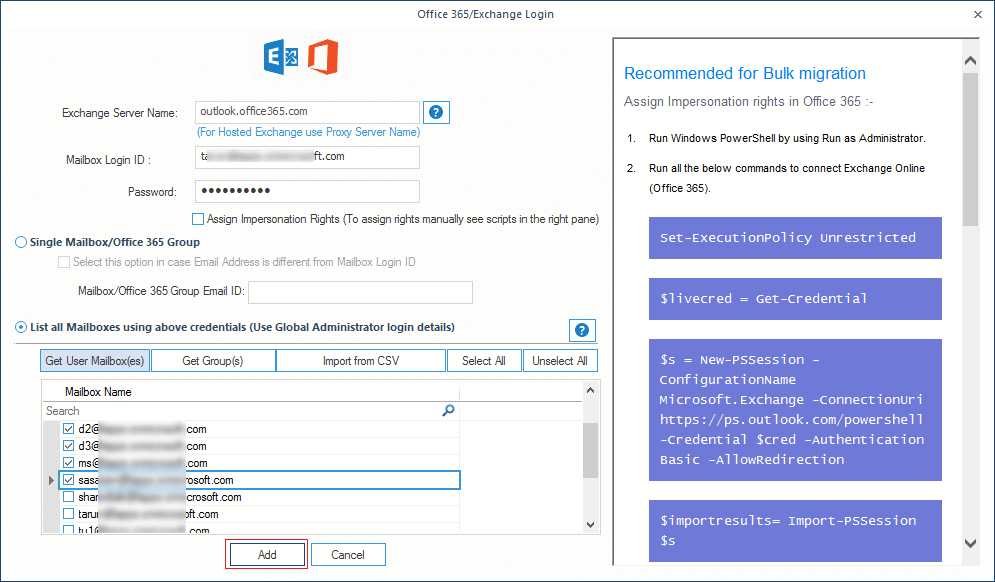
- Now, add the destination account by entering the credentials. The tool will enlist all the accounts associated with the Administrator account. You can select/deselect the account quickly. Click Add.
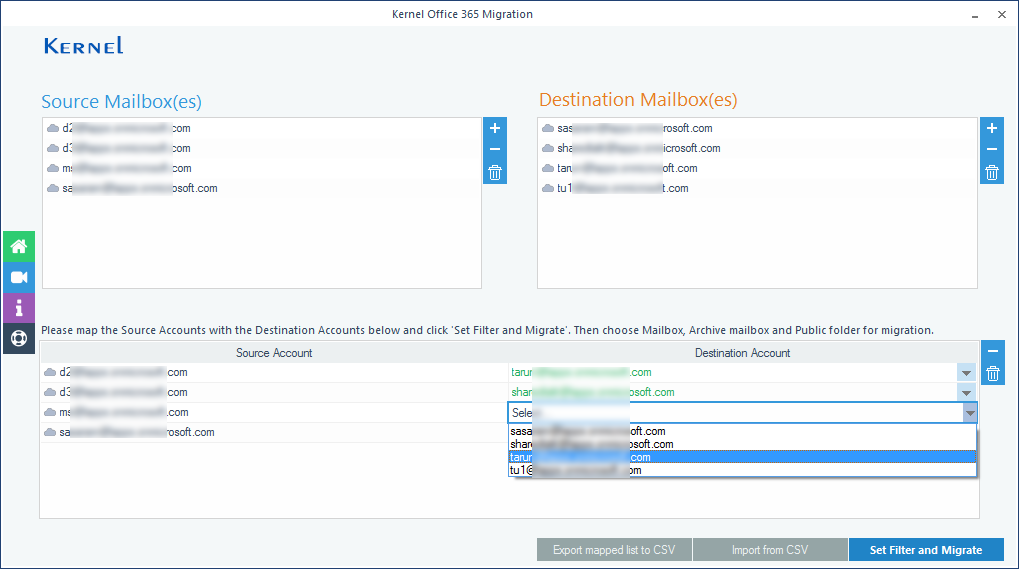
- In the next window, you need to map both source and destination account. Click the Set Filter and Migrate button.
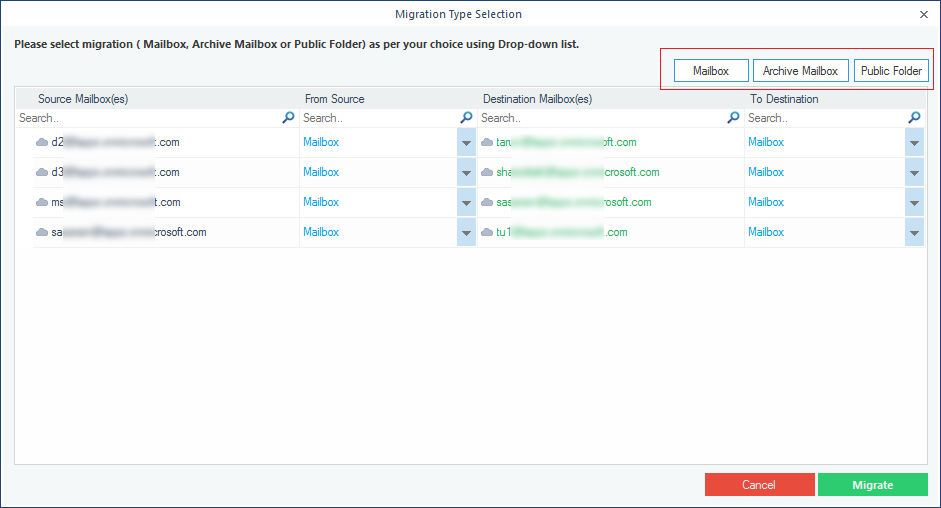
- The following window will let you select the desired type of item like Mailbox, Public Folder, and Archive Mailbox. You can make your selection from the drop-down menu and then click the Migrate button.
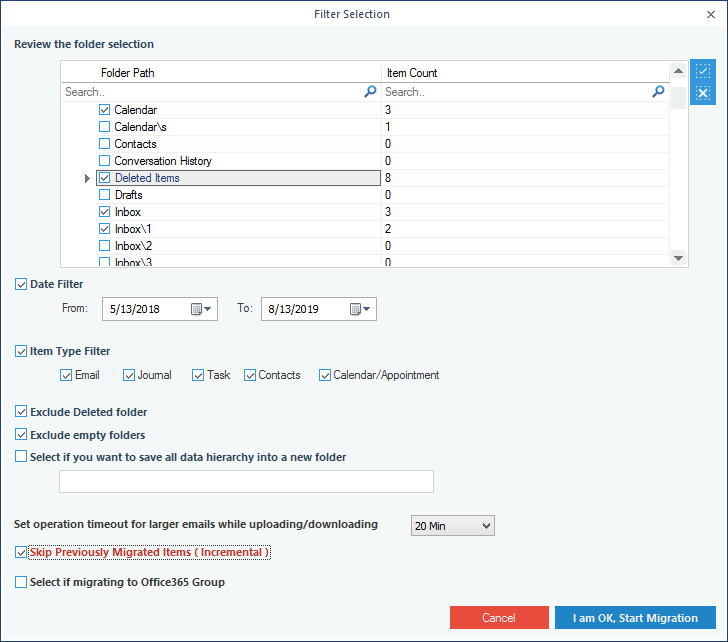
- The Filter Selection window has some best-suited filters options to select only the essential data to migrate and leave the rest.
- Date Filter: Input a date range.
- Item Type Filter: Check various options among Email, Journal, Task, Contacts, Calendar/Appointment.
- Exclude Deleted Folder: Stop the deleted folders from migration.
- Exclude empty folder: Stop empty folders from migration.
- Save all hierarchy in a new folder: Provide a name of the folder, and all the data will be saved in the folder.
- Set operation timeout: Set the time limit for the migration of each item.
- Skip previously migrated items: Stop already migrated items from migration.
- Finally, click I am OK, Start Migration.
- After a successful migration, the tool will provide you with a message that migration is complete. Click OK.
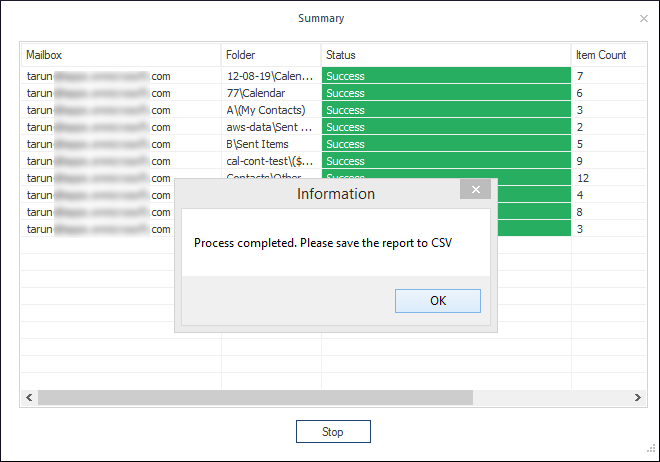
- To get a comprehensive migration report, click the option Save report to CSV.
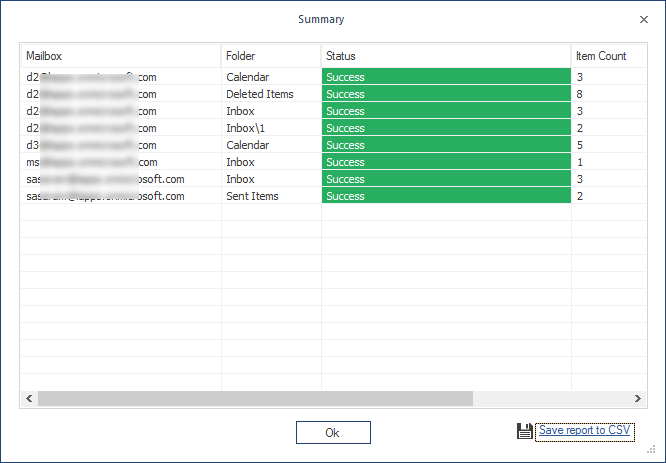
After completing the migration procedure, click OK.
Conclusion
When users come across errors, they find the solutions to get rid of them. However, there are not many manual solutions that will help you with this unauthorized error 401. The best way to fix this error is getting help from a third-party tool. Kernel Office 365 Migration tool fits perfect for this. Additionally, this tool offers a user-friendly interface to make it easy-to-use software.