Read time 9 minutes
Cloud storage is garnering significant attention as a cutting-edge solution. It offers both free accessibility and user-friendliness. Nevertheless, numerous individuals still prefer to retain their media, such as photos, videos, music files, and more, on their offline PC, often a Windows-based system.

However, there are instances when files you’ve saved locally are unintentionally or intentionally deleted. Regardless of the cause, the result is the loss of these files. If you’re using a computer running the Microsoft Windows 10 operating system, you can easily remove a file, such as a photo, by right-clicking on it and choosing the “Delete” option. This action moves the file to the Recycle Bin.
Or, you can use the Shift + Delete key combination to permanently delete a file. In such instances, whether the loss occurred unintentionally or by mistake, it is essential to promptly seek a solution for recovering the files, particularly photos, that have been permanently lost, and restore them to their original location.
While Windows 10 doesn’t provide numerous redundant methods for accomplishing tasks, there are still a few alternative approaches you can experiment with, although they may not be consistently effective.

Download Kernel Photo Recovery Tool and recover the permanently deleted photos taken from your smartphone, DSLRs, iPads, tablets, etc
This article will provide you with step-by-step instructions on recovering photos that have been permanently deleted. We will first explore native Windows 10 solutions, followed by a method that guarantees complete photo recovery, regardless of how the pictures were initially lost.
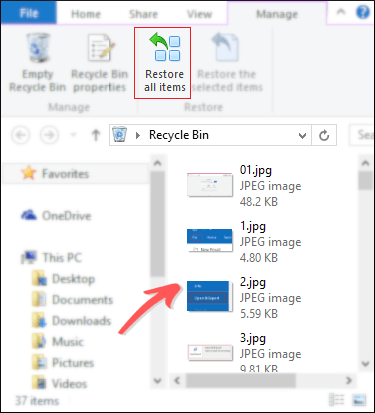
As previously stated, when you delete something by right-clicking, it is immediately sent to the Recycle Bin. Therefore, before we recommend any alternative methods or Windows 10 built-in solutions, it’s advisable to first check the Recycle Bin.
To access the Recycle Bin on your desktop, simply double-click its icon. Once open, browse through the deleted files, including the photos you seek. If you locate the photos, you can restore them either by right-clicking on the individual photos or by utilizing the “Restore all items” button.
If you come up empty-handed and discover that the Recycle Bin folder is devoid of any items, proceed to explore alternative Windows 10 solutions that you can experiment with.

Backups made on a Windows 10 system, whether they are current or recent, will encompass all file types and folders present on the system. Consequently, utilizing such a backup allows you to attempt the restoration of photos that have been permanently deleted.
TTo recover photos from a backup that you’ve recently taken, follow the steps outlined below:
After the restoration process is finished, return to the initial location where your permanently deleted photos or pictures were stored, and you will find your lost photos there.
Note: For this method to work, it is necessary that you have created a backup before, and it has the photos, which are now permanently deleted.
It’s an alternative or utility that permits the restoration of the system to a prior restore point. To make use of this method, it’s essential to have previously created a System Restore Point.
Creating system restore points is not only beneficial in familiar scenarios but also invaluable when users encounter issues stemming from significant system software updates and critical software installations.
In order to begin utilizing the System Restore Utility, the initial step involves enabling the service, which is typically disabled by default in Windows 10. Following this, you’ll need to establish a System Restore Point.
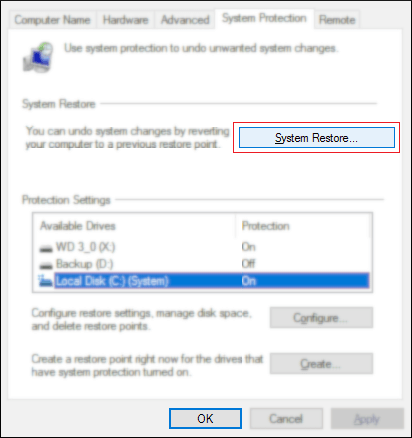
If you’ve previously created a System Restore Point, you can now proceed with the system restoration process.
Launch the Windows 10 System Properties wizard, then navigate to the System Restore option. Choose the desired Restore Point and confirm your selection by clicking “OK,” following the steps outlined below.
If you’ve exhausted all available methods and native workarounds for Windows 10 without success, we recommend utilizing specialized photo recovery software to meet your photo recovery requirements.
Kernel Photo Recovery software for Windows 10 (and other Windows versions), is a smart photo recovery software, that supports photo recovery of different formats, such as JPG, PNG, BMP, TIF, RIFF, GIF, and more. It gives you the upper hand, no matter how the files were deleted. With Kernel Photo Recovery, recovering permanently deleted Photos is fast, smooth, and easy.
Follow the steps given below to recover permanently deleted photos in Windows 10 system:


Note: For most of the photos, the format is JPG; you may select other file extensions above if required.
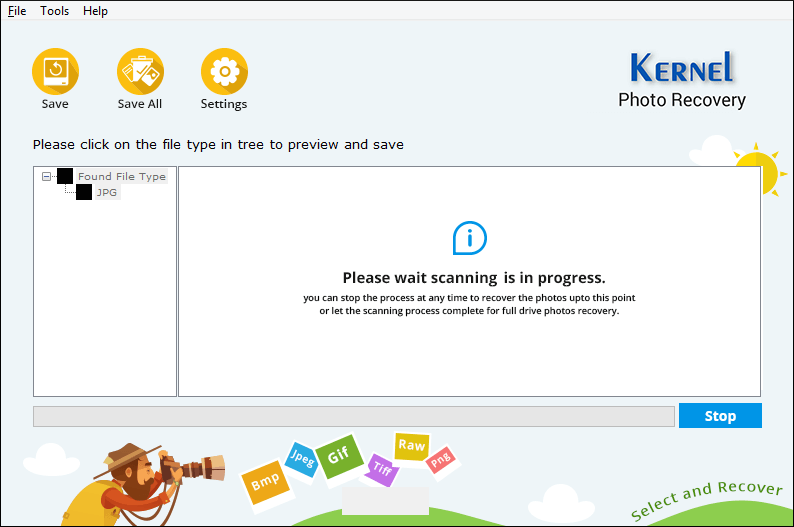 Note: In case if you want to re-select the drive, then click on the Stop button to immediately halt the scan process.
 Note: To select all the photos either click on Save All button or use CTRL + Click combination.
 Permanently lost photos/pictures are recovered successfully; open the recovered photos folder and check, as below.
Above we’ve shown, how you can recover permanently lost photos on your Windows 10 system. But when no workarounds or methods comes handy, users search on help topics like how to recover lost pictures from hard-drive, how to recover deleted photos from SD card, pictures lost because of anti-virus scan, and more. To answer all such queries, Kernel Photo Recovery is the best software you can find on the Internet.