Read time 5 minutes
Good photos make memories and memories build us to what we are. History is never undone, rather it repeats itself in mystical ways in our lives. That is why photographs are so important, and when we lose them, a big part of what we stand for is lost and gone! Our present write-up thus is an effort to let you know How to Recover Deleted JPG Files for the times you deleted your photos.
What is a JPG format?
Having said the above, note that there are different formats in which photos are saved on your computer. One of these formats is JPG. What makes JPG unique is that they reduce the storage size at the expense of the quality of the image. What sets JPG apart is that JPG photos can attain up to 10:1 compression without any perceptible degradation of the quality of the image. This is why JPG images are ideal for your web as well as casual photography.
There are different causes of the deletion of JPG photos. To examine them, you will have to go through the paragraph that follows:
Causes of Deletion
- If you have been formatting the device that contains your JPG files, it may delete the JPG photos. When you connect an external device to your computer, you receive the following messages: “Drive <X>: is not formatted. Do you wish to format it?” In case you click on the “Yes” option, the entire drive will be formatted, and in the process, your data may be lost.
- Most of your cameras provide the “format” option. While searching for one thing or the other thing in your camera, if you click on the “Format” option, then all your photos along with the important ones will now be deleted resulting in the loss of your photos.
- Using the same memory card on several different cameras leads to either formatting of the card or file system corruption that results in the loss of data.
- In case you accidentally have selected the ‘Delete All’ option while you have been previewing images, all your images will be deleted. You might accidentally delete these photos also by using the ‘Shift’+ ‘Delete’ keys.
Steps to recover deleted JPG files
In case you have deleted your photos in these manners, do not be wearied. There are different means to Recover Deleted JPG Files. To do that you need to use a third-party Photo Recovery software. That is where the Kernel Photo Recovery software comes in handy. The software is advantageous in many different ways. Some of its advantages are given here below:
- Is capable of retrieving photos in different formats, including JPG, JPEG, and so on
- Is perfect for the recovering permanently deleted photos
- Is capable of deep scanning of the hard drive to recover images
- Gives preview of each image before saving
The tool can be used, in some straightforward steps such as:
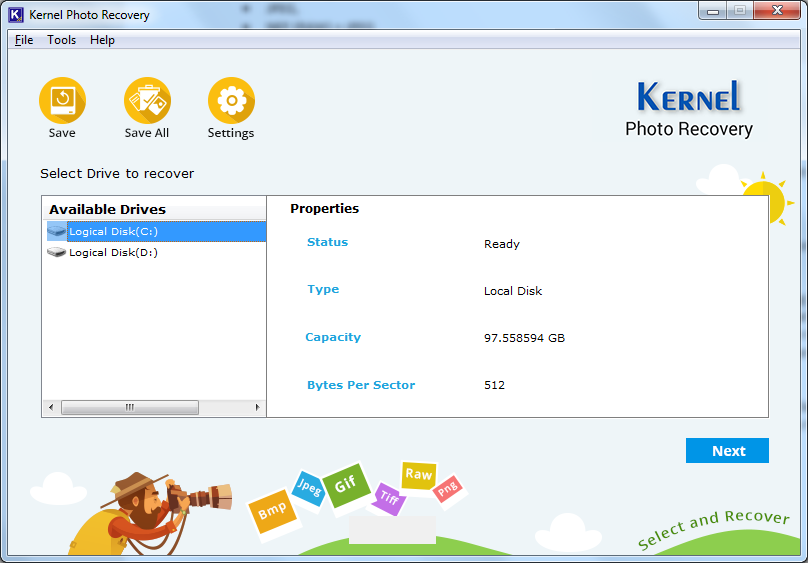
- If you do not have the software, first download and then install it. Now, launch the Photo recovery tool. When you open the tool, choose the drive from the ‘Select Drive to recover.’ Please note that this is the source of recovery. Now, Click the Next button.
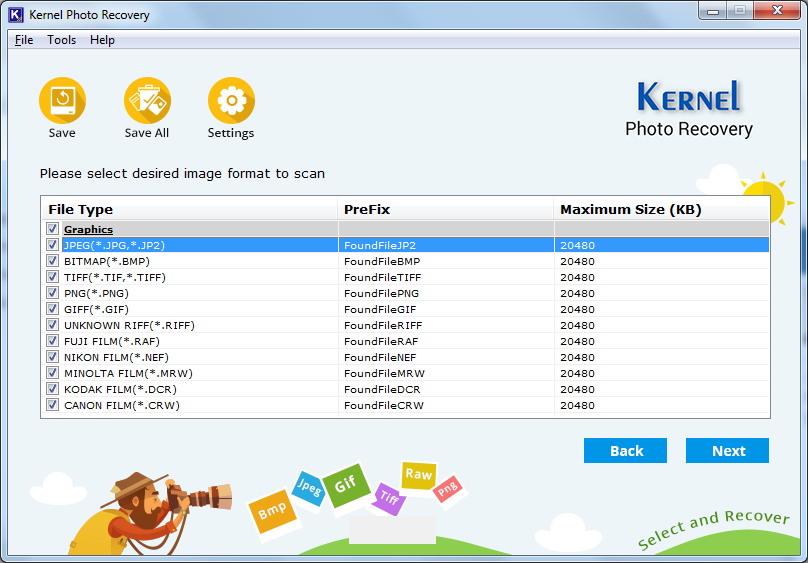
- Having done the above, select those files, you require by selecting a specific file extension with the estimated size. Press the Next button. (Please note: you can easily edit your file size as per the necessity).
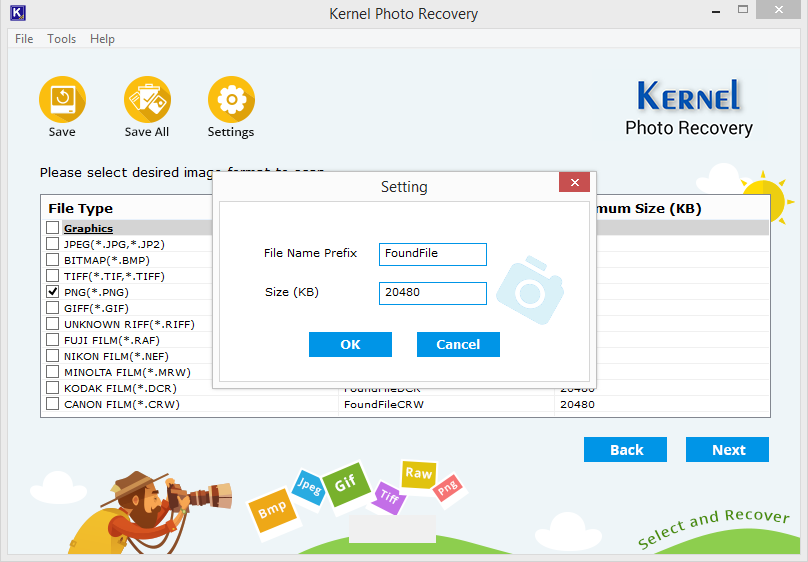
 Note: Kernel Photo Recovery Tool automatically recovers those images which have a size up to 20480kb. Therefore, you will need to set up the size capacity according to the requirements you have, from the ‘Settings.’
- After the end of the scan, preview those recovered files. This you may do by selecting the file type on the pane on the left.
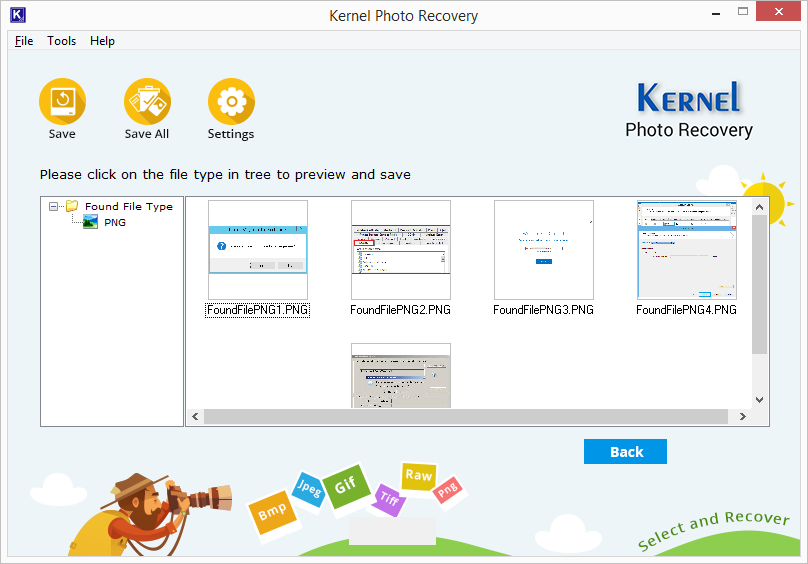 To be Noted: On double-clicking on a specific photo, you’ll have a more comprehensive preview of the files which you have recovered.
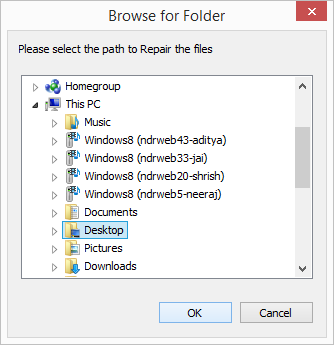
 - Finally, select the particular photo(s) which you want to recover and click Save. By clicking on the Save All option, you can save all your photos. Finally, the following window is displayed, which beckon you to choose a specific saving destination. Click Ok.
Conclusion
Your photos are precious, and we want to help you save them. I hope that the steps as mentioned above on How to Recover Deleted JPG Files provides you with the appropriate means to recover your photos in case you have deleted them. And to find out more about the Kernel Photo recovery tool, do check out the website. If you aren’t convinced about purchasing the full version, you can try out the trial version, which is free of cost.