Read time 6 minutes
Zimbra is a well-known software serving as an email server and web client. Office 365 is also a well-known cloud application, but it’s far more popular than Zimbra. It is better that you migrate your Zimbra items to Office 365 for a better experience; there are several reasons for Zimbra to Office 365 migration. It is known and quite acceptable that there is no comparison between both applications because Zimbra is also as useful as Office 365. Just like Office 365, Zimbra is also accessible from anywhere but the type of feasibility, flexibility, integration and wide range of features Office 365 provides is not easy to find anywhere. Office 365 also provides the ease of access to other MS Office applications like MS Word, MS Excel, MS Publisher, OneNote, PowerPoint, etc.
Why are users moving from Zimbra to Office 365?
Zimbra is a lightweight application that can be used only for more straightforward email communication with a limited feature set. At best, Zimbra can be collectively termed as a minor email manager without the features like an email Suite. Small businesses can work in such a manner, but more influential organizations have little benefits from Zimbra.
Office 365 is the complete package that can cover all the requirements of a big business. Various subscriptions offer a great range of applications covering cloud storage, network, communication, and collaboration. It also provides email communication through creating different mailboxes in Admin Center. Zimbra lacks all such benefits, and more prominent organizations cannot use them. Ultimately, businesses need to move their emails to Office 365. But there are no manual methods to migrate emails from Zimbra to Office 365. So, you can use a professional alternate to move emails and use them in a new platform.
After knowing such benefits of migration from Zimbra to Office 365, if you too want to migrate your items to Office, then this blog is going to explain the whole process it involves step by step.
Zimbra to Office 365 migration with Kernel IMAP to Office 365
Kernel IMAP to Office 365 is a perfect tool to perform Zimbra to Office 365 migration. Here are the steps you need to follow to perform the successful migration. Install and run the software and start from step
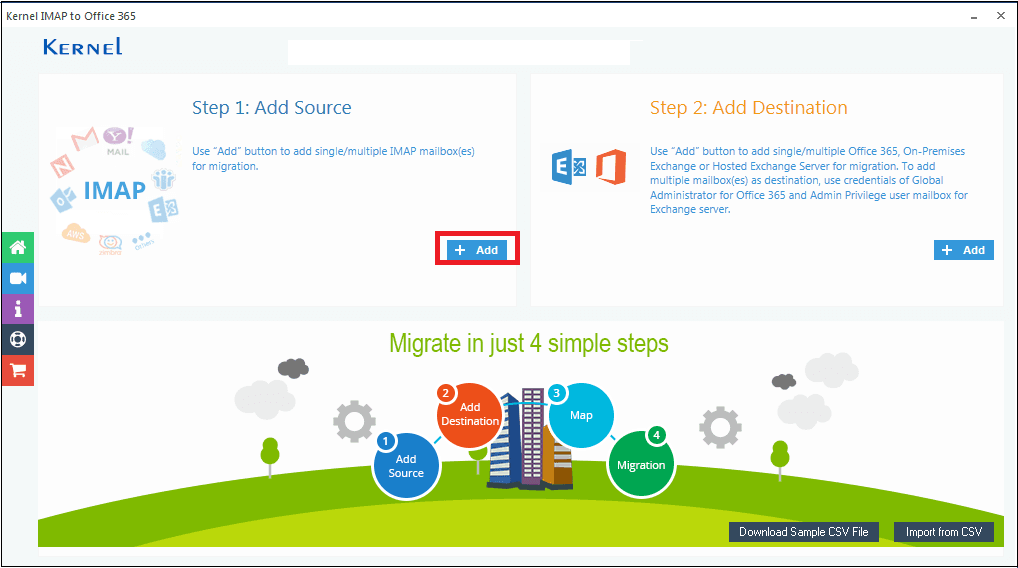
- On the first page, you need to click Add button to add IMAP files for migration.
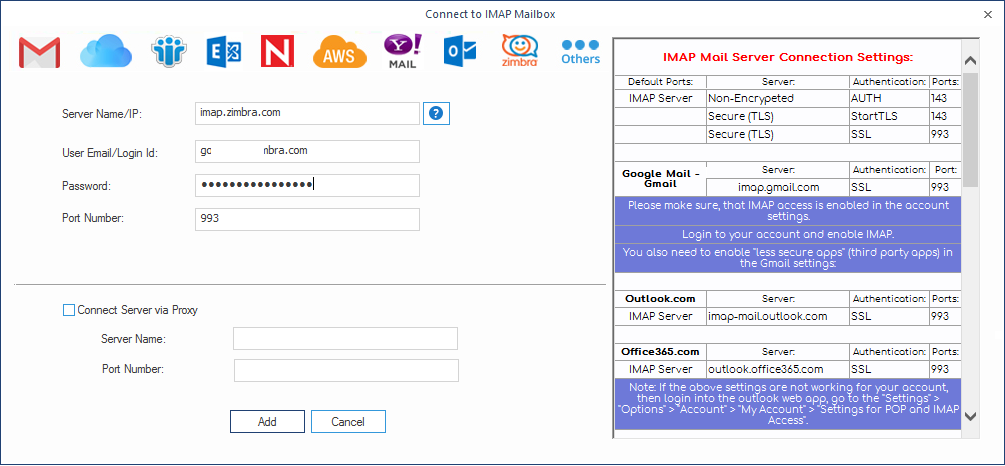
- In the next step, select your email client and enter the credentials like Server Name, Email id, Password, and Port Number. Check the box Use SSL Connection, and on the right-hand side, you will get the details of your account. Finally, click on Add to proceed.
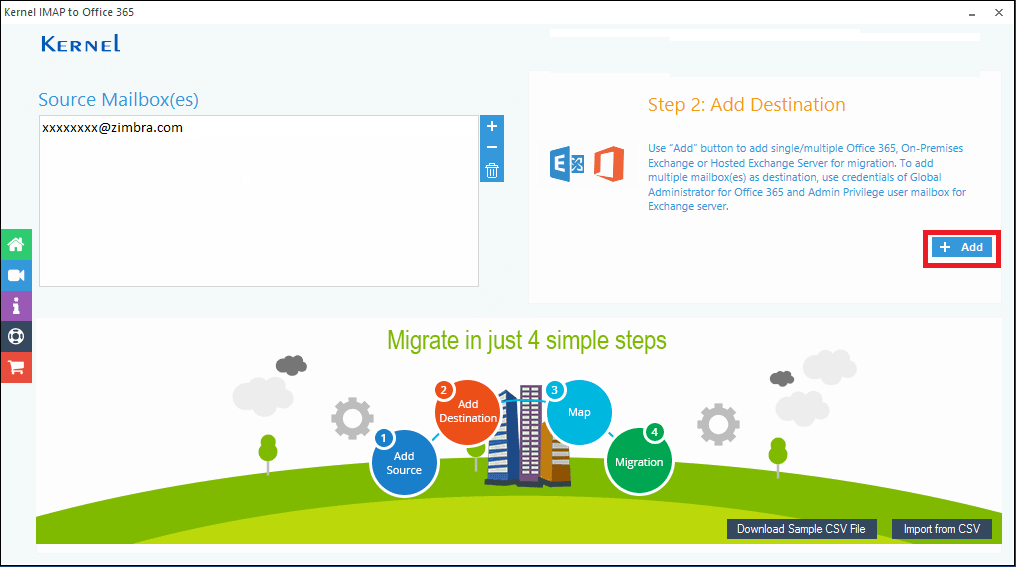
- Now, for the second step, you need to click on Add button under Step 2 to add Office 365 mailboxes.
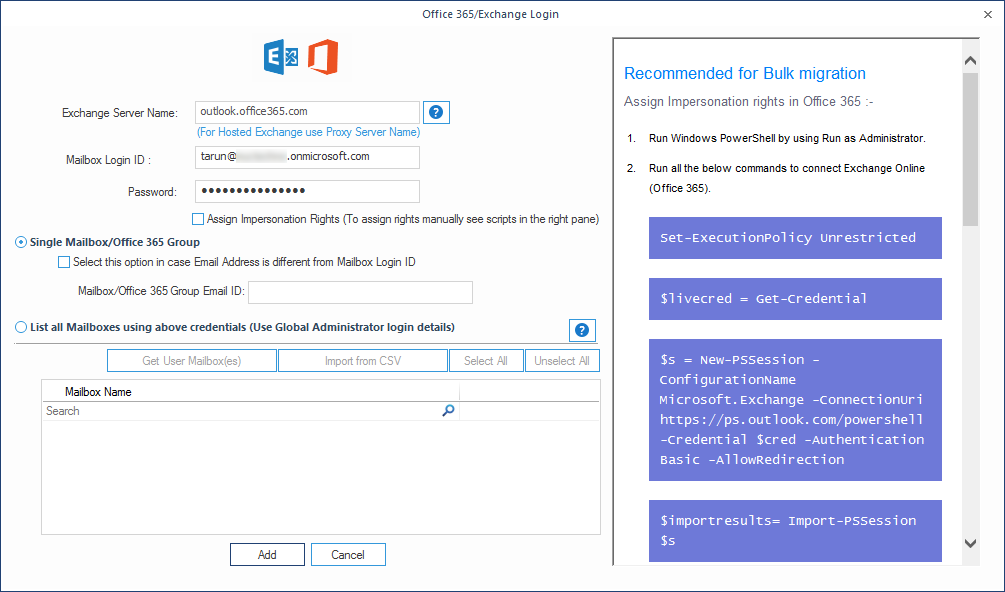
- Now add your mail details like email Id and Password, select Single/Archive Mailbox for single mailbox and List all Mailboxes using above credentials (Use Global Administrator login details) for multiple mailboxes from Office 365. Here we have opted for Single/Archive Mailbox.
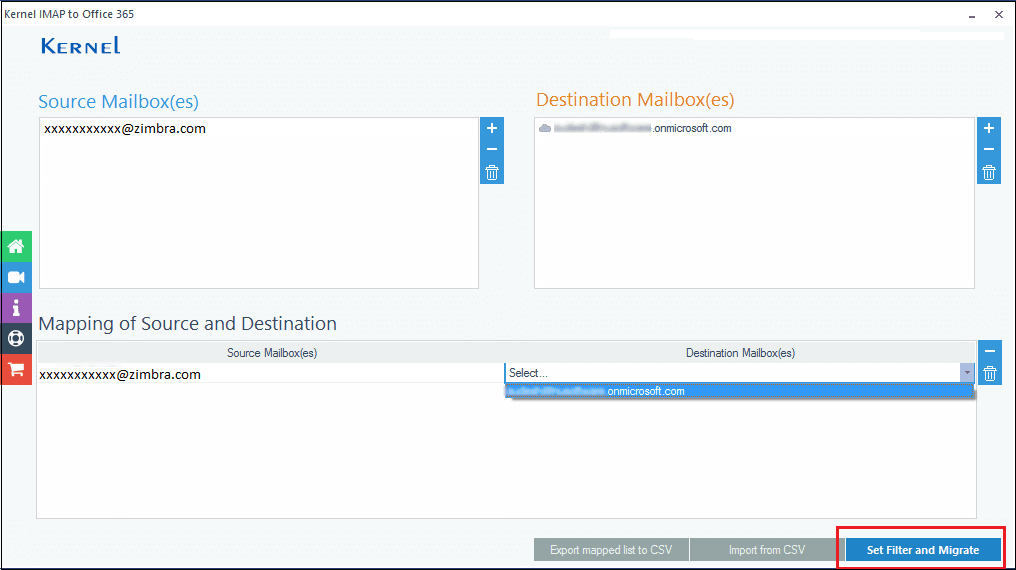
- At this stage, you will see both the source mailbox and the destination mailbox. Select the mailbox and map them and click on Set Filter and Migrate.
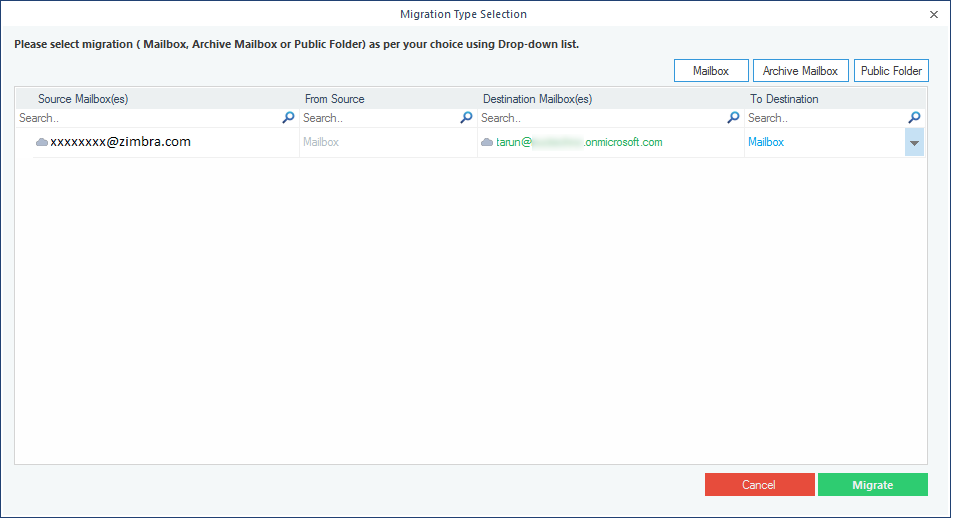
- Now provide a destination in the mailbox and click on Migrate. There are three separate button named Mailbox, Archive Mailbox, and Public Folder. If you want to migrate the data to a single type of destination, then choose these buttons.
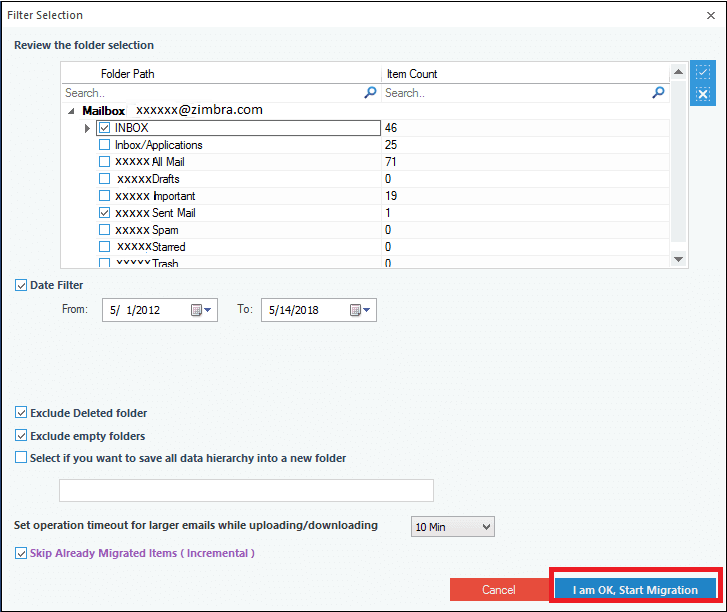
- Now on the page of filter selection, apply the desired filters and click on I am Ok, Start Migration.
- Wait till the process is completed and click on Ok after completion.
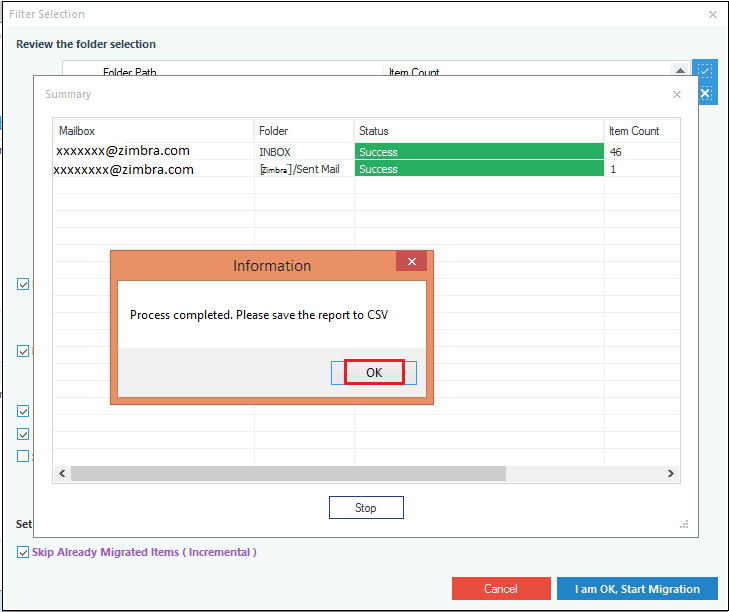
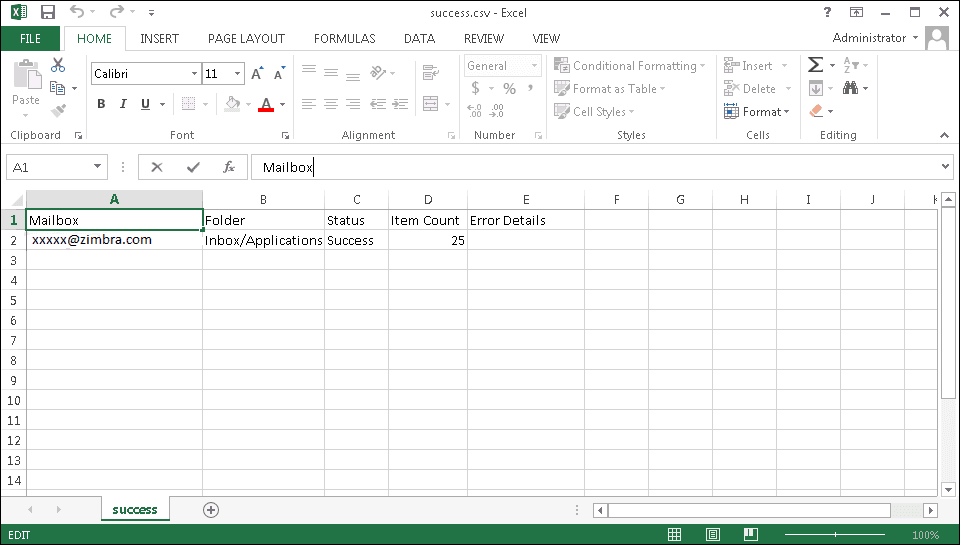
- Once all steps are executed successfully, you will get a CSV report generated right after the completion.
Conclusion:
This blog is dedicated to the Migration of IMAP Mailbox to Office 365; the main focus is on Zimbra. The blog tells how you can migrate Zimbra to Office 365 with the help of Kernel IMAP to Office 365. There are several benefits of using Kernel IMAP to Office 365 migration tool and those are; you can migrate single and multiple mailboxes, can perform incremental mailbox migration, you can use CSV file for the mailbox migration, and much more exciting features.


