Read time: 5 minutes
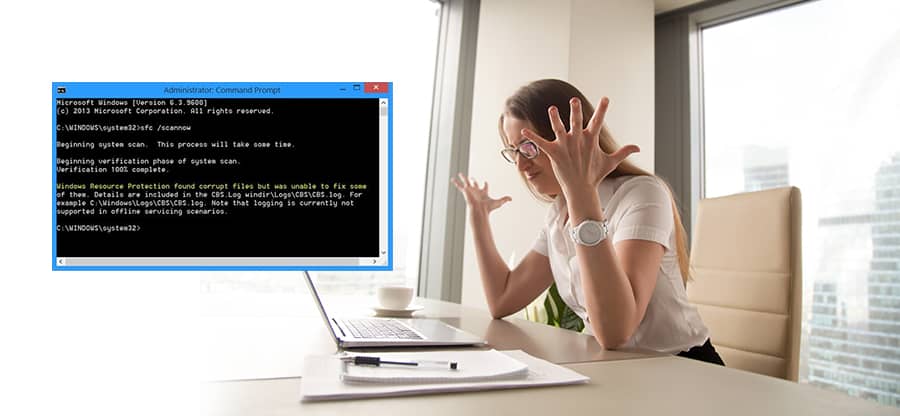
Sometimes you may encounter the error, “ Windows Resource Protection Found Corrupt Files, But was Unable to Fix Some of Them.” and you may experience slow performance or Windows crashes. Also, some Windows functions do not work due to corruption of system files too. In the present blog, we shall discuss how to fix this problem.
Understanding Windows Resource Protection (WRP)
Windows Resource Protection is a feature in Windows Vista & later Windows versions that replaced Windows File Protection. Its main function is to protect registry keys and folders besides the critical system files. WRP does not allow, essential system files, folders, registry keys installed as part of the operating system to be replaced and disable autorun apps in Windows 10 too.
System File Check (sfc.exe) is integrated with Windows Resource Protection which can be invoked through Windows Command Prompt. System File Checker tool (sfc.exe) is used to repair missing or corrupted system files by running the command ’sfc /scannow.’ This command will scan the entire protected system files and will replace corrupted files with cached copy, which is placed in a compressed folder at location, %WinDir%\System32\dllcache. The %WinDir% placeholder refers to the Windows operating system folder.
When do you face the error, “windows resource protection found corrupt files?”
To repair missing or corrupted system files, we run System File Checker Tool (sfc.exe) and use sfc/scannow command. After the process has been completed, any one of the messages given below will be shown:
- Windows Resource Protection did not find any integrity violations.
- Windows Resource Protection found corrupt files and successfully repaired them. Details are included in the CBS.Log %WinDir%\Logs\CBS\CBS.log
- Windows Resource Protection could not perform the requested operation.
- Windows Resource Protection found corrupt files but was unable to fix some of them. Details are included in the CBS.Log %WinDir%\Logs\CBS\CBS.log
The last message in the above list appears when the sfc/scannow command was not successul in fixign the issue. So, you need to fix it manually.
How to fix the error, “Windows resource protection found corrupt files but unable to fix some of them?”
Some easy methods to troubleshoot this error are given below:
METHOD 1: Run DISM Command to Repair Corrupt Files
DISM i.e. Deployment Image Servicing and Management takes the help of Windows Update to get files necessary to fix corruptions. Thus, while you do this make sure your internet connection is regular and smooth. Use the RestoreHealth command of DISM to scan Windows for corruption and repair the same automatically. To do so follow the steps given below:
- Type cmd in the search box next to the start button.
- Right-click Command Prompt and select ‘Run as Administrator.’
- Type command, dism /Online /Cleanup-Image /RestoreHealth. Press ‘Enter.’
- This will scan for corruption and repair it.
- If you are in repair mode of Windows DVD/USB, use the command
Dism /Image:C:\/Cleanup-Image /RestoreHealth. Press ‘Enter.’ - Wait till the process is complete. A message will appear stating file corruption has been resolved. Restart your computer.
- Run SFC scan in Administrative Command Prompt again and see if the error persists. If it is still present then follow the next method. The same process can be used to recover data from pen drives saved in logical drives. You can scan your drive using sfc command too.
METHOD 2: Remove Remnants of A Third-Party Antivirus Security Solution
This error may also occur due to false alerts. Generally, remnants of improperly uninstalled antivirus/security solutions may cause this error. Remove these remnants and restart your computer. Run SFC scan again to check if the issue persists.
METHOD 3: Performing SFC/DISM Scan In A Clean Boot State
If methods 1 & 2 do not work then, most probably either a third-party application is interfering or there is some system file error is not being detected by SFC & DISM. To fix the first issue, we need to perform a clean boot and run both utilities once again.
To perform a clean boot, follow the steps given below:
- Press keys Win+R. Runbox will open.
- Type msconfig. Press Enter
- System Configuration will open. The User Account Control will open and ask for permission to administrative privileges press Yes.
- Press the General tab and choose Selective Startup.
- Uncheck Load Startup times under Selective Startup.
- Move to the Services tab. Check Hide all Microsoft Services. Press Apply.
- Restart your computer in a clean boot state.
- Repeat steps 1 to 5 of method 1.
- Repeat steps 1 to 5 of method 1 with the SFC scan command (sfc /scannow in step 3).
METHOD 4: Repair the Hard Disk
Any problem with a hard drive can lead to this error which has to be fixed. Use Kernel for Windows Data Recovery to fix Windows corruption errors in logical and physical devices. It helps to recover data from corrupt FAT16, FAT32, NTFS & NTFS5 partitions. It works in three simple steps viz; Select>>View>>Recover in which it scans Windows system Drives, shows a preview of the recovered and, and saves the data selected by you. Kernel for Windows Recovery can recover data from PEN drives, ZIP drives. Mobile drives, external HDD, etc.
Conclusion
In the present blog, we discussed Windows Resource Protection files and different methods to fix corruption of these files when the system itself is unable to fix such corruption. We further discussed Kernel for Windows Recovery and how it is helpful in the recovery of data from the Windows system. It is a strong and efficient tool to recover lost, deleted, and inaccessible data from corrupt FAT16, FAT32, NTFS & NTFS5 partitions of Windows systems. It has the ability to recover from removable drives as well. It can recover data may it be audios, images, documents, etc., permanently deleted files and folders irrespective of size and corruption of the same. You can try the Demo Version for free to preview your precious files and folders.
