

Read time 5 minutes
Go through this help blog to locate Office 365 tenant geo-location.
Office 365 is the go-to platform for all the professionals. Users can utilize all its features to their maximum advantage. Office 365 tenant is the part of the Office 365 organization which can manage all the services available in a particular Office 365 plan. There can be single or multiple tenants within an organization and while creating the one, you need to specify and verify a domain and choose a location for your tenant. This location of the tenant account may be required in some situations.


The knowledge of Office 365 tenant location or region is required for safety reasons. It can be used to check the authenticity of the account, service efficiency or some other compliances. The default location of the tenant account is set up from before when the account was being created. So, let us move ahead to find the Office 365 tenant location or region.
Manual ways to find Office 365 tenant location
Office administrators can locate the geographical location of their Office 365 tenant by adopting the following manual techniques.
- Using Office 365 admin center
- Using Exchange Online PowerShell
- Login to your Office 365 admin center.
- Next move to the Settings option and then click on Organization profile option.
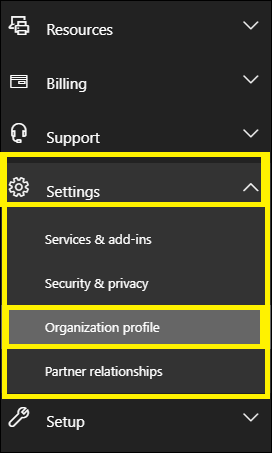
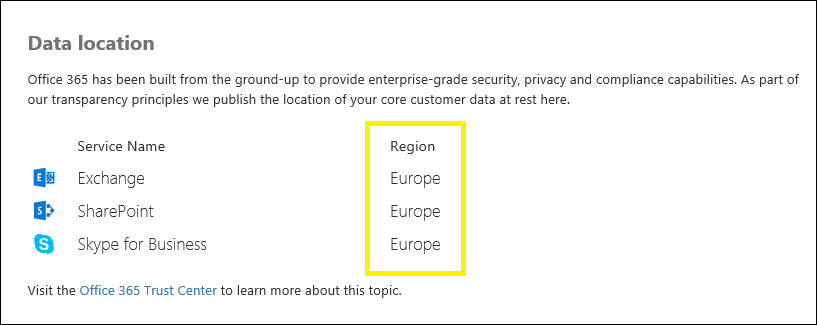
- On the Organization profile page, go to the Data location section and find the geographical location (for example – Europe) against each service available in your tenant separately.
- So, now the Office 365 tenant is located geographically.


The method to locate the Office 365 tenant using interface options is not a complex one at all. There is another method as well to locate the Office 365 tenant which involves running cmdlets in the Exchange Online PowerShell.
- Run the Windows PowerShell on your system as an administrator.
- First you need to connect your Exchange Online account with PowerShell.
- Execute this command:
$UserCredential = Get-Credential
- In the opened dialogue box, provide your Exchange Online account user name and password details and click OK.
- Next, run this command:
$Session = New-PSSession -ConfigurationName Microsoft.Exchange -ConnectionUri https://outlook.office365.com/powershell-liveid/ -Credential $UserCredential -Authentication Basic –AllowRedirection
- Then run this command further:
Import-PSSession $Session –DisableNameChecking
- The Exchange Online account is successfully configured with the PowerShell now.
- Now, run this command to get the properties details of your tenant account.
Get-OrganizationalUnit
The command gives all the details of the respective account and against OrganizationID section; you can find your account location in alphanumeric code, e.g. EURP193403 which can be taken as Europe.
Now that you know how to locate the Office 365 tenant location, let us move to the other aspect of this help blog which is changing the existing Office 365 tenant location.
How to change Office 365 tenant location or region?
When you create a new Office 365 tenant account, it automatically checks up the external IP that generated the request and provisions the tenant in that particular region. You cannot change the Office 365 tenant region as Microsoft has already created the specific instances for all workloads and also secured the required namespaces which cannot be modified.
The only way to change the Office 365 tenant location is by creating a new Office 365 tenant on your desired location and migrating the data from the old Office 365 to it. So, we recommend you to create an Office 365 tenant first and then use Kernel Office 365 Migration tool to perform the data migration between the two Office 365 tenants.
- This tool just requires the login details of the two Office 365 tenant accounts. And with this tool, you can migrate multiple mailboxes, public folders or archived mailboxes and all their content including emails, journals, contacts, attachments, and appointments to another Office 365 tenant.
- You can migrate shared mailboxes between Office 365 tenants also using this tool. It even supports automated mapping and bulk migration via a CSV file.
- Users can employ multiple filters like Item type, date, selection, exclusions etc. to make the migration more selective and need based.
- The software interface is quite simple and intuitive.
- You can take a trial anytime with the free version of this tool.
- The advanced tool supports migration of on-premises and hosted Exchange Server data as well. Visit the tool’s website to know more.
- The data is kept secure from any kind of threats and alterations. The hierarchy of all the contents remains as the original.
Wrapping up
A data center location is specified for every Office 365 tenant and to know that location, users can pursue any of the two manual ways using Office 365 admin center or PowerShell. However to change that location, the method of migration to a new tenant is suggested which can be well performed with the specified professional tool. To migrate all the mailboxes accurately and securely, a unique utility has also been suggested.