Read time: 6 minutes
When you have many pictures attached to your Outlook emails, it can take a lot of time to get them out one by one. If the pictures are all in a compressed folder, it’s not too bad. But if they’re scattered throughout the email, it can be confusing and tiring to remove them.
However, don’t worry! There are different ways to easily take out all kinds of attached pictures from your Outlook emails. In this article, we’ll show you these methods, so you can do it quickly and without any hassle.
What are embedded images in Outlook?
Embedded images in Outlook happen when you add pictures to your email. Instead of staying as separate attachments, these images become part of the email itself. So, when you send the email to other Outlook users, they’ll see the images directly, not as separate files. However, if you send the same email to Hotmail, Gmail, or Apple Mail, those images will show up as regular attachments.
This can sometimes be frustrating for Outlook users because it’s easy to save attachments, but embedded pictures need an extra step to get them out. You can extract embedded pictures by copying and saving them or by using a tool called the Snipping Tool.
How to extract embedded images in an Outlook Email?
Outlook permits users to attach images either in the message body (which is also called an inline image) or as an attachment.
Solution 1- Extract Single inline images from Outlook
- Firstly select the email in beginning after starting Outlook. Select the email from which you want to extract images.
- open the emails in the preview window.
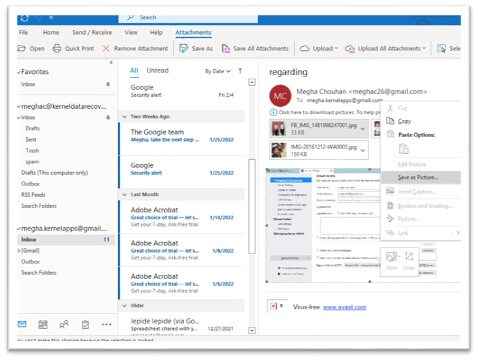
- Select the image and right-click on it and select the Save as Picture option.
- Now in the File Save wizard, select the location, specify the File name, and select Save as type to save the image. Click on the Save button.
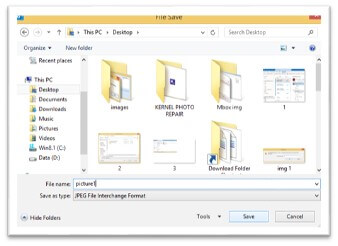
The embedded Outlook image will be saved at the specified location.
Solution 2- Extract multiple inline images from Outlook
- First, select the email from which you want to extract multiple embedded images. You can also create a new PST file in MS Outlook to extract attachments.
- Click on the File menu. Select the Save As option.
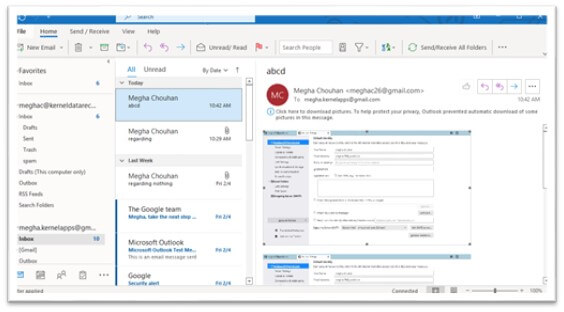
- Now in the Save As window, provide the folder path to save the inline images and select HTML from the drop-down list to extract embedded images from Outlook email.
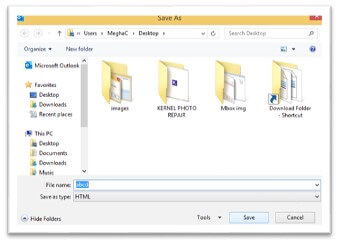
- Click the Save button to download the embedded images to the folder.
Now you can see a folder with the specific name you provided at the specified destination.
The above-discussed procedure shows the extraction of embedded inline images (where images are present in the message body section), but now we will see how to find and extract embedded images from the attachment.
Solution 3- Extract Single embedded images from the Outlook attachment
- Open the email with the single image as its attachment.
- Select the image and choose Save As from the menu.
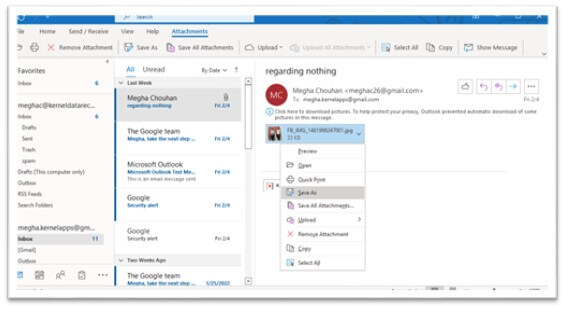
- Now the Save As window appears; specify a name and location for saving the image.
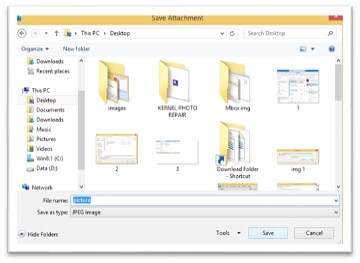
- Click the Save button. And your images are saved now.
Solution 4- Extract multiple images from the attachment
- Open the email with image attachments. Select all the images.
- Click the Save All Attachments option.
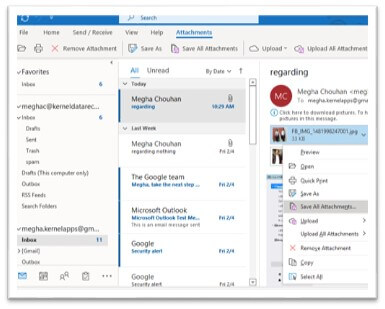
- After selection, click on the OK button.
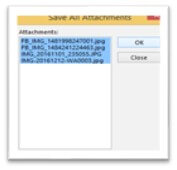
- Now the Save As window appears; specify a name for saving the image and browse a location. And click on the OK button.
Solution 5- Snipping tool
The Snipping Tool is handy when emails have pictures made of multiple parts. Instead of saving each part separately, you can use Microsoft’s Snipping Tool to capture the entire picture as one file.
To do this, make sure the whole picture is on your screen, open the Snipping Tool, and then use your cursor to draw an outline around the picture. Once you’ve done that, the picture will pop up in the Snipping Tool window, and you can save it as a single file for your convenience.
How to extract images from inaccessible Outlook emails?
After performing the above solutions, we can say that the above method is a nice approach to save a single or multiple embedded images from Outlook. But there are huge chances of various kinds of database issues and corruption with Outlook data files (PST). Emails become inaccessible due to PST file corruption. To extract images from these inaccessible emails, you need to repair corrupt PST files first. And the above procedure takes a lot of your time and effort. So, we recommend you Kernel for Outlook PST Repair which repairs corrupt PST files and exports them to Outlook PST, Office 365, Exchange, and Gmail. It also recovers all types of attachments, including images.
By means of this Outlook recovery tool, one can easily repair their PST files even if they are large. It retrieves all valuable information and enables to split of the output PST file after a specified size. It easily scans the corrupt or damaged PST files and recovers deleted items. After completion of the PST file recovery process, one can choose to save specific emails in various file formats as per requirement. It allows users to save recovered email items in DBX, MBOX, MSG, EML, PDF file formats as well.
Summing up
To wrap things up, the methods we’ve highlighted provide practical ways to extract embedded images from your Outlook emails. However, there are situations where these methods might fall short, especially when Outlook PST files become damaged or inaccessible. This is where the Kernel for Outlook PST Repair tool comes to the rescue.
This software is the best way to scan the corrupt PST files and repair Outlook 365 on Windows 10. The tool restores the corrupt PST files and displays its data in a tree-like structure. So, we will highly recommend our readers to go with this tool without any second thoughts.

