Read time 6 minutes

External hard drives help to transfer data between different systems and also to share data with others. But any problem arising with the external hard drive may threaten the security of the data stored in it. Sometimes, the issues are not significant or severe, like slowing down of the operations. But still, they need immediate attention.

Quick Approaches to Fix the Slow Down Issue

Are you too facing such slow down issues with your external hard drives? If yes, then read this, and I am sure you will find a solution to fix your problem. Let’s discuss in detail how you can solve this issue.

  1. Check if it is virus affected
  2. If your external hard drive is slowing down, one possible reason behind it might be that it is virus affected. To deal with it, use reputed anti-virus software and scan your external hard drive. After the scan, your drive should work fine. If it doesn’t, then move on to the next approach.

  3. Try cleaning-up the disk
  4. Cleaning up your external hard drive makes it work better by getting rid of unwanted files or leftover files which are probably making it slow. By doing this, all the unnecessary and unwanted data will be removed from your system, making it faster than earlier. After the clean-up, it is recommended to restart the system once. Check if it worked, otherwise move to the next solution.

  5. Try Defragging the external hard drive
  6. Defragging the external hard drive is the final approach to make your disk perform better. When the files are scattered, they use more space and slow down the external hard drive. And hence, you need to defragment it. How to do it?

    1. Open My Computer, and right-click on the external hard drive.
    2. From the menu select Properties.
    3. In the properties dialogue box, click the Tools tab.
    4. Now, click on Defragment now and then Defragment disk.
    5. Wait until the process finishes and check if solves your issue.

    This solution is most probably your last resort to make the hard drive work better; if this too doesn’t work for you, then better contact with a technical expert for the problem. If you have lost data, in the attempt to fix the hard drive manually, then you might need to look to the solution mentioned below.

Recover data from external hard drive

Kernel for Windows Data Recovery Software is a recovery tool that helps in data recovery from external hard drives. Let’s see how the tool works.
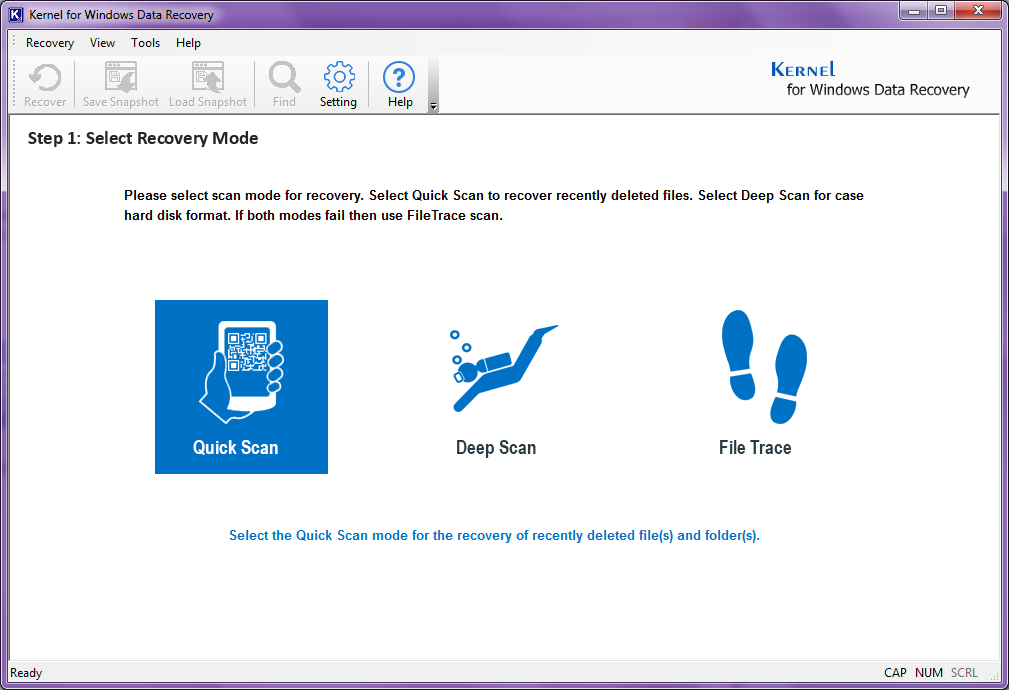
  1. As you open the tool, you will see three different modes for recovery. Select the desired recovery mode; here we are going for the Quick Scan mode.Kernel Windows Data Recovery Home Screen
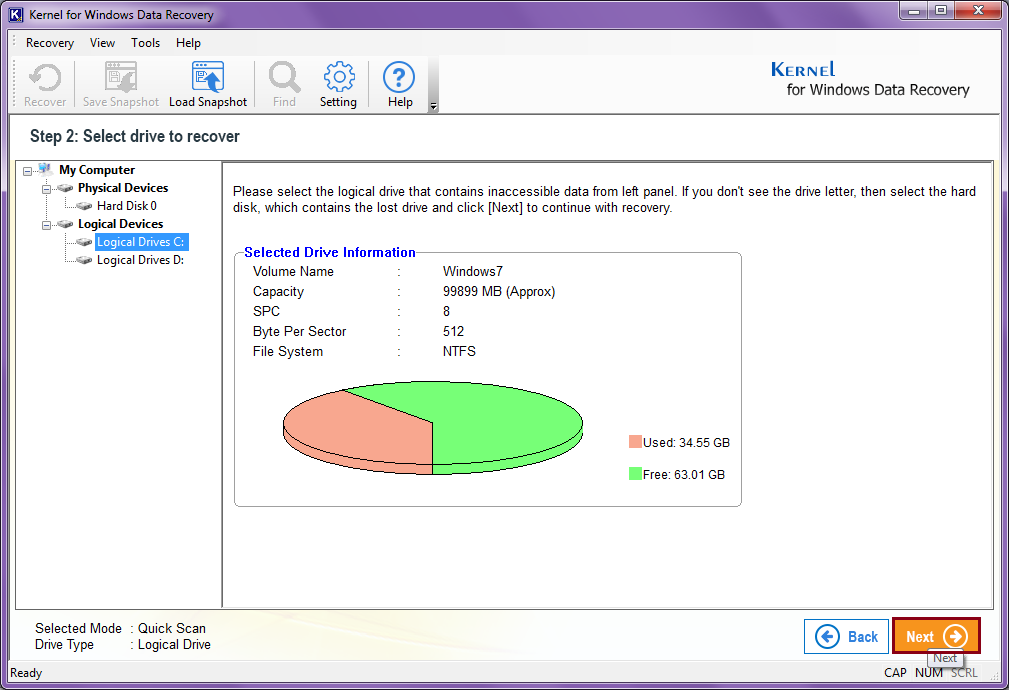
  2. Once you select the recovery mode, next, you will see the list of Logical and Physical drives on your system. Click on the Next button to continue.Select recovery mode
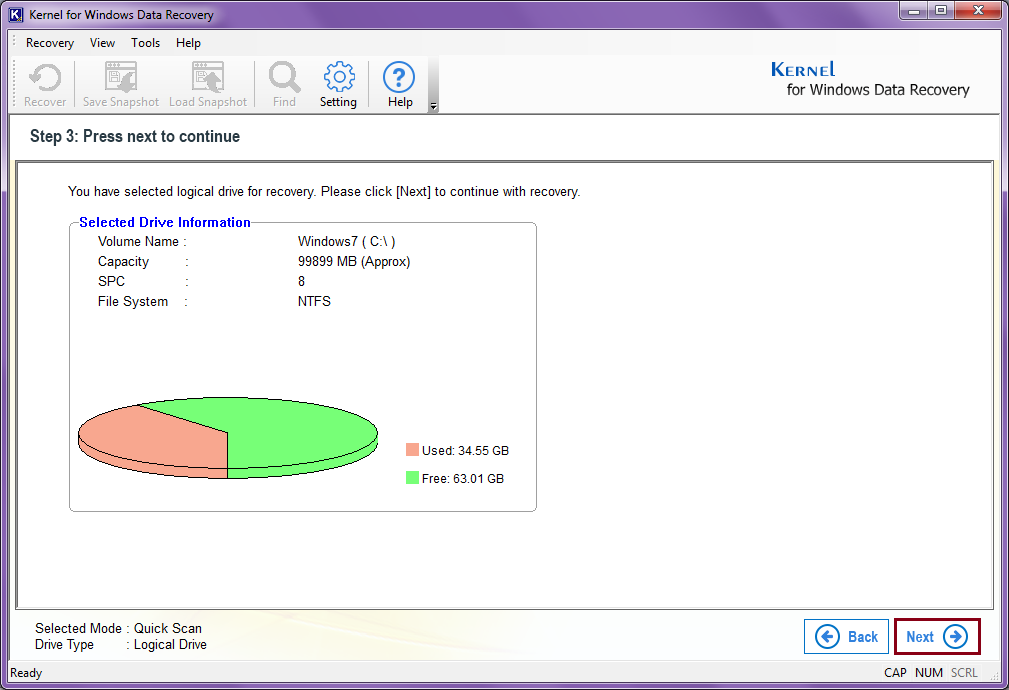
  3. In the next step, read all the drive-related information and click on the Next button.read all the drive related information and click on the Next
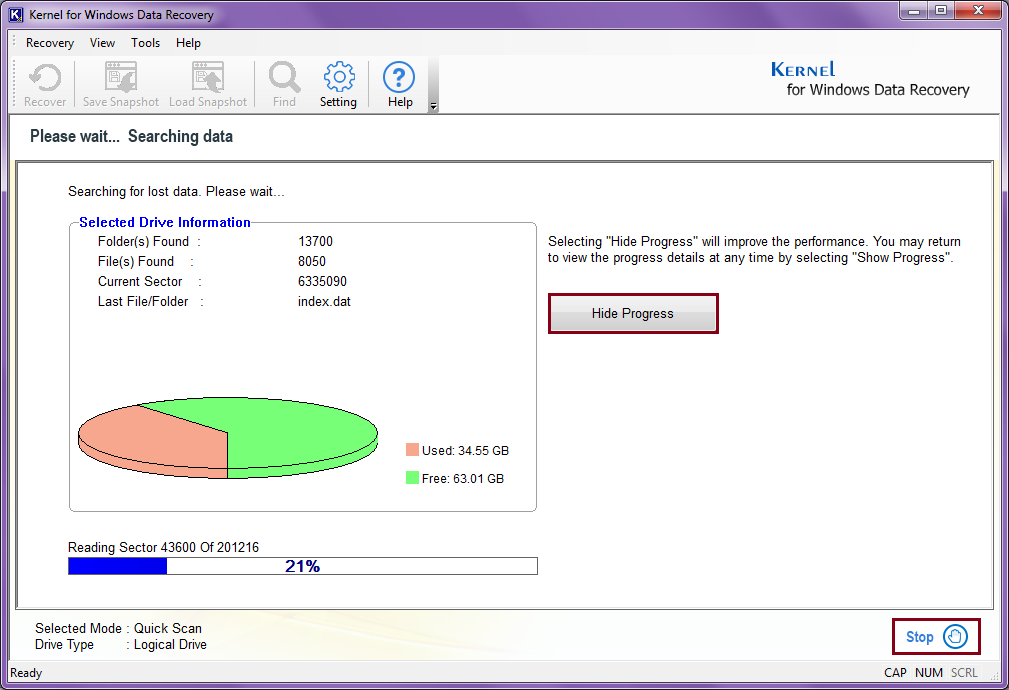
  4. In the next step, the tool will start the scanning process. The scan progress will be shown on the screen; you can choose to show or hide the progress results on the screen, by clicking on the Hide Progress and Show Progress buttons.tool will start the scanning process
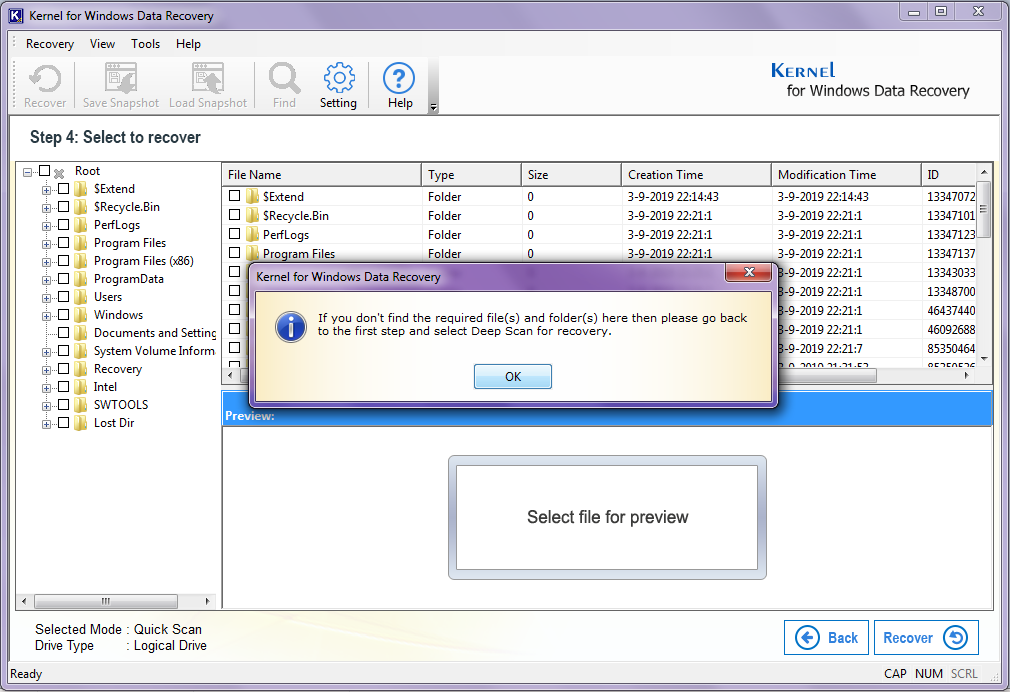
  5. Once the scan is over, you will find a dialogue box like shown in the screenshot – if the data is not fully recovered, you can go back and switch between the scanning modes. Otherwise, click OK. All the data of the hard drive will be displayed after the scan.you will find a dialogue box like shown in the screenshot
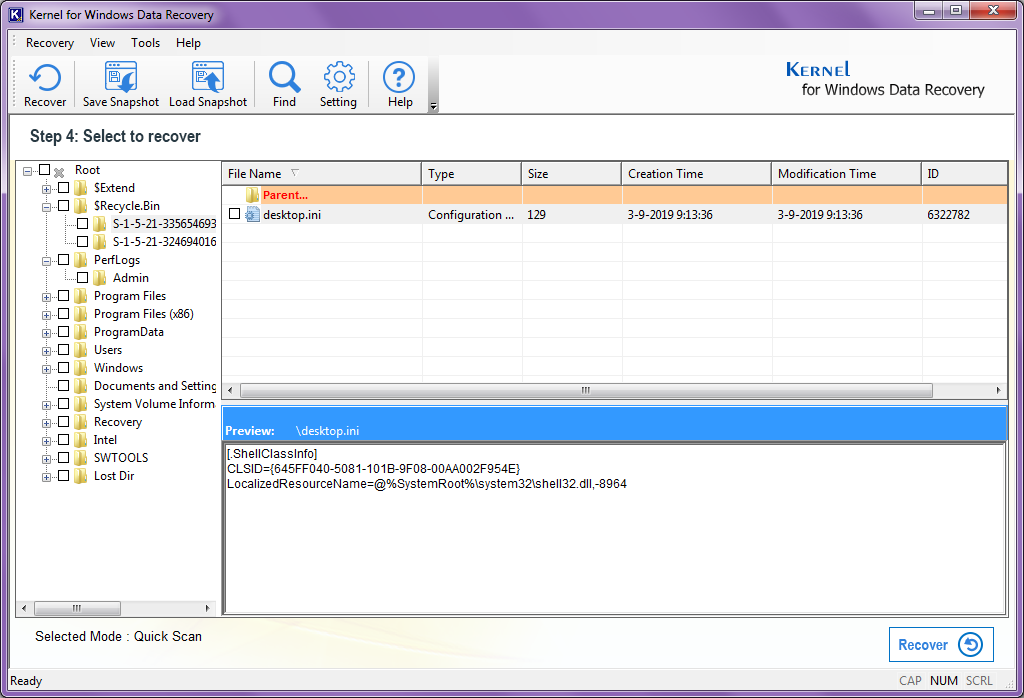
  6. You can have the preview of the content inside the file by clicking on the individual files.You can have the preview of the content inside the file by clicking on the individual files
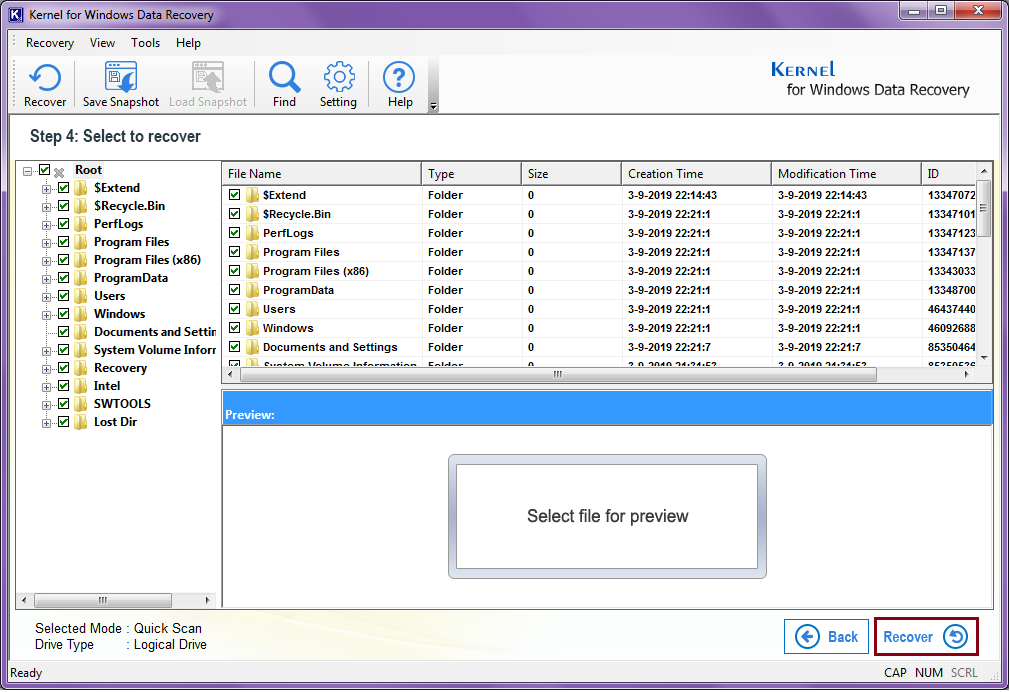
  7. Once you are satisfied with the scan results and preview, click on the Recover button to start the recovery process.click on the Recover button to start the recovery process
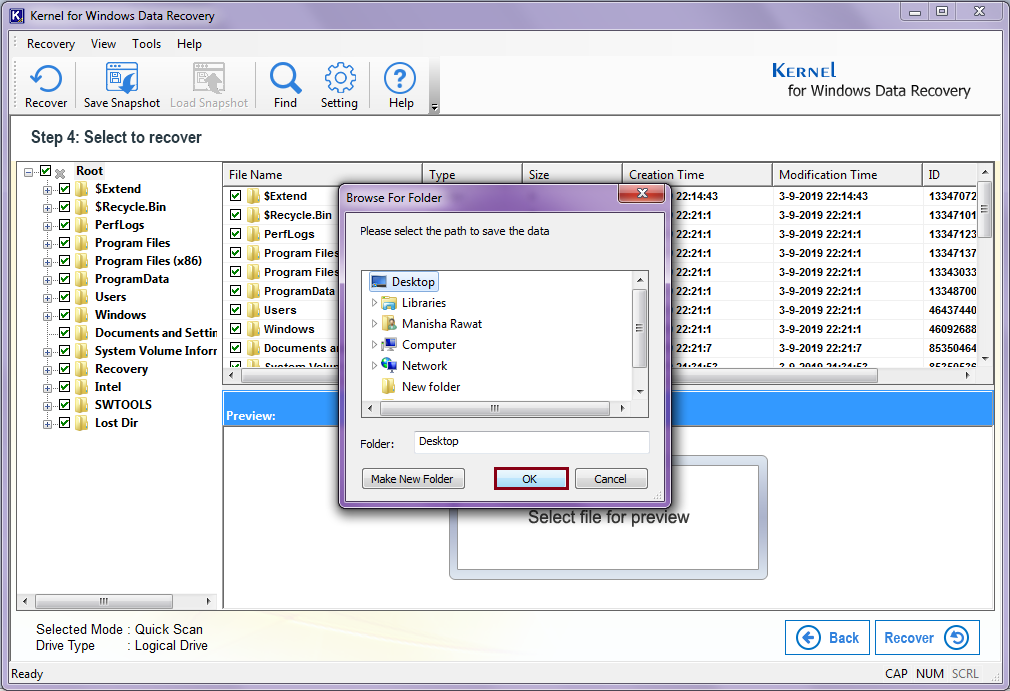
  8. Moving forward, the tool will ask you to provide a location to save the recovered data. Provide one and click on OK.the tool will ask you to provide a location to save the recovered data
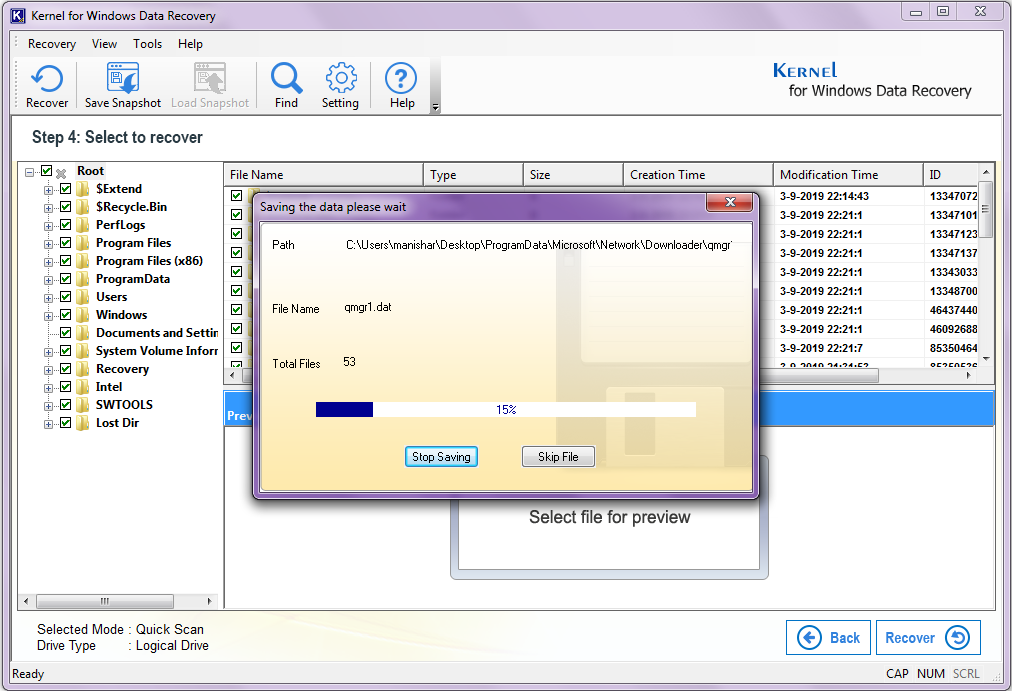
  9. As you click on the OK button the saving process will start; wait for it to finish.wait for it to finish
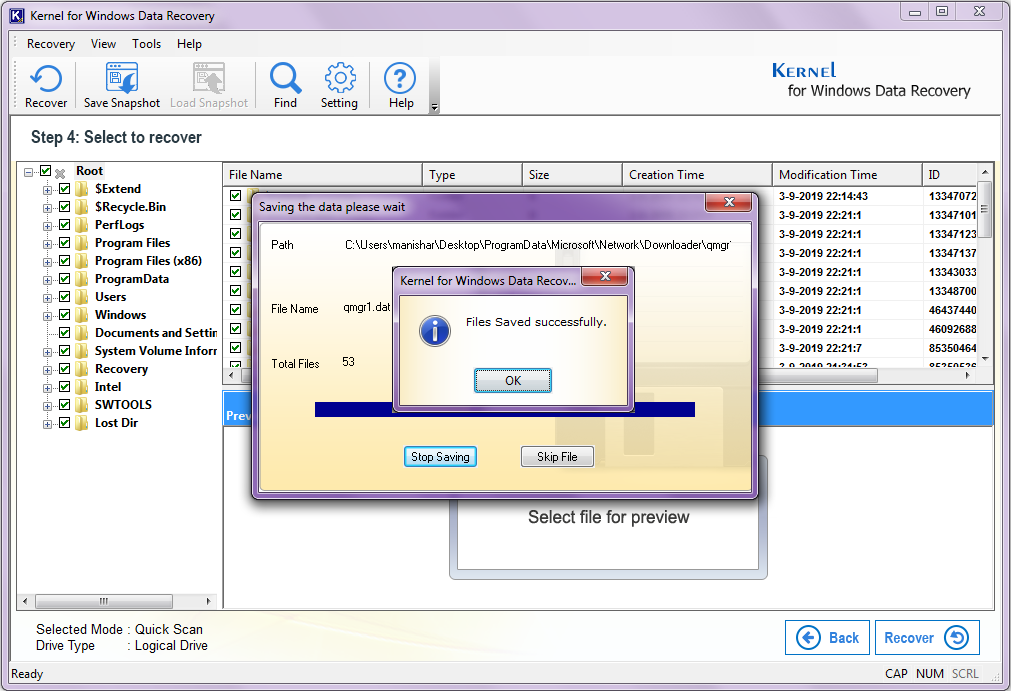
  10. Once the process is over, click on the OK button.click on the OK button

This is how you can recover the lost data with Kernel for Windows Data Recovery. The tool is user friendly and with its three recovery modes, you can recover deleted files for free.

Kernel for Windows Data Recovery
Related Posts