Read time 8 minutes
External hard drives are the storage devices that are frequently used to store and share data. These drives come in various forms such as hard disk drives (HDDs), solid-state drives (SSDs), USB thumb drives or flash drives, network attached storages (NAS), optical drives (CD/DVD), etc. Most of the photography enthusiasts are well aware of backing up their photos (taken on a camera and stored on a CF/SD card) on external HDDs. Due to the enormous volume of data, these avid photographers are bound to use external HDDs to sort and store their digital data as the CF/SD cards don’t have enough storage. To process some images, you plug in the external HDD to your PC/laptop and to your surprise you are prompted with an error message saying, ‘You need to format the disk in drive X: before you can use it.’ After several attempts of plugging your drive in and out of the USB port, still, you are unable to get it working. This can be quite frustrating and agonizing at the same time.
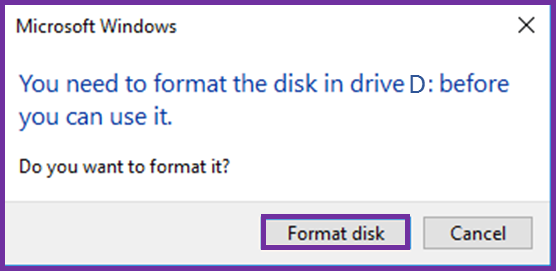
It seems like there is no option left for you other than formatting the drive. However, formatting erases the data on the drive. Believe it or not, but it is true that Data Recovery is possible even after formatting the drive. In this blog post, we are going to discuss ways and fixes to get past this annoying error with and without formatting the corrupt drive. When this error happens, checking the Disk Management displays their file systems as RAW due to which once cannot access the drive.

Before we delve any further into the solutions, we shouldn’t overlook the reasons behind this issue. Below are the possible factors for this error:
- Malicious attacks on the drive
- Existence of bad sectors on the drive
- A sudden power surge while the drive is in use
- Improper handling of the drive
If you don’t have the backup of your data, or you don’t have a third-party data recovery tool, it wouldn’t be a wise idea to format your drive. Just try the following solutions if you want a quick fix:
Fix #1
- Connect the external drive to another system to check if it can read it
- Restart your computer to check whether it works or not
- Run the antivirus software to get rid of any malicious program or virus on the external hard drive
Fix #2
- Go to the start button and click ‘Run.’
- Type ‘cmd’ into the text box and hit enter
- Type ‘chkdsk x:/f’ (replace the letter ‘x’ in the command with the drive letter that you want to format) in the command prompt and press the enter button.
- Next, CHKDSK will start repairing the damaged drives.
If CHKDSK ends without an error, then you should restart the computer before attempting to read the files from the drive. This process will take some time to fix these errors, so please be patient. However, it is to not that the CHKDSK process is not applicable to the RAW drives.
Hard drive formatting- the process behind it
The two major causes of data loss are accidental deletion and drive formatting. So, if you delete a file or a folder from your drive, in file index, that folder/file will be marked as an empty space so that new information can be rewritten on it. Formatting and deletion, both erase the data from the drive; there is only one significant difference between the two, and that is, formatting erases all the data at once. Usually, the system does not overwrite the space which was previously taken by a now-deleted file; it merely marks that space “available.” The system will never overwrite on this available space unless it runs into low disk space issue (in that case, only it will overwrite on this available space). Hence, there is always a scope for data recovery.
Using a professional data recovery tool
If you have tried both of the two fixes mentioned in this blog post but had no success with them, then it is time to consider a professional Windows Data Recovery Tool. One such tool is Kernel for Windows Data Recovery. It can efficiently repair, recover, and restore the data from corrupt Windows partitions/ drives. Most importantly, it can also extract all deleted files and folders, MS Office documents, emails, and media files.
Now we will be discussing the features of the tool in detail in a step by step manner.
Read Also : How to backup and restore files from corrupt drive
- When you open the tool, you will be prompted to choose from three scan modes. Select the mode according to the level of corruption.

- Next, from the left pane, choose the drive/partition for recovery.
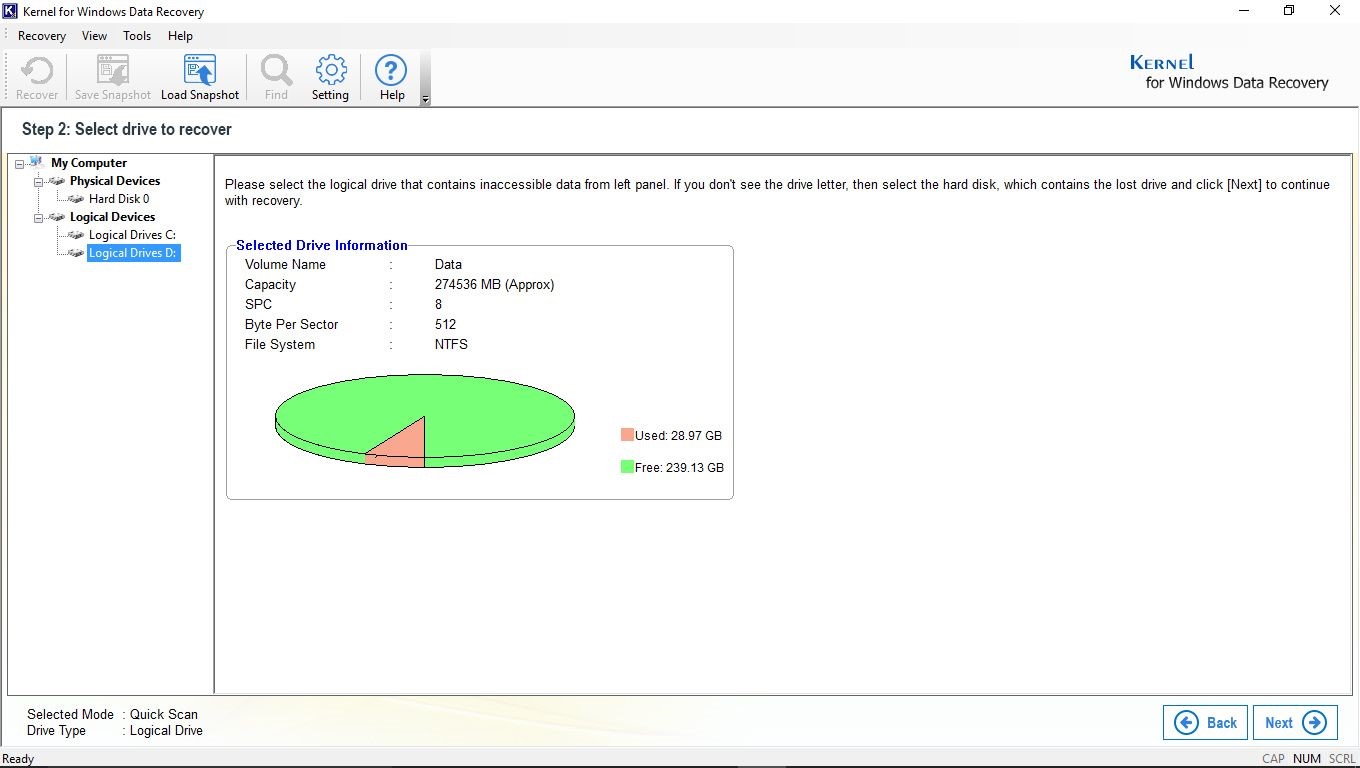
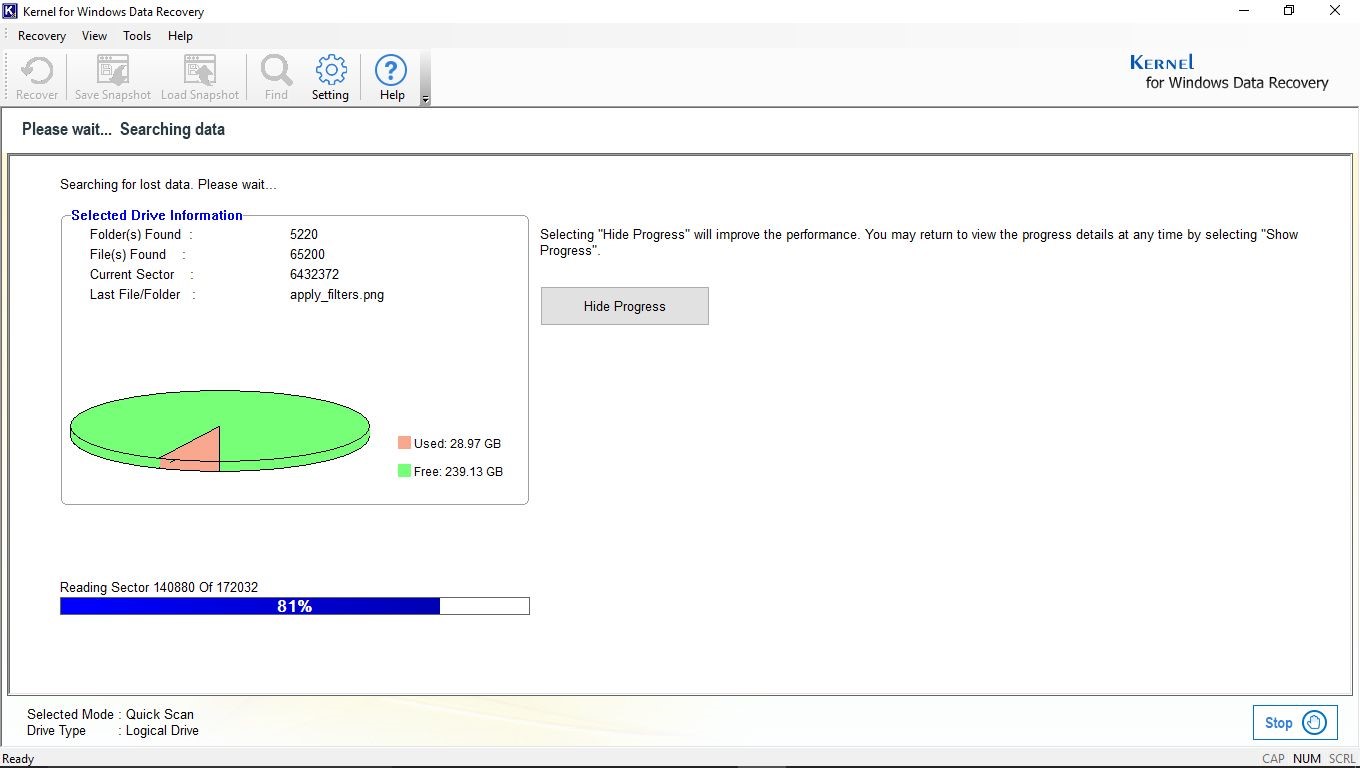
- Next, the tool will search for all the lost and deleted files from the previously specified drive. The progress bar shows the recovery progress and status.
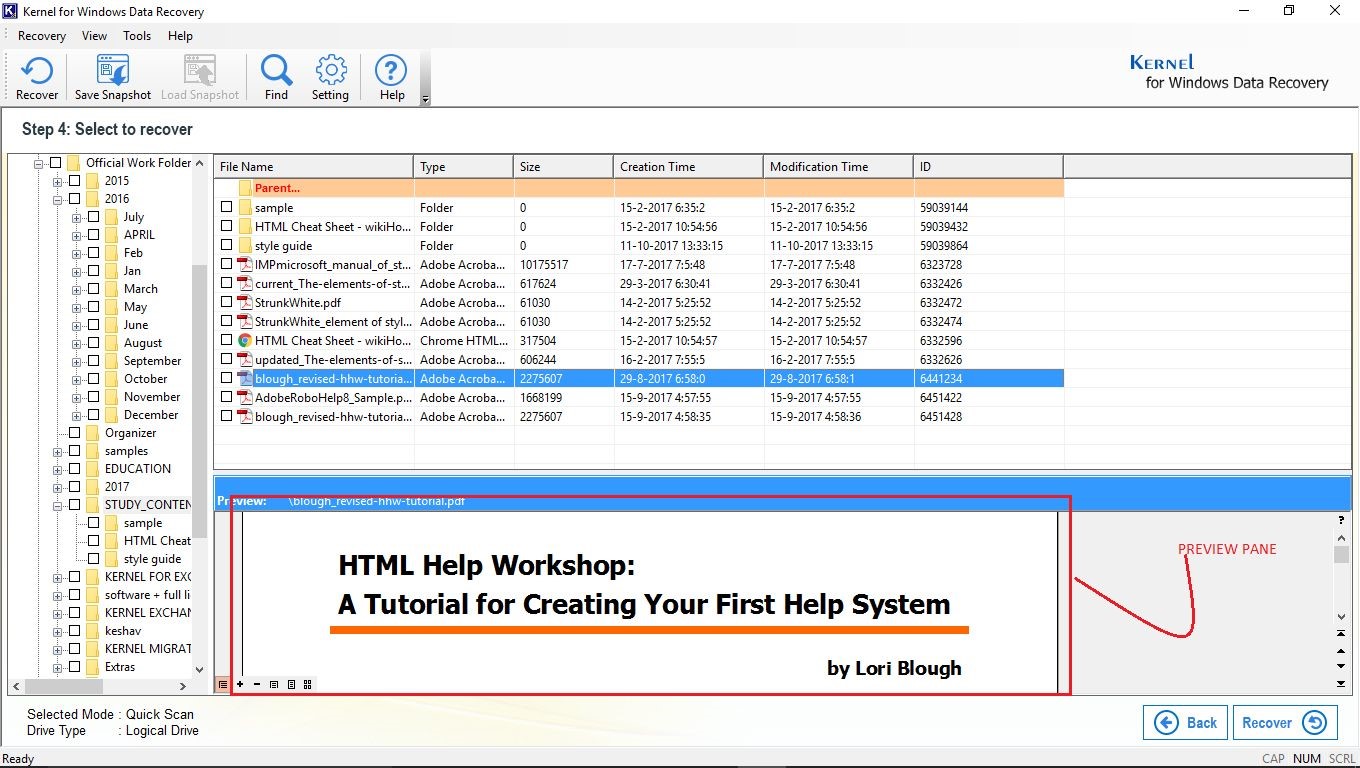
- After the scan, the recovered items will be displayed in the right pane. One can also preview the content in the preview pane. Check the items that you want to recover and hit “Recover” to recover deleted Windows files.
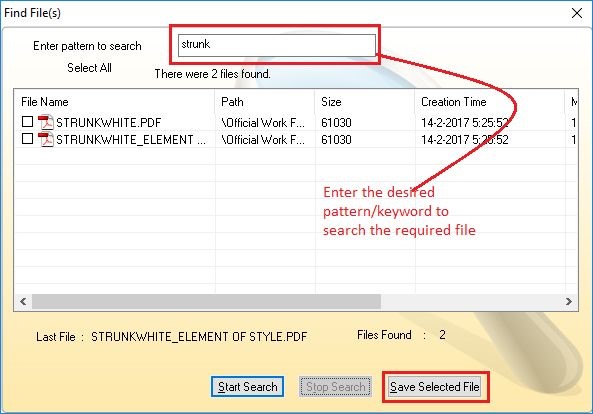
 Note: To find a specific file or files with extensions, select “Find” from the Menu Bar. Next, you can either choose to save the selected file or start a new search.
 - If you are looking for a specific file, then you can select ‘Find’ from the Menu Bar. Next, you can either choose to save the selected file or Start a new search.
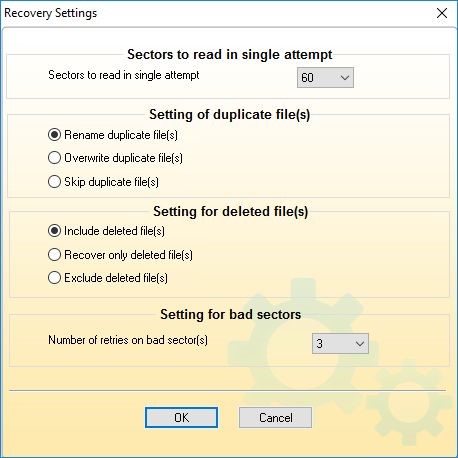
- Next, you can use the recovery settings option to manage the recovery of duplicate and deleted files.
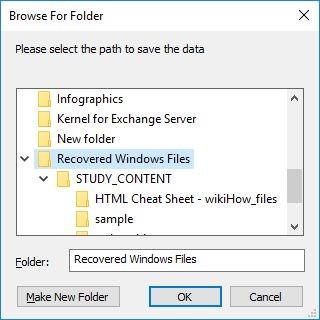
- Next, you can provide a location where you would like to save your recovered files.
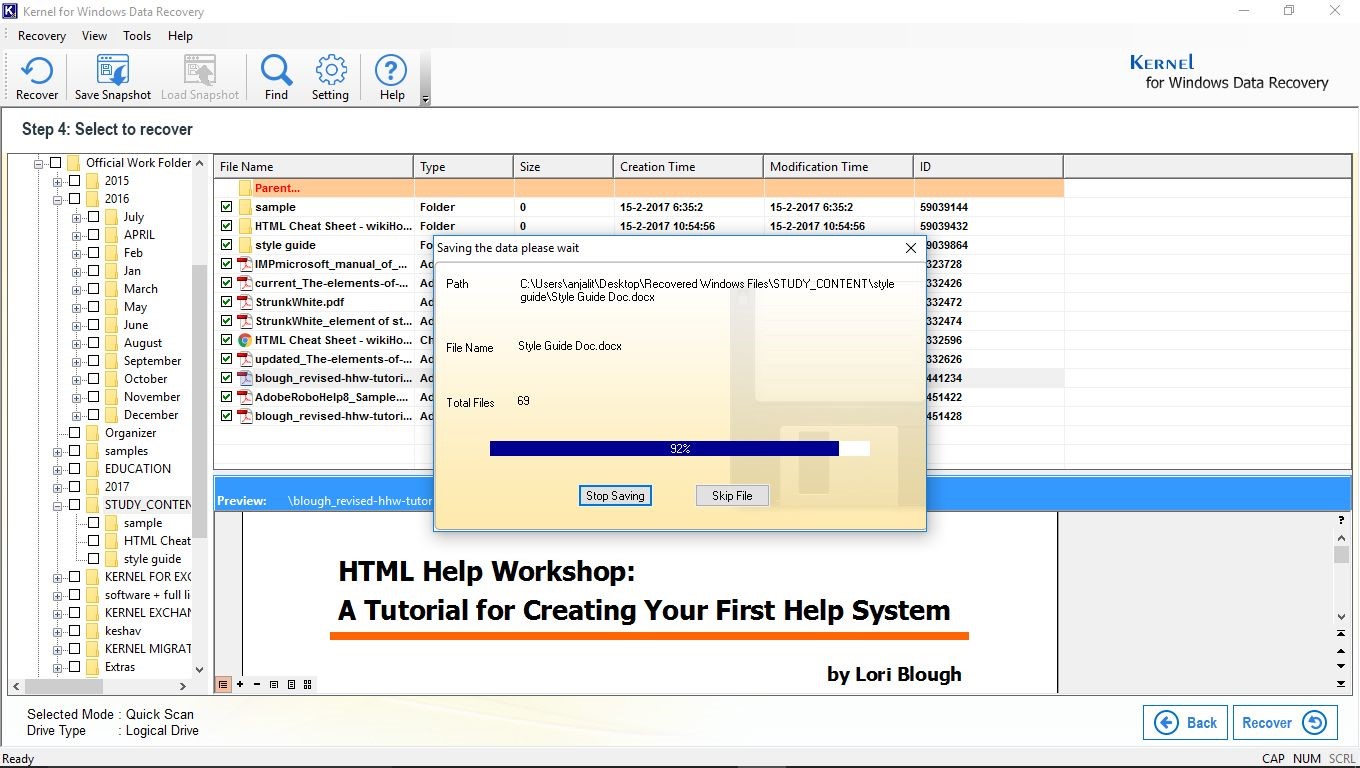
- The progress bar shows the status of the saving process.
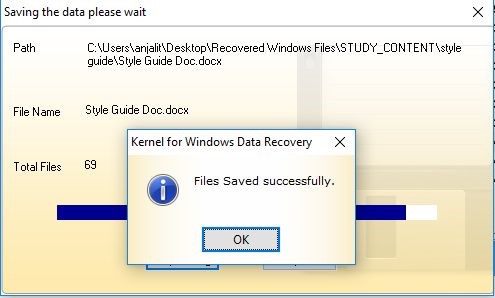
- A popup window displays a message once the files are successfully saved.
Conclusion
Here, we have discussed the “External hard drive, not formatted” error. Then we briefly have explained the causes for this error message. Moreover, we have also described two quick fixes. Finally, we have discussed a Professional Data recovery tool – Kernel for Windows Data Recovery, which is a very sophisticated tool to recover deleted Windows files. We have discussed the various capabilities of this high-end tool. The tool process is also explained in detail, which will help the user to get acquainted with the tool.

