Related Posts
How to export Exchange 2007 mailboxes to Outlook PST?

Written By
Sahil Verma
Updated On
March 07, 2025
Read time: 6 minutes
“When I started working at my company, they were using Exchange 2007. But, I had no idea how to export Exchange 2007 mailboxes to PST.
I did some extensive research online and couldn’t find a clear guide on how to do it. So, I decided to just try it and see what happened. Thankfully, it worked out, and I was able to export my mailbox to PST without any problems.
Since then, I’ve learned a lot about exporting Exchange 2007 mailboxes to PSTs and have written this guide on how to do it. Hopefully, this guide will help you export your Exchange 2007 mailbox successfully.”
With a few simple steps, you can have your Exchange 2007 data exported and ready to use in no time. In this guide, we’ll help you with the entire process. So, whether you’re switching email providers or just need a backup of your data, read on for all the information you need.
Before we get started, there are a few things you’ll need to export your mailbox:
Once you have these prerequisites installed, you’re ready to import Exchange 2007 mailbox to PST. Follow the steps below to get started:
To export mailbox data from an Exchange 2007 mailbox, the user must be granted Full Access permissions to the mailboxes. To do this,
Alternatively, you can use the below command and get away from the hassle of manual instructions:
You can easily export your Exchange 2007 mailbox as a PST file using the following command.
Furthermore, you can filter out specific items or folders from a user’s mailbox by adding filtering parameters.
It will help you export data of a specific date range.
Once it is finished, you can open the PST file in Outlook and access all your mailbox data.
If you’re looking to export an Exchange 2007 mailbox to a PST file, you can do so by using the ExMerge tool. This tool is designed for extracting data from mailboxes and exporting it to PST files, making it an ideal solution for this task. In this article, we’ll help you with the process of using ExMerge to import an Exchange 2007 mailbox to a PST file.
There are some things you’ll need to make sure you have in order:
Ensure that you are logged in with an administrator’s account on your system and the Exchange server. Ensure that your system is on the same DNS server.
The above-mentioned steps can also be completed by using PowerShell. Follow the commands given below to import Exchange 2007 mailboxes to PST:
Use the following PowerShell command to grant ExMerge group access to your Mailbox Store.
Now, ExMerge.exe can export your mailbox to PST.
There can be several reasons why users want to export their mailbox data from one server to another. It can be due to data loss, data migration, or inaccessibility. Whatever the reason may be, the manual process of exporting mailbox data from one server to another is not easy and requires technical expertise. This means more chances of critical errors.
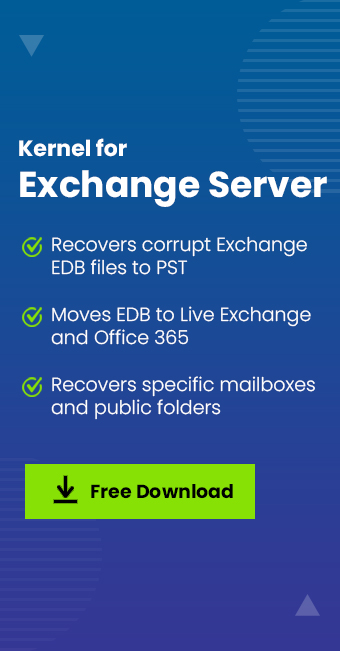
Therefore, it is recommended to take the assistance of Kernel for Exchange Server, a professional EDB Recovery tool. It is designed to perform the task of exporting mailbox data from one server to another effortlessly and without any data loss. It will help you fix Jet errors as well.
The software offers a comprehensive solution for all kinds of Exchange Server data loss scenarios. With its easy-to-use export options, advanced search features, & detailed reports, the utility makes it easy to recover lost or deleted data from an Exchange Server. And because it supports both on-premises and cloud-based Exchange deployments, it is an ideal solution for organizations of all sizes.
Whether you’re looking to recover data from an Exchange Server that’s been damaged by a natural disaster, or you simply need to export data from an Exchange mailbox, this top-notch software has the features you need.
So, there you have it. Your comprehensive guide on how to export Exchange 2007 mailbox to PST. We hope you find this information helpful, and it will make the export process easier for you.
If you need a reliable and efficient way to export Exchange 2007 mailboxes to PST, we have already recommended the tool you need. This software helps you to import Exchange server 2007 mailbox to PST files without losing a single data in just a few clicks. It comes with a free trial version, so you can try it before you buy.