Read time: 6 minutes
Microsoft 365 simplifies your cloud-based operations and supports interdepartmental collaborations to streamline work. When you are managing small or large businesses, there are various projects & meetings scheduled or planned. But if you are not using M365 calendars then the issue of import cancellations & missed communication is possible.
Microsoft 365 provides you with a feature to create Office 365 shared calendar which can be shared by respective users to view, share or setup upcoming schedules. This will help you to remember important meetings, activities or tasks in mean time, so nothing should be left behind. However, you have the feature to create shared calendars from different Office 365 applications.
Why to create a shared calendar in Office 365?
To understand the need for a shared calendar, you have analyzed the priority factor for any small or large business organization. Business’s ultimate priority is managing time, as all the tasks, operations & meetings are crucial and carry deadlines.
Are you still thinking about how a shared calendar can help you to manage time and improve business workflow?
Well, calendars in Office 365 help you to create proper schedules for your necessary tasks for upcoming weeks, months & more. In Office 365 creating a shared calendar will enhance productivity by streamlining in-house communication & plans. It also allows the facility to share it with in-house or outside users to show occupancy.
Below, we have mentioned benefits of a shared calendar:
- Manage events: Shared calendars will provide all the included members the details of upcoming events listed on the calendar such as meetings, project discussion, deadlines & appointments.
- Organized workflow: One can simply organize their work by creating a shared calendar, in which they can plan their tasks accordingly.
- Timesaving: Shared calendar improves your productivity & time utilization, as you can establish communication with inside & outside users as per free time in calendar.
- Valuable appointments: Don’t miss out on your important appointments with clients if you have a proper calendar, as it will remind you of the meetings.
Types of shared calendar in Office 365
To enable a worthy use of Office 365 calendars, it is viable to plan your purpose as there are three types of calendars. Understand your requirement & create a suitable calendar from the below mentioned typed:
- Indvidual calendar: These calendars are created to fulfill your personal requirements. You can set up a calendar with all your schedules and share it with users to show your availability.
- Group calendar: A group calendar is created for an organization where all the in-house members can create schedules & manage tasks.
- Shared calendar: In Office 365 creating a shared calendar is more beneficial as one user can make the calendar for collaboration purposes. They can also share it with other users with permission to view & manage it.
How to create shared calendar in Office 365?
Microsoft 365 businesses know the importance of having a shared calendar to create an organized environment for tasks, projects & communication in the business. But the main concern arises when the situation comes to creating a calendar. Additionally, you must be aware of Office 365 retention policies for Calendar. Find the step-by-step guide below to create Office 365 shared calendar:
- Login to your Microsoft 365 account.
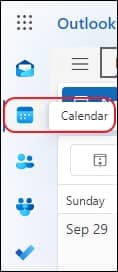
- From the side pane, choose the Calendar option.
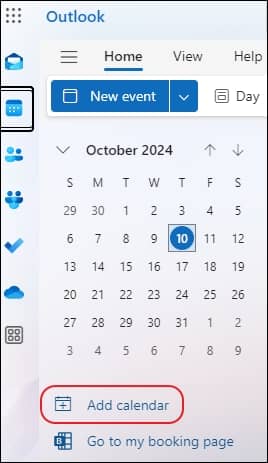
- Now, click on Add calendar.
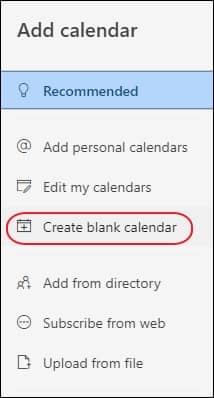
- Then, click on Create blank calendar.
- Setup your calendar by providing Calendar name, Color, Charm, and Add to (where you want your calendar). Then, click on Save.
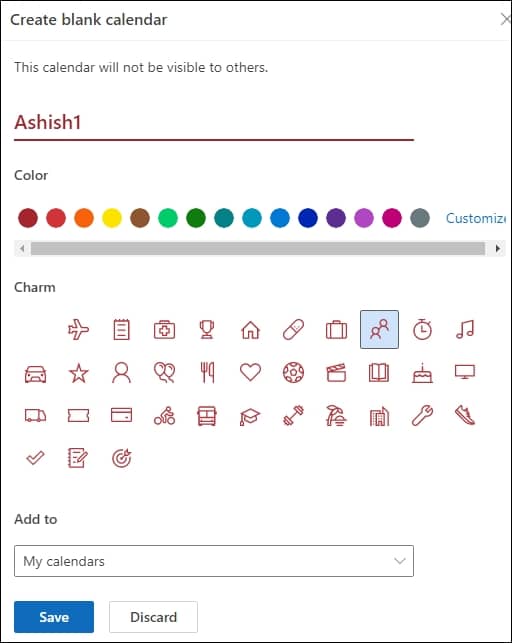
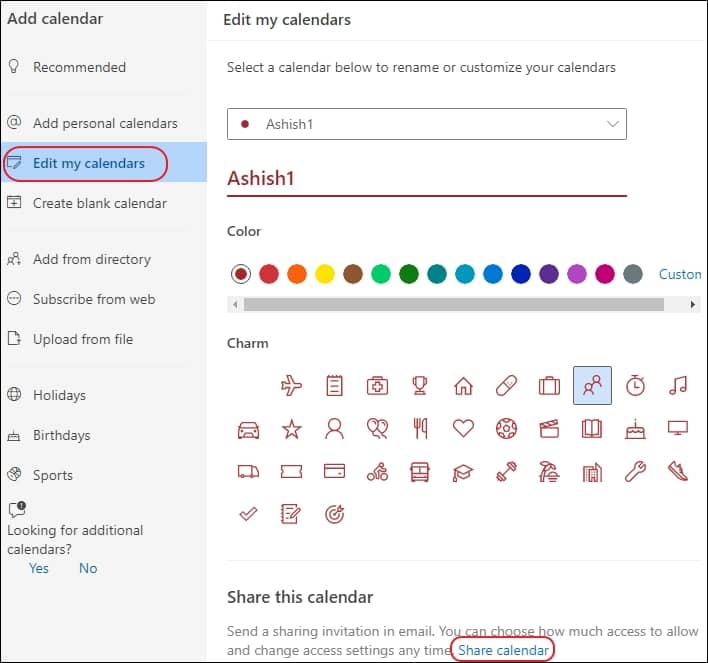
- Once the process to create Office 365 shared calendar is done. Go to Edit my calendars and click on Share calendar.
- Add users to the shared calendar and provide them with specific permission. Choose the permissions from the dropdown and click on Share.
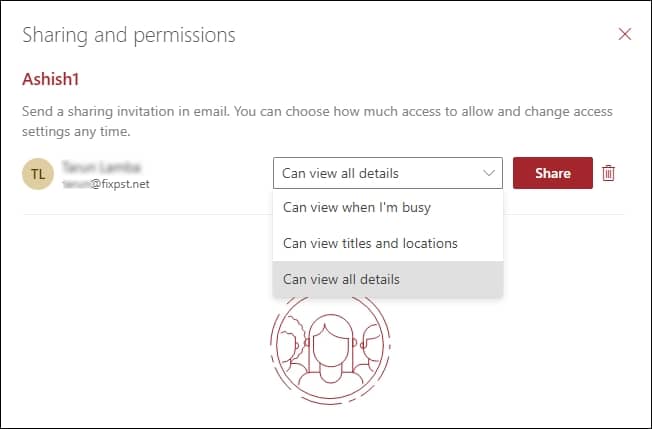
- In the end, the selected user will receive a verification mail. Once they accept the invitation, they can view the shared calendar.
Why you need a reliable backup solution
Microsoft 365 inherits robust features & functionalities in which scheduling work structure using a shared calendar is the basic. However, due to executing multiple things daily, we need to pay more attention to the risk of data loss.
Microsoft 365 is secure, but you must protect entire data using daily backups of calendar as well, but it is not easily possible manually. That’s why organizations more often employ an automated Office 365 data backup solution.
Kernel Office 365 Backup software is one of the most advanced tools that helps you secure Office 365 mailboxes along with shared calendar. This tool can perform both data backup & restore of your mailboxes while maintaining data integrity and folder hierarchy.
Conclusion
A shared calendar is a must in your Microsoft 365 environment; it will help you organize work according to their priority and help to remind them within the deadline. In the above blog, we have highlighted the benefits & productive methods of creating a shared calendar in Office 365. However, the utmost priority should be to protect your Office 365 data using the recommended Office 365 backup software. The software also lets you backup Office 365 shared mailboxes for additional security.

