Want to convert bulk EML files into a single PST file? This guide will provide you with assistance in the conversion process. Know why it is necessary to convert multiple EML files into single PST along with the reliable methods to do so. Additionally, use Kernel for EML to PST converter software for instant and secure conversion.
Electronic Mail files, also known as EML files, is a common email file format with .eml extension used to store single email messages. Files with this extension are saved in the Internet Message Format for electronic mail messages. Many email clients like Mozilla Thunderbird, Windows Live Mail, Apple Mail, etc. use EML and EMLX formats to store their data files. Sometimes, users of Microsoft Outlook want to access these EML files in it, but it doesn’t support this format directly.
Outlook stores its email messages in PST (Personal Storage Table) files. This database file format is unique to Outlook. Hence, if you want to access EML files in Outlook, you need to convert them into PST format. We will go through the possible ways to convert multiple EML files into a Single PST for your easy email access. First, let’s know more reasons behind converting EML files to PST file.
Why convert EML files to PST file format?
There are many factors including data safety and security, due to which users need to perform EML files bulk conversion. The basic reasons that make it a necessity for EML files to PST file conversion are as follows.
- Prevent emails from being corrupted: Malware and other viruses can easily corrupt EML files as they contain single email attachments. To safeguard the data stored in it, you need to export EML file into PST format.
- Easily manageable file format: The EML file only saves one email message in it, which makes it difficult to manage multiple EML files separately. By converting them to PST files, you can save all files in one place, making it easily manageable in Outlook.
- Enhanced security features: EML files lack security features, which increases the data leak risk, whereas Outlook offers outstanding security features to protect the data from theft or other risks.
Manual method to convert EML files to PST files
There are not many manual ways to convert EML files to PST format. Furthermore, you need to perform the available method in different parts to get accurate results. Before carrying out the methods, it is recommended that you keep a backup of all your important data. Follow the steps mentioned below carefully:
Part A: Extract EML file from the email client
We are using Windows Live Mail to perform the process of extraction of EML files. Here are the steps to do so:
- Step 1. Launch Windows Live Mail on your system.
- Step 2. Go to the File menu and choose the option Export Email. Now, tap on Email Messages.
- Step 3. In the Windows Live Mail Export Box, select the format “Microsoft Exchange” and tap on Next.
- Step 4. On the upcoming Export Messages pop-up, click OK.
- Step 5. Using the Selected Folders option, you now need to select the specific email folders you wish to export.
- Step 6. Tap on OK and let the export process begin. After the completion, hit Finish.
Part B: Import EML files into PST format using Outlook
In this section, first we must drag and drop the EML files into Microsoft Outlook, then we can export them into PST format.
- Step 1. Launch Outlook email client on your device.
- Step 2. Either make a new folder or select an existing folder in Outlook to save EML files.
- Step 3. Now, drag and drop the EML files into the newly created folder.
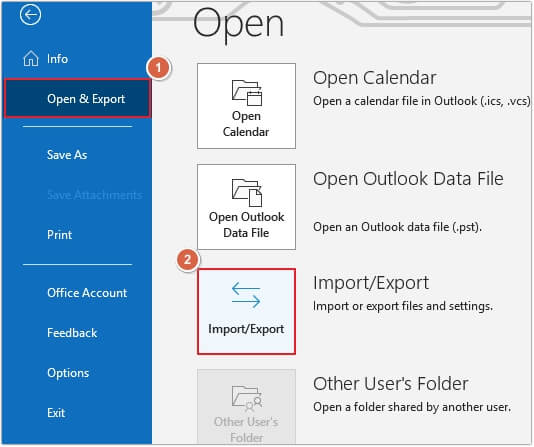
- Step 4. Now, go to File >Open & Export >Import/Export.
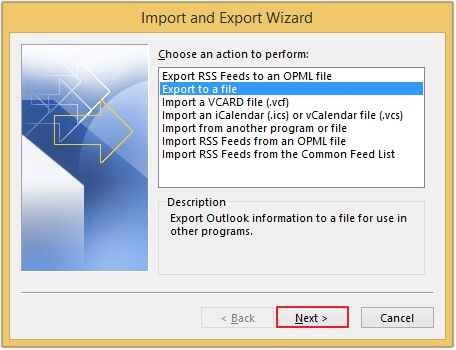
- Step 5. Now, select Export to a file option and click Next to proceed.
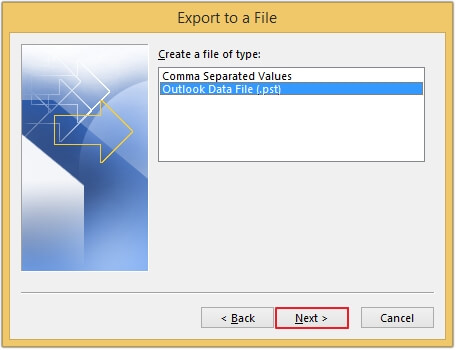
- Step 6. Choose Outlook Data File (.pst) and tap Next.
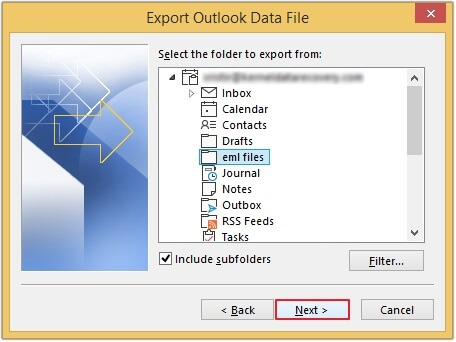
- Step 7. Select the folder containing EML file and press Next.
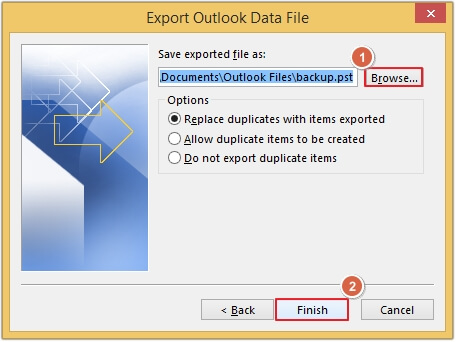
- Step 8. Click on the Browse button to provide the saving location and hit Finish to export the EML files into PST file format.
Why avoid manual method while converting EML file to PST?
The manual method comes with many drawbacks which may be frustrating for users. Below, we have described some of them:
- A user with technical knowledge can only attempt these methods.
- The method needs to be performed in different parts, making it time-consuming.
- If the process is not performed carefully, then there is a chance that your data file may get corrupted or lost.
Reliable and instant approach to convert EML file to PST file
As discussed, the manual method may not work effectively, which gives rise to errors and faults in the data files. In this situation, only a EML to PST converter tool works best and ensures quick results without any fault.
Kernel for EML to PST Converter tool offers quick migration of single or multiple EML/EMLX files to PST format. In addition this tool supports every version of Windows OS and Microsoft Outlook. With auto scanning of EML and in-built mail viewer facility, the EML file converter tool has a user-friendly interface and maintains the data integrity after conversion. Here are some its features listed below:
- Convert EML to MSG file format and other formats including Office 365.
- Get a detailed preview of the EML files before saving them.
- Save the EML file either in a new PST file or an existing PST file.
- Utilize the excellent filter options for precise data conversion and migration.
Step-by-step guide to convert EML files into PST format
Here are the easy-to-follow steps of Kernel EML to PST Converter tool to convert EML files to PST files. Execute the process and get an instant conversion:
Step 1: Download Kernel for EML to PST tool.
Step 2: Complete the installation by following the instructions given.
Step 3: Launch the software and tap on Find to browse EML files.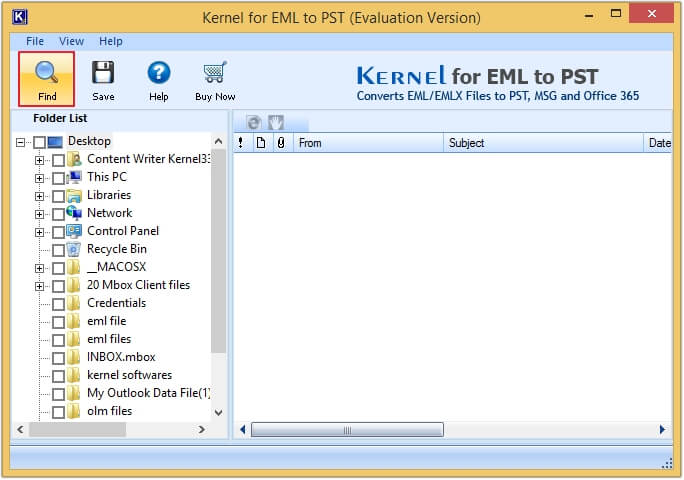
Step 4: Click on the Browse button and upload the folder containing EML file and then tap Search. All the files will get listed, select the required one and click OK.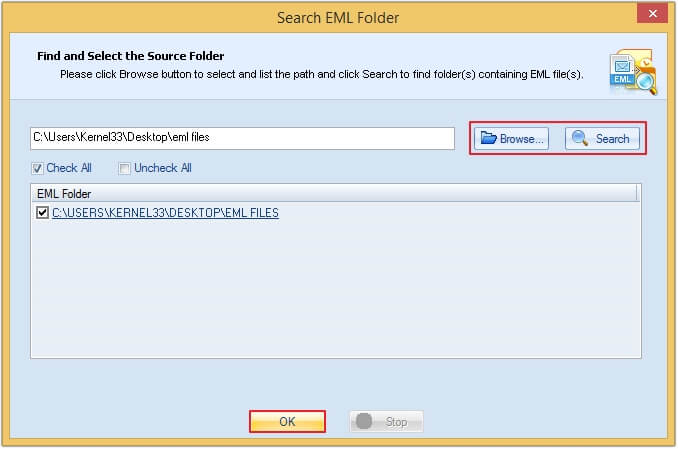
Step 5: After selecting the EML file folder, preview your EML files. Now, tap on the Save button to move forward.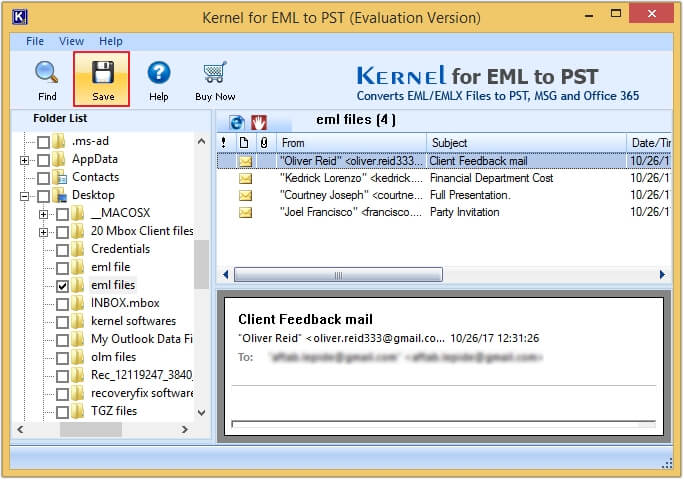
Step 6: You can use the Filtering option in the Define Conversion Rule section. Filter your EML files with email sender (From), email recipient (To), Date & Subject options. Tap on Next.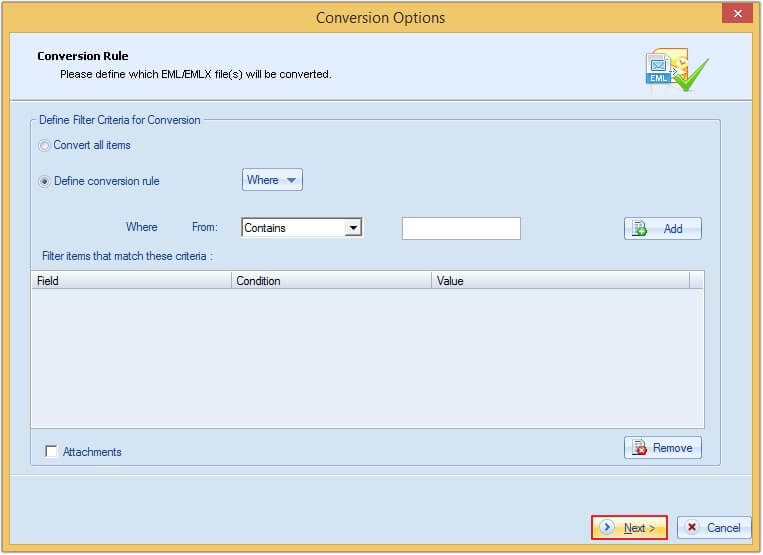
Step 7: Checkmark the Save in PST option. Here, you have two options: Create a New PST file or Save in Existing PST file. Use the desired option and provide the saving location by clicking on Browse. At last click Save. (you can use the Create a New PST File here).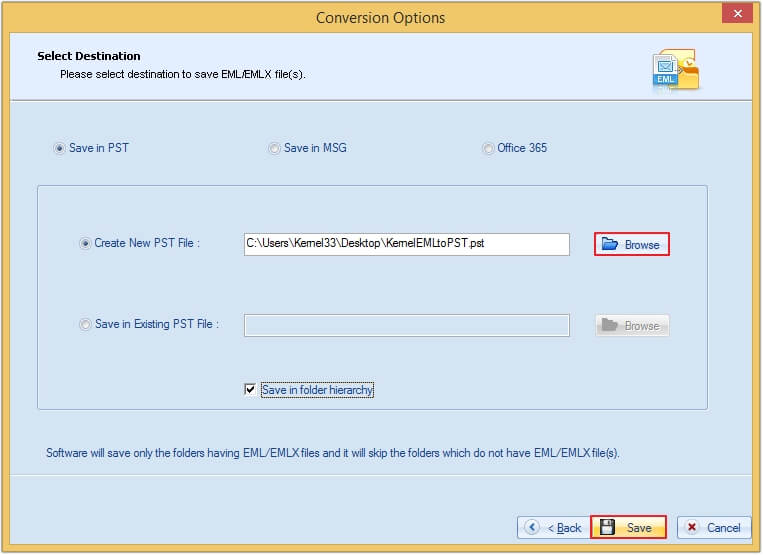
Step 8: Wait for a few moments for the conversion process to be finished. After the conversion, you will receive a message with your converted PST file saved successfully in your preferred location, click OK.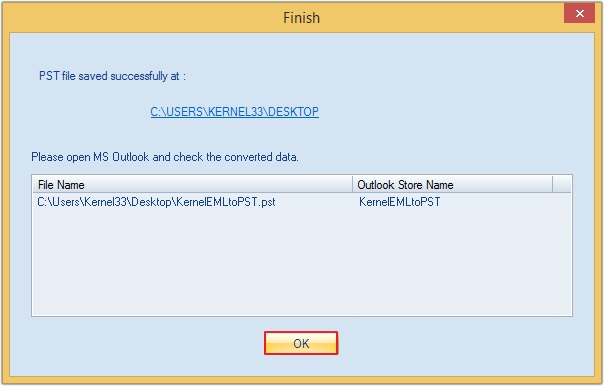
Conclusion
Our article provides all the aspects related to converting multiple EML files to a single PST file. We discussed a manual method, which has several drawbacks. It is advisable to use the EML to PST Converter tool and make your conversion process smooth and quick. With this software you can easily convert EML files into PST, MSG, or Office 365 account.
