Read time 4 minutes
The Offline Storage Table (OST) file is the repository for storing mailboxes associated with Exchange Server on-premises and Microsoft 365 accounts. Other IMAP accounts like Hotmail, Yahoo, etc. also store the synchronized mailboxes in OST files. Its significance lies in the fact that the mailbox remain accessible and available when there is no connection between Outlook and the server.
The default location of an OST file is –
- C:\Users\AppData\Local\Microsoft\Outlook
- C:\Documents and Settings\Local Settings\Application Data\Microsoft\Outlook
Microsoft has fixed the size of an OST file at 50 GB. However, experts advise to keep the size of OST file at an optimum level where it does not slow down Outlook or fill the storage in C drive. The following article will cover some methods in which you can change the location of OST file using Group Policy and gain some useful space.
How to change OST location in Outlook?
In Windows Server platforms where Active Directory Services are developed by Microsoft, Group Policy Management Console plays an important role of an Administrative tool to manage complete environment. For such Outlook-based Exchange accounts in which cached mode is turned on, there is an option to change the OST file location using available GPO settings. Following the below steps to change OST location in Outlook 2019, 2016, 2013, 2010 –
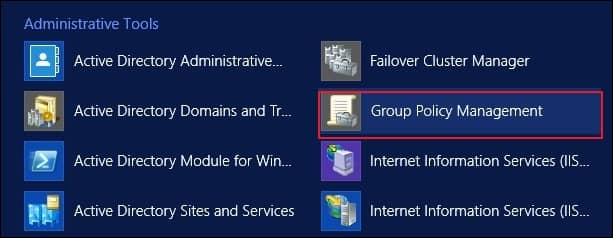
- In Windows Server, go to application, select and open Group Policy Management.
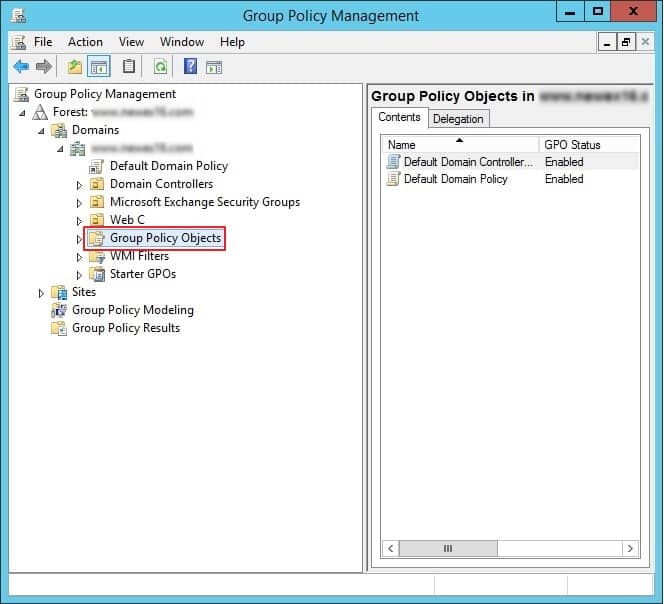
- Expand the Domains showing your current domain and go to Group Policy Objects option.
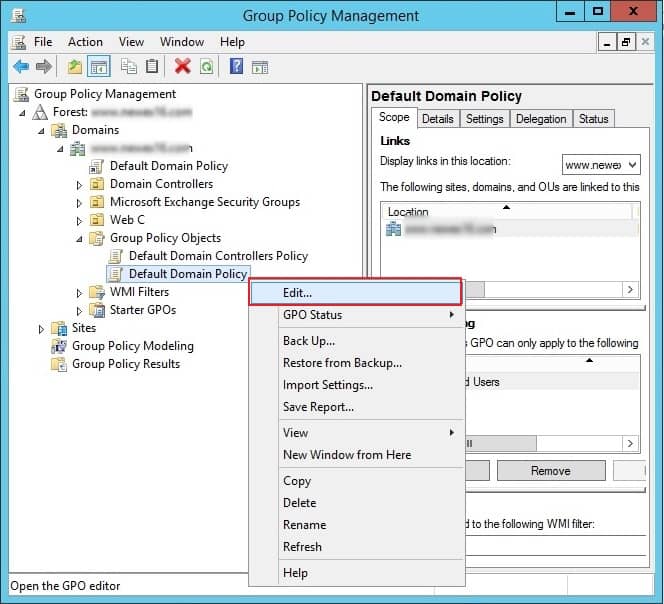
- Right-click to Default Domain Policy and click Edit. it will open Group Policy Management Editor.
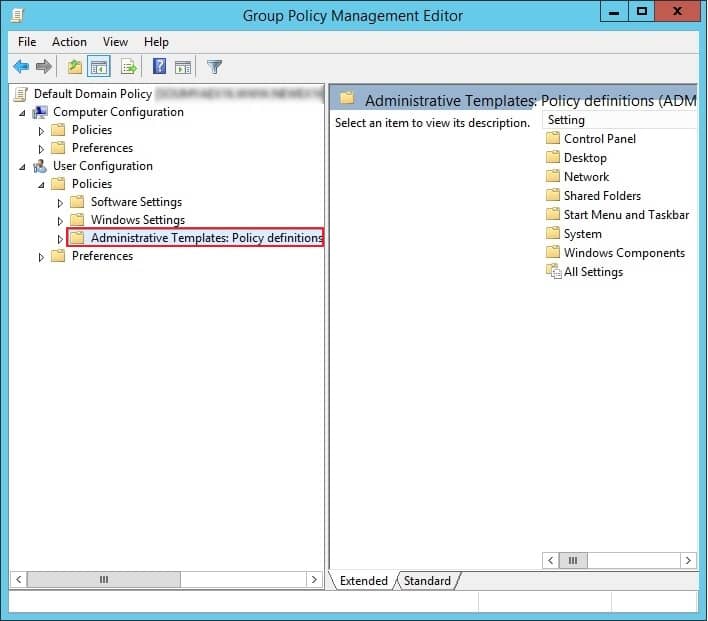
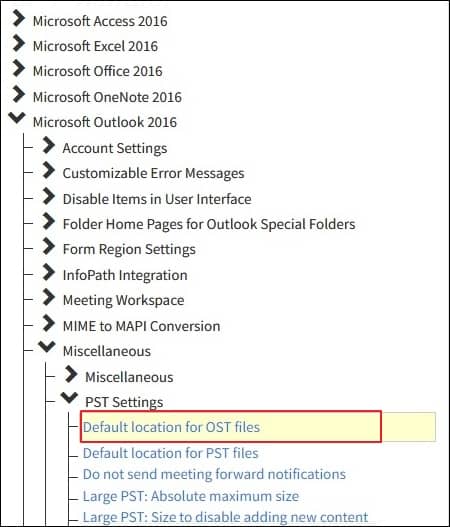
- In Group Policy Management Editor, go to Administrative Template under Policies category.
- Expand Microsoft Outlook, then miscellaneous and double-click on Default location for OST files.
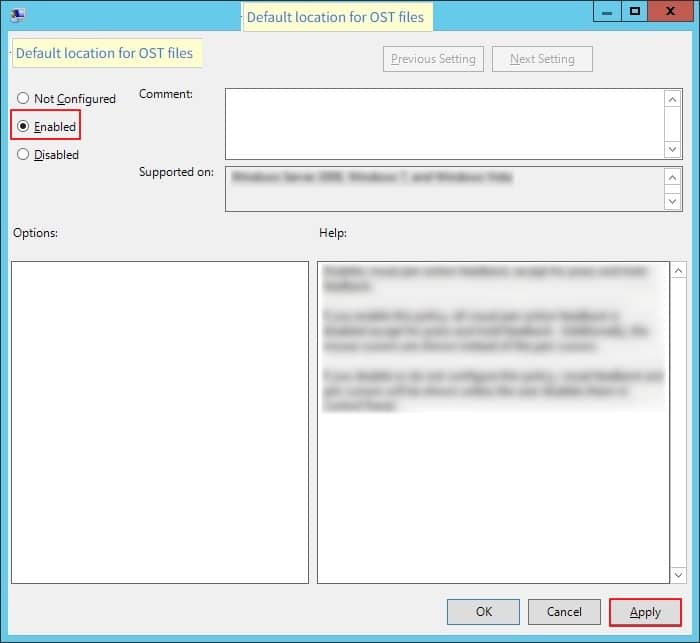
- Click on Enabled option to enable the setting to change the default location for OST files. Then, click Apply button.
- Input the new location for the OST file and click OK.
Additional Group Policy Settings
There are many Outlook related settings you can change using Group Policy. Some of them are mentioned here:
- Cached Exchange Mode Sync Settings.
- Disallow Download Full Items
- Disallow Download Headers
- Disallow Download Headers the Full Items
- Disallow On Slow Connections Only Download Headers
- Download Public Folder Favorites
- Download shared non-mail folders
- Use Cached Exchange Mode for new and existing Outlook Profile
It enables the email messages from Outlook to synchronize locally by the date of the message. By default, Outlook synchronizes messages from the previous 12 months only. If you want to get rid of this limitation, then you can select the settings and click All from the list.
It turns off the Download Full Items option for Outlook.
It turns off the Download Header option in Outlook.
It turns off the Download Headers then Full Items in Outlook.
It turns off the On Slow Connections Download Only Headers option in Outlook.
It synchronizes Public Folder Favorites in Cached Exchange Mode.
It synchronizes shared non-mail folders in the Cached Exchange Mode.
It configures new and existing Outlook profiles to add in the Cached Exchange Mode.
Final words
Changing the location of the OST file can be useful in some cases, but it is not always suitable as it can corrupt the file or make it inaccessible. During the process, the user may delete the data from the OST file or even delete the file. Although the group policies help to change the OST file location, it can create accessibility issues. If you face errors, you will need to use the ScanPST tool that can check the OST file for minor corruptions.
So, a professional alternative to the ScanPST tool seems a good idea. Kernel for OST to PST Converter can help you in recovering the inaccessible and deleted items from a corrupt OST file quickly. If you are not able to open or access the data from an OST file, you can use the software and retrieve the items. And, you can add the PST file in Outlook instantly after the OST to PST conversion.