Read time 7 minutes
Due to the advent of efficient cloud platforms and their efficient services, many business owners try migration from On-premises Exchange to Office 365. The size of exchange mailbox is generally quite heavy, and it can be a time consuming and error-prone task to perform a complete migration. There are some methods which can help you in completing the desired tasks-
Method 1- Use CSV file
A CSV file is completely suitable for bulk migration of large mailboxes to Office 365. You can use a CSV file while using the Exchange admin center (EAC) or the New-MigraitonBatch cmdlet in Exchange Management Shell to create a migration batch. There are following migration scenario where a CSV file is useful –
- Onboarding remote move migration
Onboarding remote move migration helps you to migrate mailboxes from on-premises Exchange online to Office 365. It works in the Exchange hybrid deployment scenario.
- Offboarding remote move migration
Offboarding remote move migration is opposite to onboarding remote move migration; here you can migrate Office 365 mailboxes to your on-premises Exchange environment.
- Staged Exchange migration
In Staged Exchange migration, you can migrate a subset of mailboxes from an on-premise Exchange organization to Office 365.
- IMAP migration
In this type of migration, you can migrate mailbox data from an IMAP server (including Exchange server) to Office 365.
How to use CSV file for bulk mailbox migration?
The CSV file has a defined format under you can insert the required mailbox information. The first row (header row) lists the names of attributes, or fields, specified on the rows downwards. Each attribute is separated by a comma. Each row under the header row represents a user and provides complete information required for migration. The attributes in the row must follow the same order as the attributes names in the header row. Finally, you can create a CSV file in any text editor, but it is better to create in Microsoft Excel Spreadsheet page as it can make easier to insert attribute in the dedicated cells. Always save the file in .csv or .txt format.
Note: If the attribute value for a record is null, then don’t type anything for that attribute. But, you should enter the comma to separate the null value from the next attribute.
The following section will describe you what attributes you should enter for different methods of migration –
- Staged Exchange Migration
Attribute – EmailAddress, Password, ForceChangePassword.
- IMAP migrations
Attribute – EmailAddress, UserName, Password.
Method 2- Cutover migration
Cutover migration is suitable in such situations when the number of mailboxes in Exchange Account is lesser than 2000. Here is a brief procedure of cutover migration conducted by Exchange Administrator –
- Exchange Administrator briefs all users about upcoming changes and verifies the domain ownership.
- Create empty mail-enabled security groups in Office 365.
- Connect Office 365 to the on-premises email system.
- Migrate the mailbox and verifies the process.
- Grant access rights to the users.
- Configure the domain to begin routing email to Office 365 directly.
- Verify the routing has changed, and then delete the cutover migration batch.
- Complete post-migration tasks in Office 365 like creating and assigning a new license to the user), domain name system (DNS).
- Send a welcome letter to all the users and provide complete information that how they can log in to their accounts.
Method 3- Hybrid migration
The Hybrid Migration is done when you have to maintain both on-premises exchange and online Exchange. This can be done when:
- You are using either Exchange 2010 or 2013
- You want to migrate in small batches
Quick & precise migration
Kernel Office 365 Migration is a tool that can migrate an unlimited number of mailboxes from on-premise and hosted exchange to Office 365. It does not require any prior preparation and fully migrates mailboxes and provides a full report after successful migration. Let’s see how this migration tool works:
- This is the home screen of the migration tool. Here in the Add Source section click on the Add button to add the Exchange account.
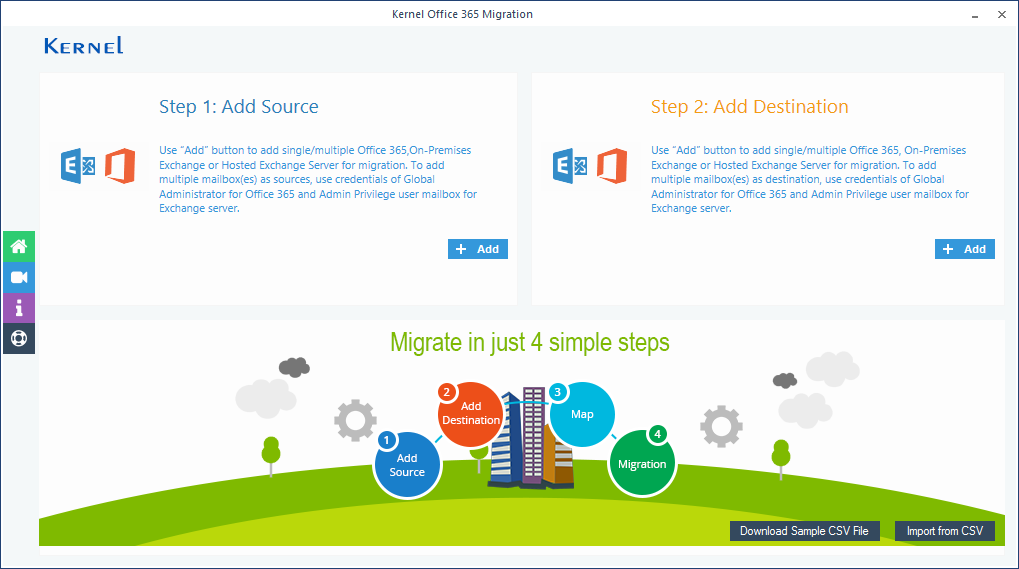
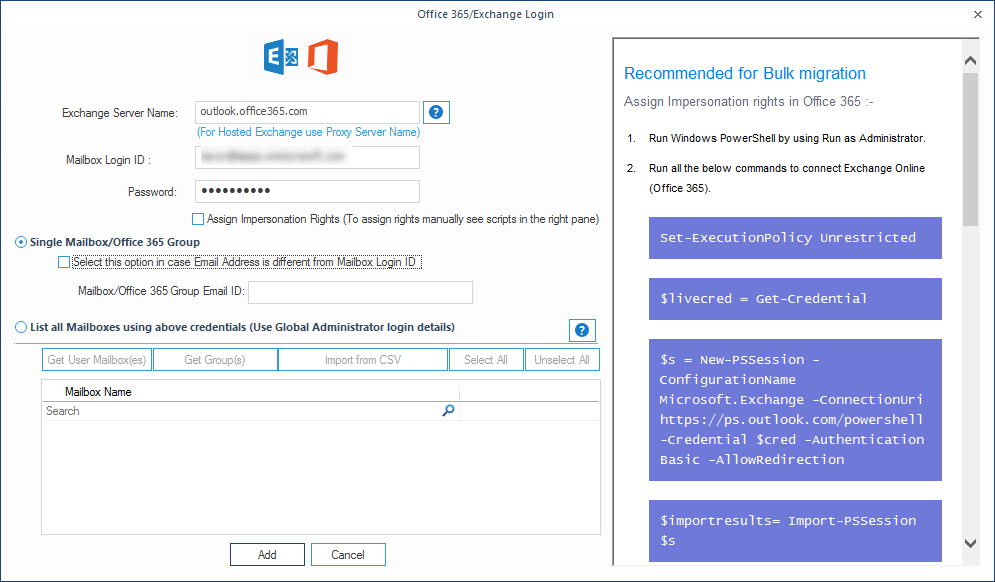
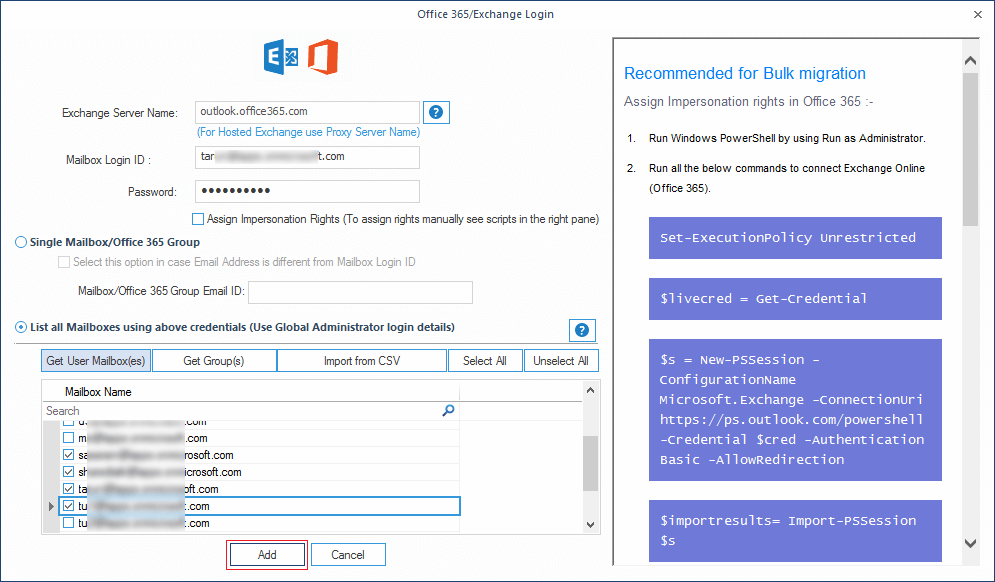
Note: When you have multiple mailboxes for migration, you can add both source and destination mailboxes using a CSV file. A CSV file is available for download in the tool as sample. After filling the details, you can import the CSV file to the tool. - Now, in the Office 365/Exchange Login dialogue box, enter the Exchange credentials in the designated boxes. Now, check the box “List all Mailboxes using above credentials (Use Global Administrator login details)” and click on the Add button.

Note: This demonstration is for bulk migration, that’s why we are adding multiple mailboxes, if you want to add a single mailbox, then after adding the credentials, click on the Add button.
- Once the mailboxes are added, click on the Add button under the Add Destination section.
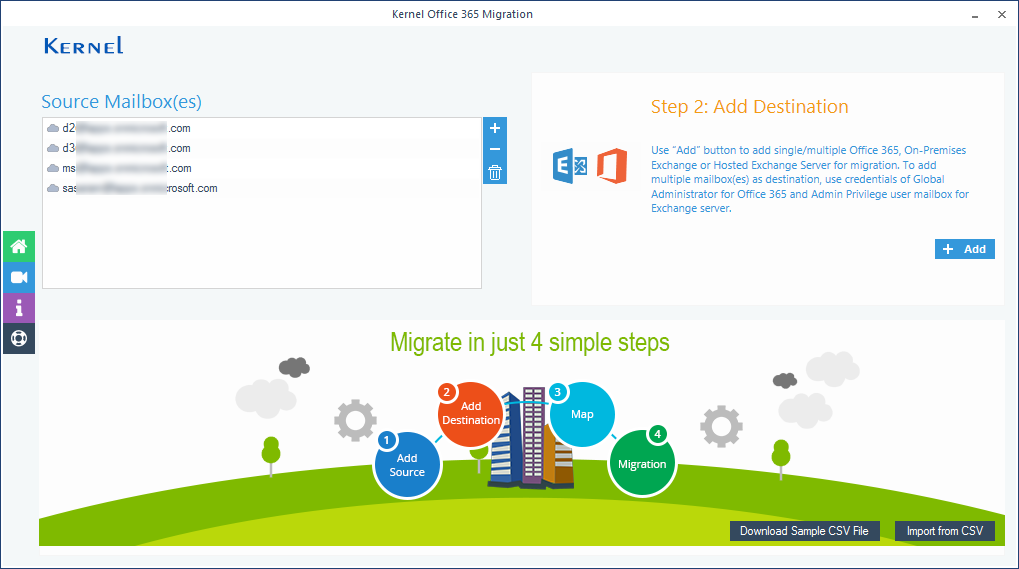
- Here, add the Office 365 credentials correctly, check the box to add multiple mailbox just as earlier and click the Add button.
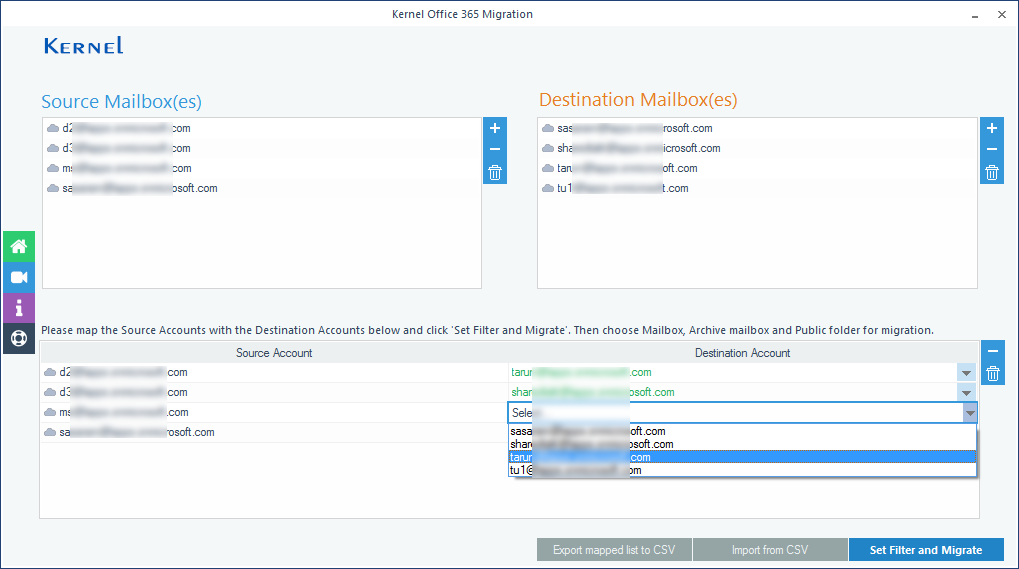
- In the next step, map the source and destination accounts and click on Set Filter and Migrate button.
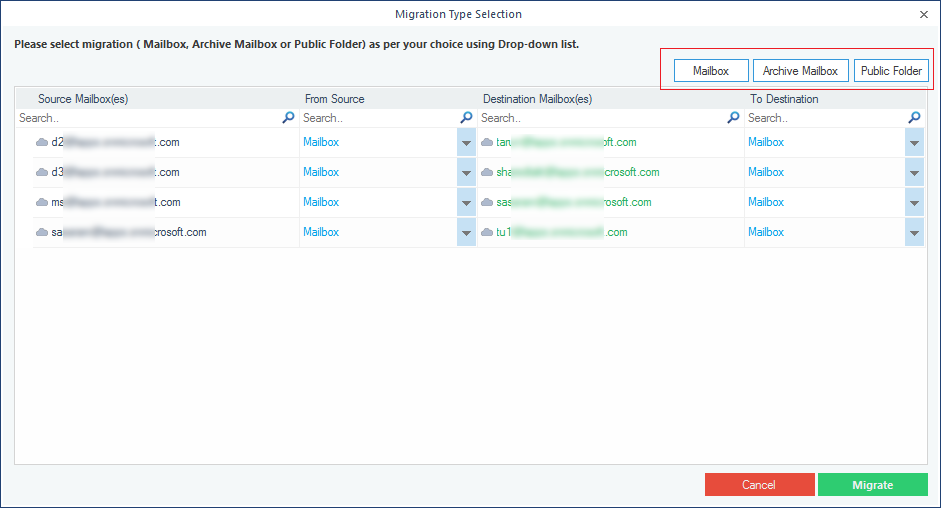
- In the next step, select where you want to migrate the mailboxes. Select one option from the drop-down and click on the Migrate button.
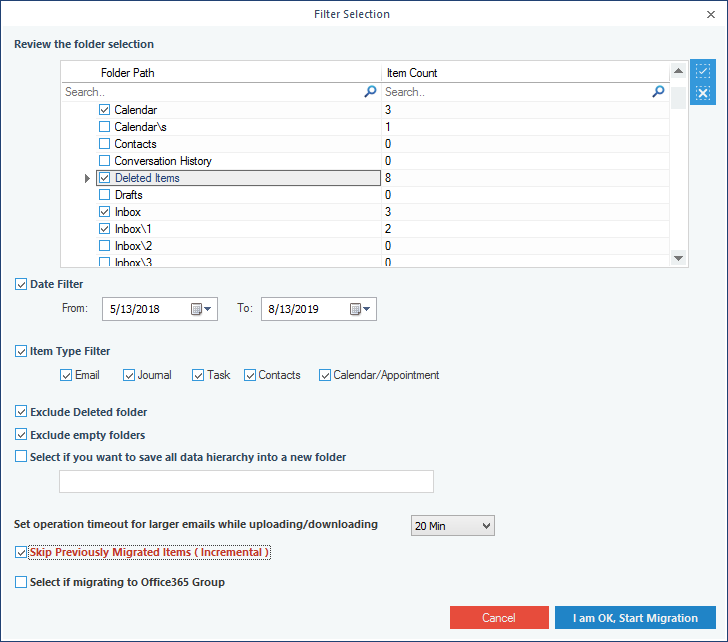
- In the next step, apply filters to the migration process. By applying this, you can customize the whole process – you can apply filters like Date, Item type, Exclude deleted/empty folders, and many more. Click on I am OK, Start Migration.
- As the process starts, wait for it to finish and click on the OK button.
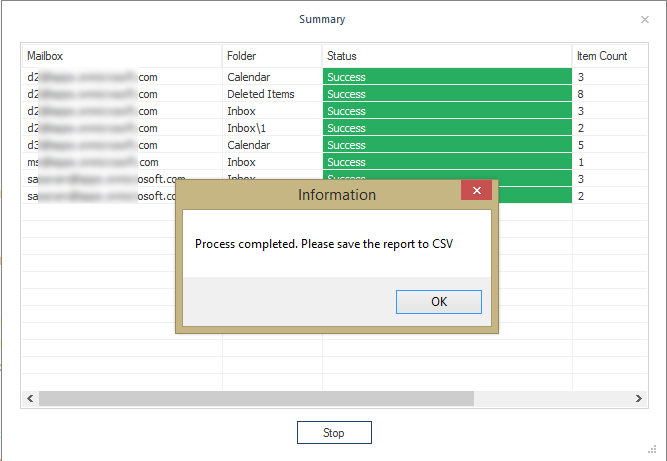
Note: You can save the CSV report of the process by clicking on the Save report to CSV option.
Conclusion
Though there are different native methods to migrate mailboxes to Office 365, most of these methods are technically complex. But with Kernel Office 365 Migration tool, you do not need to face any such complexities; just start with the migration as soon as you map mailboxes and filter their content.